
Summary of Contents for AAMP Global EchoMaster Pro FCTP-GM1903
- Page 1 Installation Guide Trailering Camera System Compatible with IOS and IOT Touchscreen Radios Silverado/Sierra Light Duty Trucks (2019-Present)
- Page 2 These instructions are designed as a guide to help make the installation of this product successful. Always use caution and ask for assistance if you are not sure how to proceed. AAMP Global & EchoMaster are not responsible for any damage that may occur during installation or any changes to the vehicle interior.
-
Page 3: What's In The Box
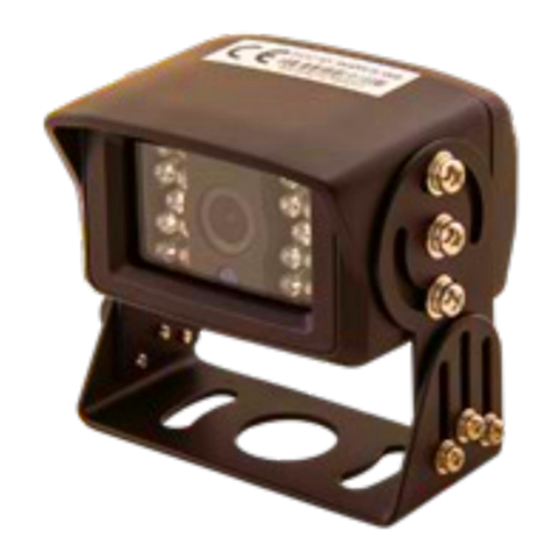
Installation Guide FCTP-GM1903 Trailering Camera System What’s in the Box Parts Description FCTP-GM1903 Image Part Number Description GMS3-USB-CBL USB Update Cable for FC-GMS3 Interface GMS3-CEH-HAR Camera Harness for FC-GMS3 GMS3-LVDS-HAR LVDS Harness for FC-GMS3 GMS3-M2F-48 48” 4 Pin Camera Extension Harness GMS3-PTH-HAR Power / CAN Harness for FC-GMS3 RVC-W8-FLTR-HAR... -
Page 4: Setting The Dip Switches
Installation Guide FCTP-GM1903 Trailering Camera System Setting the Dip Switches Please be sure to set all Dip Switches before plugging the interface module into the vehicle. Dip Switch Settings Function Left Camera On / Off Right Camera On / Off Front Camera On / Off 2 3 4 5 6 7 8 Trigger Wire (On) / CAN (Off) -
Page 5: Door Disassembly
Installation Guide FCTP-GM1903 Trailering Camera System Door Disassembly Indentation Indentation Step 1 Using a small flat blade pry tool remove the inner handle trim panel to access the 7mm bolt behind it. Step 2 Remove the 7mm bolt located behind the inner handle trim panel Step 3 Locate and remove the 2 x 7mm bolts at the bottom edge of... - Page 6 Installation Guide FCTP-GM1903 Trailering Camera System Door Disassembly (continued) Step 4 Starting at the front side of the door trim, use a plastic panel removal tool to pry towards you to release the 3 clips attaching it to the door. Once the 3 clips have been released, slide the panel forward and set aside.
- Page 7 Installation Guide FCTP-GM1903 Trailering Camera System Step 7 Once all the fasteners have been released in step 6, lift up on the door panel to remove it from the door. Step 8 With the door panel leaned toward you and away from the door, remove the door latch release cable.
-
Page 8: Removing The Mirrors
Installation Guide FCTP-GM1903 Trailering Camera System Removing the Mirrors Step 1 Remove the plastic cap on the upper inside corner of the door to gain access to the factory connectors. Step 2 Using a small flat blade screwdriver, release the red safety lock and depress the tab to release the connector from the mirror. - Page 9 Installation Guide FCTP-GM1903 Trailering Camera System Installing the Camera Pods Step 1 Slide the camera pod bucket onto the mounting base of the mirror. Step 2 Connect the camera extension cable to the camera and feed it through the notch in the bucket and out the back of the bucket by the mirror’s connector.
- Page 10 Installation Guide FCTP-GM1903 Trailering Camera System Installing the Camera Pods (continued) Step 3 Line up the bucket and the camera pod and snap the two together. Step 4 Install the supplied (x6) Phillips head screws to secure the bucket to the camera pod using a #1 Phillips head screw driver.
- Page 11 Installation Guide FCTP-GM1903 Trailering Camera System Step 6 Feed the cable through the harness opening of the door and re-install the mirror back onto the vehicle making sure the bolt studs line up with the holes in the door. At this time check that the camera extension cable has not been pinched during this step and secure the mirror to the door using the factory hardware.
- Page 12 Installation Guide FCTP-GM1903 Trailering Camera System Routing the Camera Cables Step 1 Release the rubber grommet from the door by grabbing and pulling on the attached tab. Step 2 Remove the 7mm bolt securing the speaker, unplug the speaker and set aside. This will aide in routing the camera cable in the door.
- Page 13 Installation Guide FCTP-GM1903 Trailering Camera System Step 4 Using a razor knife, make a small slit in the grommet just large enough for the camera cable to pass through. Route the cable through the grommet starting from the back side of the grommet. Step 5 Connect the GMS3-M2F-48 (passenger side) or the GMS3-M2F-108 (driver side) to the camera cable by lining...
- Page 14 Installation Guide FCTP-GM1903 Trailering Camera System Routing the Camera Cables (continued) Step 8 Remove the door sill plate using a plastic trim tool starting at the rear of the panel. Work your way forward and release from the kick area. NOTE Once the door sill plate is removed, place in safe area to avoid damage.
- Page 15 Installation Guide FCTP-GM1903 Trailering Camera System Step 11 Remove the under dash beauty panel by removing the push pin fasteners. (2 under the glove compartment and 1 towards the front of the vehicle) Step 12 From inside the vehicle: route the fish tape along the factory wiring, exiting the vehicle just below the factory door connector.
- Page 16 Installation Guide FCTP-GM1903 Trailering Camera System Routing the Camera Cables (continued) Step 13 Continue routing the fish tape through the door boot and into the speaker opening. Secure the loose end of the GMS3-M2F extension cable to the fish tape using electrical tape. Step 14 Grab the fish tape from the inside of the vehicle and slowly pull the camera extension cable into the vehicle making certain that...
- Page 17 Installation Guide FCTP-GM1903 Trailering Camera System Rear Wireless Camera Receiver Step 1 Clean the surface and secure the 3M double sided tape to the wireless camera receiver. Step 2 Clean the surface and secure the wireless camera receiver to the back window as shown in the picture.
- Page 18 Installation Guide FCTP-GM1903 Trailering Camera System Rear Wireless Camera Receiver (continued) Step 3 Release the retaining clips and remove the upper trim panel from the C pillar and route the pigtail cable from the wireless camera receiver. Make certain the cable is routed behind any air bag hardware that is located in that area.
- Page 19 Installation Guide FCTP-GM1903 Trailering Camera System Step 5 Remove the passenger side rear door sill using a plastic trim tool. Pull loose the rubber door seal between the rear door sill and the upper trim panel removed in step 3. Step 6 Tuck the in-line filter box behind the trim panel and route the RVC-W8-FLTR cable down from the power filter to the...
- Page 20 Installation Guide FCTP-GM1903 Trailering Camera System Module Assembly and Installation Step 1 At this time, refer to page 4 and set the DIP switches according to your install. NOTE DIP switches must be set prior to connecting the module to the vehicle. Step 2 Connect the GMS3-PTH-HAR, GMS3-CEH-HAR &...
- Page 21 Installation Guide FCTP-GM1903 Trailering Camera System Step 4 Place the GMS3 mounting bracket onto the vehicle’s plastic Multifunction Power Supply Converter Bracket bracket according to the picture. Make sure that the C portion of the mounting bracket clips all the way around the plastic factory bracket.
- Page 22 Installation Guide FCTP-GM1903 Trailering Camera System Module Assembly and Installation (continued) Step 6 Connect the factory Gray and Black 28 pin connectors to the GMS3-PTH-HAR and the factory LVDS connector to the GMS3-LVDS-HAR. Step 7 Connect the 2 Gray 28 pin connectors from the GMS3-PTH-HAR and the LVDS connector from the GMS3-LVDS-HAR into the factory radio brain.
- Page 23 Installation Guide FCTP-GM1903 Trailering Camera System Step 8 Connect the GMS3-M2F extension and TRAILER cables to the GMS3-CEH-HAR harness. Line up the labels and connect in the following orientation: RIGHT ----------------- GMS3-M2F48 LEFT ------------------- GMS3-M2F108 FRONT ---------------- GMS3-M2F144 (Optional Front Camera) TRAILER -------------- TRAILER OTHER --------------- TRAILER (Optional 2nd Trailer Camera) Testing...
-
Page 24: Additional Testing
Installation Guide FCTP-GM1903 Trailering Camera System Testing (continued) Step 3 Once the Intellihaul 2.0 home screen appears, press the corresponding button for the camera you wish to test. Pressing the BACK button on the radio’s control panel will return you to the Intellihaul 2.0 home screen. - Page 25 Installation Guide FCTP-GM1903 Trailering Camera System Notes: tel - 1-866-766-2267 email - gmsupport@echomaster.com...
- Page 26 Installation Guide FCTP-GM1903 Trailering Camera System Notes: tel - 1-866-766-2267 email - gmsupport@echomaster.com...
- Page 27 Installation Guide FCTP-GM1903 Trailering Camera System Notes: tel - 1-866-766-2267 email - gmsupport@echomaster.com...
- Page 28 EchoMaster. This product is intended for off-road use and passenger use only. 15500 Lightwave Drive, Suite 202, Clearwater, Florida 33760 email - gmsupport@echomaster.com tel - 1-866-766-2267 EchoMaster is a Power Brand of AAMP Global. EchoMaster.com REV. 012121...
Need help?
Do you have a question about the EchoMaster Pro FCTP-GM1903 and is the answer not in the manual?
Questions and answers