Table of Contents
Advertisement
Quick Links
Advertisement
Table of Contents
Troubleshooting

Subscribe to Our Youtube Channel
Summary of Contents for Nexus PSD
- Page 1 Deaerating Equipment Nexus PSD Operation & Maintenance Manual Rev 3.0 © 2014 Flamco group. All rights reserved. We reserve the right to change designs and technical specifications of our products Rev 4.0 Mar-16 Page 1 / 35 www.nexusvalve.com...
-
Page 2: Equipment Details
Model: Serial No: Purchase date: Purchased From: Note: A competent and qualified mechanical contractor must be used to install, commission and service this equipment. This Operation & Maintenance manual must be followed. For further advise on installation please contact Nexus Valve [1-888-900-0947 - www.nexusvalve.com] Remember to fill in installation and commissioning details for future reference. © 2014 Flamco group. All rights reserved. We reserve the right to change designs and technical specifications of our products Rev 4.0 Mar-16 Page 2 / 35 www.nexusvalve.com... -
Page 3: Commissioning Record
Commissioning Record Digital Controller As Found On Completion Start Pressure PSI Stop Pressure PSI Alarm Pressure PSI Normal Minutes Mins Turbo Hours Hours Timeout Minutes Mins Purge Seconds Secs Pump Count Pump Hours Alarm Count Power Interrupted Pumps Sense Y/N Turbo Mode Y/N Service Reminder Y/N ID Number Contractor Signature: Date: Customer Signature: Date: © 2014 Flamco group. All rights reserved. We reserve the right to change designs and technical specifications of our products Rev 4.0 Mar-16 Page 3 / 35... -
Page 4: Table Of Contents
Contents Customer Details ....................................... 2 Equipment Details ...................................... 2 Commissioning Record ...................................... 3 About this Manual ...................................... 5 Conventions used in this Manual ................................. 5 Typography ........................................ 5 Where to find more Information .................................. 6 Equipment Overview ...................................... 6 Principal of Operation Vacuum Deaerator .............................. 7 Installation/Capacity ...................................... 8 Pipe Connections ...................................... 8 Typical Installation Diagram Vacuum Deaerator ............................ 9 Floor Standing Clearance and Connection Requirements .......................... 1 0 Electrical Power Supply .................................... 1 1 Fault Contacts . -
Page 5: About This Manual
About this Manual This Operation and Maintenance Manual contains all the necessary information to install, commission, operate and maintain Vacuum Deaeration equipment. It is recommended to read all parts of this manual before undertaking any work on the equipment. Conventions used in this Manual This manual makes use of symbols to identify key pieces of information. Please take note of the following symbols and their meaning: DANGER – Important safety related information intended to prevent injury and/or damage to the equipment, system or property. CAUTION - Important information intended to prevent damage to the equipment, system or property. IMPORTANT - Important information intended to ensure that the equipment functions correctly. USEFUL – Useful information which may be helpful, but is not necessarily required for the unit to function correctly. Typography This manual makes use of different typography to identify different types of information. Italics Key words and phrases (Round Brackets) Used to identify a button on the digital controller [Square Brackets] A parameter on the digital controller <Inequality Symbols> A message/fault code displayed on the digital controller © 2014 Flamco group. All rights reserved. We reserve the right to change designs and technical specifications of our products Rev 4.0 Mar-16 Page 5 / 35 www.nexusvalve.com... -
Page 6: Where To Find More Information
Where to find more Information For further information please visit the Nexus Valve Website at the following URL: www.nexusvalve.com Alternatively, please contact the Nexus Valve offices using the details below: Phone: 1-888-900-0947 Email: info@nexusvalve.com Equipment Overview The function of this equipment is to provide a means of dissolved air removal from the water used in sealed heating and cooling systems. This equipment is not designed to cope with sudden losses of system pressure (e.g. manual draining) or major water losses (e.g. large leaks). The equipment is also not intended to be used for water boosting applications. © 2014 Flamco group. All rights reserved. We reserve the right to change designs and technical specifications of our products Rev 4.0 Mar-16 Page 6 / 35... -
Page 7: Principal Of Operation Vacuum Deaerator
Principal of Operation Vacuum Deaerator The following schematic shows the internal arrangement of a Vacuum Deaerating unit: Water is allowed into the Vacuum cylinder through a safety solenoid (13), a pressure reducing valve (14) and a special variable bypass valve (15). The pressure reducing valve (14) is used to limit the water held within the vacuum cylinder to approximately 18 PSI. This is seen as the first pressure step. When the vacuum cylinder is full and registering a suitable start pressure (8b) the pumps (9a/9b) activate. At the same time the special variable bypass valve (15) opens fully to allow the cylinder water to be completely flushed back into the system by the pumps (9a/9b). This purge cycle ensures that the maximum possible amount of aerated water will be exposed to the vacuum process. After the vacuum cylinder has been refreshed, the variable bypass valve (15) restricts the flow into the vacuum cylinder. The pumps (9a/9b) continue to draw water out of the cylinder and create a vacuum within the cylinder. The pumps (9a/9b) then stop after a 5 second dwell period. The vacuum created within the cylinder is eroded by the incoming water through the variable bypass valve (15) at a low flow rate, this gently increases the pressure within the cylinder and forces the released air pocket out through the Automatic Air Vent (AAV) on top of the cylinder. The equipment is connected to the main system via 2 isolation valves (7a/7b) and backflow from the system is prevent by a non-return valve (10a). © 2014 Flamco group. All rights reserved. We reserve the right to change designs and technical specifications of our products Rev 4.0 Mar-16 Page 7 / 35 www.nexusvalve.com... -
Page 8: Pipe Connections
Installation This unit is not designed to be installed in an outdoor environment. The unit must be installed in a frost free environment, away from precipitation and water sprays/jets. If there is a risk of flooding, the unit must be installed on a raised heavy supporting base. Please refer to the appropriate datasheet for the maximum working pressure and temperature of the pressurization unit. The conditions at the point of connection to the system must not exceed these values. Unit Capacity One FPSD-250D can handle a system up to 39,625 gallons of system volume. Consult factory for Larger volumes. Pipe Connections Where applicable, to avoid damaging the float valve, the mains water supply pipe must be flushed before connection. Deaerating connections (2of) to the return header must be made in the horizontal plane to prevent floating or heavy debris entering the pipework to this equipment. ü ü û û All pipe connections must be made with appropriate jointing compound/PTFE tape. If PTFE tape is used, care must be taken to ensure that the tape does not obstruct the orifice of the fitting. © 2014 Flamco group. All rights reserved. We reserve the right to change designs and technical specifications of our products Rev 4.0 Mar-16 Page 8 / 35 www.nexusvalve.com... -
Page 9: Typical Installation Diagram Vacuum Deaerator
Typical Installation Diagram Vacuum Deaerator Install PSD unit on vibration pad or 4 rubber isolator pads 2 “ thick. © 2014 Flamco group. All rights reserved. We reserve the right to change designs and technical specifications of our products Rev 4.0 Mar-16 Page 9 / 35 www.nexusvalve.com... -
Page 10: Floor Standing Clearance And Connection Requirements
Floor Standing Clearance and Connection Requirements Minimum 20” Minimum 31.5” Minimum 6” Connection Size Notes Reference The point of connection should be in the 2 x ½” system return, on the suction side of the NPT(ISO) System Connections circulation pump. CONNECTION Non-return valves, pressure reducing KIT INCLUDED valves and RPZ valves must not be used. © 2014 Flamco group. All rights reserved. We reserve the right to change designs and technical specifications of our products Rev 4.0 Mar-16 Page 10 / 35 www.nexusvalve.com... -
Page 11: Electrical Power Supply
Electrical Power Supply This equipment must be electrically isolated before removing the covers. Cables connected to the volt free contacts may be supplied from another source and may remain live after the unit is isolated. These must be isolated elsewhere. All electrical connections must be carried out by a suitably qualified and competent person. The mains power supply to the pressurization unit must be connected into the fused terminal block as shown below: It is recommended to supply power to the Deaeration unit via a lockable disconnect. This should be installed within 78” of the equipment. This equipment can be damaged by the high voltages produced by electrical installation testing equipment. When performing electrical installation tests, the equipment must be isolated from the supply. © 2014 Flamco group. All rights reserved. We reserve the right to change designs and technical specifications of our products Rev 4.0 Mar-16 Page 11 / 35 www.nexusvalve.com... -
Page 12: Fault Contacts
Fault Contacts There are 3 volt free fault contact which can be used for connection to a BMS system, or as an interlock. There is the Common Alarm contact on terminals 1 & 2, the Sensor Health contact on terminals 3 & 4 and the Pump Health contact on terminals 7 & 8. © 2014 Flamco group. All rights reserved. We reserve the right to change designs and technical specifications of our products Rev 4.0 Mar-16 Page 12 / 35 www.nexusvalve.com... -
Page 13: Commissioning
Commissioning It is highly recommended to have this equipment commissioned by a trained approved mechanical contractor. Any damage or loss incurred through incorrect commissioning by an unapproved contractor will not be covered by the warranty. Pre-Commissioning Checklist The following conditions must be met before starting the commissioning process. Failure to meet these conditions may result in injury or damage to the equipment, system and property. Equipment is located in a frost free area, away from precipitation and water sprays/jets All necessary pipe/electrical connections have been made to a satisfactory standard The temperature and pressure at the point of connection are within the operating limits of the equipment. The heating/cooling system is fitted with a safety relief valve and appropriately sized expansion vessel The following conditions must be met for the equipment and heating/cooling system to function correctly. If these conditions have not been met, it is not advisable to proceed with the commissioning process. The system connection(s) have been made into the system return header/pump suction It is advisable to fill the heating/cooling system prior to commissioning. © 2014 Flamco group. All rights reserved. We reserve the right to change designs and technical specifications of our products Rev 4.0 Mar-16 Page 13 / 35 www.nexusvalve.com... -
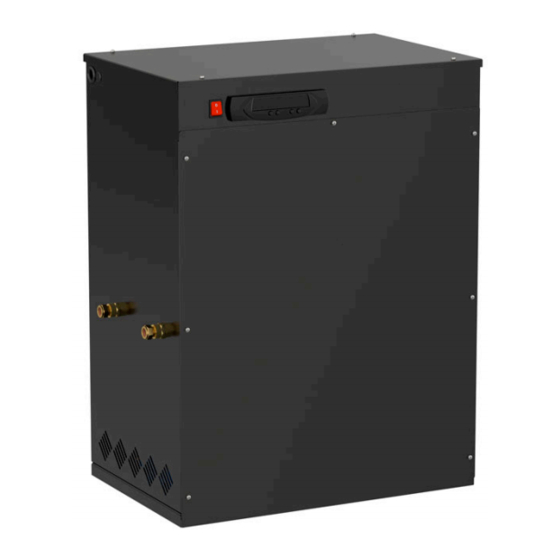
Page 14: Controller Overview
Controller Overview The following image shows the front of the PSD unit digital controller. Four buttons are provided for programming, and an LED display which shows scrolling messages. When the controller is first powered up, it will display the controller version number. This manual relates to controller version 6.3. If the controller is of a different version, there may be differences in the menu items available. When in normal operation, the controller will display the current internal pressure of the unit. If a fault occurs, the controller will display a fault code and produce an audible alarm. In normal operation, the functions of the buttons are as follows: Function Button Press Hold SET Show Current System Pressure MUTE Mute Audible Alarm Reset Unit Enter Programming Menu © 2014 Flamco group. All rights reserved. We reserve the right to change designs and technical specifications of our products Rev 4.0 Mar-16 Page 14 / 35 www.nexusvalve.com... -
Page 15: Deaerator Controller Programming
Deaerator Controller Programming Do not alter any settings without first understanding the implications of doing so. Incorrect settings may cause damage to the equipment, system or property. To enter the programming menu, hold the (+) button until “enter code” appears on the screen, followed by “0000” with a flashing cursor after the first digit. To gain access to the programming menu, one of the following codes must be entered: Customer Code is most commonly used for setup. Customer Code Standard set of options 2601 Engineer Code Extended set of options 4706 To enter the code, change the first digit with the (+) and (-) buttons, then press (SET) to move onto the next digit. Repeat for all digits, then once the correct code is shown on the display, press (SET) to enter the programming menu. Once a correct code has been entered, the first option [START PRESSURE] will appear on the screen. Once in the menu, the value of the current menu item can be changed using the (+) and (-) buttons. Once the current value has been set, pressing the (SET) button will move on to the next option. It is not possible to navigate backwards through the menu. To return to a previous setting in the menu, press the (SET) button repeatedly to scroll through to the end of the menu, and then re- enter the appropriate code. If the controller loses power while in the programming menu, all changes made will be erased. To confirm all changes, the end of the menu must be reached, and the “SAVING...” message must be displayed. © 2014 Flamco group. All rights reserved. We reserve the right to change designs and technical specifications of our products Rev 4.0 Mar-16 Page 15 / 35 www.nexusvalve.com... -
Page 16: Purge Seconds Reference Times
The table below gives details of all menu items, in the order that they will appear: Menu Item Function Default Value Internal Safe Pressure Within The Vacuum Cylinder For The 1 Start Pressure 14 PSI Pumps To Start Circulating Water 0 PSI (LTHW Internal Stop Pressure For The Pumps, Required Vacuum Systems) 2 Stop Pressure Pressure -7 PSI (CHW Systems) Internal High Pressure Alarm Setting, To Activate The Slam-shut 3 Alarm Pressure 58 PSI Solenoid Valve 4 Normal Minutes Normal Interval Between Pump Runs (De-aeration) 60 MINS 5 Turbo Hours Running Time For Turbo Mode Before Returning To Normal 168 HRS Time Limit For Vacuum Generation Or Restoration Of Internal 6 Timeout Minutes 10 MINS Pressure (Error Checking) Time Setting For Water To Be Re-circulated Into The Main 7 Purge Seconds 20 SEC System, Taking A Fresh Sample 8 Pump Count Pump Activation Counter (Logging) 9 Pump Hours... -
Page 17: Hydraulic Commissioning
Hydraulic Commissioning 1- Venting the Vacuum Cylinder Check the red cap on the air intake preventer is finger tight. Do not unscrew the red cap completely. Inside is a glass bead and spring that prevent air being drawn into the equipment at this point. Without the spring and the beads this device will not function correctly and the equipment as a whole will be unusable. With the equipment electrically powered down remove the coil from the two Inlet solenoids Be careful not to mix up the coils when disconnected. Failure to pair the correct coil with the correct valve will stop the unit from working. With the coils disconnected use a pair of Danfoss override magnets (018F0091 Danfoss part number) to manually open both of the solenoid valves. This allows the existing system pressure to fill the vacuum cylinder for the first run. Remove the override magnets, return the correct coil to the correct valve and electrically switch the unit on. If the pressure shown on the de-aerator display is below the start pressure of the equipment it may be necessary to adjust the pressure reducing valve in between the two inlet solenoids. A setting on the pressure reducing valve 2 to 4 PSI higher than the start pressure is acceptable, any lower than this and the equipment may become intermittent in operation. © 2014 Flamco group. All rights reserved. We reserve the right to change designs and technical specifications of our products Rev 4.0 Mar-16 Page 17 / 35 www.nexusvalve.com... - Page 18 If the Danfoss magnets are not available then it is possible to vent the cylinder through the internal 0.04” / 1mm bypass, although this may take a considerable amount of time. The alternative to this is to temporarily put live power directly to the solenoid coils to force the valves to open. 2- Bleeding the Pumps (if required) Locate the bleed screw on the pump. The following diagrams show examples of typical bleed screw locations for most pumps: Do not use excessive force when tightening the bleed screw as this may damage the pump casing. If the pump has a plastic bleed screw like the one shown below, do not use excessive force or attempt to use any tools to turn it as this may irreparably damage the pump casing. © 2014 Flamco group. All rights reserved. We reserve the right to change designs and technical specifications of our products Rev 4.0 Mar-16 Page 18 / 35 www.nexusvalve.com...
-
Page 19: Operation
Operation Once commissioned, the Deaerating unit should operate without any user intervention. For practical guidance on diagnosing and rectifying faults, please refer to the Troubleshooting section of this manual. Deaerating Fault Codes Auto/Manual Fault Code Description Reset Auto Reset Error Incorrect password (Code) entered. High Pressure High system pressure, audible alarm sounds. The Safety Solenoid closes. This alarm will self-reset when the system Auto Reset pressure returns to normal, audible alarm can be silenced by pressing “mute”. - Page 20 Start-Up Procedure Attention – This procedure is for restarting the unit after being shutdown (as described above). For initial start-up and commissioning procedures, please refer to the Commissioning section of this manual. To restart the unit, please follow the steps below: 1. Perform a visual inspection of the unit and installation to check for signs of damage. 2. Open the isolation valves. 3. Turn on the mains power supply and wait for the controller to start. 4. Depending on the conditions in the system, the unit may display one or more fault codes at this point. If this happens, please refer to the Troubleshooting section of this manual for guidance. © 2014 Flamco group. All rights reserved. We reserve the right to change designs and technical specifications of our products Rev 4.0 Mar-16 Page 20 / 35 www.nexusvalve.com...
-
Page 21: Troubleshooting
Troubleshooting If for any reason the Deaerating unit does not seem to be functioning correctly, please refer to the table below for a list of solutions to known problems. Symptom Problem Solution The safety solenoid valve will automatically close and the The internal pressure within the vacuum system will attempt to self- cylinder has reached the high pressure reset during the next alarm limit, probably due to the pressure Deaerating cycle. Repeated High Pressure reducing valve being contaminated with High pressure alarms will debris. require the pressure reducing valve to be inspected and cleaned. Clean the air intake preventer, The Vacuum cylinder is full of air and the and test the unit. If this fails low level switch is stopping further pump then check the bypass solenoid activation to prevent the pump(s) running and pipework for dry. There is an air leak on the cylinder, Insufficient Vacuum contamination. Finally replacing the bypass solenoid is contaminated with the automatic air vent debris or the air intake preventer is assembly is the best course of contaminated with debris action. Check the controller settings The pump is drawing either too much first to ensure that the correct current or not enough, signifying a... -
Page 22: Maintenance
Maintenance Due to variations in operating conditions, and the varying loads placed on equipment, it is not feasible to provide accurate predictions of component lifespan. The most effective method of maintenance is to inspect the pressurisation unit for early signs of component failure and take action accordingly. The following maintenance procedures should be performed at least once a year: Visual Inspection A basic visual inspection will highlight the majority of potential faults on this equipment. It is recommended to perform a visual inspection annually. However, due to the simplicity of performing these checks, frequent inspections are encouraged. • Check the digital display for fault codes • Check for signs of leakage (e.g. water, mineral deposits, corroded components/cabinet) • Check flexible hoses for signs of degradation (e.g. cracks) Integrated Control The digital control keeps a log of the number of pump starts and total hours run for each pump, as well as the number of alarm activations and power interruptions. It is advisable to take a note of these figures when servicing the unit, as they may be helpful in diagnosing potential issues. Fields are provided in the service log for these figures. It is advisable to scroll through all the settings (including engineers setting) and check them against the figures on the commissioning report. If there are any discrepancies, check first with on-site staff to see if the changes are deliberate. If not, reconfigure appropriately. If settings are persistently becoming corrupted, a power filter may be required. Please refer to the Installation section of this manual for more information. © 2014 Flamco group. All rights reserved. We reserve the right to change designs and technical specifications of our products Rev 4.0 Mar-16 Page 22 / 35 www.nexusvalve.com... - Page 23 Test Unit Operation Check PRV Strainer The Pressure Reducing Valve (PRV) is fitted with a mesh strainer beneath the brass hexagon bush. This should be removed and inspected. Depending on the condition, this part may need to be cleaned. Check System Expansion Vessel Pre-Charge Many of the problems experienced with sealed system equipment can be traced back to the expansion vessel. The expansion vessel pre-charge pressure must be checked after 2 years and annually thereafter. To perform this test, the expansion vessel must first be drained of water, then a gauge can be connected to the Schrader valve on the vessel to measure the pre-charge pressure. The pre-charge should be equal to the [COLD FILL] pressure setting. The pressure can be increased using a foot pump, air compressor or pressurised air/nitrogen cylinder. If any faults are identified during these checks, please refer to the Troubleshooting section of this manual. If replacement parts are required, please refer to the Spares section for part codes. © 2014 Flamco group. All rights reserved. We reserve the right to change designs and technical specifications of our products Rev 4.0 Mar-16 Page 23 / 35 www.nexusvalve.com...
- Page 24 Wiring diagram PSD HAS A 10 AMP 250VAC BUSSMAN GLASS FUSE INSTALLED AT LINE CONNECTIONS. © 2014 Flamco group. All rights reserved. We reserve the right to change designs and technical specifications of our products Rev 4.0 Mar-16 Page 24 / 35...
-
Page 25: Wiring Location List
Wiring location list © 2014 Flamco group. All rights reserved. We reserve the right to change designs and technical specifications of our products Rev 4.0 Mar-16 Page 25 / 35 www.nexusvalve.com... -
Page 26: Spares
Spares The drawings on the following pages show the internal components for a range of equipment. Due to continuing development and minor design changes, some components may be changed without notice. Therefore, the drawings may not accurately reflect the current production design. If in any doubt about the compatibility of replacement parts, please contact Technical Support. Electrical Items *Image for indication only Description Deaerator Controller Electrical Plate (Fuse Block and 15V PSU) Power Switch 5 Amp Fuse 6.3 Amp Slow Blow Fuse (PQA90 Pumps Only) © 2014 Flamco group. All rights reserved. We reserve the right to change designs and technical specifications of our products Rev 4.0 Mar-16 Page 26 / 35 www.nexusvalve.com... -
Page 27: Deaerator Unit
Deaerator Unit *Image for indication only Description 1 Pump 2 ½” Non-Return Valve 3 Vacuum Cylinder Low Level Switch 4 Vacuum Transducer 5 Combined Isolation & Drain Valve 6 Automatic Air Vent 7 Bypass Solenoid Valve 8 Slam-shut Solenoid Valve 9 Air Vent Non Return Valve 10 Pressure Reducing Valve 11 87 PSI (6 Bar) Vacuum Cylinder Safety Relief Valve © 2014 Flamco group. All rights reserved. We reserve the right to change designs and technical specifications of our products Rev 4.0 Mar-16 Page 27 / 35 www.nexusvalve.com... -
Page 28: Service Log
Service Log This service log should be completed by the service engineer after each annual service. Date P1 COUNT Engineers Name P1 HOURS Company P2 COUNT Contact Number P2 HOURS ALARM COUNT Comments POWER INTERRUPTIONS Date P1 COUNT Engineers Name P1 HOURS Company P2 COUNT Contact Number P2 HOURS ALARM COUNT Comments POWER INTERRUPTIONS Date P1 COUNT Engineers Name P1 HOURS Company P2 COUNT Contact Number P2 HOURS ALARM COUNT Comments POWER INTERRUPTIONS © 2014 Flamco group. All rights reserved. We reserve the right to change designs and technical specifications of our products Rev 4.0 Mar-16 Page 28 / 35... - Page 29 Date P1 COUNT Engineers Name P1 HOURS Company P2 COUNT Contact Number P2 HOURS ALARM COUNT Comments POWER INTERRUPTIONS Date P1 COUNT Engineers Name P1 HOURS Company P2 COUNT Contact Number P2 HOURS ALARM COUNT Comments POWER INTERRUPTIONS Date P1 COUNT Engineers Name P1 HOURS Company P2 COUNT Contact Number P2 HOURS ALARM COUNT Comments POWER INTERRUPTIONS © 2014 Flamco group. All rights reserved. We reserve the right to change designs and technical specifications of our products Rev 4.0 Mar-16 Page 29 / 35...
-
Page 30: Warranty Statement
Any modifications to the supplied equipment must be approved in writing by Nexus Valve, failure to do so will invalidate the warranty. All goods are carefully tested and inspected before dispatch. Should any goods appear defective owing to faulty materials or manufacture, they must be returned to us for examination. -
Page 31: Warranty Details
If the unit is identified with a manufacturing defect then no charge is made for correcting the defect. The Nexus Valve equipment is manufactured to order and is clearly marked, where applicable, with a unique serial number, allowing traceability to both individual model configuration and the engineer or site responsible for the build and test. -
Page 32: Notes
Notes © 2014 Flamco group. All rights reserved. We reserve the right to change designs and technical specifications of our products Rev 4.0 Mar-16 Page 32 / 35 www.nexusvalve.com... - Page 33 Notes © 2014 Flamco group. All rights reserved. We reserve the right to change designs and technical specifications of our products Rev 4.0 Mar-16 Page 33 / 35 www.nexusvalve.com...
-
Page 34: Notes
Notes © 2014 Flamco group. All rights reserved. We reserve the right to change designs and technical specifications of our products Rev 4.0 Mar-16 Page 34 / 35 www.nexusvalve.com... - Page 35 Nexus 9982 E. 121 Street Fishers, IN 46037 T 1-888-900-0947 F 1-800-900-8654 E info@nexusvalve.com © 2014 Flamco group. All rights reserved. www.nexusvalve.com We reserve the right to change designs and technical specifications of our products Rev 4.0 Mar-16 Page 35 / 35 www.nexusvalve.com...
Need help?
Do you have a question about the PSD and is the answer not in the manual?
Questions and answers