
Related Manuals for Kamado Joe KETTLE JOE KJ15040320


Summary of Contents for Kamado Joe KETTLE JOE KJ15040320
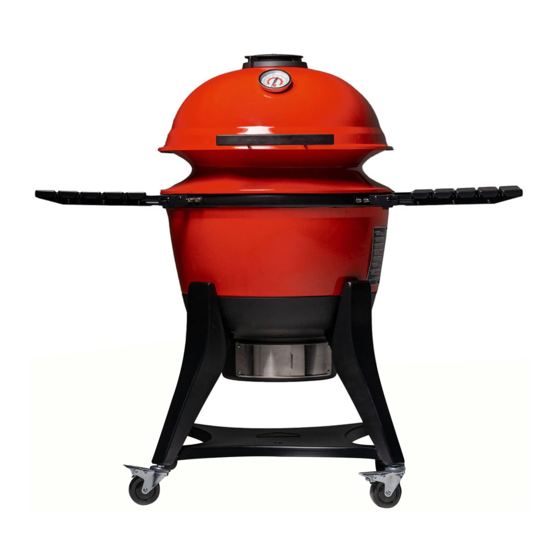
- Page 1 KETTLE JOE™ OWNER’S MANUAL KJ15040320 A GUIDE TO KAMADO COOKING Manual Code: 9804190015 | 210305-GH...
-
Page 2: Table Of Contents
Table of Contents Warnings Parts List & Tools Required Grill Set-Up Instructions Assembly Instructions Hinge Adjustment Cleaning and Care Quick Start Guide Zone Cooking Grill does not come with charcoal. -
Page 3: Warnings
WARNING • This manual contains important information necessary for the proper assembly and safe use of the appliance. • Read and follow all warnings and instructions before assembling and using the appliance. • Keep this manual for future reference. Failure to follow these instructions could result in fire, explosion or burn hazard which could cause property damage, personal injury or death. - Page 4 WARNINGS AND IMPORTANT SAFEGUARDS READ ALL INSTRUCTIONS • WARNING! This grill will become very hot. Do not move it during operation. • WARNING! Do not use indoors! • WARNING! Do not use spirit or petrol for lighting or re-lighting! Use only firelighters complying to EN 1860-3! •...
- Page 5 WARNINGS AND IMPORTANT SAFEGUARDS • Never use grill for anything other than its intended use. This grill is NOT for commercial use. • Use of alcohol, prescription or non-prescription drugs may impair user’s ability to assemble or safely operate grill. •...
- Page 6 WARNINGS AND IMPORTANT SAFEGUARDS • Be careful when removing food from grill. All surfaces are HOT and may cause burns. Use protective gloves/mitts or long, sturdy cooking tools for protection from hot surfaces or splatter from cooking liquids. • Do not touch HOT surfaces. •...
-
Page 7: Parts List & Tools Required
KONTROL TOWER™ TOP VENT (1) LID HANDLE BRACKET (1) GRILL DOME (1) LID HANDLE (1) HALF MOON COOKING GRATES (2) HEAT DEFLECTOR (1) KETTLE SLOROLLER™ (1) MULTI-PANEL™ CERAMIC FIREBOX (6) CHARCOAL BASKET (1) 10. SLIDE-OUT™ ASH DRAWER (1) 11. SLIDE-OUT ASH DRAWER BASE (1) 12. -
Page 8: Grill Set-Up Instructions
Grill Set-Up UNBOXING YOUR GRILL Open the dome of the grill and remove the components from the inside of the grill. Handle the internal ceramic parts with care. KETTLE JOE 1 Once the internal components of the grill have been removed, lift the grill out of the container and set it aside. -
Page 9: Assembly Instructions
Kettle Joe Hinge Adjustments Hinge Pin Hand Wheel Locked Pull out the pin and rotate 90°. Loosen the Position Open hand wheel and slide hinge up. When the hinge Position is close to upper secure point, rotate the pin and allow it to go into the upper hole of hinge. Close the lid and make sure it sits properly on the SLOROLLER™, re-tighten the hand wheel. - Page 10 M6X16 ф6 PRE-ASSEMBLED GASKET WASHER M6X20 M6X16 WASHER 6 WASHER GASKET DO NOT FULLY TIGHTEN SCREWS. M6X16 ф6 GASKET PRE-ASSEMBLED WASHER M6X16 M6X20 6 WASHER WASHER GASKET DO NOT FULLY TIGHTEN SCREWS.
- Page 11 M6X16 ф6 DO NOT FULLY TIGHTEN SCREWS. 16mm Wrench REAR NON-LOCKING FRONT CASTERS LOCKING CASTERS FLIP THE GRILL OVER AND FULLY TIGHTEN ALL LEG AND BOTTOM SHELF HARDWARE AT THIS TIME.
- Page 12 M6X16 WASHER ф6 M6X16...
- Page 13 ф6 M6X16...
- Page 15 Use the SLOROLLER™ for smoking only. Do not use the SLOROLLER™ when temperatures exceed 500°F. Loosen the hand wheel and pull the hinge pin to adjust the hinge height. Insert the SLOROLLER™, Heat Deflector, and Cooking Grates.
- Page 16 Without SlOROLLER™ With SlOROLLER™...
-
Page 17: Cleaning And Care
Cleaning & Care Your Kamado Joe grill is made of quality materials, so general care and maintenance is minimal. The best way to protect your Kamado Joe from the elements is with a grill cover. SELF-CLEANING 1 Add charcoal and light it. -
Page 18: Zone Cooking
ZONE COOKING 3 different cooking zones. ZONE 1 Normal Grilling Level. ZONE 2 Drop-Down Searing and Combined Grilling Level. ZONE 3 SLOROLLER™ Smoking Level. Do not exceed 500°F. - Page 19 QUICK TEMPERATURE GUIDE Approximate temperatures for cooking techniques. 400–600˚F (205–315°C) GRILLING 500–750˚F (260–400°C) SEARING 300–750˚F (150–400°C) BAKING 300–450˚F (150–230°C) ROASTING 225–275˚F (105–135°C) SMOKING CAUTION BURP When cooking above 350°F (175°C), carefully open the grill (or burp the grill) each time you lift the grill dome to prevent flashback. LIQUIDS Do not spill liquids inside or on the grill while it is hot.
- Page 20 KAMADOJOE.COM KAMADOJOE.COM/CONTACT KAMADOJOE.COM/WARRANTY KAMADOJOE.COM/COLLECTIONS/PARTS...
Need help?
Do you have a question about the KETTLE JOE KJ15040320 and is the answer not in the manual?
Questions and answers