
Related Manuals for Krups NESPRESSO YY4355


Summary of Contents for Krups NESPRESSO YY4355
- Page 1 KRUPS NESPRESSO YY4355 MANUEL D'UTILISATION PROLINE REFRIGERATEUR BRF40 Besoin d'aide ? Rendez-vous sur https://sav.darty.com...
- Page 2 ATELIER MY MACHINE...
-
Page 3: Table Of Contents
Table of Contents / Table des matières Instruction manual Guide de l’utilisateur Specifications / Spécification Bedienungsanleitung Istruzioni per l’uso Table of Contents / Table des matières Safety information Manual de instrucciones Manual de Instruções Consignes de sécurité Εγχειρίδιο Οδηγιών Packaging contents / Contenu de l’emballage Gebruikershandleiding Atelier /... -
Page 4: Consignes De Sécurité
Consignes de sécurité ATTENTION : lorsque ce symbole apparaît, veuillez consulter les Attention / Avertissement consignes de sécurité pour éviter tout risque et tout dommage potentiel. Danger électrique INFORMATION : lorsque ce symbole apparaît, veuillez vous familiariser avec les conseils pour utiliser votre machine de Débranchez le câble manière sûre et appropriée. - Page 5 d'une surveillance ou uniquement dans des identiques, afin d’éviter • Ne placez jamais la d'instructions préalables prises adaptées, facilement tout risque. machine dans un meuble concernant l'utilisation de accessibles et reliées à la • Ne faites pas fonctionner pendant son utilisation. la machine.
- Page 6 • La présence simultanée la immédiatement de la mousseur. ou une période de temps d’électricité et d’eau prise électrique. Contactez • N’utilisez pas le fouet similaire. Nespresso ou un revendeur est dangereuse et peut mousseur sans verre pour • N’utilisez pas la machine Nespresso agréé, pour la provoquer des décharges éviter les blessures.
- Page 7 machines peuvent donc Celui-ci est défini lors de la fournies dans cette notice présenter des traces d’une première utilisation grâce d’utilisation. utilisation antérieure. au bâtonnet de test de CONSERVEZ CES • Nespresso se réserve le dureté de l’eau. Pensez à INSTRUCTIONS droit de modifier sans effectuer un nouveau test...
-
Page 8: Gebruikershandleiding Gr Εγχειρίδιο Οδηγιών 104 Packaging Contents / Contenu De L'emballage
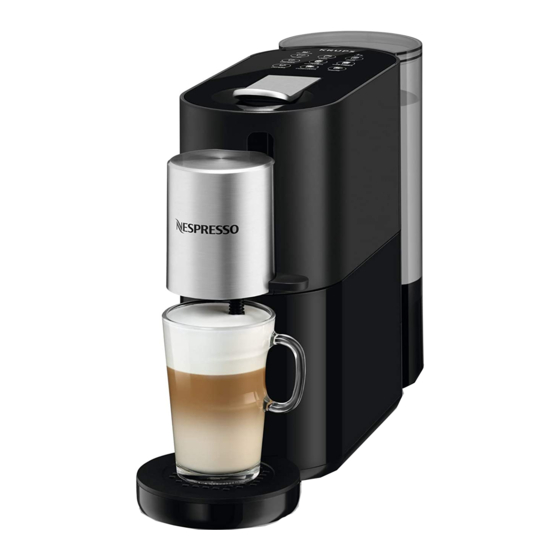
Packaging contents / Contenu de l’emballage Atelier / Atelier THE CLASSIC ESPRESSO EXPERIENCE Coffee Machine With the Nespresso Original system, you’re invited to enjoy the essence of an espresso, with or without Nespresso View Mug (270ml) milk. Inspired by the Italian coffee tradition, it’s a timeless experience at the touch of a button. The Nespresso Original machines and capsules offer an array of aromas to fit all coffee tastes. -
Page 9: Ru Руководство По Эксплуатации 139 Machine Overview / Présentation De La Machine
Machine overview / Présentation de la machine “Descaling”: Recipes keys Water tank Touches recettes Réservoir d’eau Descaling alert Alerte détartrage "Clean": Lever Milk frother cleaning alert Levier Alerte nettoyage du fouet mousseur Head Tête Milk frother storage Rangement du fouet mousseur High position for the drip tray Position haute pour le bac... -
Page 10: First Use Or After A Long Period Of Non-Use / Première Utilisation Ou Après Une Longue Période De Non-Utilisation
First use or after a long period of non-use / Première utilisation ou après une longue période de non-utilisation First, read the safety instructions to prevent hazards of fatal electrical shock and fire. • Only plug the machine into suitable outlets that are easily accessible and earthed. When using an adaptor, ensure that it provides a connection that is properly earthed. Ensure that the voltage of the power supply is the same as the one indicated on the rating plate. - Page 11 First use or after a long period of non-use / Première utilisation ou après une longue période de non-utilisation Place the water tank on its base, then insert the capsule Turn on the machine by pressing one of the 9 keys for 1 container and the drip tray.
- Page 12 First use or after a long period of non-use / Première utilisation ou après une longue période de non-utilisation Lift the lever and leave it in an open position. Press one of the 9 keys. The 9 keys blink quickly. Some water may flow from the milk frother for a few seconds.
-
Page 13: Water Hardness Setting / Réglage De La Dureté De L'eau
Water hardness setting / Réglage de la dureté de l'eau This step consists of defining the water hardness (i.e. the limestone level) so that the machine personalises how frequently descaling is performed. The water hardness level can be tested with the water hardness stick available on the first page of the user manual. -
Page 14: Coffee Preparation / Préparation Du Café
Coffee preparation / Préparation du café Never lift the lever during operation and refer to the important safeguards to avoid possible harm when operating the appliance. Ne relevez jamais le levier lors du fonctionnement de la machine et consultez les consignes de sécurité pour éviter les dommages liés à son utilisation. Turn on the machine by pressing one of the coffee keys (Ristretto, Espresso, Lungo) Allumez la machine en appuyant sur l’une des touches café... -
Page 15: Assembly / Disassembly Of The Milk Frother
Assembly / Disassembly of the milk frother / Montage / Démontage du fouet mousseur Remove the water tank. Remove the milk frother from its housing behind the machine. Lift up the head. Insert the milk frother in the connection and push it in all the way. -
Page 16: Milk Recipe Preparations When Using A Nespresso View Mug (270Ml) / Préparations De Recettes Lactées Avec Un View Mug Nespresso (270Ml)
Milk recipe preparations when using a Nespresso VIEW mug (270ml) / Préparations de recettes lactées avec un VIEW mug Nespresso (270ml) For perfect foam, use refrigerated UHT or pasteurized milk skimmed or semi-skimmed (approximately 4°C). You can use soy, almond or oat drink for your milk preparations. The volume of milk foam depends on the nature of the milk used, its temperature, the cup and the position of the milk frother in the mug. - Page 17 Milk recipe preparations when using a Nespresso VIEW mug (270ml) / Préparations de recettes lactées avec un VIEW mug Nespresso (270ml) Only when preparing a milk recipe with coffee, completely lift the lever Press the recipe key. The milk frothing starts automatically. The and insert a capsules.
- Page 18 Milk recipe preparations when using a Nespresso VIEW mug (270ml) / Préparations de recettes lactées avec un VIEW mug Nespresso (270ml) Milk / Ingredients / Default coffee quantity / Lait Ingrédients Quantité de café par défaut Hot Foam Hot Foam Mousse de lait chaude Mousse de 100 ml...
-
Page 19: Milk Recipe Preparations When Using Your Personal Cup / Préparations De Recettes Lactées Avec Votre Propre Tasse
Milk recipe preparations when using your personal cup / Préparations de recettes lactées avec votre propre tasse For perfect foam, use refrigerated UHT or pasteurized milk skimmed or semi-skimmed (approximately 4°C). You can use soy, almond or oat drink for your milk preparations. The volume of milk foam depends on the nature of the milk used, its temperature, the cup and the position of the milk frother in the cup. -
Page 20: Milk Recipes For Your Personal Cup / Recettes Lactées Pour Votre Tasse
Milk recipe preparations when using your personal cup / Préparations de recettes lactées avec votre propre tasse Lift the head of the machine and place the milk frother. Put the drip tray on the high position. If your mug is too tall to fit under the head of the machine, place the drip tray in the low position or Refer to the “Assembly/Disassembly of the milk frother”... - Page 21 Milk recipe preparations when using your personal cup / Préparations de recettes lactées avec votre propre tasse Only when preparing a milk recipe with coffee, Press the recipe key. The milk frothing starts automatically. The selected recipe key completely lift the lever and insert a capsules. Close blinks slowly while it is being prepared.
-
Page 22: Kg Programming Coffee Volume / Programmation Du Volume De Café
Programming coffee volume / Programmation du volume de café Turn on the machine by pressing one of the coffee keys Lift the lever completely and insert a capsule. Close the lever and place a cup under the coffee outlet. (Ristretto, Espresso, Lungo) Levez le levier complètement et insérez une capsule. -
Page 23: Reset To Factory Settings / Rétablir Les Réglages D'usine
Reset to factory settings / Rétablir les réglages d'usine Turn on the machine by pressing one of the coffee keys (Ristretto, Espresso, Lungo). The factory settings are restored. The machine automatically exits from the Factory Settings Menu mode. Allumez la machine en appuyant sur l’une des touches café (Ristretto, Espresso, Lungo). Le rétablissement des réglages d'usine est fait. -
Page 24: L Automatic Power Saving Setting / Réglage De L'arrêt Automatique
Automatic power saving setting / Réglage de l’arrêt automatique The machine will turn into OFF mode automatically after 9 minutes of non-use. La machine s’éteint automatiquement au bout de 9 minutes de non-utilisation. Turn on the machine by pressing one of the coffee keys (Ristretto, Espresso, Lungo) Press one of the Hot Foam, Latte Macchiato and Cappuccino keys to select the desired automatic power off time. -
Page 25: Daily Maintenance / Entretien Quotidien
Daily maintenance / Entretien quotidien Do not use any aggressive or solvent-based cleaning products. Use a non-abrasive damp cloth and a gentle cleaning agent to clean the surface of the machine. Do not wash any of the machine’s components in the dishwasher, except for the milk frother and the capsule container. N’utilisez pas des produits de nettoyage agressifs ou à... -
Page 26: Descaling / Détartrage
Descaling / Détartrage Descaling is mandatory when the machine indicates that this is required (steady "Descaling" alert indicator light). The machine locks itself until the descaling is performed. Le détartrage est obligatoire lorsque la machine indique que cela est nécessaire (le voyant de l’alerte "Descaling" est fixe). La machine se bloque jusqu'à... - Page 27 Descaling / Détartrage Insert the milk frother. Place a minimum 1L container under the head. Refer to the "Assembly/Disassembly of the milk frother” Placer un récipient de 1 L minimum sous la tête. paragraph. Mettez en place le fouet mousseur. Référez-vous au paragraphe «...
- Page 28 Descaling / Détartrage Rinse the water tank and completely fill it with fresh drinking Press the Lungo + Ristretto keys again. Rinsing water. continues via the coffee outlet and the milk frother. The Lungo + Ristretto keys blink. Rincez le réservoir d'eau et remplissez-le complètement d'eau fraîche potable.
-
Page 29: Priming, After Emptying Or Unpriming / Amorçage, Après Vidange Ou Désamorçage
Priming, after emptying or unpriming / Amorçage, après vidange ou désamorçage This function empties air from the machine to ensure the quality of the preparations. As a safety measure, the machine may block use if there is any air present. Cette fonction permet de purger l’air de la machine afin garantir la qualité... -
Page 30: Une Réparation
Emptying the system before a period of non-use, for frost protection or before a repair / Vidange du système avant une période de non-utilisation, en protection contre le gel ou avant une réparation 3 sec. Insert the milk frother.Turn on the machine by pressing one of Remove the water tank. -
Page 31: Troubleshooting
Troubleshooting Videos are available via the Nespresso Mobile Application and on www.nespresso.com – Consult the "Services” section. No light on the keys and indicator lights. - Check the outlet, plug, voltage and fuse. Milk overflows from the mug during preparation. - Refer to "Milk recipe preparations"... -
Page 32: Dépannage
Dépannage Des videos sont disponibles sur l’Application Mobile Nespresso et sur www.nespresso.com – Consultez la section « Services ». Pas de lumière sur les touches et voyants. - Vérifiez la prise, la fiche, la tension, le fusible. Les voyants des touches recettes lactées ne - Mettez en place le fouet mousseur pour que les s’allument pas. -
Page 33: Recycling & Environmental Protection / Recyclage Et Protection De L'environnement
Krups guarantees this product against all material and manufacturing defects over a period of two Krups garantit ce produit contre tous les défauts matériels et de fabrication pour une période de deux years starting from the purchase date or delivery date. A proof or purchase is required to validate this ans à... - Page 34 XN89 by Nespresso 8020003541...
Need help?
Do you have a question about the NESPRESSO YY4355 and is the answer not in the manual?
Questions and answers