
Related Manuals for JUGS Z7100


Summary of Contents for JUGS Z7100
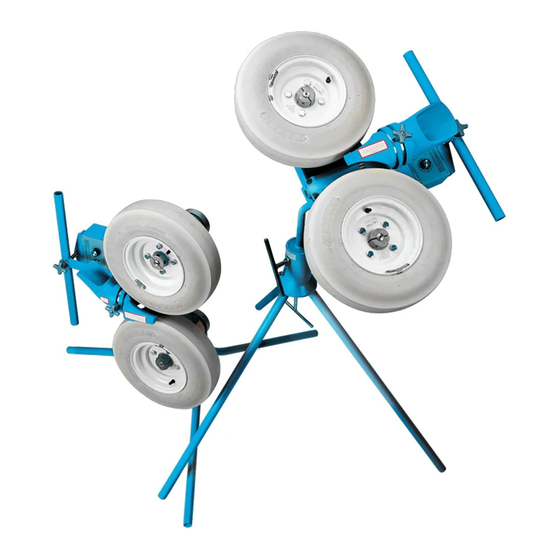
- Page 1 OWNER’S MANUAL Part No. Z 7100 Instructions for the JUGS Combination Pitching Machine REV 5 SAVE THIS MANUAL...
- Page 2 This manual must be kept with the pitching machine AT ALL TIMES. Each coach and/or operator must read and understand the instructions in this manual bEfORE USING the JUGS Combination Pitching Machine. Call (1-800-547-6843 or 503-692-1635) if you need additional copies.
-
Page 3: Table Of Contents
Table of Contents Introduction......... . 2 Product Safety Signs and Labels . -
Page 4: Introduction
It has many features designed to make your practices more efficient and enjoyable. Safety, performance and dependability have been given top priority in the design of all JUGS pitching machines, making them easy to operate and maintain. With proper care, your JUGS pitching machine will give you many years of enjoyable service. -
Page 5: Product Safety Signs And Labels
Product Safety Signs & Labels Safety Alert Symbols Safety Alert Symbols indicate DANGER, WARNING or CAUTION. These symbols may be used in conjunction with other symbols or pictographs. Failure to obey a safety warning will result in serious injury to yourself or to others. - Page 6 Safety Signs and Labels Carefully read all safety-sign decals affixed to your JUGS pitching machine before operating it. See some typical examples below. DANGER -MECHANICAL HAZARD- READ ALL OPERATING AND SAFETY INSTRUCTIONS BEFORE USING THIS MACHINE. ONLY INSTRUCTED PERSONNEL SHALL OPERATE THIS MACHINE.
-
Page 7: Rules For Safe Operation
Rules for Safe Operation WARNING: JUGS pitching machines are intended for use by operators who are at least 18 years of age and who have been instructed in their use. WARNING: Do not attempt to operate this machine until you have read thoroughly and understand completely all instructions, safety rules, machine labels, etc., contained in this manual. - Page 8 Rules for Safe Operation • Use the right ball. Use only JUGS dimpled style, Lite-Flite ® , Softie ® , one- ounce polyball baseballs, high-quality leather baseballs (9-inch Wilson A1010 equal or better), or tennis balls in this machine. •...
- Page 9 • Replacement parts: All repairs, whether electrical or mechanical, should be made by a qualified JUGS service technician. When servicing, use only JUGS replacement parts. • Do not operate this machine under the influence of drugs, alcohol, or any medication.
-
Page 10: Electrical
WARNING: Do not allow your familiarity with the machine to cause you to be careless. Remember that a careless fraction of a second is enough time to inflict severe injury to yourself or others. SAVE THIS MANUAL. Refer to it often and use it to instruct other users. Do not loan your pitching machine to anyone who has not been instructed in its use. - Page 11 Electrical Connection Your JUGS pitching machine is powered by a 90 volt motor(s). Do not operate this machine on direct current (DC). A substantial voltage drop will cause a loss of power and the motor will overheat. If the machine does not operate when plugged into an outlet, double check the power supply.
-
Page 12: Terminology
Terminology COMbO bASEbALL DIAGRAM Figure 3... - Page 13 Terminology COMbO SOfTbALL DIAGRAM Figure 4...
-
Page 14: Unpacking
To move the pitching machine, slowly tip machine over until tires rest on the ground. Grasp and lift two legs and roll on wheels to new position as you would a wheelbarrow. The JUGS pitching machine will fit in the trunk of a car by removing it’s legs. -
Page 15: Set Up
Tighten the Leg T-Clamp sufficiently to hold the legs in place very snugly. 4. Place rubber leg caps on lower end of legs if JUGS is to be used indoors. The leg caps are not recommended for outdoor use. - Page 16 Set Up 9. Plug heavy-duty, No. 16 gauge three-prong, extension cord into 110-volt GFCI outlet and connect to short cord on pitching machine. Place the pitcher’s screen in front of the pitching machine to protect the operator and the pitching machine from batted balls. for Poly baseball (Whiffle type only) Use: Set dials no more that five (5) digits apart.
- Page 17 Set Up To Convert Setup from baseball to Softball Use 1. Place JUGS upside down, with tires flat on ground or floor and legs pointing upwards. 2. Loosen Leg T-Clamp, which secures legs in place, and remove long legs from sockets.
-
Page 18: Operating Instructions
Your JUGS Combination (Combo) Pitching machine has the versatility to throw baseballs, softballs, tennis balls and polyballs. 1. Operators of JUGS Pitching Machines must wear safety glasses and batting helmets at all times. 2. Check speed dial and make sure it is in the full counter-clockwise position (pointer at “0”) and the toggle switch is in the Off position. - Page 19 NOTE: We suggest that each operator spend a couple of hours experimenting with the JUGS pitching machine. Try many different speed settings. Do not be afraid that any setting you make will harm the pitching machine; however, you should use a wide backstop when experimenting with faster speeds.
- Page 20 Pitching to batters Follow all safety performance instructions in this manual. The following feeding instructions should be used to insure accurate and efficient operation of the JUGS pitching machine. IMPORTANT PITCHING MACHINE fEEDING INSTRUCTIONS: • When feeding the machine with leather balls, hold the ball the same way every time.
- Page 21 • Out-of-round, soft, mushy, or wet balls will affect accuracy of pitches and must not be used. Mixing different types of balls (leather, rubber, JUGS, etc.) will affect consistency of pitches. For best accuracy, throw only one type of ball at a time.
- Page 22 Always have the batter and others stand clear while adjusting your JUGS pitching machine and throwing test balls. 3. Be sure to try different settings. For example, when throwing a right-hand curve, set the right hand dial at 70, 75, or 80 and the left hand dial at 30, 35, or 40.
- Page 23 Operation a. Fastball and overhand curve. b. Sidearm curves, lefty or righty. c. Right-handed curves or sliders. d. Left-handed curves or sliders. Figure 6 Throwing Straight balls: 1. A straight fastball can be thrown by setting the pitching machine with one wheel directly on top of the other wheel (Figure 6a) and adjusting the lower wheel to a faster speed than the upper wheel.
- Page 24 Operation Dial Settings for Various Pitches Use the following diagrams shown below in Figure 7 as guides for using the JUGS Combo pitching machine. Each diagram shows the approximate tilt of the wheels. Numbers represent the speed dial settings. IMPORTANT: You may have to vary speeds slightly from the examples to get the desired accuracy and consistency.
- Page 25 NOTE: We suggest that each operator spend a couple of hours experimenting with the JUGS pitching machine. (Refer to Table 1, page 25.) You may want to jot down the wheel position and speed dial settings in the space provided on pages 29-30 for future reference.
- Page 26 Table 1 [right] is a detailed chart which depicts approximately how fast, in miles per hour, a JUGS Curveball or JUGS Combination pitching machine is throwing, when the dials are set in various positions.
-
Page 27: Speed Chart
L E f T- W H E E L D I A L S E T T I N G... -
Page 28: Fielding Practice
Practice fielding Practice Your JUGS pitching machine can be locked in one position or you can loosen and remove the Base T-Clamp which will allow you to turn the pitching machine freely from side-to-side. Figure 8: Ground balls Figure 9: Catcher pop-ups Grounders (figure 8) Position the wheels so they point downward. -
Page 29: Maintenance
Maintenance Review the following instructions carefully to maintain maximum accuracy with your JUGS Pitching Machine. • Maintain tire pressure at 16 to 17 psi (25 psi for tennis balls). Cleaning • Keep machine clean, and free of grit and dirt. Always use a clean damp cloth when cleaning. -
Page 30: Product Specifications
Recommended Generator ..... Yamaha ® EF1000iS Recommended Balls ..JUGS Balls or high-quality leather balls IMPORTANT: Servicing requires extreme care and knowledge of the machine and should be performed only by JUGS. -
Page 31: Operator Notes
Operator Notes... - Page 32 Operator Notes...
-
Page 33: Warranty Information
Tualatin factory in any respect which, in our judgment, affects its condition or operation. RETURN PERfORATED CARD bELOW TO JUGS SPORTS Warranty Record JUGS Serial No. - Page 34 In the USA and Canada, call toll-free: 1-800-547-6843 Internationally, call collect: 0-503-692-1635 Fax us: 1-503-691-1100 Visit our website: www.jugssports.com Model Serial No. Date Delivered SAVE THIS PORTION fOR YOUR RECORDS PLACE STAMP H E R E JUGS Sports P.O. box 365 Tualatin, Oregon 97062...
- Page 36 If you need more information about this product or any other JUGS product or service, please contact the manufacturer: In the USA and Canada, call toll-free: 1-800-547-6843. For International Orders, call collect: 0-503-692-1635. Our fax number is 1-503-691-1100. Visit our website at www.jugssports.com.
Need help?
Do you have a question about the Z7100 and is the answer not in the manual?
Questions and answers