Table of Contents
Advertisement
Advertisement
Table of Contents

Related Manuals for Computime S-210

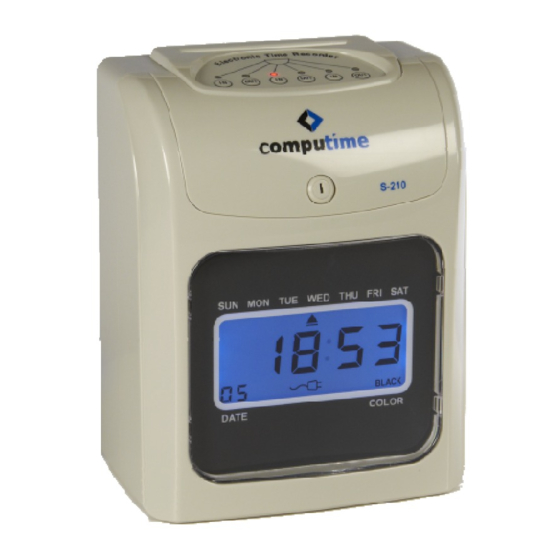
Summary of Contents for Computime S-210
- Page 1 Computime S-210 Electronic Time Recorder Instruction Manual...
-
Page 2: Table Of Contents
CONTENTS 1. Introduction 1.1 Package content 1.2 Parts identification 1.3 Setting select key 2. Function options 2.1 Quick codes’ selection 2.2 Detail codes’ selection 3. Be ready for setting 4. Function setting 4.1 - 4.5 Setting of year, month, date, hour, minute 4.6 Setting the regular time signal 4.7 Setting the date changing time 4.8 Setting the shifting time... -
Page 3: Introduction
1. Introduction In order to operate your time recorder accurately and efficiently with a longer product life, please read this manual thoroughly. Models Analogue Functions LCD Display Clock Face Two color printing Time Signal Perpetual calendar Back up battery Auto In-Out adjustment External Signal Unit Data memory backup during power failure... -
Page 4: Package Content
1.1 Package Contents Unpack the time recorder and check its contents to ensure that the time recorder unit and all accessories as shown below are included. Time Recorder Instruction Manual 1.2 Parts identification (a) Keypad (b)LCD on the top - 4 -... -
Page 5: Setting Select Key
1.3 Setting select key to increase the set value by 1 to decrease the set value by 1 Enter to save the set value & enter the next step Back to backspace the set value Clear to cancel the set value Program switch Normal/ Programming Battery... -
Page 6: Function Options
2. Function options The function options will be started by unlocking and removing the lid from the time recorder with the program switch to right side. Here are total 37 pcs function codes, which are from “00, 01, 02…” to “ 37” , different code is for different setting. - Page 7 Setting the Duration of time signal(Seconds) Setting the time of 1 group of ringing Setting the time of 2 group of ringing Setting the time of 3 group of ringing Setting the time of 4 group of ringing Setting the time of 5 group of ringing Setting the time of 6 group of ring...
-
Page 8: Be Ready For Setting
Setting the S/W solstice end(month and day) Setting the S/W solstice end(hour and minute) Be ready for setting 1. Power Supply (1) Stable power source are highly recommended. (2) Please check the correct voltage & power cord before uses. 2. Top Cover Remove the top cover prior to set program or change the ribbon case Open the Top Cover by using the key provided and remove the top cover. -
Page 9: Setting The Regular Time Signal
4.3 Setting the date Press Enter or Back to enter the program Code 02, press + or – button to set the day. Press Enter again to register the setting value. 4.4 Setting the Hour Press Enter or Back to enter the program Code 03, Press + or –... -
Page 10: Setting The Shifting Time
press + or – button to set the Hour. Press Enter again to register the setting value. press + or – button to set the Minute. Press Enter again to register the setting value. Note: The default is 00:00, the day and printing line will change to the next at the time. -
Page 11: Setting The Extension Time Signal
4.10 Setting the extension time signal Press Enter or Back to enter the program Code 25, Press + or – button to set the Hour. Press Enter again to register the setting value. Press + or – button to set the Minute. Press Enter again to register the setting value, the 7 extension ringing time is set. -
Page 12: Setting The S/W Solstice Start (Month And Day)
Month pay time card Weekly pay time card 4.13a Setting the Monthly pay period end day When the card type is set to 00,the first row on the 1~15 row card surface is automatically as blank row. theset value is from 00 to 31 4.13b Setting the Weekly pay period end day Press Enter or Back to enter the program code 33 Press... -
Page 13: Setting The S/W Solstice End (Month And Day)
4.16 Setting the S/W solstice end (month and day) Press Enter or Back to enter the program code 36, press + or – button to set the end month. Press Enter again to register the setting value. Press + or – button to set the end date. Press Enter again to register the setting value. -
Page 14: Replacing Ribbon Cartridge
Set it correctly. 1. Mistakes in setting the The clock is clock. slow (or fast) 2. Power failure Set it correctly. 1. The ribbon cartridge is not set correctly. 2. Change a new cartridge. Light printing 2. The cartridge has been used for long time. -
Page 15: Cautions
8. Cautions 1. To avoid fire or electric shock, please do not expose this machine to rain or excessive condensed moisture. 2. Do not expose to direct sunlight, strong heat source or dusty area. 9. Specifications DC13V 1.5A Input Power Supply (Refer to the indication on the label of each machine) Power Consumption... - Page 16 - 16 -...
Need help?
Do you have a question about the S-210 and is the answer not in the manual?
Questions and answers