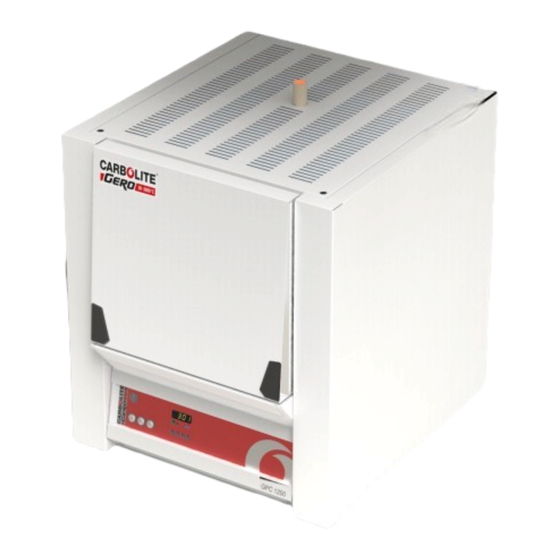
VERDER CARBOLITE GERO BLF 17/3 Installation, Operation And Maintenance Instructions
1700 c bottom loading furnace 3 litres no controller
Hide thumbs
Also See for CARBOLITE GERO BLF 17/3:

Related Manuals for VERDER CARBOLITE GERO BLF 17/3


Summary of Contents for VERDER CARBOLITE GERO BLF 17/3
- Page 1 Installation, Operation and Maintenance Instructions 1700°C Bottom Loading Furnace - BLF Model: 3 Litres No Controller BLF 17/3 + No Controller MEN-BLF1703-003_NOCTRL (29-10-2021)
-
Page 2: Table Of Contents
Contents This manual is for guidance on the use of the Carbolite Gero product specified on the front cover. This manual should be read thoroughly before unpacking and using the furnace or oven. The model details and serial number are shown on the back of this manual. - Page 3 Safety Warning - Disconnection from Power Supply Safety Warning - Refractory Fibre Insulation Safety Warning - Molybdenum Disilicide Elements Temperature Controller Replacement Fuse Replacement Thermocouple Replacement Element Protection Tube Option Replacement Procedure Insulation Replacement Element Installation and Replacement 7.0 Fault Analysis Furnace Does Not Heat Up Product Overheats 8.0 Wiring Diagrams...
-
Page 4: Symbols And Warnings
1.0 Symbols and Warnings Switches and Lights Instrument switch: when the instrument switch is operated the temperature control circuit is energised. Heat light: the adjacent light glows or flashes to indicate that power is being supplied to the elements. General Warnings DANGER –... -
Page 5: Prerequisites To Use
1.3 Prerequisites to Use Prior to the commissioning and use of this product, all personnel involved in its installation, operation and maintenance must be deemed competent and have: Read and understood the information contained within this manual Received the relevant training with regard to safety and operation of the product Been provided with the appropriate PPE (Personal Protective Equipment) required for the safe operation of this product Note: The customer is responsible for ensuring that all of the above conditions are... -
Page 6: Installation
2.0 Installation Unpacking and Handling When unpacking or moving the product always lift it by its base. Do not use the door or any other protruding parts. The product contains a transformer and is heavy: use two or more people to carry the product. Some models may alternatively be lifted by fitting lifting bolts to captive threads in the top of the case. - Page 7 Depending on the application of the product, it may be appropriate to position it under an extraction hood. Ensure the extraction hood is switched on during use. Ensure that the product is placed in such a way that it can be quickly switched off or disconnected from the electrical supply.
-
Page 8: Tie Wrap Removal Instructions
Tie Wrap Removal Instructions The motor powered arm that operates the hearth movement has been fixed in place for transit. Please ensure the plastic tie wrap used to fix the arm is removed before operation. 1. Remove the back panel of the furnace. 2. -
Page 9: Fitting The Chimney And Heating Elements
2.4 Fitting the Chimney and Heating Elements Please refer to the Element Installation and Replacement in section 6.0. Wear eye protection when handling the heating elements. The molybdenum disilicide elements are EXCEPTIONALLY FRAGILE and are packed separately, together with other items shown in the list. -
Page 10: Electrical Connections
Transit Clamps – dependent on model: the example shown here is for the 3 litre models; remove any transit clamps as shown. Fit the ceramic chimney to the hole that exits the top of the chamber. Most models are supplied with an insulation piece to fit around the chimney;... - Page 11 Electrical Connection Details: Supply Types Supply Terminal Label Cable Colour Reversible or Live- Live - Neutral Live to either power conductor 1-phase Brown to live (For USA 200-240V, connect L1) to the other power conductor N / L2 Blue to neutral (For USA 200-240V, connect L2) to earth...
-
Page 12: Temperature Controller
3.0 Temperature Controller If this product is fitted with a temperature controller, instructions are provided separately. -
Page 13: Operation
4.0 Operation Operating Cycle This product is fitted with an instrument switch which cuts off power to the control circuit. Connect the product to the electrical supply. The cooling fans should automatically operate. The furnace is fitted with a pair of gates that have a safety switch. the hearth can only be lowered or raised if the gates are closed. -
Page 14: Atmospheres & Corrosive Materials
When heating large objects, in particular poor conductors, avoid shielding the thermocouple from the heating elements. The thermocouple is intended to sense the temperature near the heating elements. However, if a large object is placed in the chamber it may record the average temperature of the object and the elements, this can lead to overheating of the elements. -
Page 15: Operator Safety
Operator Safety This product incorporates a safety switch which interrupts the heating element circuit when the furnace is opened. This prevents the operator touching a live heating element and also prevents the product from heating up if the furnace is left open. The operation of this switch should be checked periodically. -
Page 16: Inverted Crucible Option
Operators are advised to periodically check the thermocouple output, either by a calibration test or by comparing the output with a new reference thermocouple which has been subjected to high temperatures for a minimum length of time. Failure to check the thermocouple regularly may result in overheating of the work and the furnace, with consequential damage to both. -
Page 17: Maintenance
5.0 Maintenance General Maintenance Preventive rather than reactive maintenance is recommended. The type and frequency depends on the product use; the following are recommended. Maintenance Schedule CUSTOMER QUALIFIED PERSONNEL DANGER! ELECTRIC SHOCK. Risk of fatal injury. Only electrically qualified personnel should attempt these maintenance procedures. Frequency Maintenance Method... - Page 18 Function Tested using certified equipment, frequency Temperature Calibration dependent on the standard required Check that all functions are working nor- Operational Check mally Thorough inspection and report incor- Operational Check porating a test of all functions Performance Element Circuit Electrical measurement Measure the current drawn on each phase / Power Consumption circuit...
-
Page 19: Cleaning
5.2.1 Cleaning Soot deposits may form inside the furnace, depending on the process. At appropriate intervals remove these by heating as indicated in the General Operation Notes. The product's outer surface may be cleaned with a damp cloth. Do not allow water to enter the interior of the case or chamber. Do not clean with organic solvents. -
Page 20: Power Adjustment (Thyristor)
The correct setting for the power limit depends on the supply voltage, table given in section9.0 Power Adjustment (Thyristor) The current-limiting thyristor stacks which control power to the elements are fitted with an adjustable resistor which is factory set to limit the maximum current supplied. In the event of a change of supply voltage, or the fitting of a new thyristor, further adjustment may be required. -
Page 21: Repairs And Replacements
6.0 Repairs and Replacements Safety Warning - Disconnection from Power Supply Immediately switch the product off in the event of unforeseen circumstances (e.g. large amount of smoke). Allow the product to return to room temperature before inspection. Always ensure that the product is disconnected from the electrical supply before repair work is carried out. -
Page 22: Safety Warning - Molybdenum Disilicide Elements
Safety Warning - Molybdenum Disilicide Elements Molybdenum disilicide elements form a glazed surface when heated. Internal stresses can form through heating and cooling which render the glaze fragile. The glaze can sometimes splinter into a shower of sharp particles when handled. Always wear eye protection when handling the elements. -
Page 23: Element Protection Tube Option Replacement Procedure
Element Protection Tube Option Replacement Procedure Ensure the furnace is cold and isolated from the electrical connection. On the underside of the front cowl is a stainless steel mesh, which should be removed for access to the underside of the furnace. You will see three crescent shaped stainless steel brackets which will support the protection tube once in place;... -
Page 24: Element Installation And Replacement
Element Installation and Replacement See section 6.3 - Safety Warning - molybdenum disilicide. Molybdenum disilicide elements form a glazed surface when heated. Internal stresses can form through heating and cooling which render the glaze fragile. The glaze can sometimes splinter into a shower of sharp particles when handled. - Page 25 Braid Roof Insulation Element block Element Element Clamp See text Clip Braid Element Connections (3-phase example)
- Page 26 Use of Clip Tool The distance from the top of the element clamp to the top of the element should be 40 mm. Larger clips require the clip tool, comprising two levers: 1. Clip tool 2. Apply hand pressure...
-
Page 27: Fault Analysis
7.0 Fault Analysis Furnace Does Not Heat Up An ohm meter applied HEAT to the element circuit A heating element has failed. light(s) shows an open circuit. are ON. The controller shows a HEAT The thermocouple has broken or very high temperature light(s) has a wiring fault. -
Page 28: Product Overheats
Product Overheats The HEAT light goes The controller OFF with the shows a very high The controller is faulty. instrument switch. temperature. The thermocouple may The controller have been shorted out or shows a low may have been moved out temperature. -
Page 29: Wiring Diagrams
8.0 Wiring Diagrams 195-1-1013... -
Page 30: Fuses And Power Settings
9.0 Fuses and Power Settings Fuses F1 to F3 - Refer to the circuit diagrams. Fitted if supply cable fitted. Internal 38 mm x 10 mm type F fitted on Supply Fitted on board to some types EMC filter circuit board(s) Fuses of EMC filter. - Page 31 The setting for the power limit parameter in the controller (OP.Hi) should be 100% for this product. Please refer to the rating label for product specific information. Please refer to the rating label for product specific information.
-
Page 32: Specifications
10.0 Specifications Carbolite Gero reserves the right to change the specification without notice. Approx. Chamber Size (mm) Max Temp Max Power Net Weight Capacity Model (°C) (kW) (kg) Height Diameter Bottom Loading Furnaces heated by Molybdenum Disilicide elements, with electrically operated hearth. - Page 33 Notes Service Record Engineer Name Date Record of Work...
- Page 34 The products covered in this manual are only a small part of the wide range of ovens, chamber furnaces and tube furnaces manufactured by Carbolite Gero for laboratory and industrial use. For further details of our standard or custom built products please contact us at the address below, or ask your nearest stockist.
Need help?
Do you have a question about the CARBOLITE GERO BLF 17/3 and is the answer not in the manual?
Questions and answers