Table of Contents
Advertisement
Advertisement
Table of Contents

Summary of Contents for deSoutter Medical Vdrive V-MBQ-707
- Page 1 International English User Manual V-MBQ-707/708...
- Page 2 UKPA GB1304019.1 WO 2014/135868...
-
Page 3: Table Of Contents
Contents Important Information ..........1 Safety Instructions . - Page 4 Troubleshooting ........... . . 31 Further Help .
-
Page 5: Important Information
Important Information Save this user manual. This user manual contains important safety and operating instructions for this equipment. Throughout this user manual, the words WARNING, CAUTION and NOTE are used to highlight important information. : WARNING information identifies conditions or practices that could result in injury WARNING : CAUTION information identifies conditions or practices that could result in damage to CAUTION... -
Page 6: Intended Use
Intended Use The equipment described in this user manual is intended for use in veterinary surgical procedures involving drilling, reaming, wire or pin driving, and cutting bone or hard tissue. Disposal : do not dispose of batteries by throwing them into a fire or immersing them in water WARNING : lithium batteries are subject to transportation restrictions WARNING... -
Page 7: Symbols
Symbols Symbol Meaning Symbol Meaning Refer to the user manual Only for use by a physician Single-use only Do not immerse Dispose of in accordance Suitable for recycling with local regulations Vacuum steam sterilise Type BF protection Normal mode Screwing mode Drive in the direction Pull and/or turn in the indicated... -
Page 8: Reprocessing - Sterilisable Equipment
Reprocessing - Sterilisable Equipment These reprocessing instructions are suitable for the sterilisable equipment described in this user manual. • All Handpieces • All Attachments • AH-xxx - Aseptic Housing • AS-xxx - Aseptic Shield Limitations on reprocessing Repeated processing as specified in these instructions has minimal effect on this equipment. Equipment end-of-life is normally determined by wear or damage during use. -
Page 9: Point Of Use (Before Reprocessing)
Detergents and Rinse Aids for use on all Other Equipment : the choice of detergent or rinse aid, and the manner in which they are used, is critical WARNING to sustaining the reliability of the equipment. Failure to follow the instructions given in this user manual may cause premature failure of the equipment and may compromise patient safety. - Page 10 Automatic Cleaning • Remove large contaminant deposits by manual cleaning. • Remove all attachments and accessories and wash them separately. • Dispose of single-use accessories in accordance with local guidelines. An automatic washer-disinfector, capable of meeting the relevant national and international cleaning and disinfection standards (such as, ISO 15883 or HTM 2030), should be used.
-
Page 11: Maintenance
3. Remove the disinfected equipment from the washer-disinfector and place the equipment in a clean area. 4. Remove any washing spacers and end caps, if fitted. 5. Visually inspect each item. Verify that all contaminants have been removed in accordance with local reprocessing guidelines. Disinfection Thermal disinfection is recommended and included in the automatic cleaning process. -
Page 12: Sterilisation Of Handpieces And Accessories
Sterilisation of Handpieces and Accessories Steam Sterilisation : these sterilisation instructions are not suitable for sterilisable batteries CAUTION : ensure that aseptic battery housings are open, with the open side facing down CAUTION Exposure Time and Cycle Temperature Wrapping Drying Time (-0°C / +3°C) 30 minutes at vacuum assisted... -
Page 13: Sterilisation Of Sterilisable Batteries
Sterilisation of Sterilisable Batteries Steam Sterilisation : aseptic batteries (AB-xxx) are not suitable for sterilisation CAUTION : high temperature can affect the performance and life of a battery. The specified drying CAUTION times should not be exceeded. : ensure that sterile batteries are fitted to the holder in the sterilisation container. The CAUTION contacts should be facing downwards to allow any liquid to drain away freely. -
Page 14: Point Of Use (After Reprocessing)
Point of Use (after reprocessing) : do not operate this equipment while it is still warm from reprocessing CAUTION : this equipment should not be placed in a refrigerator or similar CAUTION Following sterilisation, allow this equipment to cool to room temperature before being used. Additional Information Manual cleaning has been validated in accordance with AAMI TIR30. -
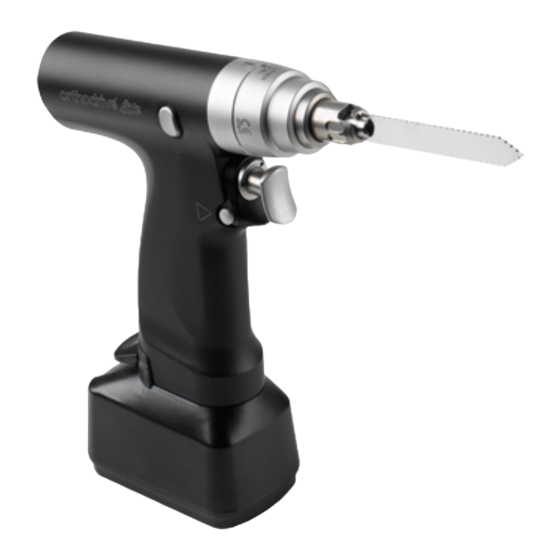
Page 15: Overview
Overview Attachment release button (x2) Trigger Mode selector... -
Page 16: Configuring A Handpiece
Configuring a Handpiece Selecting the Mode : ensure the handpiece is set to SAFE mode before attempting to change the handpiece WARNING configuration, and before fitting or removing attachments and accessories Slide the mode selector to choose the required mode. V-MBQ-707 Forward mode SAFE... -
Page 17: Using Attachments
Using Attachments Fitting an Attachment : ensure the handpiece is set to SAFE mode before attempting to change the handpiece WARNING configuration, and before fitting or removing attachments and accessories Push the attachment into the end of the handpiece until it clicks into place. : attachments can be used in any of eight angular positions NOTE : all attachments are fitted in the same way... -
Page 18: Removing Attachments
Removing Attachments : ensure the handpiece is set to SAFE mode before attempting to change the handpiece WARNING configuration, and before fitting or removing attachments and accessories Press both attachment release buttons and remove the attachment. : all attachments are removed in the same way NOTE... -
Page 19: Using A Wire Or Pin Driver
Using a Wire or Pin Driver : if the wire is to be removed from the surgical site, ensure the wire is wiped clean before CAUTION inserting into the attachment : if the wire or pin protrudes from the rear of the tool, a wire guard must be fitted WARNING : do not use bent wires CAUTION... -
Page 20: Using Accessories
Using Accessories Fitting and Removing a Rotary Cutter : ensure the handpiece is set to SAFE mode before attempting to change the handpiece WARNING configuration, and before fitting or removing attachments and accessories To secure or release the accessory, adjust the chuck according to the chuck type. Chuck Type Adjustment Instructions Keyed... -
Page 21: Fitting A Tplo Blade (Slocum Hub)
Fitting a TPLO blade (Slocum Hub) : ensure the handpiece is set to SAFE mode before attempting to change the handpiece WARNING configuration, and before fitting or removing attachments and accessories 1. Insert the blade in the desired orientation. 2. Using the hex tool, tighten the grub screws to secure the blade. : all three screws must be tightened NOTE : ensure the inserted blade is securely clamped in place... -
Page 22: Removing A Tplo Blade (Slocum Hub)
Removing a TPLO blade (Slocum Hub) : ensure the handpiece is set to SAFE mode before attempting to change the handpiece WARNING configuration, and before fitting or removing attachments and accessories 1. Using the hex tool, loosen the grub screws. : all three screws must be loosened NOTE 2. -
Page 23: Fitting A Tplo Blade (Synthes Hub)
Fitting a TPLO blade (Synthes Hub) : ensure the handpiece is set to SAFE mode before attempting to change the handpiece WARNING configuration, and before fitting or removing attachments and accessories 1. Insert the blade in the desired orientation. 2. Using the torx wrench, tighten the grub screw to secure the blade. : ensure the inserted blade is securely clamped in place NOTE : this procedure applies to the V-OQ-708... -
Page 24: Removing A Tplo Blade (Synthes Hub)
Removing a TPLO blade (Synthes Hub) : ensure the handpiece is set to SAFE mode before attempting to change the handpiece WARNING configuration, and before fitting or removing attachments and accessories 1. Using the torx wrench, loosen the grub screw. 2. -
Page 25: Fitting A Sagittal Blade (Lever-Release)
Fitting a Sagittal Blade (Lever-release) : ensure the handpiece is set to SAFE mode before attempting to change the handpiece WARNING configuration, and before fitting or removing attachments and accessories 1. Turn the blade clamp lever anti-clockwise to open the blade clamp. 2. -
Page 26: Removing A Sagittal Blade (Lever-Release)
Removing a Sagittal Blade (Lever-release) : ensure the handpiece is set to SAFE mode before attempting to change the handpiece WARNING configuration, and before fitting or removing attachments and accessories 1. Turn the blade clamp lever anti-clockwise to release the blade. 2. -
Page 27: Fitting A Sagittal Blade (Knob-Release)
Fitting a Sagittal Blade (Knob-release) : ensure the handpiece is set to SAFE mode before attempting to change the handpiece WARNING configuration, and before fitting or removing attachments and accessories 1. With the blade clamp in the open position, insert the blade. 2. -
Page 28: Removing A Sagittal Blade (Knob-Release)
Removing a Sagittal Blade (Knob-release) : ensure the handpiece is set to SAFE mode before attempting to change the handpiece WARNING configuration, and before fitting or removing attachments and accessories 1. Pull the blade clamp down and unscrew, anti-clockwise. 2. Lift and remove the blade. : this procedure applies to the V-NQ-708 NOTE... -
Page 29: Fitting A Wire Or Pin (V-Wq-707)
Fitting a Wire or Pin (V-WQ-707) : ensure the handpiece is set to SAFE mode before attempting to change the handpiece WARNING configuration, and before fitting or removing attachments and accessories : if the wire is to be removed from the surgical site, ensure the wire is wiped clean before CAUTION inserting into the attachment : do not grip the lever while adjusting the wire position... -
Page 30: Fitting A Wire Or Pin Guard
Fitting a Wire or Pin Guard : ensure the handpiece is set to SAFE mode before attempting to change the handpiece WARNING configuration, and before fitting or removing attachments and accessories : do not use bent wires CAUTION 1. Slide the wire guard over the end of the wire at the rear of the handpiece. 2. -
Page 31: Powering The Handpiece
Powering the Handpiece : ensure the handpiece is set to SAFE mode before attempting to change the handpiece WARNING configuration, and before fitting or removing attachments and accessories 1. Slide the battery onto the base of the handpiece until it clicks into place. 2. -
Page 32: Technical And Ordering Information
Technical and Ordering Information Handpiece Specifications Model V-MBQ-707 V-MBQ-708 Part no. 1291774 1291884 0 - 1350 rpm Speed 0 - 1350 rpm (using DQ-70x) 0 - 650 rpm Cannulation Diameter 4.4 mm Protection Type Type BF protection Protection Class Class 1 Enclosure Protection IPX0 - ordinary equipment... -
Page 33: Attachments
Attachments Drill Attachments Model Description Capacity Cannulation Part No. V-DQ-708 Keyed 0.5 - 6.4 mm 18320 V-DQ-708 Small AO Synthes 18330 Rotary Chuck Accessories Description Part No. Key for 0.5 - 7.4 mm keyed chuck 30062 Reaming Attachments Model Description Capacity Cannulation Part No. -
Page 34: Power Accessories
Power Accessories Battery Systems Small batteries are recommended for light use applications and for when a larger battery is not practical. Medium batteries are recommended for applications where low weight or small size are important. Large batteries are recommended for applications where long duration or high power are important. -
Page 35: Troubleshooting
Troubleshooting Problem Cause Action Handpiece does not Battery is discharged Charge the battery Battery is expended Replace the battery Handpiece runs Battery is discharged Charge the battery slowly or judders Small battery is being used Use a larger battery Both triggers are pressed when Ensure only one trigger is using a saw attachment pressed... -
Page 36: Further Help
Further Help If the problem cannot be resolved, or for any other queries, contact your De Soutter Medical representative. Service and Repair Information All equipment should be periodically checked and cleaned. To minimise the risks associated with loss of performance, annual servicing is recommended for normal use. Due to the specialist techniques used in the manufacture and maintenance of De Soutter Medical equipment, user servicing is not possible. -
Page 37: Emc Guidance
EMC Guidance Guidance and Manufacturer’s Declaration - Electromagnetic Emissions The Product is intended for use in the electromagnetic environment specified below. Users must ensure that it is used in this environment. Emissions Test Compliance Electromagnetic Environment - guidance RF emissions CISPR 11 Group 1 The Product uses RF energy only for its internal function. - Page 38 Guidance and Manufacturer’s Declaration - Electromagnetic Immunity The Product is intended for use in the electromagnetic environment specified below. Users must ensure that it is used in this environment. Immunity Test IEC 60601 Test Level Compliance Level Electromagnetic Environment - Guidance Electrostatic discharge (ESD) ±...
- Page 40 United Kingdom De Soutter Medical Limited Halton Brook Business Park Weston Road Aston Clinton Aylesbury Bucks, HP22 5WF +44 (0) 1296 634 000 +44 (0) 1296 634 033 info@de-soutter.com http://www.de-soutter.com Australia France De Soutter Medical Australia Pty Ltd De Soutter Medical France 2/12-14 Apollo Drive 949 Avenue Parc des Expositions Hallam...
Need help?
Do you have a question about the Vdrive V-MBQ-707 and is the answer not in the manual?
Questions and answers