
Summary of Contents for MESO DICOM
- Page 1 DICOM CAMERA DICOM Camera User Manual Version 2.4.0 ©1995 - 2020 meso international GmbH. All rights reserved.
-
Page 2: Dicom Camera
DICOM Camera as well as all other MESO- and DICOM Camera logos are registered trademarks of meso international GmbH. -
Page 3: Symbols Used
User Manual DICOM Camera SYMBOLS USED In this manual, the following symbols are used to identify text passages: HINT: Provides additional information IMPORTANT: Pay particular attention to this point WARNING: Warns of acts that could lead to serious problems, to the complete system failure or to misdiagnoses and thus in patients to mistreatment and worst of all to death. -
Page 4: Dicom Camera Models
DICOM Camera DICOM CAMERA MODELS The following codes and names are used for the individual camera models DC-CC DC-CC2 DC-CPB DICOM Camera Compact DICOM Camera Compact 2 DICOM Camera Pro DC-EN-240F... -
Page 5: Eu Declaration Of Conformity
Class I device according to Annex VIII, rule 10 and rule 13 of MDR (EU) 2017/745 Statement: meso international GmbH assumes sole responsibility for issuing this EU Declaration of Conformity. The conformity assessment was carried out in accordance with Annex IV of MDR (EU) 2017/745. -
Page 6: Table Of Contents
OPERATING THE CAMERA ................ 2 Power on / off and standby ................2 Status bar ....................3 2.2.1 Operators ..................3 2.2.2 Connection to DICOM Camera Server ..........4 2.2.3 Wi-Fi ..................... 4 2.2.4 Storage usage ................4 2.2.5 Battery ..................5 2.2.6... - Page 7 Wi-Fi and network ..................33 3.1.1 Configure SSID and security ............34 3.1.2 Configure static IP address ............35 Configure DICOM Camera Server..............37 Install certificate ..................38 Power, Fast Start-up, Auto power off ............40 Display....................41 3.5.1 Sleep (Standby) ................42 WEBVIEWER ..................
-
Page 9: Intended Use
The DICOM Camera receives the current patient list from your hospital information system (HIS) or practice program and then sends the images assigned to the patient to the DICOM Camera Server. The transmission of the data is encrypted thereby protecting it from the access from outside. -
Page 10: Operating The Camera
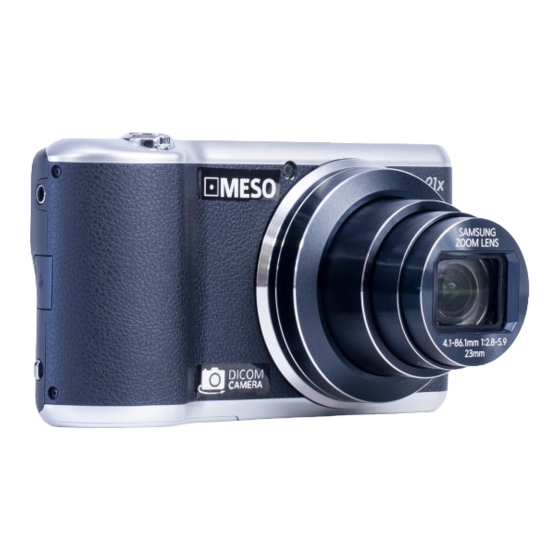
User Manual DICOM Camera OPERATING THE CAMERA These operating instructions are valid for all models of the DICOM Camera. 2.1 Power on / off and standby Fig. 2: DICOM Camera from above (here model DCC) Power on Press and hold power button until the display turns on. -
Page 11: Status Bar
2.2.1 Operators A separate icon is displayed for each operator of the camera. Its individual appearance depends on the user alias (DICOM) entered in the DICOM Camera Server. In addition to the symbol, the operator's initial letter is displayed. In order to make a better distinction, each operator is assigned to his own color. -
Page 12: Connection To Dicom Camera Server
Tap long on the bottom area of the symbol to get more details and to modify server’s IP address. 2.2.3 Wi-Fi The DICOM Camera receives and transmits data via Wi-Fi. A stable Wi-Fi connection is a requirement to successfully work with the DICOM Camera. Connected, best reception... -
Page 13: Battery
Time, which is also used as the recording time of captures. Tap long to view and change the date and time. A warning appears if the date and time differ from the DICOM Camera Server. Tap long on the bottom area of the symbols to display more details and to change time and date. -
Page 14: Upload
NOTE: The user profiles are managed in the DICOM Camera Server (see the user manual of the DICOM Camera Server, chapter Manage users). 2.3.1 Select operator If more than one operator has been defined for a camera, the selection of the operators appears. -
Page 15: Enter Operator Pin
Tap your name to log in. 2.3.2 Enter operator PIN A PIN can be configured in DICOM Camera Server to control the access to the camera. If no PIN has been configured, you will be taken directly to the worklist after selection. -
Page 16: Logout Operator
The operator is logged out automatically when the camera is put into standby or turned off. In the DICOM Camera Server is configured whether the operator is logged off in standby immediately or some minutes afterwards. This means that the camera can also be put into standby during an examination, without requiring a new login. -
Page 17: Worklist
2 Operating the Camera 2.4 Worklist Fig. 9: Worklist • After starting the camera, the worklist of the last server query is always displayed first. • The worklist is refreshed automatically while entering the screen. • A refresh can be triggered manually by pulling down the list or via [Refresh]. -
Page 18: Pinned Exams
Whether or not an exam is pinned is controlled by its study description. See manual of DICOM Camera Server, section Enter study descriptions. A pinned examination is only completed when you mark the examination as finished. -
Page 19: Add Exam Manually
2 Operating the Camera 2.4.2 Add exam manually The following patient data can be transferred automatically via ADT or created manually in the camera: First name ▪ Last name ▪ Birthdate ▪ ▪ Patient ID ▪ Accession number ▪ Admission ID ▪... - Page 20 User Manual DICOM Camera • After changing the admission ID, the camera attempts to supplement patient data via HL7 (if HL7 is configured) • You will be made aware of the minimum data you must enter. Fig. 12: Minimal required filled fields •...
-
Page 21: Sent History
2 Operating the Camera In the worklist, manually created patients are indicated by the symbol Fig. 16: Manually create exams in the worklist 2.4.3 Sent history You can track which captures were successfully sent by the camera in the last 8 days - even if the respective entries are no longer in the worklist. -
Page 22: Scan Admission Id And Supplement With Patient Data Via Hl7
NOTE: For the retrieval of patient data via HL7, you need the HL7 license option. NOTE: Enable HL7 offline mode in the DICOM Camera Server to speed up the process. A WLAN connection is then no longer needed at the time of scanning. - Page 23 2 Operating the Camera State of worklist Action Contains exam with scanned Starts exam and supplements patient data via admission ID Contains several exams with Worklist gets filtered for the scanned admission scanned admission ID ID. Supplements patient data of those exams via HL7.
-
Page 24: Capture Images And Videos (Capture Mode)
Fig. 20: Successful image capture confirmed by green frame 2.6.1 Display of patient data in capture mode The DICOM Camera ensures that the current patient is always displayed in the recording mode to support the correct assignment of patient and recordings. Patient name, birthdate and study description are always displayed. -
Page 25: Change Operator And Performing Physician
2 Operating the Camera • Tap on patient data to minimize the display. This makes it easier to change the camera settings. Fig. 22: Click area to minimize patient data Fig. 23: Minimized patient data display • Click area to restore normal patient data display •... -
Page 26: Capture Images
NOTE: Good light conditions are important for good photo quality. Use the flash when there is insufficient light. ATTENTION: Avoid the zoom function on the DICOM Camera Compact 2 (DC-CC2) to ensure optimum picture quality. There a two ways to capture a still image •... - Page 27 2.6.4.2 Model DICOM Camera Pro DC-DPB Operation via the touch screen is similar to the DICOM Camera Compact (DC-CC). In addition, this model has a physical video recording button on the top of the case. Fig. 28: DICOM Camera Pro (DC-DPB) from above...
- Page 28 2.6.4.4 Maximum recording size The maximum file size for a video can be determined in the DICOM Camera Server. During the video recording, you can see the current recording size in relation to the maximum permitted video size at the top of the screen. As soon as 70% of the allowed size is exceeded, the color of the display changes and corresponding warnings appear.
-
Page 29: Specifying Laterality And Comment
NOTE: If the "Image gallery" option is activated for the camera, laterality and comment can also be specified later (see section 2.7.4). Each capture of the DICOM camera can be provided with information about the laterality and the image content. The entries affect the following DICOM tags Image Laterality (0020,0062) ▪... -
Page 30: Return To Worklist
2.6.6 Return to worklist Each recording of the DICOM camera can be provided with information about the laterality and the image content. The entries affect the following DICOM tags... -
Page 31: Image Gallery
It is possible to send only a selection of the recordings and to discard the rest. This function is optional and must be enabled in DICOM Camera Server at each camera. (See the user manual of the DICOM Camera Server, chapter Configure cameras). - Page 32 User Manual DICOM Camera Fig. 35: Select captures Selected entries have a white check mark on blue background. Fig. 36: Select and send captures • to return to capture mode. So, you can add more images or videos to the gallery.
- Page 33 2 Operating the Camera Fig. 37: Zoomed image Fig. 38: Video player You can also send pictures which have not yet been sent or subsequently taken. Already sent captures are indicated by a white check mark on gray background.
- Page 34 Fig. 40: Icons in the image gallery NOTE: If you are attempting to send videos bigger than your administrator has allowed in DICOM Camera Server, you’ll first guided through the trim process. Such video are marked with a DC-EN-220F...
-
Page 35: Trim Videos
2 Operating the Camera 2.7.3 Trim videos You can trim videos by selecting a range of the film you want to keep. As long as the video hasn’t been sent yet you can change that range any time. • Open the desired video, e.g. by tapping in the gallery •... -
Page 36: Laterality And Comment In Image Gallery
User Manual DICOM Camera • 2.7.4 Laterality and comment in image gallery NOTE: This section describes how to view, set or change laterality and comment after capture. To set the laterality and comment before capture, see section 2.6.5. Laterality and comments are shown in the image gallery according to Fig. 42 and Fig. 43. -
Page 37: Leave Study Unfinished Or Delete Study
2 Operating the Camera 2.7.5 Leave study unfinished or delete study • Open the menu • Tap [Leave study unfinished] to return to the worklist without sending captures. This study stays permanently in the worklist. • Tap [Delete study] to delete the exam including all of its captures. Fig. -
Page 38: View And Delete Captures
DICOM Camera Server. Sent captures stay for a configured period of time in the cache of DICOM Camera Server (see chapter Queue in manual of DICOM Camera Server). These cached items can be viewed using the Webviewer (see chapter 4). -
Page 39: Settings
The settings are password protected. This is to prevent settings from being changed by accident. Fig. 47: Password to enter settings • Tap the line to open the virtual keyboard and enter dca as password (Memoranda: „DICOM Camera Administrator“) • Confirm with [OPEN SETTINGS]. - Page 40 User Manual DICOM Camera Fig. 48: Settings In some cases a button appears to return to worklist. Tap the DICOM Camera icon to get back to worklist. Use the hand icon to move the button around. Fig. 49: Return to worklist...
-
Page 41: Wi-Fi And Network
3 Settings 3.1 Wi-Fi and network The camera requires Wi-Fi to work. Therefore you need to configure Wi-Fi first. • Tap [Wi-Fi Network] Alternatively, press long on the bottom area of the Wi-Fi icon in the status bar NOTE: If your network requires certificates, these must be installed beforehand (see section 3.3). -
Page 42: Configure Ssid And Security
User Manual DICOM Camera Fig. 53: Scan for Wi-Fi networks manually (model DC-CC2) Hidden networks must be added manually. Fig. 54: Scroll to the bottom to add a new network (model DC-CC und DC-CPB) Fig. 55: Add network (model DC-CC2) Tap long on an existing network to modify it. -
Page 43: Configure Static Ip Address
3 Settings Fig. 56: Enter SSID Enter type of protection and password. Your administrator can help you with that. • Tap [Security]. Fig. 57: Enter type of protection and password 3.1.2 Configure static IP address As per default the camera uses DHCP to retrieve its IP address. However, you can enter a static IP address as well. - Page 44 User Manual DICOM Camera Fig. 58: Enter static IP address Tap on a line to modify the content. In some cases the virtual keyboard opens in fullscreen mode. Fig. 59: Modify data Tap [>] or [Next] to go to the next input field.
-
Page 45: Configure Dicom Camera Server
3 Settings 3.2 Configure DICOM Camera Server To connect to DICOM Camera Server the camera must know his IP address. • Open Settings screen (see chapter 3 Settings). • Tap [DICOM Camera Server]. Fig. 60: Configure DICOM Camera Server’s IP address •... -
Page 46: Install Certificate
(if not specified yet). Fig. 62: Screen lock method “swipe pattern“ NOTE: If you want to change or remove the lock method, contact the MESO service. The certificate files must exist in the root directory on a microSD card. - Page 47 3 Settings Fig. 64: Select certificate Fig. 65: No valid certificate on microSD card • Name the certificate to be installed Fig. 66: Name certificate • If no screen lock method is set yet, you are guided to specify one.
-
Page 48: Power, Fast Start-Up, Auto Power Off
User Manual DICOM Camera 3.4 Power, Fast Start-up, Auto power off You can modify settings that affect energy consumption and ease of use. Auto power off (only DC-CC and DC-CPB): Specify whether and when the camera ▪ should turn off when inactive. It is adjustable for 1 to 4 hours of inactivity. -
Page 49: Display
3 Settings ATTENTION: For the DC-CC and DC-DPB models, Fast power-on must be disabled. ATTENTION: For the model DC-CC2, Starting the camera must be disabled. 3.5 Display Some display settings can be configured on the camera. • Open settings (see chapter 3 Settings). •... -
Page 50: Sleep (Standby)
User Manual DICOM Camera Fig. 70: Display settings on model DC-CC2 ATTENTION: High brightness level shortens battery life. 3.5.1 Sleep (Standby) Specify the time of inactivity when the camera is put into standby (see also chapter 2.1 Power on / off and standby) •... -
Page 51: Webviewer
Webviewer is a software option that can be purchased additionally. It can be used by any computer in the network and allows access to cached captures by DICOM Camera Server via a browser (IE, Firefox etc.). The access rights of Webviewer users are configured in DICOM Camera Server (see manual of DICOM Camera Server, section Manage users). -
Page 52: View Images
User Manual DICOM Camera • The found patients are displayed in tabular form. Click on a line to view the recordings. Fig. 72: Studies search 4.1.3 View images The preview shows all images of the study. Fig. 73: Captures of a study •... -
Page 53: Change Webviewer Password
4 Webviewer Fig. 74: Image in fullscreen mode 4.1.4 Change Webviewer password After successful login, you can change your password using [Settings]. Fig. 75: Webviewer settings... -
Page 54: Camera Maintenance
When properly used, the DICOM Camera is largely maintenance-free. 5.1 Battery The camera is equipped with a Li-Ion battery. The models DICOM Camera Compact (DC- CC) and Pro (DC-DPB) have a removable battery. Spare batteries can be purchased from the supplier. -
Page 55: Storage
5 Camera Maintenance ATTENTION: Do not use aggressive chemicals for cleaning and disinfecting. Perform these procedures only when absolutely necessary, as they are always at the expense of the material due to unavoidable chemical interactions. Improper cleaning and penetration of fluids into the interior of the device can lead to damage and impair the safety of the user. -
Page 56: Software Update
User Manual DICOM Camera 5.4 Software update DICOM Camera compares its software version each time with the one provided by the DICOM Camera Server and downloads an update if necessary. You’ll get notified once an update is ready to be installed. -
Page 57: Device Information
5 Camera Maintenance 5.5 Device information and then [Info] in worklist or operator selection to open the device information screen. Sometimes the support team asks you about specific readings on that screen. : Menu to open device information screen : Device information...
Need help?
Do you have a question about the DICOM and is the answer not in the manual?
Questions and answers