
Related Manuals for Cosori VeSync Aeroblaze CAG-A601S Series


Summary of Contents for Cosori VeSync Aeroblaze CAG-A601S Series
- Page 1 User Manual VeSync Aeroblaze Indoor Grill ™ Model Line: CAG-A601S Models: CAG-A601S-KUS, CAG-A601S-KUSR Questions or Concerns? Mon–Fri, 9:00 am–5:00 pm PST/PDT support@cosori.com | (888) 402-1684...
- Page 2 CONTACT OUR CHEFS Our helpful, in-house chefs are ready to assist you with any questions you might have! Email: recipes@cosori.com Toll-Free: (888) 402-1684 Mon–Fri, 9:00 am—5:00 pm PST/PDT On behalf of all of us at Cosori, Happy cooking!
-
Page 3: Table Of Contents
Table of Contents Package Contents Package Contents Aeroblaze Indoor Grill Specifications Smoke Filter (Pre-Installed) Important Safeguards Cooking Pot Getting to Know Your Indoor Grill Grill Grate Display Basket Controls Cleaning Brush Before First Use Recipe Book • Setting Up Quick Reference Guide •... -
Page 4: Important Safeguards
READ AND SAVE THESE INSTRUCTIONS IMPORTANT SAFEGUARDS Follow basic safety precautions when using your indoor grill. Read all instructions. Key Safety Points • Do not use third-party replacement parts or accessories, as this may cause injuries. • Do not touch hot surfaces. To open, use handle and a heat-resistant glove •... - Page 5 Use on a flat, stable, heat- resistant surface away from heat • Do not place oversized foods or sources or liquids. metal utensils (except for Cosori accessories) into your grill. • Immediately turn off and unplug your grill if you see dark smoke •...
- Page 6 Power & Cord Electromagnetic Fields (EMF) • Your grill has a polarized plug (one This indoor grill complies with all prong is wider than the other), which standards regarding electromagnetic fits into a polarized outlet only one fields (EMF). If handled properly and way.
-
Page 7: Getting To Know Your Indoor Grill
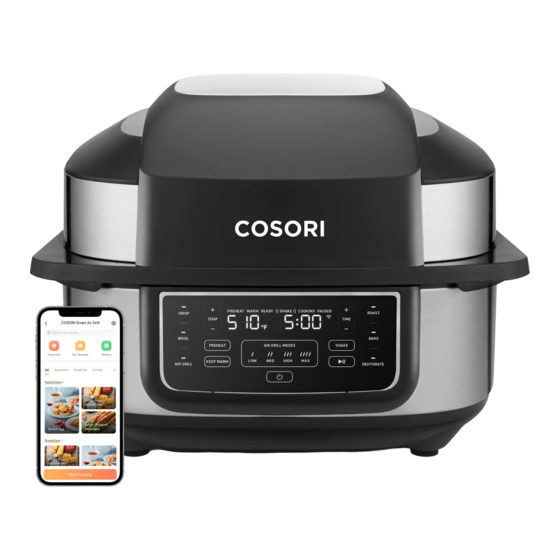
GETTING TO KNOW YOUR INDOOR GRILL Your Cosori Indoor Grill uses rapid 360° air circulation technology to cook with little-to-no oil for crispy, delicious food with up to 85% less fat than traditionally deep-fried foods. With 6 convenient cooking functions, and ceramic-coated accessories, the Cosori Indoor Grill is the star of your kitchen. -
Page 8: Display
DISPLAY Cooking Wi-Fi Icon ® Status Temperature Shake Note: This indicates app configuration status. Display Reminder See the VeSync in-app instructions for more information. Time Display Celsius/Fahrenheit Indicators... -
Page 9: Controls
CONTROLS TEMP Button Power Button – • Press to adjust temperature in • Press to turn the grill on/off. increments of +/- 5°F. • While the grill is cooking or paused, press • Press and hold to adjust in increments of to cancel cooking. - Page 10 Cooking Functions Air Grill (Low, Crisp Roast Broil Bake Dehydrate Preheat Keep Warm Medium, High, Max) Time Increment Chart Crisp, Broil, Roast, Bake Press once +/- 1-minute increments Below 60 minutes Press and hold +/- 15-minute increments 1–2 hours Press or press and hold +/- 15-minute increments Dehydrate Press once...
-
Page 11: Before First Use
BEFORE FIRST USE Setting Up Test Run 1. Remove all packaging around and A test run will help you become familiar with inside the grill, including any temporary your grill, make sure it’s working correctly, stickers. and clean it of possible residues. 2. -
Page 12: Vesync App Setup
VeSync App Setup 3. Turn on Bluetooth on your phone. ® Note: Due to ongoing updates and improvements, the VeSync app may be slightly different than 4. Tap in the VeSync app and select your shown in the manual. In case of any differences, grill. -
Page 13: Cooking With Your Indoor Grill
COOKING WITH YOUR INDOOR GRILL Note: You can use the VeSync app to control your indoor grill, follow in-app recipes, and more. (see page 17). CAUTION: • The outer surface of the grill, including the lid, is hot during and after use. Temperature may be over 212°F / 100°C. -
Page 14: Splatter Guard Assembly
Splatter Guard Assembly Oil Collector Assembly 1. Insert the notches on the splatter guard 1. Align the oil collector with the slot on the into the slots on the underside of the grill back of the unit. [Figure 2.3] lid. [Figure 2.2] 2. -
Page 15: Cooking Functions
Cooking Functions Cooking functions are programmed with an ideal time and temperature for cooking certain foods. For more information on each cooking function, see its individual section, or the Cooking Functions Quick Reference Chart. Customizing Cooking Functions • You can customize a cooking function’s default settings, including time and temperature. •... - Page 16 • Grill setting using high heat and Temp: 500°–505°F / high air flow Air Grill 260°–262°C Grill grate (High) • Best used for searing meat Time: 1 min–30 min • Grill setting using highest heat and highest air flow Temp: 510°F / 265°C Air Grill Grill grate (Max)
-
Page 17: Vesync App Functions
• Pre-programmed recipes made by Note: The VeSync app is continually updated and Cosori’s in-house chefs are available in app features will expand. the app. Selecting a recipe automatically sets the recommended time and temperature. -
Page 18: Preheat Function ("Preheat")
Preheat Function (“PREHEAT”) We recommend preheating before placing food inside the grill, unless your grill is already hot. Food will not cook thoroughly without preheating. 1. Plug in. Press to turn on the grill. 2. Select a cooking preset. The PREHEAT function will light up automatically. -
Page 19: Crisp Function ("Crisp")
Crisp Function (“CRISP”) 5. Optionally, select KEEP WARM This function is ideal for cooking a variety to have of food, including French fries and chicken the Keep Warm function turn on after wings. Uses high heat and airflow. your food is done cooking. a. -
Page 20: Broil Function ("Broil")
Broil Function (“BROIL”) This function focuses heat on the tops of 5. Optionally, select KEEP WARM to have foods, including cheeses, sausages, and the Keep Warm function turn on after vegetables. Uses high heat. your food is done cooking. a. Customize temperature and time 1. -
Page 21: Roast Function ("Roast")
Roast Function (“ROAST”) 5. Optionally, select KEEP WARM This function cooks food thoroughly and is to have best used for large or tougher cuts of meats the Keep Warm function turn on after and larger vegetables. Uses low to high heat your food is done cooking. -
Page 22: Bake Function ("Bake")
Bake Function (“BAKE”) This function is ideal for making breads, 5. Optionally, select KEEP WARM to have cakes, muffins, pies, and cookies. Uses low to the Keep Warm function turn on after medium heat to cook food evenly. your food is done cooking. a. -
Page 23: Air Grill Function ("Air Grill")
Air Grill Function (“AIR GRILL”) This function is ideal for cooking open- through cooking. The grill will beep SHAKE faced sandwiches, thin cuts of meat (such will flash on the display. as bacon), poultry, fish, sausages, and b. Press to resume cooking after vegetables. -
Page 24: Dehydrate Function ("Dehydrate")
Dehydrate Function (“DEHYDRATE”) This function combines low and stable heat with steady airflow to evenly dry out foods without cooking. Ideal for drying herbs, fruit, or making beef jerky. 1. Place the cooking pot into the base of the grill, followed by the basket. 2. -
Page 25: Shaking Food
Shaking Food Shake Reminder How to Shake • The Shake Reminder is designed to • Add the Shake Reminder to your cooking program by pressing SHAKE. remind you to check on your food, SHAKE usually to flip or mix it. Press •... -
Page 26: Accessories
ACCESSORIES Additional and replacement accessories are available for your indoor grill. For more information, contact Customer Support (see page 34). CARE & MAINTENANCE Clean grill accessories (including cooking pot, splatter guard, etc.) and grill interior after every use. 1. Before cleaning, turn off and unplug 6. - Page 27 Removing the Splatter Guard Deep Clean Note: The splatter guard will be hot after cooking. Deep clean the splatter guard to remove Allow the grill to cool before cleaning the splatter excess grease and food residue. guard. 1. Deep clean the splatter guard by placing 1.
- Page 28 Replacing the Filter After a period of use, the lights over the CRISP and ROAST buttons will flash and “Replace Filter” will show on the display to indicate that the filter needs to be replaced. 1. Open the grill lid or press any button to stop the indicators.
-
Page 29: Troubleshooting
TROUBLESHOOTING Problem Possible Solution The grill will not turn on. Make sure the grill is plugged in. New grills may have a plastic smell. This is normal. Follow the The grill has a plastic smell. instructions for a Test Run to get rid of the plastic smell (page 11). Increase cooking temperature or time. - Page 30 Problem Possible Solution A thermometer shows that the Commonly used thermometers usually have low sensitivity and take grill temperature is different over 10 minutes to measure the correct temperature. This will not from the grill setting. affect cooking. There is an open circuit in the temperature monitor. Display shows Error Code “E1”.
-
Page 31: Vesync App Troubleshooting
VESYNC APP TROUBLESHOOTING Why isn’t my grill connecting to the VeSync app? • During the setup process, you must be on a secure 2.4 GHz Wi-Fi network. Confirm that the ® network is working correctly. • Make sure the Wi-Fi password you entered is correct. •... - Page 32 FCC STATEMENT- PART 15 This device complies with Part 15 of the FCC Rules. Operation is subject to the following two conditions: 1. This device may not cause harmful interference, and 2. This device must accept any interference received, including interference that may cause undesired operation.
-
Page 33: Warranty Information
There is no other express warranty. This warranty with a copy of the invoice and order ID. does not apply: Every Cosori product automatically includes a • If the product has been modified from its 2-year warranty. To make the customer support original condition;... -
Page 34: Customer Support
If you have any questions or concerns about your new product, please contact our helpful Customer Support Team. Support Hours Arovast Corporation 1202 N. Miller St., Suite A Anaheim, CA 92806 Mon–Fri, 9:00 am–5:00 pm PST/PDT Email: support@cosori.com Toll-Free: (888) 402-1684 * Please have your invoice and order ID ready before contacting Customer Support. - Page 35 We hope this has been helpful to you. We can’t wait to see your beautiful results, and we think you’ll want to share glam shots! Our community awaits your uploads—just pick your platform of choice below. Snap, tag, and hashtag away, Cosori chef! #LiveLifeTastefully #iCookCosori @CosoriCooks...
- Page 36 Questions or Concerns? Mon–Fri, 9:00 am–5:00 pm PST/PDT support@cosori.com | (888) 402-1684 OM093021AC-M1_0921CAG-A601-KUS...
Need help?
Do you have a question about the VeSync Aeroblaze CAG-A601S Series and is the answer not in the manual?
Questions and answers