Table of Contents
Advertisement
Quick Links
Advertisement
Table of Contents

Related Manuals for Major tech MTi11

Summary of Contents for Major tech MTi11
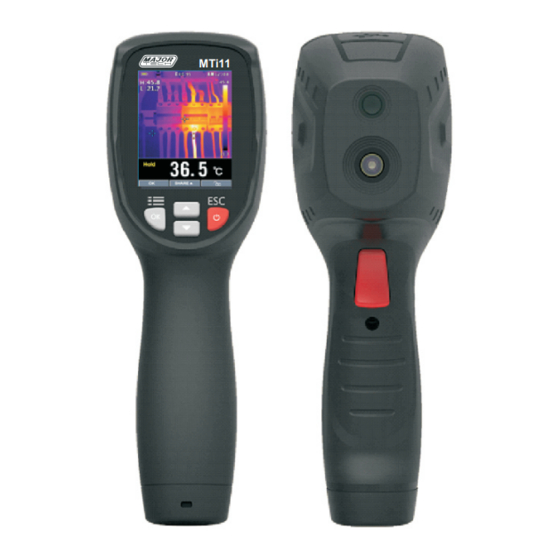
- Page 1 MTi11 Thermal Imager MTi11...
-
Page 3: Table Of Contents
CONTENTS PAGE 1. Introduction ……………………………………………………..………….. 2. Safety ………………………………………………………………….………. 2.1. International Safety Symbols ………………………..…………. 2.2. Cautions ………………………………………………...…………….. 3. Quick Start Guide …………………………………………………..…….. 3.1. Basic Steps ………………………………………………..………….. 3.2. Powering and Charging the thermal imager …………..….. 3.3. The IR Thermal Imaging Display ……………………………… 3.4. -
Page 4: Introduction
1. INTRODUCTION The MTi11 Thermal Imager is a compact handheld imaging camera used for predictive maintenance, equipment troubleshooting, and verification. Thermal images are displayed on the LCD and can be saved to internal memory. The MTi11 comes with a Bluetooth instant share function, thermal images can be transferred to a smart phone to be analyzed, shared and reported quickly. -
Page 5: Quick Start Guide
3. Quick Start Guide 3.1. Basic Steps The thermal imager is intuitive and easy to use; here are the basic steps (covered in more detail later in this Guide): Press and hold the Power button for >2 seconds to power ON. The logo startup screen will appear followed by the thermal image display. -
Page 6: Powering And Charging The Thermal Imager
3.2.Powering and charging the thermal imager Press and hold the power button for >2 seconds to switch ON the unit. A start-up screen (a thermal image) will appear, The unit is now ready to use; to switch OFF, press and hold for > 2 seconds. Note: that the Auto Power OFF function switches the unit OFF automatically after a programmed period of time. -
Page 7: The Ir Thermal Imaging Display
3.3. The IR Thermal Imaging Display Current Emiisivity setting Battery indicator Hot temperature point reading Gold temperature point reading Center crosshair Cold temperature crosshair Hot temperature crosshair Frozen Image Icon Center temperature point reading 10. "OK" button 11. "LOCK" button 12. -
Page 8: Measure, Save, Delete And Review Ir Images
3.5. Measure, Save, Delete, and Review IR Images Point the thermal imager toward the object or area of interest. Pull the trigger to capture the image. Press "SAVE" to save image. Press "SHARE" to share the image. To review an image, access the Settings Menu (see Section 6). -
Page 9: General Specifications
4.1. General Specifications Temperature units Center crosshair Max temperature readings Hot crosshair Minimum temperature readings Cold crosshair Freezing image icon Unlock icon 12 time format Lock icon IRON Color palette Bluetooth icon Battery empty Battery Full Battery charging 5. OPERATION 5.1. -
Page 10: Lock/Unlock Scene Temperature Level-Span
5.2. Lock/Unlock scene temperature level-span 1 . The MTi11 comes with 80x80 pix detector that gives you 6400 pixels to clearly identify hotspots. 2. The temperature scale can be locked to highlight higher temperature in white. When the temperature is lower it is indicated in black. -
Page 11: Share Images Using Bluetooth
5.4. Share images using Bluetooth Instant share For quick analysis & reporting of thermal images, The unit has Bluetooth instant share function that works on iOS, Androi and PC. Enable the Bluetooth on the thermal imager. Run Apps on smart devices, connect unit with smart device or PC (Detailed reference in “Bluetooth connect”). -
Page 12: Review/Delete Images
Transfer the saved images Enable the Bluetooth on the unit. Run Apps on smart devices, connect unit with smart device or PC. To access the Image Review mode, access the Settings Menu (Section-6) to review and delete images. Press Trigger to share the current picture. Press "SHARE"... -
Page 13: Lens And Image Field Of View
5.6. Lens and Imager Field of View This table lists the horizontal FOV, vertical FOV and IFOV for the lens. Focal Length Horizontal FOV Vertical FOVIFOV 7.5mm 21° 21° 4.53mrad IFOV (Instantaneous Field of View) is the smallest detai within the FOV that can be detected or seen at a set distance, the unit is rad. -
Page 14: Settings Menus
6. Settings Menus 6.1. Using Settings Menus Press the OK button to open the Settings Menus, as show below. Press the UP/DOWN button to select a menu item or change the value of the current focus item. Press the OK button to enter the submenu or set focus on the current selected item. -
Page 15: Measure
6.4. Measure Press the OK button to enter measure menu. Two selections are available: Temp. Max and Temp. Min. Press the OK button to set cur select item ON or OFF. Temp.Max: This option enables thermal imager automatically detect the highest temperature point. Temp.Min: This option enables thermal imager automatically detect the lowest temperature point. -
Page 16: Setup
6.7. Setup Press OK button to enter setup menu. Three options are available: Bluetooth, Brightness and Auto Off Bluetooth: Use OK button to set bluetooth power ON or OFF. Brightness: Press OK button to set focus on this option. In focus state, use UP/DOWN button to change LCD's brightness, use ESC/OK button to exit focus state. - Page 17 Turn on the bluetooth of smartphone, press the icon "Thermoview+" and enter into the home interface, Then press Connect Device icon on the Home interface, bluetooth device name will appear. Touch the device name listed in Bluetooth devices list to connect the device.
-
Page 18: Time/Date
6.9. Time/Date Press OK button to enter time menu. In this menu, yeas, month, day, hour, minute and time format can be set. The changes take effect after exiting settings menus. 6.10. Memory Press OK button to enter photo menu. Two options are available: Photo Review and Delete Photo. -
Page 19: Information
6.11 Information Press the OK button to enter system information menu. This menu contains the software's version, hardware's version and thermal imager's version. 6.12 Factory Set When select Factory Set option, after press the OK button, the dialog box will be displayed as show below. -
Page 20: Image Browser
7. Image Browser In Image Browser mode. User can browse the pictures in 'RECORD' folder of the memory card. Press the UP/DOWN button to select previous or next picture. Press any other keys to exit Image Browser mode. Current displayed picture's filename. Current picture's.index and total number of pictures. -
Page 21: Technical Specifications
8. Image Browser IR Resolution 80x80 (6400 pix) Field of view (FOV) / Minimum 21° x 21°/ 0.5m focus distance Spatial resolution (IFOV) 4.53mrad Thermal sensitivity/NIETD < 0.1°C @ +30°C (+86°F) / 100 mK Image frequency 50Hz Focus mode Focus free Focal length 7.5mm Focal Plane Array (FPA)/... - Page 24 MAJOR TECH (PTY) LTD T9 Industrial Village, 7 Sam Green Road, Telephone: +27 11 872 5500 Tunney Ext. 9, Elandsfontein, National Contact Number: 08 61 62 5678 South Africa Sales Facsimile: +27 11 822 2806 P .O. Box 888, Isando 1600,...
Need help?
Do you have a question about the MTi11 and is the answer not in the manual?
Questions and answers