Table of Contents
Advertisement
Advertisement
Table of Contents

Related Manuals for Redsbaby ARBOUR


Summary of Contents for Redsbaby ARBOUR
- Page 1 R E D S B A B Y . C O M . A U...
- Page 5 P R O D U C T G U I D E...
- Page 6 For Your Journey We are committed to innovating, crafting and bringing to life the best in baby products and experiences. Our products are designed in Australia for our unique lifestyle. They are as functional as they are beautiful, serving our core purpose to enrich your family journey.
- Page 7 Scan to Watch How-to and assembly videos available at redsbaby.com.au P R O D U C T G U I D E...
-
Page 8: Table Of Contents
Contents General Instructions Product Care Safety Standards Warnings and Safety Precautions Getting to Know Your ARBOUR Cot Configurations Based on your Child's Age Components in Your Package Assembly Instructions Installation of Safety Bolts High Position Low Position Toddler Bed Understanding Your Warranty... - Page 9 P R O D U C T G U I D E...
-
Page 10: General Instructions
Only use the Redsbaby ARBOUR Cot for children aged between 0-5 years old. R E D S B A B Y . C O M . A U... -
Page 11: Product Care
• Ensure the furniture is damage or wear and tear. located or stored in a clean and dry place. • Contact Redsbaby for replacement parts, do • Avoid direct sunlight. not substitute parts. P R O D U C T G U I D E... -
Page 12: Safety Standards
Safety Standards Redsbaby ARBOUR Cot is designed to comply with the safety requirements of AS/NZS 2172:2013 and CPN No.6 of 2005. Warnings and Safety Precautions IMPORTANT! READ CAREFULLY AND KEEP FOR FUTURE REFERENCE. Please follow the assembly instruction in detail to ensure the safety features of the cot are not compromised. - Page 13 WARNING: TO PREVENT FALLS, THE MAXIMUM MATTRESS THICKNESS SHOULD NOT EXCEED 150mm. WARNING: TO PREVENT SUFFOCATION AND FALLS, THE RECOMMENDED MATTRESS SIZE SHOULD BE 690mm WIDE x 1300mm LONG and 125mm THICK. RECOMMENDED MATTRESS SIZE This cot has been manufactured for use with a mattress which measures 690mm wide by 1300mm long and 125mm in thickness.
-
Page 14: Getting To Know Your Arbour Cot
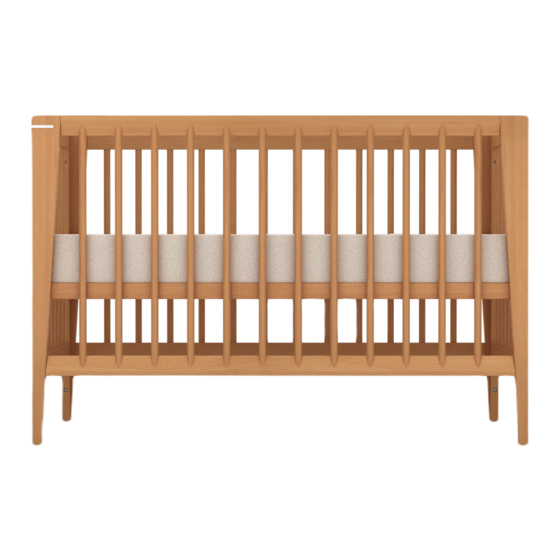
Getting to Know Your ARBOUR Cot R E D S B A B Y . C O M . A U... -
Page 15: Configurations Based On Your Child's Age
Configurations Based on Your Child's Age P R O D U C T G U I D E... - Page 16 Cot - High Position Use until your child can sit up unaided (approximately 5-8 months old). Cot - Low Position Use until your child is ready to transition to a toddler bed (approximately 18-36 months old). Toddler Bed Use until your child is 5 years old.
-
Page 17: Components In Your Package
Components in Your Package Mattress base Screw (A) x8 Long side panel x2 Dowel (B) x4 Short side panel x2 Screw (C) x4 Toddler bed conversion Safety bolt (D)* x4 Allen Key Bracket kit for low position and toddler bed conversion (K) *You cot will come with 4 x Safety bolts (D) assembled in the low position of the 2 x long side panels (2). - Page 18 Kit includes: 2x L Brackets 4x L Bracket Screw R E D S B A B Y . C O M . A U...
-
Page 19: Assembly Instructions
Assembly Instructions P R O D U C T G U I D E... -
Page 20: Installation Of Safety Bolts
Assembly Instructions Installation of Safety Bolts Your cot will come with 4 x safety bolts (D) assembled in the low position of the long side panels on your cot. IMPORTANT: The 4 x safety bolts (D) must always be assembled on your cot. This is an important safety requirement to avoid finger entrapment. - Page 21 Low Position When the mattress base is in the low position, the 4 x safety bolts (D) must be assembled in the high position of the long side panels. P R O D U C T G U I D E...
- Page 22 R E D S B A B Y . C O M . A U...
-
Page 23: High Position
Assembly Instructions High Position Assemble the panels together using the dowel (B) and screws (A) & (C). Do not tighten the screws for now. P R O D U C T G U I D E... - Page 24 R E D S B A B Y . C O M . A U...
- Page 25 P R O D U C T G U I D E...
- Page 26 On both long side panels (2), ensure the safety bolts (D) are secured in the low position. This is an important safety requirement to avoid finger entrapment. High Position Low Position R E D S B A B Y . C O M . A U...
- Page 27 Install mattress base (1) using screws (A). Tighten all the connecting screws. P R O D U C T G U I D E...
- Page 28 Position mattress inside the cot (mattress sold separately). R E D S B A B Y . C O M . A U...
- Page 29 P R O D U C T G U I D E...
-
Page 30: Low Position
Assembly Instructions Low Position Follow steps 1-3 in High Position Assembly Instructions (page 22-24). R E D S B A B Y . C O M . A U... - Page 31 On both long side panels (2), ensure the safety bolts (D) are secured in the high position. This is an important safety requirement to avoid finger entrapment. High Position Low Position P R O D U C T G U I D E...
- Page 32 3 I nstall the mattress base using screws (A). Secure the mattress base to the long side panels (2) by using the L brackets and screws (K). R E D S B A B Y . C O M . A U...
- Page 33 Position mattress inside the cot (mattress sold separately). P R O D U C T G U I D E...
- Page 34 R E D S B A B Y . C O M . A U...
-
Page 35: Toddler Bed
Assembly Instructions Toddler Bed Remove one long side panel (2) from the cot low position configuration (as shown). Note: Only one screw (K) from the L bracket needs to be removed. This screw (K) is located on the long side panel (2). P R O D U C T G U I D E... - Page 36 Attach the Toddler bed conversion (4) to the short side panel (2) using screws taken out in step 1. R E D S B A B Y . C O M . A U...
- Page 37 Position mattress inside the cot (mattress sold separately). P R O D U C T G U I D E...
- Page 38 R E D S B A B Y . C O M . A U...
-
Page 39: Understanding Your Warranty
Understand Your Warranty 36 Month Warranty Your Redsbaby ARBOUR Cot comes with a 24 Month Warranty to cover against faults in materials and workmanship when your products are used under normal conditions, according to our user manuals and technical specifications. Register your product online at Redsbaby.com.au within 60 days... - Page 40 Our goods come with guarantees The 24 Month Warranty period that cannot be excluded under starts from the date your the Australian Consumer Law. You product(s) are dispatched from are entitled to a replacement, our warehouse, including products or refund, for a major failure purchased on pre-order.
-
Page 41: Claim Validity
Contact for claims made within the Redsbaby to report the issue. claim period. You must make a claim within the Redsbaby will provide free claims period for it to be valid. -
Page 42: Warranty Promise
Visit redsbaby.com.au/warranty and complete a warranty claim form or contact Customer Care on 1300 344 964 for assistance with making your warranty claim. Further warranty information is available at redsbaby.com.au. R E D S B A B Y . C O M . A U... - Page 43 For Future We strive to use resources and make decisions that safeguard our planet for future generations. We have made a commitment to use plastic-free packaging by 2023 and design products that are made to last for years to come. P R O D U C T G U I D E...
- Page 44 ‘REDSBABY’ is a registered trademark of Redsbaby Pty Ltd ACN 625 563 519 729 Elizabeth Street Zetland 2017 NSW Australia P 1300 344 964 R E D S B A B Y . C O M . A U...
Need help?
Do you have a question about the ARBOUR and is the answer not in the manual?
Questions and answers