Table of Contents
Advertisement
Available languages
Available languages
Quick Links
Advertisement
Table of Contents

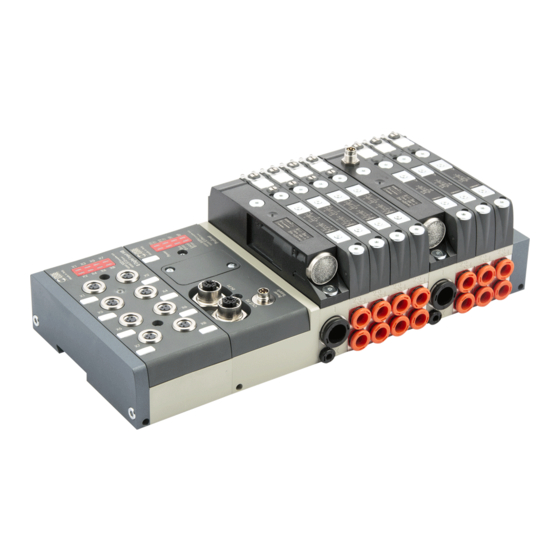
Summary of Contents for Metalworks EB 80 ETHERNET POWERLINK
- Page 1 MANUALE D'USO USER MANUAL...
-
Page 2: Table Of Contents
INDICE IMPIEGO AMMESSO PAG. DESTINATARI PAG. 1. INSTALLAZIONE PAG. 1.1 INDICAZIONI GENERALI PER L’INSTALLAZIONE PAG. 1.2 ELEMENTI ELETTRICI DI CONNESSIONE E SEGNALAZIONE PAG. 1.3 COLLEGAMENTI ELETTRICI: PIEDINATURA CONNETTORI PAG. 1.3.1 Connettore M8 per l’alimentazione del nodo e delle uscite PAG. 1.3.2 Connettore M12 per la connessione alla rete POWERLINK PAG. - Page 3 3.3.6.3 Parametri dell’unità PAG. 17 4. REGOLATORE PROPORZIONALE DI PRESSIONE PAG. 19 4.1 IMPIEGO AMMESSO PAG. 19 4.2 CARATTERISTICHE PAG. 19 4.3 COLLEGAMENTO PNEUMATICO PAG. 19 4.4 PRINCIPIO DI FUNZIONAMENTO PAG. 20 4.4.1 Schema funzionale PAG. 20 4.5 MESSA IN SERVIZIO PAG.
-
Page 4: Impiego Ammesso
IMPIEGO AMMESSO La Connessione Elettrica POWERLINK consente il collegamento del sistema EB 80 ad una rete POWERLINK. Conforme alle specifiche POWERLINK offre funzioni di diagnostica. Il sistema consente di collegare fino a 128 Out per elettro piloti, 128 out digitali, 128 Input digitali, 16 out analogici, 16 input analogici, 16 Input per misura di temperature e 16 Regolatori di pressione. -
Page 5: Connettore M12 Per La Connessione Alla Rete Powerlink
1.3.2 Connettore M12 per la connessione alla rete POWERLINK 1 = TD+ 2 = RD+ 3 = TD- 4 = RD- Ghiera metallica = Schermo I connettori di rete sono M12 con codifica di tipo D secondo le specifiche POWERLINK; per il collegamento si possono utilizzare cavi Industrial Ethernet precablati, in modo da evitare i malfunzionamenti dovuti a cablaggi difettosi, o in alternativa connettori M12 maschi metallici 4 poli Industrial Ethernet ricablabili. -
Page 6: Corrente Assorbita
1.4.2 Corrente assorbita Il controllo delle elettrovalvole avviene attraverso una scheda elettronica dotata di microprocessore. Per garantire un azionamento sicuro della valvola e ridurre il consumo energetico, il comando è di tipo “speed up”, cioè all’elettropilota vengono forniti 3W per 15 millisecondi e successivamente la potenza viene ridotta gradualmente a 0.3W. Il microprocessore attraverso un comando PWM regola la corrente circolante nella bobina, che rimane costante indipendentemente dalla tensione di alimentazione e dalla temperatura, mantenendo di conseguenza inalterato il campo magnetico generato dall’elettropilota. -
Page 7: Messa In Servizio
2. MESSA IN SERVIZIO ATTENZIONE Disattivare la tensione prima di inserire o disinserire i connettori (pericolo di danni funzionali). Collegare il dispositivo a terra, mediante un conduttore appropriato. La mancanza di collegamento a terra può causare, in caso di scariche elettrostatiche, malfunzionamenti e danni irreversibili. -
Page 8: Occupazione Degli Indirizzi
2.5 CONFIGURAZIONE DEL SISTEMA EB 80 IN UNA RETE POWERLINK Selezionare dal catalogo hardware del sistema di sviluppo, il dispositivo EB 80 Ethernet POWERLINK bus controller e inserirlo nella configurazione. Al dispositivo vengono assegnati tutti i bytes di uscita e tutti i bytes di ingresso, compreso il byte di stato che indica lo stato diagnostico del sistema EB 80. -
Page 9: Configurazione Dei Parametri Dell'unità - System Parameters - Failsafeoutput_I5F01_S01
2.5.3 Configurazione dei Parametri dell’unità - System Parameters - FailSafeOutput_I5F01_S01 Questa funzione consente di definire lo stato degli elettropiloti delle uscite digitali e analogiche, nel caso di comunicazione interrotta con il Master. Per il modulo pneumatico sono possibili tre diverse modalità: •... -
Page 10: Accessori
3. ACCESSORI 3.1 INTERMEDIO - M CON ALIMENTAZIONE ELETTRICA SUPPLEMENTARE Tra le basi delle valvole possono essere installati dei moduli intermedi con alimentazione elettrica supplementare. Possono servire come alimentazione elettrica supplementare, quando il numero di elettropiloti azionato contemporaneamente è elevato, oppure per separare elettricamente alcune parti dell’isola da altre, per esempio quando si vuole interrompere l’alimentazione elettrica di alcune elettrovalvole all’apertura di una protezione della macchina, o alla pressione di un pulsante di emergenza. -
Page 11: Indirizzamento Della Connessione Elettrica Addizionale - E0Ad
3.2.2 Indirizzamento della Connessione elettrica Addizionale - E0AD L’indirizzamento di tutti i moduli è sequenziale. • L’indirizzamento degli elettropiloti delle valvole, inizia dal primo elettropilota del nodo POWERLINK e finisce con l’ultimo elettropilota dell’ultima isola Addizionale collegata. • L’indirizzamento dei moduli - S di ingressi digitali, inizia dal primo modulo collegato al nodo POWERLINK e finisce con l’ultimo modulo - S di ingressi digitali dell’ultima isola Addizionale collegata. -
Page 12: Stato Di Attivazione - Activationstatedi8_X_I5F21_Sxx - Activationstatedi16_X_I5F71_Sxx
3.3.1.4 Stato di attivazione - ActivationStateDI8_x_I5F21_Sxx - ActivationStateDI16_x_I5F71_Sxx È possibile selezionare lo stato di attivazione di ogni singolo ingresso. Lo stato di attivazione si definisce con ActivationStateDI8_x_I5F21_Sxx Init value. Sono presenti 16 SubIndex corrispondenti ai 16 Moduli S installabili nel sistema. •... -
Page 13: Stato Di Attivazione - Activationstatedo8_X_I5F31_Sxx - Activationstated16_X_I5F81_Sxx
3.3.2.4 Stato di attivazione - ActivationStateDO8_x_I5F31_Sxx - ActivationStateD16_x_I5F81_Sxx È possibile selezionare lo stato di attivazione di ogni singola uscita. Lo stato di attivazione si definisce con ActivationStateDO8_x_I5F31_Sxx. Sono presenti 32 SubIndex corrispondenti ai 16 Moduli S installabili nel sistema. Ogni modulo è definito con 2 Byte. •... -
Page 14: Range Segnale - Signal_Rangeai_X_I5F50_Sxx
3.3.4.2 Range Segnale - Signal_RangeAI_x_I5F50_Sxx Consente di configurare ogni singolo canale con un tipo di segnale di ingresso. Sono disponibili le seguenti tipologie: • Init value = 0 • Init value = 1 0..10 VDC • Init value = 2 - 10/+10 VDC •... -
Page 15: Range Segnale - Signal_Rangeao_X_I5F60_Sxx
3.3.5.2 Range Segnale - Signal_RangeAO_x_I5F60_Sxx Consente di configurare ogni singolo canale con un tipo di segnale di uscita. Sono disponibili le seguenti tipologie: • Init value = 0 • Init value = 1 0..10 VDC • Init value = 2 - 10/+10 VDC •... -
Page 16: Modulo 4 Input Analogici M8 Per La Misura Di Temperature
3.3.6 Modulo 4 input analogici M8 per la misura di Temperature Ogni modulo S per la misura di temperature può gestire fino a 4 ingressi, liberamente configurabili per l’utilizzo di sensori di temperatura o di termocoppie di vario tipo. Dispongono di alcuni parametri configurabili singolarmente. La compensazione della temperatura (Cold Junction Compensation CJC) per l’utilizzo delle termocoppie è... -
Page 17: Parametri Dell'unità
3.3.6.3 Parametri dell’unità Parametri comuni - General parameters temperature CHx-CHy I5F90...I5F93 • Unità di misura - Temperature scale_I5F90_S01: è possibile selezionare la temperatura letta in °Celsius oppure in °Fahrenheit. I5F9x_S01 = 0 °Celsius I5F9x_S01 = 1 °Fahrenheit • Soppressione del rumore - NoiseRejection_I5F9x_S02: consente di sopprimere il rumore elettrico generato dalla rete di alimentazione. Lavora in combinazione con il parametro “Filtro di acquisizione”. - Page 18 • Segnalazione corto circuito (solo per RTD) - Short_circuitSignaling_I5F9x_S06: se abilitato, un corto circuito del collegamento del sensore genera un allarme. I5F9x_S06 = 0 Disabilitato I5F9x_S06 = 1 Abilitato • Monitor Valore minimo - MonitorLowestValue_I5F9x_S07: l’abilitazione di questa funzione consente di generare un allarme nel caso la temperatura sia inferiore al valore impostato in Valore minimo.
-
Page 19: Regolatore Proporzionale Di Pressione
4. REGOLATORE PROPORZIONALE DI PRESSIONE 4.1 IMPIEGO AMMESSO Il regolatore di pressione EB 80, può essere integrato in sistemi EB 80 POWERLINK e offre funzioni di diagnostica avanzata. Il sistema consente di collegare fino a 16 unità, possono essere collegati al modulo ADD ed essere utilizzati anche senza valvole. 4.2 CARATTERISTICHE •... -
Page 20: Principio Di Funzionamento
4.4 PRINCIPIO DI FUNZIONAMENTO Il circuito di controllo attraverso un algoritmo software, confronta il segnale di ingresso con la pressione in uscita rilevata dal sensore di pressione. Quando avvengono delle variazioni, interviene attivando le elettrovalvole di carico e scarico ristabilendo l’equilibrio. In questo modo si ottiene una pressione di uscita proporzionale al segnale di ingresso. -
Page 21: Impostazioni
5. IMPOSTAZIONI 5.1 CONFIGURAZIONE DEI PARAMETRI DELL'UNITÁ - Parameters Pressure Regulator I5FC0...I5FCF Numero del Regolatore di pressione: è sequenziale iniziando dal Regolatore installato più vicino al terminale POWERLINK. NB: Le modifiche dei parametri possono essere eseguite sia tramite il Master POWERLINK che da tastiera. Le impostazioni da tastiera sono temporanee, alla riaccensione del sistema, vengono ripristinate le impostazioni del Master. -
Page 22: Fondo Scala - Full Scale Mbar I5Fcx_S04
5.3.3 FONDO SCALA - Full Scale mbar I5FCx_S04 Indica la Pressione massima regolata. Il valore è espresso in mbar, il valore massimo impostabile è 10000 mbar. Per una regolazione ottimale, la pressione di alimentazione deve essere uguale a FS (Fondo Scala) + 1 bar. 5.3.4 MINIMA PRESSIONE - Minimal Pressure mbar I5FCx_S05 Indica la pressione minima regolata con set 0. -
Page 23: Debug - La Funzione È Disponibile Solo Da Tastiera
5.4 DEBUG - La funzione è disponibile solo da tastiera Utility per verificare il corretto funzionamento delle due elettrovalvole • Selezionare DEBUG, premere OK. • Selezionare PIN, premere OK l’elettrovalvola di carico si attiva, la pressione aumenta. • Premere OK, l’elettrovalvola di carico si disattiva, la pressione si stabilizza. •... -
Page 24: Riferimento Set (S) - I5Fcx_S06
5.6.2 RIFERIMENTO SET (S) - I5FCx_S06 = 1 L’utilizzo di questa funzione consente una impostazione “variabile”del pressostato. L’attivazione dell’Out avviene al raggiungimento della pressione impostata, con una tolleranza definita da P+ e P-. Impostazione da tastiera: • Selezionare OUTPUT utilizzando i tasti freccia, premere OK •... -
Page 25: Accesso Al Menù Da Tastiera
6. ACCESSO AL MENÙ DA TASTIERA • Per accedere alla visualizzazione dei parametri impostati premere il tasto OK. • Per accedere al menù di impostazione dei parametri premere contemporaneamente i tasti OK ed ESC. • Per scorrere il menù e modificare i parametri utilizzare i tasti freccia su freccia giù. -
Page 26: Funzioni I4.0
7. FUNZIONI I4.0 Le nuove funzioni di diagnostica avanzata di EB 80, denominate EB 80 I4.0, forniscono alla manutenzione tradizionale un potente strumento di analisi, per assicurare un esercizio affidabile, sicuro e duraturo delle unità produttive. Assegnazione degli indirizzi di diagnostica N°... -
Page 27: Mappatura Dinamica
Configurazione del Master con l’ambiente di sviluppo B&R Automation Studio 4.3 Importare dal catalogo hardware il modulo "EB 80 Ethernet POWERLINK bus controller Dynamic Mapping (000002EE_EB80D)". Aprire la scheda "Physical view", selezionare il modulo "EB 80" con il tasto destro e cliccare su "Configuration"". - Page 28 Configurazione dei Moduli 16 Input/Output digitali: per attivare tutti gli ingressi/uscite è necessario abilitare entrambi gli oggetti che definiscono il modulo. Configurazione dei Moduli 4 Input / Output analogici: ogni canale di ingresso / uscita analogica è definita con 2 byte. Per il corretto funzionamento è...
- Page 29 Configurazione dei Regolatori di Pressione: ogni Regolatore è definito con 3 byte di ingresso e 2 byte di uscita. Per il set della pressione abilitare i byte di Out, PressureRegulator_TargetPressure_Byte1 e 2. Per la lettura della pressione regolata, abilitare i byte di In, PressureRegulator_Pressure_Byte1 e 2. Per la lettura della funzione pressostato abilitare il byte di InStateOfSwitch_PressureRegulator.
-
Page 30: Configurazione Dynamic Mapping - Bit Offset
Configurazione del Master con l’ambiente di sviluppo B&R Automation Studio 4.3 Importare dal catalogo hardware il modulo EB 80 Ethernet POWERLINK bus controller Dynamic 1 Mapping (000002EE_EB80D1). Aprire la scheda "Physical view", selezionare il modulo "EB 80" con il tasto destro e cliccare su "Configuration". - Page 31 Per abilitare gli oggetti, cliccare sulla casella "Cyclic transmission – Value". Modificare da "None" a "Write" per attivare le uscite e da "None" a "Read" per attivare gli ingressi. Map data as single channel = FALSE: gli 8 output / input dell’oggetto vengono gestiti come singoli bit Map data as single channel = TRUE: gli 8 output / input dell’oggetto vengono gestiti come singolo Byte Dopo aver salvato il progetto aprire la scheda "IO Mapping"...
- Page 32 Configurazione dei Regolatori di Pressione: ogni Regolatore è definito con 3 byte di ingresso e 2 byte di uscita. Per il set della pressione abilitare i byte di Out, PressureRegulator_TargetPressure_Byte1 e 2. Per la lettura della pressione regolata, abilitare i byte di In, PressureRegulator_Pressure_Byte1 e 2. Per la lettura della funzione pressostato abilitare il byte di InStateOfSwitch_PressureRegulator.
-
Page 33: Diagnostica
9. DIAGNOSTICA La diagnostica del sistema EB 80 POWERLINK, è definita dallo stato dei Led di interfaccia. Ogni componente del sistema segnala il suo stato, localmente tramite Led e al nodo POWERLINK tramite messaggi software. 9.1 DIAGNOSTICA DEL NODO POWERLINK La diagnostica del nodo POWERLINK è... - Page 34 Stato dei Led Codice Hex Significato Note Soluzione Power Bus Error Local Error ON (verde) ROSSO 0x16 Errore indirizzo / Base valvole o modulo segnale Togliere l’alimentazione elettrica e configurazione di una base per difettoso rimuovere la causa del guasto valvole o di un modulo segnale (doppio lampeggio)
-
Page 35: Diagnostica Del Sistema Eb 80 - Base Valvole
9.3 DIAGNOSTICA DEL SISTEMA EB 80 – BASE VALVOLE La diagnostica delle basi per valvole è definita dallo stato dei Led di interfaccia. La generazione di un allarme attiva un messaggio software per la Connessione Elettrica con il codice relativo all’errore rilevato. Led VERDE Significato Stato dell’Out Segnalazione GUASTO e memorizzazione... -
Page 36: Diagnostica Dei Moduli Segnali - S - Input Analogici
9.4.3 Diagnostica dei Moduli segnali - S – Input Analogici Significato Soluzione X1..X4 L’ingresso non è attivo ON (verde) L’ingresso è attivo e funziona correttamente VERDE Segnale analogico fuori dal range ammesso Impostare correttamente il tipo di ingresso Sostituire il sensore con uno di tipo ammesso (lampeggiante) ON (rosso) -
Page 37: Diagnostica Dei Moduli Segnali - S - Ingressi Analogici Per Misura Di Temperature
9.4.5 Diagnostica dei Moduli segnali - S – Ingressi Analogici per misura di temperature Significato Soluzione X1..X4 L'ingresso non è attivo ON (verde) L'ingresso è attivo e funziona correttamente VERDE ROSSO Valore della tensione di alimentazione fuori dal range ammesso Alimentare correttamente il modulo (Lampeggio contemporaneo... -
Page 38: Guida Alla Ricerca Dei Guasti
9.6.2 Guida alla ricerca dei guasti PROBLEMA POSSIBILE CAUSA SOLUZIONE Il display non si accende Manca la tensione di alimentazione Accertarsi della presenza della tensione, che sia sufficiente e che il cablaggio sie eseguito secondo lo schema di collegamento L’unità non risponde o risponde in modo errato al setpoint Impostazione del segnale di ingresso errata Configurare il tipo di ingresso appropriato nel menù... -
Page 39: Dati Tecnici
11. DATI TECNICI 11.1 CONNESSIONE ELETTRICA POWERLINK DATI TECNICI Fieldbus 100 Mbit/s - Half-duplex - Supporta l’autonegoziazione Impostazioni di fabbrica Denominazione modulo: EB80series - indirizzo 2 Indirizzamento Hardware tramite ROTARY SWITCH Range di tensione di alimentazione 12 -10% 24 +30% Tensione minima di funzionamento 10.8 Tensione massima di funzionamento... -
Page 40: Moduli Di Segnali - S - Output Digitali + Alimentazione Elettrica
11.4 MODULI DI SEGNALI - S - OUTPUT DIGITALI + ALIMENTAZIONE ELETTRICA DATI TECNICI 6 Output digitali M8 + Alimentazione elettrica Range di tensione di alimentazione 12 -10% 24 +30% Tensione minima di funzionamento 10.8 Tensione massima di funzionamento 31.2 Tensione massima ammissibile Tensione in uscita Corrispondente alla tensione di alimentazione... -
Page 41: Moduli Di Segnali - S - Input Analogici Per La Misura Di Temperature
11.7 MODULI DI SEGNALI - S - INPUT ANALOGICI PER LA MISURA DI TEMPERATURE DATI TECNICI 4 Input analogici M8 per la misura di temperature Tensione di alimentazione sensori Corrispondente alla tensione di alimentazione Tensione massima di ingresso Tipo di sensore (RTD) al platino (-200 ÷... - Page 42 INDEX INTENDED USE PAGE 44 TARGET GROUP PAGE 44 1. INSTALLATION PAGE 44 1.1 GENERAL INSTRUCTIONS FOR INSTALLATION PAGE 44 1.2 ELECTRICAL CONNECTION AND DISPLAY ELEMENTS PAGE 44 1.3 ELECTRICAL CONNECTIONS: PIN ASSIGNMENT OF CONNECTOR PAGE 44 1.3.1 M8 connector for node and output power supply PAGE 44 1.3.2 M12 connector for connection to the POWERLINK network PAGE 45...
- Page 43 3.3.6.3 Unit Parameters PAGE 57 4. PROPORTIONAL PRESSURE REGULATOR PAGE 59 4.1 INTENDED USE PAGE 59 4.2 FEATURES PAGE 59 4.3 PNEUMATIC CONNECTION PAGE 59 4.4 OPERATING PRINCIPLE PAGE 60 4.4.1 Function diagram PAGE 60 4.5 COMMISSIONING PAGE 60 4.5.1 Addressing PAGE 60 5.
- Page 44 INTENDED USE The POWERLINK Electrical Connection can be used to connect the EB 80 system to a POWERLINK network. In compliance with current specifications, the POWERLINK offers diagnostic functions. The system is available in the configuration up to 128 outputs for solenoid pilots, 128 digital outputs,128 digital inputs, 16 analogue outputs, 16 analogue inputs, 16 inputs for temperature measurement and 16 Proportional Pressure Regulators.
- Page 45 1.3.2 M12 connector for connection to the POWERLINK network 1 = TD+ 2 = RD+ 3 = TD- 4 = RD- Metal ring nut = Shield The network connectors are the M12 D-coded type, in accordance with POWERLINK specifications. Pre-wired Industrial Ethernet cables can be used to prevent any malfunction due to faulty wiring or, as an alternative, recyclable Industrial Ethernet 4-pin M12 metallic male connectors can also be used.
- Page 46 1.4.2 Input current Solenoid valves are controlled via an electronic board equipped with a microprocessor. In order to ensure safe operation of the valve and reduce energy consumption, a “speed-up” control is provided, i.e. 3W is supplied to solenoid pilot for 15 milliseconds and then power is gradually reduced to 0.25W. The microprocessor regulates, via a PWM control, the current in the coil, which remains constant regardless of the supply voltage and temperature, thus keeping the magnetic field generated by the solenoid pilot unchanged.
- Page 47 2. COMMISSIONING WARNING Power off the system before plugging or unplugging the connector (risk of functional damage). Connect the device to the earth using a suitable lead. Failure to make the earth connection may cause faults and irrevocable damages in the event of electrostatic discharge.
- Page 48 2.4 ADDRESSING The following address volume is made available to the Master: • 16 bytes of output for valve bases (pneumatic module), maximum 128 solenoid pilots; • 16 bytes of output for 8 digital output signal modules, maximum 128 total digital outputs; •...
- Page 49 2.5.3 Unit parameter configuration - System Parameters – FailSafeOutput_I5F01_S01 This function can be used to determine the state of digital and analogue output solenoid pilots when the communication with the Master is interrupted. Three different modes can be selected for the pneumatic module. •...
- Page 50 3. ACCESSORIES 3.1 INTERMEDIATE MODULE - M, WITH ADDITIONAL POWER SUPPLY Intermediate modules with additional power supply can be installed between valve bases. They either provide additional power supply when numerous solenoid pilots are activated at the same time or electrically separate some areas of the valve island from others, e.g. when some solenoid valves need to be powered off when a machine safety guard needs to be opened or an emergency button has been pressed, in which case only the valves downstream the module are powered on.
- Page 51 3.2.2 Addressing the Additional Electrical Connection - E0AD All the modules are addressed in sequence. • Addressing valve solenoid pilots - from the first solenoid pilot of the POWERLINK node to the last solenoid pilot of the last-in-line additional island. •...
- Page 52 3.3.1.4 Activation State - ActivationStateDI8_x_I5F21_Sxx- ActivationStateDI16_x_I5F71_Sxx The operating state can be selected individually for each input. It is defined ActivationStateDI8_x_I5F21_Sxx Init value. There are 16 SubIndex tasks corresponding to 16 S modules that can be installed in the system. • Init value = 0 Normally Open, the signal is ON when the sensor is enabled. The LED light is on when the sensor is enabled. •...
- Page 53 3.3.2.4 Operating state - ActivationStateDO8_x_I5F31_Sxx - ActivationStateD16_x_I5F81_Sxx The operating state of each output can be selected as follows. The operating state is defined by ActivationStateDO8_x_I5F31_Sxx. There are 16 SubIndex tasks corresponding to16 S modules that can be installed in the system. Each module is defined by 2 Bytes. •...
- Page 54 3.3.4.2 Signal range - Signal_RangeAI_x_I5F50_Sxx Each channel can be configured with a type of input signal. The 0x8050 is an array of 8 bytes. Each input is defined by 4 bits, up to a total of 2 bytes per module. The following types are available: •...
- Page 55 3.3.5.2 Signal Range - Signal_RangeAO_x_I5F60_Sxx Each channel can be configured with a type of output signal. The following types are available: • Init value = 0 • Init value = 1 0..10 VDC • Init value = 2 - 10/+10 VDC •...
- Page 56 3.3.6 M8 analogue 4-input module for temperature measurement Each temperature measurement module S can handle up to 4 inputs that can be configured freely for the use of temperature sensors or thermocouples of various type. They come with some individually configurable parameters. Temperature compensation (CJC –...
- Page 57 3.3.6.3 Unit Parameters Common parameters - General parameters temperature CHx-CHy I5F90...I5F93 • Unit of measurement - Temperature scale_I5F90_S01: temperature reading option °Celsius or °Fahrenheit. I5F9x_S01 = 0 °Celsius I5F9x_S01 = 1 °Fahrenheit • Noise suppression- NoiseRejection_I5F9x_S02: suppresses electrical noise generated by mains electricity supply. This parameter works in conjunction with the "Acquisition Filter"...
- Page 58 • Short-circuit signalling (for RTD only) - Short_circuitSignaling_I5F9x_S06: if enabled, a short circuit of the sensor connection generates an alarm. I5F9x_S06 = 0 disabled I5F9x_S06 = 1 enabled • Minimum value monitor - MonitorLowestValue_I5F9x_S07: when this function is enabled, an alarm is generated when the temperature falls below the set minimum value.
- Page 59 4. PROPORTIONAL PRESSURE REGULATOR 4.1 INTENDED USE The EB 80 pressure regulator can be integrated into EB 80 POWERLINK systems and offers advanced diagnostic functions. The system allows to connect of up to 16 units, they can be connected to the ADD module and can also be used without valves. 4.2 FEATURES •...
- Page 60 4.4 OPERATING PRINCIPLE Using a software algorythm, the control circuit compares the input signal with the output pressure measured by the pressure sensor. When there is a change, it activates the inlet and outlet solenoid valves to re-establish an equilibrium. This gives an output pressure that is proportional to the input signal.
- Page 61 5. SETTING 5.1 UNIT PARAMETER CONFIGURATION - Parameters Pressure Regulator I5FC0...I5FCF Pressure Regulator Number: it is sequential starting with the Regulator installed closest to the POWERLINK terminal. NB: the changes to the parameters can be made via the POWERLINK Master or from the keyboard. The keyboard settings are temporary, when the system is restarted, the settings of the Master are restored.
- Page 62 5.3.3 FULL SCALE - Full Scale mbar I5FCx_S04 This indicates the maximum preset pressure. The value is expressed in mbar, the maximum settable value is 10000 mbar. For optimal regulation, the supply pressure must be equal to FS (Full Scale) + 1 bar. 5.3.4 MINIMUM PRESSURE - Minimal Pressure mbar I5FCx_S05 Indicates the minimum regulated pressure with set 0.
- Page 63 5.4 DEBUG - The function is only available from the keyboard Utility used for checking correct operation of the two solenoid valves. • Select DEBUG and press OK. • Select PIN and press OK. The in solenoid valve activates and the pressure increases.
- Page 64 5.6.2 SET (S) REFERENCE - I5FCx_S06 = 1 This function can be used to make a “variable” setting for the pressure switch. Out is activated when the preset pressure is reached, with a tolerance defined by P+ and P-. Keyboard setting: •...
- Page 65 6. ACCESS TO THE MENU FROM THE KEYBOARD • Press OK to display the set parameters. • Press OK and ESC together to access the parameter setting menu. • Use the up and down arrows to scroll through the menu and modify the parameters.
- Page 66 The new advanced EB 80 diagnostic functions, known as EB 80 I4.0, provide a powerful analysis tool for traditional maintenance operations, ensuring the safe, reliable and lasting operation of production units. 7. I4.0 FUNCTIONS The new advanced EB 80 diagnostic functions, known as EB 80 I4.0, provide a powerful analysis tool for traditional maintenance operations, ensuring the safe, reliable and lasting operation of production units.
- Page 67 Master configuration with the B&R Automation Studio 4.3 development environment Import the "EB 80 Ethernet POWERLINK bus controller Dynamic Mapping module (000002EE_EB80D)" from the hardware catalogue Open the "Physical View" tab, select the "EB 80" module with the mouse right button and click on "Configuration".
- Page 68 Digital 16 Input/Output module configuration: enable both objects defining the module to activate all the inputs/outputs. Analogue 4 Input/Output module configuration: each analogue input/output channel is defined with 2 bytes. For correct operation, both bytes must be enabled.
- Page 69 Configuration of the Pressure Regulators: each Regulator is defined with 3 bytes of input and 2 bytes of output. To set the pressure, enable the bytes of Out, PressureRegulator_TargetPressure_Byte1 and 2. To read the regulated pressure, enable the bytes of In, PressureRegulator_Pressure_Byte1 and 2. To read the pressure switch function, enable the byte of InStateOfSwitch_PressureRegulator.
- Page 70 Master Configuration with B&R Automation Studio 4.3 development environment Import the EB 80 Ethernet POWERLINK bus controller Dynamic 1 Mapping (000002EE_EB80D1) module from the hardware catalogue. Open the "Physical View" tab, select the "EB 80" module with the mouse right button and click on "Configuration".
- Page 71 Click on "Cyclic transmission – Value" to enable the objects. Switch from "None" to "Write" to enable the outputs and from "None" to "Read" to enable the inputs.. Map data as single channel = FALSE: the 8 outputs / inputs of the object are processed as single bits Map data as single channel = TRUE: the 8 outputs / inputs of the object are processed as a single Byte After saving the project, open the IO Mapping tab to verify that the outputs/inputs are actually enabled.
- Page 72 Configuration of the Pressure Regulators: each Regulator is defined with 3 bytes of input and 2 bytes of output. To set the pressure, enable the bytes of Out, PressureRegulator_TargetPressure_Byte1 and 2. To read the regulated pressure, enable the bytes of In, PressureRegulator_Pressure_Byte1 and 2. To read the pressure switch function, enable the byte of InStateOfSwitch_PressureRegulator.
- Page 73 9. DIAGNOSTICS The diagnosis of the EB 80 POWERLINK system is defined by the state of the interface LED lights. Each component in the system relays its state, locally by LED lights, and to the POWERLINK node by software messages. 9.1 POWERLINK NODE DIAGNOSTIC MODE The diagnosis of the EB 80 POWERLINK system is defined by the state of the interface BS, BE, P1 and P2.
- Page 74 LED light state Hex code Meaning Notes Solution Power Bus Error Local Error ON (green) 0x16 Address / configuration of a Valve base or signal module Turn off power supply and remove the valve base or a signal module faulty cause of failure error (double...
- Page 75 9.3 EB 80 SYSTEM DIAGNOSTIC MODE – VALVE BASE The diagnosis of bases for valves is defined by the state of the interface Led lights. The generation of an alarm activates a software electrical connection message with the code associated with the detected error. Led Green Meaning FAULT signal output state and storage...
- Page 76 9.4.3 Diagnostic mode of Signal Modules - S – Analogue Inputs Meaning Solution X1..X4 Input not active ON (green) The input is active and works properly GREEN Analogue signal outside permitted range Set input type correctly Replace sensor with a permitted type (flashing) ON (red)
- Page 77 9.4.5 Diagnostic mode of Signal Modules - S - Analogue Inputs for temperature measurement Meaning Solution X1..X4 Input not active ON (green) The input is active and works properly GREEN RED Value of power supply voltage outside permitted range Power the module correctly (all Led lights flashing simultaneously...
- Page 78 9.6.2 Troubleshooting PROBLEM POSSIBLE CAUSES SOLUTION The display does not come on No power supply Check the power supply, make sure it is enough and check the wiring is in accordance with the wiring diagram The unit does not respond or responds wrongly to the Wrong input signal configuration Configure the appropriate type of input from the menu set point...
- Page 79 11. TECHNICAL DATA 11.1 POWERLINK ELECTRICAL CONNECTION TECHNICAL DATA Fieldbus 100 Mbit/S - Half-duplex - Supports auto-negotiation Factory settings module denomination: EB80series address number 2 Addressing Hardware by rotary switch Supply voltage range 12 -10% 24 +30% Minimum operating voltage 10.8 Maximum operating voltage 31.2...
- Page 80 11.4 SIGNAL MODULES - S - DIGITAL OUTPUTS + ELECTRICAL POWER SUPPLY TECHNICAL DATA 6 M8 Digital Outputs + Electrical power supply Supply voltage range 12 -10% 24 +30% Minimum operating voltage 10.8 Maximum operating voltage 31.2 Maximum admissible voltage Output voltage Corresponding to power voltage Current for each connector...
- Page 81 11.7 SIGNAL MODULES - S - ANALOGUE INPUTS FOR TEMPERATURE MEASUREMENT TECHNICAL DATA 4 M8 analogue Inputs for temperature measurement Sensors supply voltage Corresponding to the supply voltage Maximum input voltage Sensor type (RTD) platinum (-200 to +850°C) Pt100, Pt200, Pt500, Pt1000 (TK = 0.00385 and TK = 0.00391) nichel (-60 to +180°C) Ni100, Ni120, Ni500, Ni1000 (TK = 0.00618) Connections type (RTD)
Need help?
Do you have a question about the EB 80 ETHERNET POWERLINK and is the answer not in the manual?
Questions and answers