Table of Contents
Advertisement
Quick Links
Advertisement
Table of Contents

Subscribe to Our Youtube Channel
Related Manuals for Corsa OSMOTIC ZERO

Summary of Contents for Corsa OSMOTIC ZERO
- Page 1 INSTRUCTION MANUAL...
- Page 2 Using OSMOTIC ZERO, you ensure perfect water for drinking and cooking. OSMOTIC ZERO uses only physical processes to achieve the desired water purity: this consists of segrega- ting out all the undesired elements using semi-permeable membranes, letting only the water through. We do...
-
Page 3: Table Of Contents
TABLE OF CONTENTS 1. Safety precautions 2. Features 3. Parts of the equipment 4. Installation accessories 5. Technical specifications 6. Main functions 7. Hydraulic diagram 8. Pilot lights and alarms 9. Installation 10. Use of the equipment 11. Maintenance 12. Steps for replacing the filters 13. -
Page 4: Safety Precautions
OSMOTIC ZERO equipment or serious injury. Notes: if you do not heed the content of this section, this could cause damage to certain parts of the OSMOTIC ZERO equipment or injury to others. WARNINGS • The equipment includes a pressure regulator rated at 3.5 bars. - Page 5 OSMOTIC OSMOTIC Do not let the equipment come into contact Do not place the equipment near heat sources! with corrosive materials! Do not place the equipment near a heat source These materials can corrode the outer casing and or where the temperature is excessively high as affect the interior parts.
- Page 6 Do not damage the cable or the plug! Do not touch the plug with wet hands! Doing so could cause electric shock, shortcircuits This can cause electric shock. or a fire. NOTES For proper operation of the equipment, no inlet or outlet pipe should have folds and none of the stopcocks should be closed.
-
Page 7: Features
2. FEATURES 480L 3,5 BARES 1 DÍA 20L/HORA 1. Guaranteed water quality 2. Stable water flow Water of pH 7.4 and total optimal salinity The equipment has a filtration system capable monitored with a TDS reader are obtained as a of producing up to 38 l/h at 3.5 bar pressure, result of the full water treatment undertaken in in addition to having an accumulation tank of 4... - Page 8 OSMOTIC 7. Simple supply of water 8. GPRS connection The equipment automatically replenishes the You can connect via GPRS to check the equipment water in the tank, connecting and disconnecting status and settings. the elements necessary, merely by opening the tap.
-
Page 9: Parts Of The Equipment
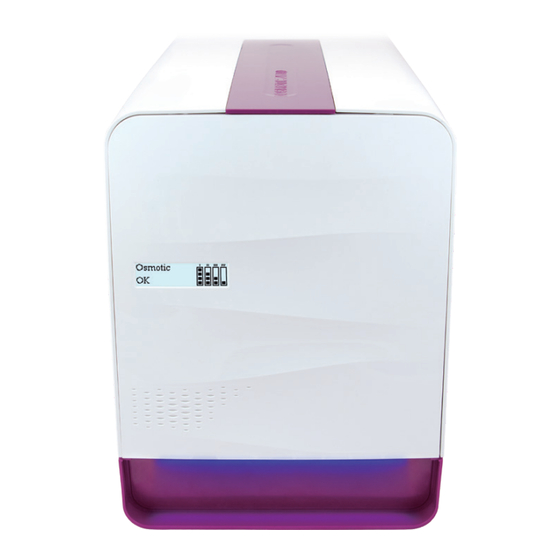
3. PARTS OF THE EQUIPMENT Side slits for opening Permeate, water produced Power supply (WHITE 5/16”) Water inlet Pressure transducer ((BLUE) 1/4”) Reject, drain Water recovery Tap coupling coupling (RED 1/4”) ((BLUE) 5/16”) -
Page 10: Installation Accessories
4. ACCESORIES 1. Quick installation guide. 2. Adhesive label for Osmotic Zero equipment light and sounds. 3. 2 x 150GPD membrane. 4. AC100-240V 50/60Hz power supply. 5. Electronic tap. 6. Installation kit: 6.1 Vinyl pipes: 2m white pipe 5/16” 2m blue pipe 1/4 2m red pipe ¼... -
Page 11: Main Functions
6. MAIN FUNCTIONS The OSMOTIC ZERO water filtering process consists of: 1. The first stage is an encapsulated 5-micron 2. The second stage is an encapsulated GAC sediment filter: carbon filter: It can effectively filter out rust, sand, other larger It can effectively absorb chlorine, disinfectant particles and solid impurities in the water. -
Page 12: Hydraulic Diagram
7. HYDRAULIC DIAGRAM U. Electronic circuit with GPRS connection 13. Permeate water 4 L capacity accumulation module and SIM card. tank. 1. Input power supply 100-240VAC 2A and 14. Permeate pump. output 24VDC 4A. 15. Conductivity and temperature meter. 2. Installation cold water inlet. 16. -
Page 13: Pilot Lights And Alarms
On opening the tap, continuous Permeate water tank empty Attention Water tank until tap closed. empty. Wait until full Attention Close the Tank overflow Osmotic Zero inlet tap. Steady Contact technical service Continuous amber Attention Close the Electrical failure or missing Osmotic Zero inlet tap. -
Page 14: Installation
Osmotic Zero through electricity supply. the white 1/4 “pipe The cabling used for the electronic circuit must be supplied by the manufacturer. Under no circumstances... -
Page 15: Use Of The Equipment
• This equipment requires an appropriate supply of water. Should the installation set up not meet certain minimum standards, this could cause malfunctioning. • Osmotic Zero is fitted with an automatic washing system (FLUSHING), programmed to work for 30 minutes every 24 hours. The user can modify this parameter by using the app. -
Page 16: Maintenance
11. MAINTENANCE LThe OSMOTIC ZERO reverse osmosis equipment requires little maintenance: Components such as the sediment pre-filter, activated carbon filter, reverse osmosis membrane and remineralising post filter are subject to wear and have a limited duration. Their duration depends on local circumstances, as the water of each region has its own composition. -
Page 17: Steps For Replacing The Filters
12. STEPS FOR THE REPLACEMENT OF FILTERS 1. OPEN THE EQUIPMENT Open the two white side lids. To do this, press with two hands on each lid (figure 1) and remove them (figure Figure 1 Figure 2 2. EXTRACTION OF SOCKET FILTERS (SEDIMENTS, ACTIVE CARBON AND MEMBRANES) Before removing the filters, it is important to place a paper, cloth or absorbent material on the bottom of the filter to be changed (figure 3), to retain the possible remaining water when it is removed. - Page 18 Figure 7 3. INSTALLATION OF SOCKET FILTERS: Look at the symbols that appear engraved on the upper part of the purple section of your equipment (figure 8). Insert the filter in its holder in the position indicated on its base (figure 9) and then turn it clockwise, using the key until the symbol on the base of the filter reaches position 2 ( figure 10).
- Page 19 4. REMINERALISING POST-FILTER SPARE PART Disconnect the connecting pipes by pressing the quick-link clamp (figure 12) and replace the post-filter (figure 13). Figure 12 Figure 13 5. CLOSING Poser les couvercles latéraux dans les clips (figure 14). Figure 14...
-
Page 20: Troubleshooting
13. TROUBLESHOOTING ANOMALY SOURCE SOLUTION A) Contact the authorised technical service The equipment makes A) Defective outlet pump noise B) Inlet valve partially blocked The equipment works A) Lack of water A) Check the general water inlet valve B) Contact the authorised technical service continually B) Inlet valve closed C) Membrane saturated... - Page 21 14. TEST CONDITIONS The performance and operation of the equipment has been tested according to the following conditions: • 400 ppm NaCl solution • Applied pressure of 50 psi (3.5 bar) • 25°C Operating temperature: • 7.0-8.0 pH Range With these specified working conditions, the equipment is able to: •...
- Page 22 THE WATER REVOLUTION...
Need help?
Do you have a question about the OSMOTIC ZERO and is the answer not in the manual?
Questions and answers