
Related Manuals for Vello BOX Series

Summary of Contents for Vello BOX Series
- Page 1 installatie en gebruikershandleiding (nl) installation and user manual (en) manuel d’installation et d’utilisation (fr) d.d. 03-04-2019...
- Page 2 This document serves as the installation and user manual voor the given product series. This information is essential for the users of the product and therefore available in accordance with NEN-EN-IEC 61439. This document is copyrighted. To copy, reproduce or modify it is not allowed without the permission of Vello Elektro.
- Page 3 11 Onderhoud p. 12 Reiniging p. 12 Inspectie p. 12 Buitenbedrijfstelling p. 12 Buitenbedrijfstelling p. 12 Verwijdering p. 12 Technische gegevens p. 13 Typeplaatje p. 13 Afmetingen p. 13 Technische specificaties behuizing p. 14 Vello Elektro − 3 −...
-
Page 4: Table Of Contents
De ifieke productuitvoeringen zijn die vragen om spec- producttypes die tot deze serie behoren zijn: ifieke instructies. Raadpleeg hiervoor de instructie- bladen die door Vello elektro worden verstrekt. Producttype Artikelnummer Zorg er tevens voor dat er voldoende kennis is ge- Box-36.1... - Page 5 Dit is afhanke- lijk van het toepassingsgebied en dit kan worden afge- Vello producten voldoen aan de actueel geldende leid van de norm waar de verdeelkast aan voldoet: normen op het moment van levering.
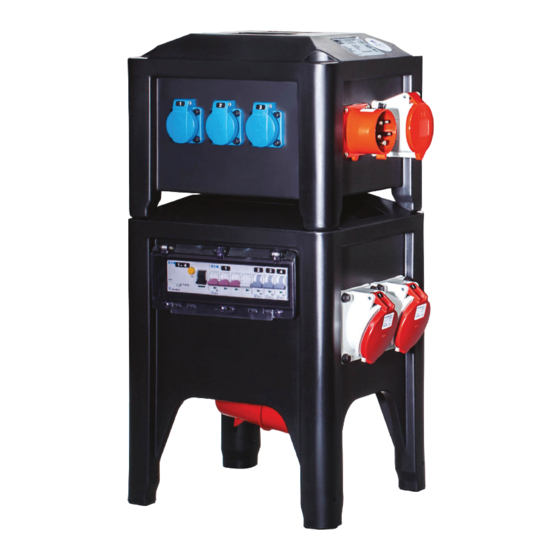
- Page 6 3. opslag en transport 4. onderdelen 3.1 Opslag Neem de volgende maatregelen om later een stor- ingsvrij gebruik te garanderen: Getoonde weergave is representatief voor de betref- • Sla de kast op in een schone stofvrije en droge fende serie, maar het specifieke product waar deze omgeving met een omgevingstemperatuur tussen handleiding voor wordt geraadpleegd kan functio- 0 °C en 40 °C.
- Page 7 Vello Elektro − 7 −...
- Page 8 5. installatie en inbedrijfstelling verdeelkast, te weten; spanning (Un), stroom (In) en frequentie (fn). • Maak gebruik van het daarvoor bestemde De installatie en inbedrijfstelling van de verdeelkast gereedschap. mag alleen door een gekwalificeerd persoon uitge- voerd worden. Deze dient tevens de veiligheidsvoor- Ga naar: schriften uit hoofdstuk 2 in acht te nemen.
- Page 9 35 - 50 RKA50 • Plaats de kabelschoen met het oog over 70 - 95 RKA95 het draadstuk. • Zorg ervoor dat het vlakke gedeeltje 120 - 185 RKA185 M10 = 26nM M12 = 45nM Torque (nM) Vello Elektro − 9 −...
- Page 10 6. gebruiksvoorschriften 5.3.4 Aansluitkast sluiten 6.1 Voorbereiding • Sluit het deksel en draai de bevestigingsschroeven • Controleer of de verdeelkast niet is aangetast of -lippen weer vast. of beschadigd. Mocht dit toch het geval zijn, gebruik de verdeelkast dan niet en schakel een 5.3.5 Spanning controleren gekwalificeerd persoon in.
- Page 11 • Indien de kast is uitgerust met klapvensters die voorzien zijn van een schroefsluiting, dan dienen de schroeven handvast te worden aangedraaid voor een goede afsluiting. Open Close Click! Vello Elektro − 11 −...
- Page 12 • Controleer vooraf bij Vello elektro of het gebruik van het door u beoogde reinigingsmiddel is toegestaan. Een ongeschikt reinigingsmiddel kan schade veroorzaken aan het apparaat.
-
Page 13: Producttype Artikelnummer
Omschrijving producttype CE markering artikelnummer IP-graad isolatieklasse dubbele isolatie markering spanning nominale stroom gewicht frequentie slagvast markering productiedatum gebouwd volgens norm qr-code 9.2 Afmetingen Art. nr. Box-36.1 Box-38.1 Box-38.2 Box-39.1 front/ back left/ right bottom Vello Elektro − 13 −... -
Page 14: Box-36.1
9.3 Technische specificaties behuizing Box-36.1 Box-38.1 Box-38.2 Box-39.1 Materiaal behuizing Polyethylene (LDPE) Polyethylene (LDPE) Polyethylene (LDPE) Polyethylene (LDPE) Wanddikte Materiaal montageplaten Polyethylene (HDPE) bi-color Polyethylene (HDPE) bi-color Polyethylene (HDPE) bi-color Polyethylene (HDPE) bi-color Dikte montageplaat 10mm Inserts in behuizing 18 M4 Messing inserts Gewicht (kg) Afmetingen (b x d x h) 250x200x500... - Page 15 Vello Elektro − 15 −...
- Page 16 installation and user manual − 16 −...
- Page 17 25 Maintenance p. 26 Cleaning p. 26 Inspection p. 26 Decommissioning p. 26 Decommissioning p. 26 Removal p. 26 Technical information p. 27 Nameplate p. 27 Dimensions p. 27 Technical specifications enclosure p. 28 Vello Elektro − 17 −...
- Page 18 This user manual is also available as download at www.vello.nl or via the qr-code below: 1.1 Contact information Vello Elektro B.V. Typograaf 14 NL-6921 VB Duiven www.vello.nl...
- Page 19 Prevent faulty usage of the power distribution box. Vello Elektro will not take any responsibility in case the user does not live up to the precautions. The war- ranty and responsibility of the manufacturer expires.
- Page 20 3. storage and transport 4. parts 3.1 Storage To guarantee an inteference free use in the future, take the following measures: The displayed distribution box is a representative for • Store the distribution box in a dust-free and dry the series, but the specific product what this manual environment with a temperature between 0 °C and is consulted for may differ in terms of functionality, 40 °C.
- Page 21 Vello Elektro − 21 −...
- Page 22 5. installation and commissioning Go to: • Cable power supply; Chapter 5.3.1 • Plugable power supply; Chapter 5.3.6 Installation and commissioning the distribution box may only be done by a qualified electro-technician. This person has the obligation to follow the safety 5.3.1 Opening the cable entry precautions from chapter 2.
- Page 23 Put the conductor in the cable entry and tighten it with the torque given on the 70 - 95 RKA95 clamp and the datasheet. 120 - 185 RKA185 M10 = 26nM M12 = 45nM Torque (nM) Vello Elektro − 23 −...
- Page 24 6. user instructions 6.1 Preparation • Check if the distribution box has any damages or flaws. If this is the case, do not use the distribution box and call for a qualified electro technician to inspect it. • Prevent faulty usage of the power distribution box.
- Page 25 Press them firmly until a clear ‘‘CLICK’’ is noticed. • When the box is executed with hinged windows with a screwed closure, the screws must be tightened hand-tight to secure the sealing. Open Close Click! Vello Elektro − 25 −...
- Page 26 Let a qualified electro technician decommission 7.1.A Dry cleaning the distribution box. • Vello Elektro advices to dry clean the • Make sure the power supply is switched OFF and distribution box regularly. Before doing the disconnect plugged in connectors before this, make sure the box is diconnected decommissioning the distribution box.
- Page 27 CE marking article number protection degree appliance class appliance class symbol voltage current weight frequency impact resistance symbol date of production standardization qr-code 9.2 Dimensions Art. nr. Box-36.1 Box-38.1 Box-38.2 Box-39.1 front/ back left/ right bottom Vello Elektro − 27 −...
- Page 28 9.3 Technical specifications enclosure Box-36.1 Box-38.1 Box-38.2 Box-39.1 Material Polyethylene (LDPE) Polyethylene (LDPE) Polyethylene (LDPE) Polyethylene (LDPE) Wall thickness (mm) Material mounting plates Polyethylene (HDPE) bi-color Polyethylene (HDPE) bi-color Polyethylene (HDPE) bi-color Polyethylene (HDPE) bi-color Thickness mounting plate 10mm Inserts 18 M4 Brass inserts Weight (kg) Dimensions (b x d x h)
- Page 29 Vello Elektro − 29 −...
- Page 30 manuel d’installation et d’utilisation − 30 −...
- Page 31 40 Inspection p. 40 Mise hors service p. 40 Mise hors service p. 40 Enlèvement p. 40 Informations techniques p. 41 Plaque signalétique p. 41 Les dimensions p. 41 Boîtier de spécifications techniques p. 42 Vello Elektro − 31 −...
- Page 32 61439 (la partie spécifique est indiquée sur la plaque signalétique; voir la section 9.1). N’oubliez pas que les réglementations locales (nationales) peuvent être applicable dans le pays d’utilisation. Vous pouvez télécharger ce manuel sur www.vello.nl ou via le code QR ci-dessous: 1.1 Coordonnées Vello Elektro B.V.
- Page 33 être lu attentivement avant la mise en service du boîti- environnement présentant un risque d’explosion. er de distribution. Respectez les règles d’utilisation du coffret de distri- Les produits Vello répondent aux normes en vigueur bution. au moment de la livraison. Vello décline toute responsabilité en cas de non-re- 2.1 Utilisation en securité...
- Page 34 3. stockage et transport 4. pièces 3.1 Stockage Prenez les mesures suivantes pour assurer un bon fonctionnement de l’appareil La représentation indiquée est représentative pour • Rangez le boîtier dans un environnement propre, la série concernée, mais le produit spécifique pour sans poussière et sec, à...
- Page 35 Vello Elektro − 35 −...
- Page 36 5. installation et mise en service l’interrupteur d’alimentation en position 0 (zéro). • Vérifiez si les valeurs de l’alimentation correspondent à celles du coffret de distribution, L’installation et la mise en service du coffret de dis- à savoir; tension (Un), courant (In) et fréquence tribution ne peuvent être effectuées que par une per- (fn).
- Page 37 Placez la cosse de câble avec l’oeil sur le 70 - 95 RKA95 morceau de fil. • Assurez-vous que la partie plate de la 120 - 185 RKA185 M10 = 26nM M12 = 45nM Torque (nM) Vello Elektro − 37 −...
- Page 38 6. mode d’emploi 5.3.4 Fermer le coffret de connexion 6.1 Préparation • Fermez le couvercle et resserrez les vis de • Vérifiez si le boîtier de distribution n’est fixation. endommagé. Si c’est le cas, n’utilisez pas le coffret de distribution et faites appel à une 5.3.5 Vérifier la tension personne qualifiée.
- Page 39 Appliquez une pression jusqu’à ce qu’un clic clair soit détecté. • Si le coffret est équipé des fenêtres à charnières munies d’un bouchon à vis, les vis doivent être serrées à la main pour une bonne fermeture. Ouvrir Fermer Click! Vello Elektro − 39 −...
- Page 40 • Vérifiez à l’avance auprès de Vello Elektro si l’utilisation de l’agent de nettoyage que vous envisagez est autorisée. Un produit de nettoyage inadapté peut endommager l’appareil.
- Page 41 9.2 Les dimensions Art. nr. Box-36.1 Box-38.1 Box-38.2 Box-39.1 front/ back left/ right bottom Vello Elektro − 41 −...
- Page 42 9.3 Boîtier de spécifications techniques Box-36.1 Box-38.1 Box-38.2 Box-39.1 Matière Polyethylene (LDPE) Polyethylene (LDPE) Polyethylene (LDPE) Polyethylene (LDPE) Épaisseur de paroi (mm) Materiaal montageplaten Polyethylene (HDPE) bi-color Polyethylene (HDPE) bi-color Polyethylene (HDPE) bi-color Polyethylene (HDPE) bi-color Dikte montageplaat 10mm Inserts in behuizing 10 M4 Inserts en laiton Poids (kg) Dimensions totales (L x P...
- Page 43 Vello Elektro − 43 −...
- Page 44 Vello Elektro B.V. Typograaf 14 NL - 6921 VB Duiven T: +31(0)316-251500 www.vello.nl sales@vello.nl...
Need help?
Do you have a question about the BOX Series and is the answer not in the manual?
Questions and answers