Table of Contents
Advertisement
Quick Links
Installation Manual
Kenworth T680
without factory installed heater
For Phoenix Gen 4 units built after 6/26/2017
The information contained herein is proprietary to Bergstrom Inc and/or its subsidiaries shall
not be reproduced, copied, or disclosed in whole or in part, or used for manufacture or any
other purpose, without prior written permission of Bergstrom Inc. The only controlled version
is that viewed electronically on the designated Bergstrom intranet site.
2390 Blackhawk Road ● Rockford, IL 61109 ●
● 1-866-204-8570
www.nitesystem.com
1
Advertisement
Table of Contents

Related Manuals for Bergstrom NITE Kenworth T680

Summary of Contents for Bergstrom NITE Kenworth T680
- Page 1 For Phoenix Gen 4 units built after 6/26/2017 The information contained herein is proprietary to Bergstrom Inc and/or its subsidiaries shall not be reproduced, copied, or disclosed in whole or in part, or used for manufacture or any other purpose, without prior written permission of Bergstrom Inc.
-
Page 2: Table Of Contents
Table of Contents Introduction Before You Start / EPA Unit Exploded View Warranty / Website Tools Required 1-10 Installation Procedures Electrical Installation Espar Heater Install Refrigerant Charging Wiring Diagrams Operating Instructions Battery Management... -
Page 3: Introduction
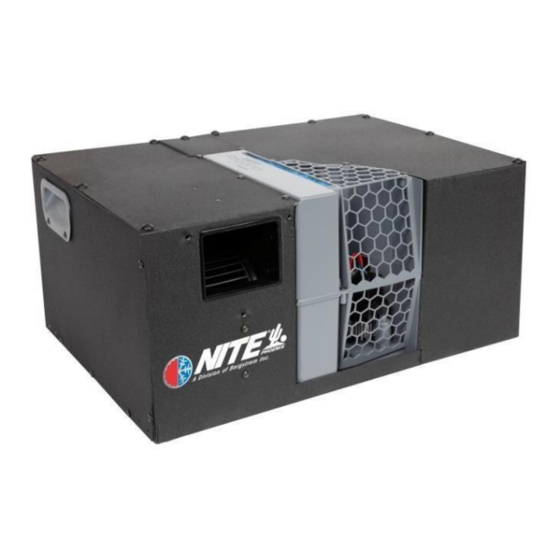
Congratulations. You have chosen the premier no-idle climate control system on the market today—the ® NITE Phoenix from Bergstrom. NOTE: The NITE Phoenix A/C system is The NITE Phoenix is a powerful 12V designed to maintain a comfortable rechargeable DC system that keeps... -
Page 4: Before You Start / Epa
Before You Start / EPA A typical installation of the NITE Phoenix generally takes between 8 to 10 hours, although your particular situation may vary. This manual contains step-by- step installation instructions. It is divided into three categories: ● General installation ●... - Page 5 Under certain Health, Safety, and Environmental Policy circumstances, failure to comply with these Under any condition Bergstrom Inc. is committed to protecting instructions can cause severe or life-threatening the health and safety of all working individuals at or visiting our impairment.
- Page 6 Before You Start / EPA Precautions for working with HFC134a (R134a) Refrigerant and Polyvinyl Ether (PVE) Refrigerant Oil WARNING Note Do not breath A/C refrigerant, oil vapor, or mist. Exposure may cause irritation to the The air conditioning system is designed only for eyes, nose, and throat.
- Page 7 Before You Start / EPA Important Safety Notices When handling corrosion inhibitors and lubricating oils avoid exposure to eyes and repeated contact WARNING to skin for they may contain alkali. In case of Ill-advised practices, negligence, and/or contact, immediately wash skin with soap and ignoring warning signs may cause death, water.
- Page 8 Before You Start / EPA ...
-
Page 9: Unit Exploded View
Unit Exploded View Cardboard Template Layout... -
Page 10: Warranty / Website
Warranty / Website WARRANTY TO REGISTER YOUR NEW SYSTEM OR FILE A WARRANTY CLAIM FOLLOW LINK LISTED BELOW. https://warranty.bergstrominc.com For technical manuals or service parts go to https://us.bergstrominc.com/eproduct-systems/ Email us at parts@bergstrominc.com Or call the - NITE LINE 1-866-204-8570... -
Page 11: Tools Required
Tools Required 1) Drill Bit Set 2) Hole saws (1″, 1-5/8″, 2″, 2-1/2″, 4-1/2″ and 4-3/4″) 3) Electric/Air Drill 4) Screwdrivers/Assorted Bits (Flat Head & Phillips Head) 5) Impact Gun 6) Air saw/Jigsaw (Cutting Sheet metal) 7) Torx Head (T20-T25) Bit Set 8) Metric Wrenches 9) SAE Wrenches 10) 1/4″, 3/8″... -
Page 12: Installation Procedures
1-10 Installation Procedures Prepare the Work Area Start by disconnecting the ground wire from the starting batteries. Set up your work light 37” and clear the sleeper compartment of loose items. Floor Insulation Determine approximate location for the Phoenix unit. Measure 37 inches from the 4.5”... - Page 13 1-11 Installation Procedures Cut Hole in Truck Floor Do not cut Drill starter holes in all four corners of the this area area marked for cutting. Note location of cross members prior to drilling holes. Use air saw/jigsaw to cut through truck floor. Position the NITE Phoenix mounting template, as shown, with the condenser openings over the holes cut in the truck...
- Page 14 1-12 Installation Procedures Modify Condenser Air Inlet Measure and notch the flat mounting side of the deflector so it will sit flat on the truck floor avoiding the floor seam and rivets. (See Photo) Install the Condenser Air Inlet Place modified deflector in the condenser opening.
- Page 15 1-13 Installation Procedures Install Recirculation Air Grill Using black Phillips head screws provided. New Duct Adapter Connect the Phoenix Duct to the OE Photo to the right shows duct adapter already cut and ready for installation. Before removing cross car duct, mark the location for the duct adapter.
- Page 16 1-14 Installation Procedures Cutting the New Duct Adapter Using the appropriate size hole saw, cut out each side of the new duct adapter. Slide Adapter Onto OE Duct Center it on the X mark made in step 14. Cut OE Duct Section as shown Using an air saw, remove the marked section.
- Page 17 1-15 Installation Procedures Prepare to Install Unit Attach Seal Strip to Duct Bracket and Elbow Install foam seal around opening of flange bracket and elbow. Install the Duct Elbow Mounting Bracket to the Phoenix unit using #10 X 1/2″ T20 elbow bracket screws.
- Page 18 1-16 Installation Procedures Install Mounting Feet The Phoenix unit has 8 pre-dimpled locations. Fasten feet in the 4 locations matching the predrilled holes from page 13 step 5. Use 1″ x 5/16 hex head self- drilling screws. Do not install feet where the case is not dimpled or you will damage the unit.
- Page 19 1-17 Installation Procedures Controller Location On this model, the location for the controller is stamped in the back of the OE panel. Place the controller template in the area to be cut to make sure the dimensions and area are ok to cut. Drill Starter Holes for Air Saw Cut out marked section.
- Page 20 1-18 Installation Procedures Install the Controller to the Control Center Using #10 x ½” T 20 torque head screw (PN 600129). Do not over tighten. Install Phoenix Control Harness Route the controller harness from Phoenix unit to control center area. Connect harness to controller.
- Page 21 1-19 Installation Procedures Top of duct as it is installed Using the Dimensions From the Drawing in the truck Mark 1 hole on each side closer to the top of the OE duct. Make sure the holes are 20.4 mm from the top side of the duct and 50 mm from the rear edge.
- Page 22 1-20 Installation Procedures Install the Preassembled Door Sliding it at an angle inside the OE duct and inserting one side of the pivot in one of the holes. Once you have one side installed, you can squeeze the OE duct to create an egg shape and slide the other end into the pivot hole.
-
Page 23: Electrical Installation
Section 2 Electrical Installation... - Page 24 The floor is not designed to carry that amount of weight and even deep cycle AGM batteries can emit gas under certain circumstances. Bergstrom can only support batteries being placed in battery boxes or tool boxes designed to support the weight of the batteries outside the cab of the truck.
- Page 25 Electrical Installation Electrical Installation Steel Battery Box Installation Locate the battery box on the frame as close as possible to the sleeper NITE Phoenix unit. When positioning the box, always keep the top of the box as close to the top of the frame rail as possible – Some manufacturers recommend no drilling within 2″...
- Page 26 Electrical Installation Electrical Installation Preparing Cables The batteries are wired series/parallel for 6 volt or parallel only for 12 volt. See diagrams on pages 2-4 and 2-5 Make and Install All Cables Described in steps 5a or 5b depending on which batteries are being used.
- Page 27 Electrical Installation Electrical Installation Directions for Wiring a 6-Volt Series/Parallel, 4 Battery NITE Phoenix Step 1: Make and install the two short battery cables. These cables connect the positive (+) of one battery to the negative (-) of the other to create a set or bank.
- Page 28 Electrical Installation Electrical Installation Directions for Wiring a 12-Volt Parallel, 4 Battery NITE Phoenix Parallel - all positives connected together and all negatives connected together Step 1: For the positive (+) to positive (+) parallel connections measure and cut pieces of red cable to length. Attach a ring terminal to each end using a professional grade crimper.
- Page 29 Electrical Installation Electrical Installation Install the NITE Phoenix Power Harness Take the power harness and place the protective split plastic loom around each cable. Route the cables from the NITE Phoenix unit, down through the floor grommet and along the frame rails to the NITE Batteries.
- Page 30 Electrical Installation Electrical Installation CAUTION: Battery management device must be positioned on top of the battery where it is supported. The cork gasket should be installed to help prevent vibrations. Install Battery Management System Battery Management System Lug with (open hole) mounts on the battery Installed negative post.
- Page 31 Electrical Installation Electrical Installation STOP! FOR KISSLING SEPARATOR FOLLOW STEPS 9-18 FOR THE TERRA POWER/ LITTLE FUSE SEPARATOR PROCEED TO PAGE 2-13, STEPS 19-39 KISSLING TERRA POWER/ LITTLE FUSE...
- Page 32 Electrical Installation Electrical Installation Electrical Installation Mounting the Separator Enclosure Disregard the enclosure The battery separator can be located in a instructions if you mount the battery box or in the supplied protected separator inside the battery enclosure. Mark and drill two ¼″ holes box.
- Page 33 2-10 Electrical Installation Electrical Installation Electrical Installation Battery Management System Wiring Harness 8 pin connector plugs into the BMS. Auxiliary battery power wire with fuse connects to battery positive on the auxiliary batteries. This harness splits three ways: Red/black goes to truck starting batteries; orange/tan/white go to separator;...
- Page 34 2-11 Electrical Installation Electrical Installation Electrical Installation Connect Battery Management System to BLACK Start Batteries 2 wire harness from 8 pin connector. This harness routes from the BMS in the auxiliary battery box to the truck starting battery box. This harness must be loomed.
- Page 35 2-12 Electrical Installation Electrical Installation Electrical Installation Connect Battery Management System to Battery Separator Solenoid This 3 wire harness from the 8 pin Orange connector routes to the battery separator White solenoid. Cut wires to length, crimp snap fork terminals on each wire and connect to designated terminals.
- Page 36 2-13 Electrical Installation WIRING THE TERRA POWER/LITTLE FUSE SEPARATOR Disregard the enclosure instructions if you mount the separator inside the battery box. Install Separator Enclosure Remove the enclosure cover, Place the separator mounting bracket, centered on the inside of the cover. Mark and drill 4 holes to secure the bracket to the cover.
- Page 37 2-14 Electrical Installation Install the Assembly to the Cover Using 4 10 x 32 x ¾″ screws, lock and flat washers provided. Next, Drill a 2″ Hole in the Center of the bottom of the box as shown. Trim the hole on each side as shown, creating a 2″...
- Page 38 2-15 Electrical Installation Run Cables from Truck Batteries Loom 2 full length battery cables, 1 red and 1 black. The red (positive) cable will connect the truck starting batteries positive post to the (start) post (A) of the battery separator. You must use the provided 90 degree battery terminal end at the Terra Power separator rotated to the center of the switch.
- Page 39 2-16 Electrical Installation Electrical Installation Battery Management System Wiring Harness 8 pin connector plugs into the BMS. Auxiliary battery power wire with fuse connects to battery positive on the auxiliary batteries. This harness splits three ways: Red/black goes to truck starting batteries; orange/tan/white go to separator;...
- Page 40 2-17 Electrical Installation Connect Battery Management System to Black Start Batteries 2 wire harness from 8 pin connector. This harness routes from the BMS in the auxiliary battery box to the truck starting battery box. This harness must be loomed. The red connects through the supplied, field installed, 5 amp mini fuse and holder (G) to any 12 volt POSITIVE post in the truck starting battery box.
- Page 41 2-18 Electrical Installation...
- Page 42 2-19 Electrical Installation Electrical Installation Cut Wires to Length Strip insulation as instructed in the Deutsch tool section. Crimp terminals on each wire. Install 4 Sealing Plugs into the unused terminal locations 3 through 6. Install Separator Control Wires Into Deutsch Connector Terminals are marked as: 1–...
- Page 43 2-20 Electrical Installation Electrical Installation Connect the assembled connector to the existing connector on the Terra Power switch. Optional Phoenix System Lockout Beginning 6/26/2017 Connecting the 12 volts to terminal 2 on the 4 pin connector will disable the Phoenix system.
- Page 44 2-21 Electrical Installation This completes the electrical section of the installation. If you are installing the ESPAR heater proceed to section 3. If you are not installing an aftermarket heater, your installation is complete and you may reconnect the truck batteries. WARNING: If you have a fuel operated heater that was installed at the factory or prior to the SSI install, you can continue to operate the heater with the existing controller.
- Page 45 Section 3 ESPAR Fuel Operated Heater Installation...
- Page 46 Espar Heater Install The heater instructions in this manual are generic. For the latest install information please refer to the Espar D2 heater install manual WARNING: If you have an Espar fuel operated heater that was installed at the factory or prior to the SSI install, you can continue to operate the heater with the existing controller.
- Page 47 Espar Heater Install Drill Outlet Hole for Heat Unit Mark the floor of the truck using the 5 small holes of the mounting plate. Remove mounting plate, place a 4 ¼″ hole saw over the middle of the floor marks, and drill the outlet hole for the heater, intake, exhaust and pickup tube.
- Page 48 Espar Heater Install Heater Unit Assembly – Attach Mounting Plate Snap end cap on heater unit (A). Place mounting plate over heater unit (B). Attach with flat lock washers and 10mm lock nuts, tighten down securely. Heater Unit Assembly – Attach Gasket and Fuel Line Connection Peel off backing from gasket and place gasket over mounting plate edges, sticky-...
- Page 49 Espar Heater Install Heater Unit Assembly – Identify Intake and Exhaust Ports Look closely at the two small metal tubes. One has an arrow pointing out away from the unit—this is the exhaust. One has an arrow pointing in towards the unit—this is the intake.
- Page 50 Espar Heater Install Prepare To Mount Unit Check to make sure truck batteries are still disconnected. Carry unit into truck. It will be mounted over the 4 ¾″ hole that was drilled earlier. Make sure hoses and tubes don’t get tangled or caught on anything. Run Lines Through Cab Floor Feed exhaust hose, intake hose, and fuel line through the 4 ¾″...
- Page 51 Espar Heater Install Attach Heat Line to Sleeper Vent Take the black metallic flex tube, measure and cut length to run from heater unit to louver/vent opening (A). Place two clamps over ends of tube, and clamp tube to heating unit and louver. Tighten clamps securely but do not over tighten.
- Page 52 Espar Heater Install WARNING: If you have an Espar fuel operated heater that was installed at the factory or prior to the SSI install, you can continue to operate the heater with the existing controller. IF you choose to wire the existing factory installed heater to the SSI controller, YOU WILL VOID THE FACTORY WARRANTY OF THE HEATER! Optional Heater Controlled by the SSI Controller...
- Page 53 Espar Heater Install Finish Intake and Exhaust Hose Installation First, attach intake air tube to truck structure with zip ties. Put cap on bottom of intake tube. Next, run exhaust hose to the back of cab, attach with clamps to the structure of the truck.
- Page 54 Espar Heater Install Drill Hole in Fuel Tank, Insert Pickup Tube and Mount Fuel Assembly Use a 1″ hole saw to scribe initial location for two outer holes. Drill the two outer 1/4″ holes centered on scribe. Then complete drilling the 1″ hole. See diagram A. Option: When possible drill holes in the fuel sender block off plate.
- Page 55 3-10 Espar Heater Install Option 1: Heater Power from Phoenix Unit Notice: Beginning 6/26/2017 the Phoenix unit harness changed. Phoenix unit now contains an additional fuse and connector for powering an aftermarket heater. Your Phoenix kit includes a mating electrical connector for connecting the heater battery power.
-
Page 56: Espar Heater Install
3-11 Espar Heater Install Option 2: Heater Power from Auxiliary Batteries not Phoenix Unit Run Heater Unit Power Cable to NITE Batteries Take the heater unit power cable, run it under the truck (attach with zip ties where necessary) over to the NITE Batteries. Strip back outer cover to expose two inner wires. -
Page 57: Wiring Diagrams
Section 4 Wiring Diagrams NOTE: Pages 4-1 and 4-2 are for unit manufactured after 6/26/2017 Pages 4-3 and 4-4 are for unit manufactured 2/8/2012 to 6/26/2017 Pages 4-5 and 4-6 are for units manufactured prior to 2/8/2012... - Page 58 Wiring Diagrams New Phoenix wiring for units built from 6/26/2017 to current...
- Page 59 Wiring Diagrams New Phoenix wiring for units built from 6/26/2017 to current...
- Page 60 Wiring Diagrams Use for units manufactured from 2/08/2012 to 6/26/2017...
- Page 61 Wiring Diagrams Use for units manufactured from 2/08/2012 to 6/26/2017...
- Page 62 Wiring Diagrams Use for units manufactured prior to 2/08/2012...
- Page 63 Wiring Diagrams Use for units manufactured prior to 2/08/2012...
-
Page 64: Operating Instructions
Section 5 Operating Instructions... - Page 65 Operating Instructions OPERATING INSTRUCTIONS FOR CONTROLLER To start the system push ON/OFF button, Display will show current mode/ temperature setting / battery level. First time system is powered on - Initial default setting is Blower Speed 1 / AUTO- MODE / Temp 72 °F Battery charge level indicator shows 4 bars for fully charged and 1 bar equals low batteries.
- Page 66 Operating Instructions Changing TEMPERATURE set point, Anytime the temperature set point is displayed on the screen, push the up or down arrows to change. Temperature range is from 60 °F (coolest) to 85 °F (warmest). NOTE: Control will retain the last Mode and Blower settings but the Temperature will always default back to 72 °F degrees on restarts.
- Page 67 Operating Instructions To enter SERVICE MODE: Push both the ON/OFF and ENTER button simultaneously at any time. Display will show service indicator and a code 00 unless a fault has occurred. If there is an active fault the display will show it as 01, 02, etc. Use up and down arrows to scroll through the Fault Codes.
-
Page 68: Battery Management
Section 6 Battery Management System (BMS) Installation... - Page 69 Battery Management Bergstrom NITE System BMS 100 Installation...
- Page 70 Battery Management...
- Page 71 Battery Management...
Need help?
Do you have a question about the NITE Kenworth T680 and is the answer not in the manual?
Questions and answers