Advertisement
Available languages
Available languages
Quick Links
Advertisement

Subscribe to Our Youtube Channel
Related Manuals for TOBIAS GRAU XT-A TABLE PLUS 70/90 USM LED OSA XA47-5

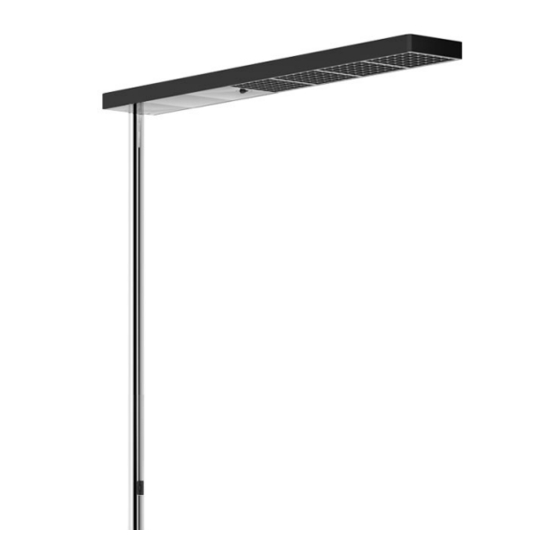
Summary of Contents for TOBIAS GRAU XT-A TABLE PLUS 70/90 USM LED OSA XA47-5
- Page 1 XT-A TABLE PLUS 70/90 USM LED OSA XA47-5 XA47-6 XA43-5 XA43-6 XC47-5 XC47-6 XC43-5 XC47-6...
- Page 2 Leuchtenzusammenstellung Luminaires collection Leuchte Kopf Schaft XA47-5 XT-A TABLE PLUS 70 USM chrome/black BR 06 1388 BR 06 1348 XA43-5 XT-A TABLE PLUS 90 USM chrome/black BR 06 1392 BR 06 1348 XC47-5 XT-A TABLE PLUS 70 USM chrome/black BR 06 1388 BR 06 1352 XC43-5 XT-A TABLE PLUS 90 USM chrome/black...
- Page 3 Montage Leuchtenkopf Der Netzstecker dient der Leuchte als Trennvorrichtung und die Steckdose muss frei zugänglich sein. 1. Demontieren Sie die Abdeckung 2. Drehen Sie den Stecker vor der Montage des Leuchtenkopfes in die skizzierte Position (siehe Zeichnung). 3. Jetzt befestigen Sie den Leuchtenkopf mit den beiden Schrauben auf dem Schaft.
- Page 4 Montage Tischadapter Der Netzstecker dient der Leuchte als Trennvorrichtung und die Steckdose muss frei zugänglich sein.
- Page 5 (220V-240V; 50-60Hz). Bitte beachten Sie, dass aufgrund der speziellen Ausführung der Anschluß- leitung diese im Falle einer Beschädigung nur durch die Firma Tobias Grau ausgetauscht werden darf. Pflegehinweise Bitte die Leuchte mit einem trockenen Tuch reinigen, z.B. Microfasertücher für empfindliche Oberflächen.
- Page 6 Funktionsbeschreibung DIMMTASTER 1 x Taster kurz drücken - Leuchte geht an Taster gedrückt halten - Leuchte wird heller Taster nochmal gedrückt halten - Leuchte wird dunkler 1 x Taster kurz drücken - Leuchte geht aus SENSOR und FERNBEDIENUNG Zur Funktionsweise des Sensors und der Fernbedienung, nutzen Sie bitte die gesonderte Bedienungsanleitung.
- Page 8 Mounting the Lamp Head The power plug is used as a circuit breaker and the plug socket must be easily accessible. 1. Remove the cover. 2. Turn the multi-point connector before mounting the lamp head as shown in the illus- trated position (see diagram).
- Page 9 Mounting the Table Adapter The power plug is used as a circuit breaker and the plug socket must be easily accessible.
-
Page 10: Care Instructions
Fine Adjustment / Setup / Care Instructions The power plug is used as a circuit breaker and the plug socket must be easily accessible. Following set up of the lumianire, if the lamp head is not level, the horizontal position of the lamp head can be finely ad- justed by turning the levelling screw of the lamp head. -
Page 11: Functional Description
Functional Description DIMMER SWITCH 1 x quick press of switch – light goes on hold switch down – light gets brighter hold switch down again – light gets darker 1 x quick press of switch – light goes off .SENSOR and REMOTE CONTROL See instruction manual for sensor and remote control. - Page 12 DEUTSCH Wechsel der Batterie: Nähere Informationen zum Wechsel der Batterie auf der Rückseite der mitgelieferten Fern- bedienung. Batterie: CR2032 (1 Stück) Die Ware muss vor Montage auf optische Fehler bzw. Kratzer überprüft werden. Mit der Montage erlischt der Reklamationsanspruch auf optische Mängel der Ware. Bitte lassen Sie die Montage von einem Elektrofachbetrieb durchführen.
- Page 13 ENGLISH Changing the batteries: More information about how to change batteries is on the back of the supplied remote control unit. Battery: CR2032 (1 item) The products must be checked for visual defects, and/or scratches, prior to assembly. Once the product has been assembled, the right for a customer to make a complaint due to visual defects expires.
- Page 16 5 years guarantee of LED Numéro de contrôle final 2 ans de garantie 5 ans de garantie sur les LED Numero di controllo finale 2 anni di garanzia 5 anni di garanzia per i LED TOBIAS GRAU GmbH Siemensstrasse 35b D-25462 Rellingen www.tobiasgrau.com info@tobiasgrau.com...
Need help?
Do you have a question about the XT-A TABLE PLUS 70/90 USM LED OSA XA47-5 and is the answer not in the manual?
Questions and answers