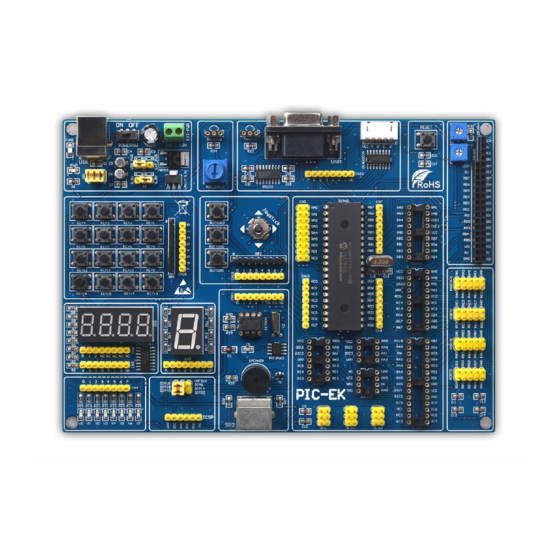
LogiFind PIC-EK Operation Manual
Hide thumbs
Also See for PIC-EK:
- User manual (23 pages) ,
- Operation manual (75 pages) ,
- Operation manual (75 pages)
Table of Contents
Advertisement
Quick Links
To our valued customers
I want to express my thanks to you for being interested in our products and for having confidence in Nanning LogiFind
Tech CO., Ltd. The primary aim of our company is to design and produce high quality electronic products and to
constantly improve the performance thereof in order to better suit your needs.
Please share your thoughts and feelings regarding our operation so that we can serve you better in the future. I thank you
for your continued support and patronage.Your Dream is our Destination!
The Microchip, TI, Freescale, ST, Atmel, Silicon and CYPRESS name, logo and products names are trademarks of
Microchip, TI, Freescale, ST, Atmel, Silicon and CYPRESS Inc. in the U.S.A. and other countries.
Sincerely,
PIC EK Lab Operation Guide (for PIC18F4550)
Owner and General Manager
of Nanning LogiFind Tech CO., Ltd.
1
Advertisement
Table of Contents

Related Manuals for LogiFind PIC-EK


Summary of Contents for LogiFind PIC-EK
- Page 1 To our valued customers I want to express my thanks to you for being interested in our products and for having confidence in Nanning LogiFind Tech CO., Ltd. The primary aim of our company is to design and produce high quality electronic products and to constantly improve the performance thereof in order to better suit your needs.
-
Page 2: Table Of Contents
PIC EK Lab Operation Guide (for PIC18F4550) CONTENTS Lab1.Speaker1 ............................... 4 Lab2.Speaker2 ............................... 5 Lab3.Drive one LED V0 ..........................6 Lab4.Drive one LED V0(flashing) ......................7 Lab5.Drive 8 LEDs(from V0 to V7) ......................8 Lab6.16digit Segled Display ........................9 Lab7.16digit Segled Display(069) ......................10 Lab8.46digit Segled Display (ones place) ....................11 Lab9.46digit Segled Display (tens place) .................... - Page 3 PIC EK Lab Operation Guide (for PIC18F4550) Lab44. AN1(8BIT)+LCD1602 Display ...................... 49 Lab45. AN2(8BIT)+LCD1602 Display ...................... 50 Lab46. AN3(8BIT)+LCD1602 Display ...................... 51 Lab47. AN4(8BIT)+LCD1602 Display ...................... 52 Lab48. AN5(8BIT)+LCD1602 Display ...................... 53 Lab49. AN6(8BIT)+LCD1602 Display ...................... 54 Lab50. AN7(8BIT)+LCD1602 Display ...................... 55 Lab51.
-
Page 4: Lab1.Speaker1
PIC EK Lab Operation Guide (for PIC18F4550) Lab1.Speaker1 a).Hardware Connection b). OBJECTIVES 1.To understand the operation of an IO. 2.To interface and drive a Buzzer/Speaker. c). Result RC2=1,The transistor T1(S8050) is saturated and “ON”, and the Speaker will be continued activated. -
Page 5: Lab2.Speaker2
PIC EK Lab Operation Guide (for PIC18F4550) Lab2.Speaker2 a).Hardware Connection b). OBJECTIVES 1.To understand the operation of an IO. 2.To interface and drive a Buzzer/Speaker. c). Experimental Principle and Results RC2=1,the transistor T1(S8050) is saturated and “ON”, and the Speaker will be activated;... -
Page 6: Lab3.Drive One Led V0
PIC EK Lab Operation Guide (for PIC18F4550) Lab3.Drive one LED V0 a).Hardware Connection b). OBJECTIVES To understand the operation of an IO. To interface and drive an LED. c). Experimental Principle and Results RD0=1, and the V0 will be “ON”. -
Page 7: Lab4.Drive One Led V0(Flashing)
PIC EK Lab Operation Guide (for PIC18F4550) Lab4.Drive one LED V0(flashing) a).Hardware Connection b). OBJECTIVES To understand the operation of an IO. To interface and drive an LED. c). Experimental Principle and Results RD0=1, and the V0 will be “ON”; RD0=0, and the V0 will be “OFF”.We give it some frequency via delay,the V0 will be flashing. -
Page 8: Lab5.Drive 8 Leds(From V0 To V7)
PIC EK Lab Operation Guide (for PIC18F4550) Lab5.Drive 8 LEDs(from V0 to V7) a).Hardware Connection b). OBJECTIVES To understand the operation of an IO. To interface and drive an LED. c). Experimental Principle and Results Make a value table and send the value to the RD port to make the 8 LEDs running in flowing water mode , from left to right, reciprocating cycle. -
Page 9: Lab6.16Digit Segled Display
PIC EK Lab Operation Guide (for PIC18F4550) Lab6.16digit Segled Display a).Hardware Connection b). OBJECTIVES To understand the operation of an IO. To interface and drive a dynamic state SEGLED. c). Experimental Principle and Results segment “b” and “c”—“ON”,the others segments—“OFF”. -
Page 10: Lab7.16Digit Segled Display(069)
PIC EK Lab Operation Guide (for PIC18F4550) Lab7.16digit Segled Display(069) a).Hardware Connection b). OBJECTIVES To understand the operation of an IO. To interface and drive a dynamic state SEGLED. c). Experimental Principle and Results Make a table to save value 0~9,and send them to RD port. d).Table for value 069... -
Page 11: Lab8.46Digit Segled Display (Ones Place)
PIC EK Lab Operation Guide (for PIC18F4550) Lab8.46digit Segled Display (ones place) a).Hardware Connection b). OBJECTIVES To understand the operation of an IO. To interface and drive a dynamic state SEGLED. c). Experimental Principle and Results Set Y0=0 on 74HC138,and send “0” to the RD port at the same time. The fourth digit will display “0”. -
Page 12: Lab9.46Digit Segled Display (Tens Place)
PIC EK Lab Operation Guide (for PIC18F4550) Lab9.46digit Segled Display (tens place) a).Hardware Connection b). OBJECTIVES To understand the operation of an IO. To interface and drive a dynamic state SEGLED. c). Experimental Principle and Results Set Y1=0 on 74HC138,and send “1” to the RD port at the same time. The third digit will display “1”. -
Page 13: Lab10.46Digit Segled Display (Hundreds Place)
PIC EK Lab Operation Guide (for PIC18F4550) Lab10.46digit Segled Display (hundreds place) a).Hardware Connection b). OBJECTIVES To understand the operation of an IO. To interface and drive a dynamic state SEGLED. c). Experimental Principle and Results Set Y2=0 on 74HC138,and send “2” to the RD port at the same time. The second digit will display “2”. -
Page 14: Lab11.46Digit Segled Display (Thousands Place)
PIC EK Lab Operation Guide (for PIC18F4550) Lab11.46digit Segled Display (thousands place) a).Hardware Connection b). OBJECTIVES To understand the operation of an IO. To interface and drive a dynamic state SEGLED. c). Experimental Principle and Results Set Y3=0 on 74HC138,and send “3” to the RD port at the same time. The first digit will display “3”. -
Page 15: Lab12.46Digit Segled Display (0123)
PIC EK Lab Operation Guide (for PIC18F4550) Lab12.46digit Segled Display (0123) a).Hardware Connection b). OBJECTIVES To understand the operation of an IO. To interface and drive a dynamic state SEGLED. c). Experimental Principle and Results Set Y06Y3 to “0” one by one, and send “0” “3” to the RD port at the same time. The four digit will display “0123”. -
Page 16: Lab13.46Digit Segled Display (000069999)
PIC EK Lab Operation Guide (for PIC18F4550) Lab13.46digit Segled Display (000069999) a).Hardware Connection b). OBJECTIVES To understand the operation of an IO. To interface and drive a dynamic state SEGLED. c). Experimental Principle and Results Set Y06Y3 to “0” one by one, and send value to the RD port at the same time and then value+1. -
Page 17: Lab14.Jostick&Buttons+16Digit Segled
PIC EK Lab Operation Guide (for PIC18F4550) Lab14.Jostick&Buttons+16digit Segled a).Hardware Connection b). OBJECTIVES To understand the operation of an IO. To interface and drive a dynamic state SEGLED. c). Experimental Principle and Results The Key value display on the 4 digit segled when Button1 Button3 or Joystick is pressed. -
Page 18: Lab15.Jostick&Buttons+Speaker
PIC EK Lab Operation Guide (for PIC18F4550) Lab15.Jostick&Buttons+Speaker a).Hardware Connection b). OBJECTIVES To understand the operation of an IO. To interface and drive a Buzzer/speaker. c). Experimental Principle and Results The Speaker will be activated when Button1 Button3 or Joystick is pressed. -
Page 19: Lab16.4X4Keyboard+16Digit Segled
PIC EK Lab Operation Guide (for PIC18F4550) Lab16.4x4Keyboard+16digit segled a).Hardware Connection b). OBJECTIVES To understand the operation of an IO. To understand the keypad scan tech. c). Experimental Principle and Results The Key value display on the 1 digit segled when KEY1 KEY16 is pressed. -
Page 20: Lab17. 4X4Keyboard+Speaker
PIC EK Lab Operation Guide (for PIC18F4550) Lab17. 4x4Keyboard+Speaker a).Hardware Connection b). OBJECTIVES To understand the operation of an IO. To understand the keypad scan tech. c). Experimental Principle and Results The Speaker will be activated when KEY1 KEY16 is pressed. -
Page 21: Lab18. Stepmotor
PIC EK Lab Operation Guide (for PIC18F4550) Lab18. Stepmotor a).Hardware Connection b). OBJECTIVES To understand how to control a stepmotor. c). Experimental Principle and Results We use a 4 phase step motor in this application. The step motor will rotate when we add different voltage on the 4 lines. -
Page 22: Lab19. Lcd1602 Display (Char)
PIC EK Lab Operation Guide (for PIC18F4550) Lab19. LCD1602 Display (Char) a).Hardware Connection b). OBJECTIVES To understand the operation of a Char LCD. c). Experimental Principle and Results... -
Page 23: Lab20. Lcd1602 Display (Arabic Numerals)
PIC EK Lab Operation Guide (for PIC18F4550) Lab20. LCD1602 Display (Arabic numerals) a).Hardware Connection b). OBJECTIVES To understand the operation of a Char LCD. c). Experimental Principle and Results... -
Page 24: Lab21. Lcd1602 Display (Number++)
PIC EK Lab Operation Guide (for PIC18F4550) Lab21. LCD1602 Display (number++) a).Hardware Connection b). OBJECTIVES To understand the operation of a Char LCD. c). Experimental Principle and Results... -
Page 25: Lab22. Timer0+V0
PIC EK Lab Operation Guide (for PIC18F4550) Lab22. Timer0+V0 a).Hardware Connection b). OBJECTIVES To understand the operation of timer. c). Experimental Principle and Results Set timer T0 250us*200=0.5s,V0 “ON” 0.5s V0 “OFF” 0.5s V0 “ON”BB.. -
Page 26: Lab23. Timer0+16Digit Segled Display
PIC EK Lab Operation Guide (for PIC18F4550) Lab23. Timer0+16digit segled Display a).Hardware Connection b). OBJECTIVES To understand the operation of timer. c). Experimental Principle and Results Set timer T0 250us*400=1s,0,1,2,3,B9,0,1,2B.. -
Page 27: Lab24. Timer0+Lcd1602 Display
PIC EK Lab Operation Guide (for PIC18F4550) Lab24. Timer0+LCD1602 Display a).Hardware Connection b). OBJECTIVES To understand the operation of timer. c). Experimental Principle and Results Set timer T0 250us*400=1s, 00000,00001,00002BB.. 50000,00000,00001BBB... -
Page 28: Lab25. Timer1+V0
PIC EK Lab Operation Guide (for PIC18F4550) Lab25. Timer1+V0 a).Hardware Connection b). OBJECTIVES To understand the operation of timer. c). Experimental Principle and Results Set timer T1 250us*200=0.5s,V0 “ON” 0.5s V0 “OFF” 0.5s V0 “ON”BB.. -
Page 29: Lab26. Timer1+16Digit Segled Display
PIC EK Lab Operation Guide (for PIC18F4550) Lab26. Timer1+16digit segled Display a).Hardware Connection b). OBJECTIVES To understand the operation of timer. c). Experimental Principle and Results Set timer T1 250us*400=1s,0,1,2,3,B9,0,1,2B.. -
Page 30: Lab27. Timer1+Lcd1602 Display
PIC EK Lab Operation Guide (for PIC18F4550) Lab27. Timer1+LCD1602 Display a).Hardware Connection b). OBJECTIVES To understand the operation of timer. c). Experimental Principle and Results Set timer T1 250us*400=1s, 00000,00001,00002BB.. 50000,00000,00001BBB... -
Page 31: Lab28. Timer2+V0
PIC EK Lab Operation Guide (for PIC18F4550) Lab28. Timer2+V0 a).Hardware Connection b). OBJECTIVES To understand the operation of timer. c). Experimental Principle and Results Set timer T2 250us*200=0.5s,V0 “ON” 0.5s V0 “OFF” 0.5s V0 “ON”BB.. -
Page 32: Lab29. Timer2+16Digit Segled Display
PIC EK Lab Operation Guide (for PIC18F4550) Lab29. Timer2+16digit segled Display a).Hardware Connection b). OBJECTIVES To understand the operation of timer. c). Experimental Principle and Results Set timer T2 250us*400=1s,0,1,2,3,B9,0,1,2B.. -
Page 33: Lab30. Timer2+Lcd1602 Display
PIC EK Lab Operation Guide (for PIC18F4550) Lab30. Timer2+LCD1602 Display a).Hardware Connection b). OBJECTIVES To understand the operation of timer. c). Experimental Principle and Results Set timer T2 250us*400=1s, 00000,00001,00002BB.. 50000,00000,00001BBB... -
Page 34: Lab31. Interrupt(Rb0)+Button1+Leds
PIC EK Lab Operation Guide (for PIC18F4550) Lab31. Interrupt(RB0)+BUTTON1+LEDs a).Hardware Connection b). OBJECTIVES To understand the operation of RB0 Interrupt. c). Experimental Principle and Results Press BUTTON1(RB0), LEDs will return to the initial state(restart). -
Page 35: Lab32. Interrupt(Rb0)+Button1+16Digit Segled Display
PIC EK Lab Operation Guide (for PIC18F4550) Lab32. Interrupt(RB0)+BUTTON1+16digit segled Display a).Hardware Connection b). OBJECTIVES To understand the operation of RB0 Interrupt. c). Experimental Principle and Results Press BUTTON1(RB0), the 1 digit segled will return to the initial state(restart),0++. -
Page 36: Lab33. Interrupt(Rb0)+Button1+46Digit Segled Display
PIC EK Lab Operation Guide (for PIC18F4550) Lab33. Interrupt(RB0)+BUTTON1+46digit segled Display a).Hardware Connection b). OBJECTIVES To understand the operation of RB0 Interrupt. c). Experimental Principle and Results Press BUTTON1(RB0), the 4 digit segled will return to the initial state(restart),0000++. -
Page 37: Lab34. Interrupt(Rb0)+Button1+Lcd1602
PIC EK Lab Operation Guide (for PIC18F4550) Lab34. Interrupt(RB0)+BUTTON1+LCD1602 a).Hardware Connection b). OBJECTIVES To understand the operation of RB0 Interrupt. c). Experimental Principle and Results Press BUTTON1(RB0), the LCD1602 will return to the initial state(restart),0000++. -
Page 38: Lab35. Ps2 Keyboard+ Lcd1602 Display
PIC EK Lab Operation Guide (for PIC18F4550) Lab35. PS2 KEYBOARD+ LCD1602 Display a).Hardware Connection b). OBJECTIVES To understand the operation of PS/2 Keyboard using a Microcontroller. c). Experimental Principle and Results Press a keys on the keyboard, the key value will be displayed on LCD1602. -
Page 39: Lab36. Watch Dog+ Lcd1602 Display
PIC EK Lab Operation Guide (for PIC18F4550) Lab36. Watch Dog+ LCD1602 Display a).Hardware Connection b. OBJECTIVES To understand the operation Watch Dog. c). Experimental Principle and Results... -
Page 40: Lab37. Internal Eeprom+ Lcd1602 Display
PIC EK Lab Operation Guide (for PIC18F4550) Lab37. Internal eeprom+ LCD1602 Display a).Hardware Connection b. OBJECTIVES To understand the operation of internal eeprom. c). Experimental Principle and Results 0x10, write 0x10,and display on LCD1602. Read the data X from address X+1, X+1 to Reset or re power the board. -
Page 41: Lab38. Pwm(Ccp1)+ V2
PIC EK Lab Operation Guide (for PIC18F4550) Lab38. PWM(CCP1)+ V2 a).Hardware Connection b). OBJECTIVES To understand the operation of PWM. c). Experimental Principle and Results Use different duty cycle to control the brightness of the LED.The V2 will be activated and act from Dim to Bright Bright to DimB.. -
Page 42: Lab39. Pwm(Ccp2)+ V1
PIC EK Lab Operation Guide (for PIC18F4550) Lab39. PWM(CCP2)+ V1 a).Hardware Connection b). OBJECTIVES To understand the operation of PWM. c). Experimental Principle and Results Use different duty cycle to control the brightness of the LED.The V1 will be activated and act from Dim to Bright Bright to DimB.. -
Page 43: Lab40. Ccp2+Remote+ Lcd1602 Display
PIC EK Lab Operation Guide (for PIC18F4550) Lab40. CCP2+Remote+ LCD1602 Display a).Hardware Connection b). OBJECTIVES To understand the operation of CCP and infrared Remote control c). Experimental Principle and Results After pressed on the infrared remote controller, the code signal is received by the infrared receiver on PIC6EK board, trigger an interrupt, Decoding based on pulse width, send the decoding value to LCD1602.Press the key on the Remoter, the key value will be displayed on the LCD1602. - Page 44 PIC EK Lab Operation Guide (for PIC18F4550)
-
Page 45: Lab41. Remote+ Speaker
PIC EK Lab Operation Guide (for PIC18F4550) Lab41. Remote+ SPEAKER a).Hardware Connection b. OBJECTIVES To understand the operation of infrared Remote control c). Experimental Principle and Results Press the any key on the Remoter, the speaker will be activated... -
Page 46: Lab42. Rb0+Remote+Lcd1602 Display
PIC EK Lab Operation Guide (for PIC18F4550) Lab42. RB0+Remote+LCD1602 Display a).Hardware Connection b). OBJECTIVES To understand the operation of RB0 external Interrupt and infrared Remote control c). Experimental Principle and Results After pressed on the infrared remote controller, the code signal is received by the infrared receiver on PIC6EK board, trigger an interrupt, Decoding based on pulse width, send the decoding value to LCD1602.Press the key on the Remoter, the key value will be displayed on the LCD1602. - Page 47 PIC EK Lab Operation Guide (for PIC18F4550)
-
Page 48: Lab43. An0(8Bit)+Lcd1602 Display
PIC EK Lab Operation Guide (for PIC18F4550) Lab43. AN0(8BIT)+LCD1602 Display a).Hardware Connection b). OBJECTIVES To understand the operation of 8,bit ADC. c). Experimental Principle and Results Adjust the potentiometer ADC_INPUT, The 8 bit AD0 ampling value will be displayed on the LCD1602,the range of 0 255. -
Page 49: Lab44. An1(8Bit)+Lcd1602 Display
PIC EK Lab Operation Guide (for PIC18F4550) Lab44. AN1(8BIT)+LCD1602 Display a).Hardware Connection b). OBJECTIVES To understand the operation of 8,bit ADC. c). Experimental Principle and Results Adjust the potentiometer ADC_INPUT, The 8 bit AD1 ampling value will be displayed on the LCD1602,the range of 0 255. -
Page 50: Lab45. An2(8Bit)+Lcd1602 Display
PIC EK Lab Operation Guide (for PIC18F4550) Lab45. AN2(8BIT)+LCD1602 Display a).Hardware Connection b). OBJECTIVES To understand the operation of 8,bit ADC. c). Experimental Principle and Results Adjust the potentiometer ADC_INPUT, The 8 bit AD2 ampling value will be displayed on the LCD1602,the range of 0 255. -
Page 51: Lab46. An3(8Bit)+Lcd1602 Display
PIC EK Lab Operation Guide (for PIC18F4550) Lab46. AN3(8BIT)+LCD1602 Display a).Hardware Connection b). OBJECTIVES To understand the operation of 8,bit ADC. c). Experimental Principle and Results Adjust the potentiometer ADC_INPUT, The 8 bit AD3 ampling value will be displayed on the LCD1602,the range of 0 255. -
Page 52: Lab47. An4(8Bit)+Lcd1602 Display
PIC EK Lab Operation Guide (for PIC18F4550) Lab47. AN4(8BIT)+LCD1602 Display a).Hardware Connection b). OBJECTIVES To understand the operation of 8,bit ADC. c). Experimental Principle and Results Adjust the potentiometer ADC_INPUT, The 8 bit AD4 ampling value will be displayed on the LCD1602,the range of 0 255. -
Page 53: Lab48. An5(8Bit)+Lcd1602 Display
PIC EK Lab Operation Guide (for PIC18F4550) Lab48. AN5(8BIT)+LCD1602 Display a).Hardware Connection b). OBJECTIVES To understand the operation of 8,bit ADC. c). Experimental Principle and Results Adjust the potentiometer ADC_INPUT, The 8 bit AD5 ampling value will be displayed on the LCD1602,the range of 0 255. -
Page 54: Lab49. An6(8Bit)+Lcd1602 Display
PIC EK Lab Operation Guide (for PIC18F4550) Lab49. AN6(8BIT)+LCD1602 Display a).Hardware Connection b). OBJECTIVES To understand the operation of 8,bit ADC. c). Experimental Principle and Results Adjust the potentiometer ADC_INPUT, The 8 bit AD6 ampling value will be displayed on the LCD1602,the range of 0 255. -
Page 55: Lab50. An7(8Bit)+Lcd1602 Display
PIC EK Lab Operation Guide (for PIC18F4550) Lab50. AN7(8BIT)+LCD1602 Display a).Hardware Connection b). OBJECTIVES To understand the operation of 8,bit ADC. c). Experimental Principle and Results Adjust the potentiometer ADC_INPUT, The 8 bit AD7 ampling value will be displayed on the LCD1602,the range of 0 255. -
Page 56: Lab51. An0(10Bit)+Lcd1602 Display
PIC EK Lab Operation Guide (for PIC18F4550) Lab51. AN0(10BIT)+LCD1602 Display a).Hardware Connection b). OBJECTIVES To understand the operation of 10,bit ADC. c). Experimental Principle and Results Adjust the potentiometer ADC_INPUT, The 10 bit AD0 ampling value will be displayed on the LCD1602,the range of 0 1023. -
Page 57: Lab52. An1(10Bit)+Lcd1602 Display
PIC EK Lab Operation Guide (for PIC18F4550) Lab52. AN1(10BIT)+LCD1602 Display a).Hardware Connection b). OBJECTIVES To understand the operation of 10,bit ADC. c). Experimental Principle and Results Adjust the potentiometer ADC_INPUT, The 10 bit AD1 ampling value will be displayed on the LCD1602,the range of 0 1023. -
Page 58: Lab53. An2(10Bit)+Lcd1602 Display
PIC EK Lab Operation Guide (for PIC18F4550) Lab53. AN2(10BIT)+LCD1602 Display a).Hardware Connection b). OBJECTIVES To understand the operation of 10,bit ADC. c). Experimental Principle and Results Adjust the potentiometer ADC_INPUT, The 10 bit AD2 ampling value will be displayed on the LCD1602,the range of 0 1023. -
Page 59: Lab54. An3(10Bit)+Lcd1602 Display
PIC EK Lab Operation Guide (for PIC18F4550) Lab54. AN3(10BIT)+LCD1602 Display a).Hardware Connection b). OBJECTIVES To understand the operation of 10,bit ADC. c). Experimental Principle and Results Adjust the potentiometer ADC_INPUT, The 10 bit AD3 ampling value will be displayed on the LCD1602,the range of 0 1023. -
Page 60: Lab55. An4(10Bit)+Lcd1602 Display
PIC EK Lab Operation Guide (for PIC18F4550) Lab55. AN4(10BIT)+LCD1602 Display a).Hardware Connection b). OBJECTIVES To understand the operation of 10,bit ADC. c). Experimental Principle and Results Adjust the potentiometer ADC_INPUT, The 10 bit AD4 ampling value will be displayed on the LCD1602,the range of 0 1023. -
Page 61: Lab56. An5(10Bit)+Lcd1602 Display
PIC EK Lab Operation Guide (for PIC18F4550) Lab56. AN5(10BIT)+LCD1602 Display a).Hardware Connection b). OBJECTIVES To understand the operation of 10,bit ADC. c). Experimental Principle and Results Adjust the potentiometer ADC_INPUT, The 10 bit AD5 ampling value will be displayed on the LCD1602,the range of 0 1023. -
Page 62: Lab57. An6(10Bit)+Lcd1602 Display
PIC EK Lab Operation Guide (for PIC18F4550) Lab57. AN6(10BIT)+LCD1602 Display a).Hardware Connection b). OBJECTIVES To understand the operation of 10,bit ADC. c). Experimental Principle and Results Adjust the potentiometer ADC_INPUT, The 10 bit AD6 ampling value will be displayed on the LCD1602,the range of 0 1023. -
Page 63: Lab58. An7(10Bit)+Lcd1602 Display
PIC EK Lab Operation Guide (for PIC18F4550) Lab58. AN7(10BIT)+LCD1602 Display a).Hardware Connection b). OBJECTIVES To understand the operation of 10,bit ADC. c). Experimental Principle and Results Adjust the potentiometer ADC_INPUT, The 10 bit AD7 ampling value will be displayed on the LCD1602,the range of 0 1023. -
Page 64: Lab59. Voltage Measuring (Using 86Bit An0) +Lcd1602 Display
PIC EK Lab Operation Guide (for PIC18F4550) Lab59. Voltage Measuring (Using 86BIT AN0) +LCD1602 Display a).Hardware Connection b). OBJECTIVES To understand the operation of 8,bit ADC. c). Experimental Principle and Results Adjust the potentiometer ADC_INPUT, The 8 bit AD0 ampling voltage will be displayed on the LCD1602. -
Page 65: Lab60. Voltage Measuring (Using 106Bit An0) +Lcd1602
PIC EK Lab Operation Guide (for PIC18F4550) Lab60. Voltage Measuring (Using 106BIT AN0) +LCD1602 a).Hardware Connection b). OBJECTIVES To understand the operation of 10,bit ADC. c). Experimental Principle and Results Adjust the potentiometer ADC_INPUT, The 10 bit AD0 ampling voltage will be displayed on the LCD1602. -
Page 66: Lab61. An06Ccp1+V2
PIC EK Lab Operation Guide (for PIC18F4550) Lab61. AN06CCP1+V2 a).Hardware Connection b). OBJECTIVES To understand the operation of CCP1 and AD0. c). Experimental Principle and Results Adjust the potentiometer ADC_INPUT, the LED brightness V2 will changing. -
Page 67: Lab62. An06Ccp2+V1
PIC EK Lab Operation Guide (for PIC18F4550) Lab62. AN06CCP2+V1 a).Hardware Connection b). OBJECTIVES To understand the operation of CCP2 and AD0. c). Experimental Principle and Results Adjust the potentiometer ADC_INPUT, the LED brightness V1 will changing. -
Page 68: Lab63. Ds18B20+Lcd1602 Display
PIC EK Lab Operation Guide (for PIC18F4550) Lab63. DS18B20+LCD1602 Display a).Hardware Connection b). OBJECTIVES To understand the operation of 1 wire device DS18B20. c). Experimental Principle and Results The current environment’s temperature value will be displayed on the LCD1602. -
Page 69: Lab64. 24Cxx+Lcd1602 Display
PIC EK Lab Operation Guide (for PIC18F4550) Lab64. 24CXX+LCD1602 Display a).Hardware Connection b). OBJECTIVES To understand the operation of external eeprom 24Cxx. c). Experimental Principle and Results Press the “Reset” KEY, the external eeprom will record the number of times. Press Reset Button or re power up the boardB.. -
Page 70: Lab65. Rtc Pcf8563+Lcd1602 Display
PIC EK Lab Operation Guide (for PIC18F4550) Lab65. RTC PCF8563+LCD1602 Display a).Hardware Connection b). OBJECTIVES To understand the operation of PCF8563 using IIC. c). Experimental Principle and Results The RTC will will be displayed on the LCD1602. -
Page 71: Lab66. Rs232+Lcd1602
PIC EK Lab Operation Guide (for PIC18F4550) Lab66. RS232+LCD1602 a).Hardware Connection b). OBJECTIVES To understand the operation of RS232. c). Experimental Principle and Results Send a data X from PC, the MCU will receive it and return X+1 to PC. All data will be displayed on the LCD1602. - Page 72 PIC EK Lab Operation Guide (for PIC18F4550) 3)Sent data “0x37” and received data “0x 38” will be displayed on LCD1602.
-
Page 73: Lab67. Lcd12864(With St7920 Controller)
PIC EK Lab Operation Guide (for PIC18F4550) Lab67. LCD12864(with st7920 controller) a).Hardware Connection b). OBJECTIVES To understand the operation of LCD12864. c). Experimental Principle and Results... -
Page 74: Contact Us
PIC EK Lab Operation Guide (for PIC18F4550) Contact Us Nanning LogiFind Tech CO.,LTD Room 606,B# of Nanguo Building,NO.16,Zhuxi South Road,Nanning,Guangxi,P.R.China Mobile:(0086)15978193886/TEL: (0086)0771 5677749 Skype:love100mhz E,MAIL:love100mhz@hotmail.com Website:www.LogiFind.com http://stores.ebay.com/logifind ebay Store 1: ebay Store 2: http://stores.ebay.com/kitfind ebay Store 3: http://stores.ebay.com/opendiy If you want to learn more about our products, please visit our website at: www.LogiFind.com... -
Page 75: Disclaimer
LogiFind. The manual PDF edition can be printed for private or local use, but not for distribution.