
Related Manuals for GE PowerVac GEK-86132G


Summary of Contents for GE PowerVac GEK-86132G
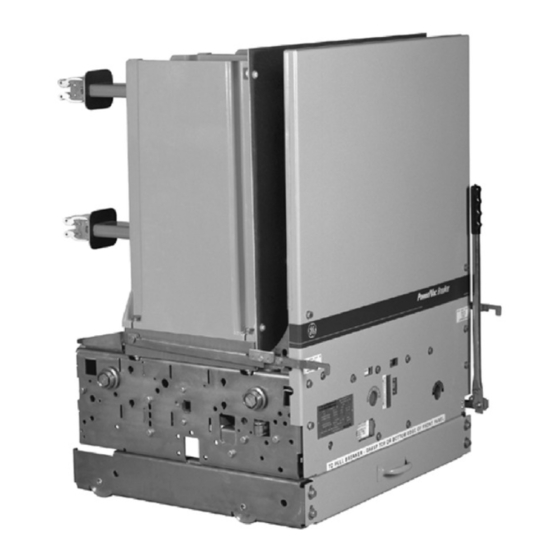
- Page 1 GEK-86132G Instructions PowerVac Vacuum Circuit Breaker ® with ML-18 or ML-18H Mechanism ________________________________________________________________________________...
-
Page 2: Table Of Contents
® PowerVac Vacuum Circuit Breaker With ML-18 or ML-18H Mechanism Table of Contents Description Page Description Page SECTION 1 Introduction SECTION 9 Electrical Checks ..........4 ........14 Safety ................4 Electrical Operation ............14 Maintenance ..............4 High Potential Test............14 9.2.1 Primary Circuit.............. - Page 3 List of Illustrations Figure Page Table Page ® Front view of PowerVac breaker with front cover ....6 Control Device and Voltage............. 18 Rating interference plate............6 Measurements ............... 36 Front view of PowerVac breaker without front cover ....8 Adjustments................
-
Page 4: Section 1 Introduction
POSITION. In the “CONNECTED” position with the interrupter contacts separated (breaker open), small It is the GE recommendation that, until the user has leakage current with high voltages can flow across the accumulated enough experience to select a test interval gap. -
Page 5: Section 2 Description
All such design Some users may require additional assistance from GE in the changes must be qualified to the original manufacturers planning and performance of maintenance. Local GE Sales specifications. -
Page 6: Section 4 Features
The breaker should be protected against condensation, at construction sites and has a very corrosive effect on preferably by storing it in a warm dry room of moderate many parts. temperature such as 40° - 100°F. Circuit breakers for Rollers, latches, etc., of the operating mechanism should outdoor metalclad switchgear should be stored in the be coated with 0282A2048P009 grease to prevent equipment only when power is available and the heaters... -
Page 7: Closing Spring Interlock
“DISCONNECT/TEST” and “CONNECT” position and upon 4.2.2 Closing spring interlock withdrawal from the metalclad compartment. This racking-track operated interlock (item 4, Figure 20) prevents racking into or out of the metalclad compartment a 4.2.4 Positive Interlock Bar breaker that has the closing spring charged. This action is This interlock will prevent the racking of a closed breaker into accomplished by a roller on the right side of the breaker. -
Page 8: Section 5 Operation
SECTION 5—Operation that a missing tooth is adjacent to the driving pawl and any 5.1—General motor over spin will not drive the ratchet wheel, thus preventing ® The PowerVac vacuum circuit breaker uses sealed vacuum damage to the system. power interrupters to establish and interrupt a primary circuit. Primary connections to the associated metalclad switchgear are When the spring is completely charged, the assembly is made by horizontal bars and disconnect fingers, electrically and... -
Page 9: Opening Operation
is closed, the charging motor is again energized and the closing open position operates the auxiliary switch (item 17, view D) spring is charged as described under “CLOSED SPRING which opens the trip coil circuit. If the closing spring has been CHARGING”. -
Page 10: Closing Spring Charging
spring and also partially close the vacuum interrupter contacts. Do not energize the secondary control circuit at this time. 7.4—Slow Closing To manually slow close the breaker contacts, install the closing spring gag, as described above, and push the manual close button (item 11, Figure 3). -
Page 11: Section 8 Dimensional Checks
SECTION 8—Dimensional Checks With the breaker closed and the gag plate installed, perform measure with a feeler gauge and record the distance the following dimensional checks. between the bellville washer and the trunion between the bell crank arms. 8.1—Primary Contact Erosion 8.4—Contact Gap In the closed position, the erosion disk (item 3, Figure 6) below the operating rod insulator is aligned with a reference... -
Page 12: Control Switch Adjustment
resistance is felt the “go” gauge must fit between the coil 8.5.1—Close Coil Plunger Gap housing and the surface of the red PVC cap covering the steel The close coil plunger gap and correct setting is shown in plunger base. With the armature in the same position the “no- Figure 9. -
Page 13: Il/Ms Switch Adjustment
be required, adjust the wiring terminals and set the plunger 8.6.3 IL/MS Switch adjustment dimension from .99 to 1.01 from its mounting bracket as The nut should be adjusted to fully extend the plunger. shown in Fig.11. AUXILIARY SWITCH LCS SWITCH IL/MS SWITCH NEGATIVE INTERLOCK... -
Page 14: Section 9 Electrical Checks
SECTION 9—Electrical Checks Electrical checking consists of electrical breaker operation 9.2.2 Secondary Circuit primary and secondary wiring high-potential testing (if ® required), primary circuit resistance (if required), PowerVac Prior to hipotting the breaker secondary circuit, disconnect interrupter high-potential testing, and insulation resistance to the motor leads and thread a wire connecting all secondary ground. -
Page 15: Insulation Test
If a failure of a vacuum bottle should incur during the integrity that may be retained. test, the test procedure should be reviewed and the pole piece cleaned. GE failure rate for vacuum bottles is 0.0007 per An acceptable AC high potential machine is available from: GE field unit. -
Page 16: Section 10 Checking And Installing Breakers
SECTION 10—Checking and Installing Breakers CAUTION: IN THE DISCONNECTED/TEST POSITION IF THE COMPARTMENT SECONDARY CON- TROL CIRCUITS ARE NOTE: When inserting the breaker and prior to racking, the ENERGIZED, THE FOLLOWING PROCEDURE MUST BE operator must ensure that both the right and left side racking FOLLOWED TO PREVENT ARCING AND BURNING OF THE arms are engaged on the drive blocks. -
Page 17: Section 11 Maintenance
SECTION 11—Maintenance deleterious effects of conditions such as: WARNING: BEFORE ANY MAINTENANCE WORK IS PERFORMED, MAKE CERTAIN THAT CONTROL Salt spray CIRCUITS ARE DE-ENERGIZED AND THAT THE BREAKER IS Changes in temperature that produce condensation REMOVED FROM THE METALCLAD UNIT. DO NOT WORK Conductive and/or abrasive dust ON THE BREAKER OR MECHANISM WHILE IT IS IN THE Damaging chemicals and fumes... -
Page 18: Lubrication
design of the interrupter operating rod insulator connection. 11.9—Recommended Maintenance They should be returned to the same location from which they The following operations should be performed at each were removed. maintenance check: Perform a visual inspection of the breaker. Check for 11.8—Lubrication loose or damaged parts. -
Page 19: Section 12 Timing
Optional travel recorders can be Trip-free operation maybe checked by applying a obtained through your local GE Sales Office by ordering part simultaneous close and trip signal, and a minimum re-close number 0144D1235G001. A typical travel trace and operation may be checked by tripping a charged breaker open interpretation are shown in Figure 12. -
Page 20: Section 13 Opening And Closing Speed
SECTION 13—Opening and Closing Speed The opening speed is modified by moving the opening spring The operating speeds are as follows: adjusting nut on the opening spring assemblies. A change in opening speed affects the closing speed. Reference Figure 13. Operation Operation Operation... -
Page 21: Section 14 Repair And Replacement
3/4 inch between ears. Retaining rings can be obtained from your local wrench. Screw down the lock nut and the operating rod GE Sales Office by ordering kit number 0282A2015G001. insulator until clear of interrupter rod. Remove the four 14.5—Control Switches bolts holding the pole assembly to the mechanism and remove the old pole assembly. -
Page 22: Closing Coil Replacement
Perform the operation in the following sequence: clamping bolt in operating link. Remove mounting hardware securing auxiliary switch to mechanism plate. Slide auxiliary Charge closing spring and install gag plate. switch and shaft out of operating link. Before removing any Depress the close and then the trip buttons. -
Page 23: Section 15 Renewal Parts
For prices or information on parts not listed in the A separate Renewal Parts Bulletin is available from your local Renewal Parts Bulletin, refer to the nearest GE office. GE Sales office by asking for GEK-90218. SECTION 16—Mechanical Adjustments The thread is 1/2-13 and each turn will give about 0.078... -
Page 24: Trip Coil Plunger
After adjustment of the left and right phase, remeasure the center phase. The center phase should not exceed 0.60 inch. If it does then readjust the left and right phases. 16.4—Trip Coil Plunger To adjust trip coil plunger gap (Figure 10), lift locktab away from adjusting nut. - Page 25 (A) Breaker open - spring discharged Output crank Jackshaft Trip latch Trip roller Closing roller Trip link 7a. Closing toggle 7b. Closing toggle Prop Closing cam Prop spring Linkage return spring NOTE: Shading indicates fixed pivots (B) Breaker open - spring charged Figure 16 Toggle linkage positions of the ML-18 mechanism (Viewed from right side) Continued on next page NOTE: Orientation of closing cam (item 9) in view A &...
- Page 26 (C) Breaker closed - spring discharged (D) Breaker closed - spring charged Figure 16 Continued...
- Page 27 Figure 17 Schematic of ML-18 mechanism (Continued on next page) 1. Close spring 12. Output crank 2. Cam shaft 13. Cross shaft 3. Manual charge 14. Bell cranks 4. Charging arms 15. Opening springs 5. Ratchet wheel 16. Wipe springs 6.
- Page 28 Figure 17 Continued...
- Page 29 Figure 18 Typical wiring diagram for ML-18 and ML-18H mechanisms...
- Page 30 Gag interlock angle Track rollers Positive interlock bar Closing spring discharge roller Negative interlock roller Rating interference plate Front cover Racking engagement lever Secondary coupler 10. Secondary disconnect handle ® Figure 19 PowerVac breaker left-front view ® Figure 20 PowerVac breaker right-rear view...
- Page 31 Figure 21 Trip coil and linkage 1. Trip coil 2. Closing spring 3. Trip linkage adjusting rod and nut...
- Page 32 Figure 22 Close coil linkage 1. Close linkage adjusting nut 2. Close linkage adjusting rod 3. Link to close latch actuator...
- Page 33 Figure 23 Bottom view of ML-18 mechanism 1. Closing spring 10. Pivot bolt 2. Opening springs 11. Negative Interlock bracket 3. Auxiliary switch 12. CHG motor control switch 4. Spring charging motor 13. LCS latch checking switch 5. Trip coil 14.
- Page 34 MID BAND RING (not on all Interrupters) Figure 24 Flex cable connections Figure 25 Negative interlock CAUTION This is a safety feature, not routine maintenance...
- Page 35 Figure 26 Close latch stop (on ML-18 Type -0, -1 & -2 only) CAUTION: This is a safety feature, not routine maintenance A change in the setting of the close latch stop bolt will affect the adjustment of the spring discharge interlock Figure 27 Spring wipe...
- Page 36 TABLE 2 MEASUREMENTS ITEM BREAKER CL. SPRING OP. SPRING MEASUREMENT CONTACT OPEN CHARGED DISCHARGED MEASURED BETWEEN EROSION WIPE CLOSED CHARGED CHARGED DISK AND WIPE INDICATOR CONTACT OPEN CHARGED DISCHARGED MEASURE THE TRAVEL OF THE CLOSED CHARGED CHARGED OPERATING ROD INSULATOR CONTACT MEASURE BETWEEN EROSION EROSION...
-
Page 37: Index
INDEX Primary Disconnect Fingers 21 Primary Insulation Parts 17 Adjustments (Table 3) 36 Front Cover 6 Auxiliary Switch Replacement 22 Installation 16 Insulation Tests 15 Interlocks 6, 7 Rating Interference Plate 6 Spring Discharge Interlock 6 Receiving 5 Close Coil Plunger 24 Closing Spring Gag Interlock 7 Recommended Maintenance 17, 18 Close Coil Plunger Gap 12, 24... - Page 38 Intentionally Left Blank...
-
Page 39: Trouble Reporting Form
USER REPORT NO. FAILURE REPORTING FORM FOR POWER CIRCUIT BREAKERS Check all appropriate blocks and provide information indicated. For major trouble provide additional information requested on back of page supplemented with additional pages if necessary. User Ident EQUIPMENT: Station____________________________ of Breaker___________________ Equipment Nameplate Mfgr._______________________________Type_______________ Serial #_____________________ Information... - Page 40 ADDITIONAL INFORMATION REQUIRED FOR ANALYSIS OF MAJOR OR SYSTEM RELATED FAILURE (USE ADDITIONAL PAGES AS NECESSARY) Single line station diagram showing involved breakers Operation and timing sequence (including all alarms) of this and related breakers from last time that conditions were definitely normal Line conditions before, during, and after failure Oscillograms - attach with explanation &...
- Page 41 Notes...
- Page 42 Notes...
- Page 43 Intentionally Left Blank...
- Page 44 Should further information be desired or should particular problems arise which are not covered sufficiently for the purchaser's purposes, the matter should be referred to the General Electric Company. GE Consumer & Industrial ______________________________________________________ General Electric Company...
Need help?
Do you have a question about the PowerVac GEK-86132G and is the answer not in the manual?
Questions and answers