
Related Manuals for Thermo Scientific Invitrogen Countess 3

Summary of Contents for Thermo Scientific Invitrogen Countess 3
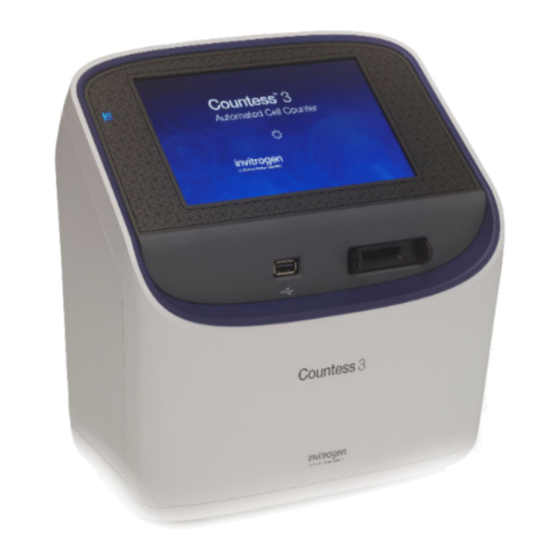
- Page 1 ™ Countess 3 Automated Cell Counter USER GUIDE Catalog Number AMQAX2000 Publication Number MAN0019566 Revision A.0 For Research Use Only. Not for use in diagnostic procedures.
- Page 2 Life Technologies Corporation | 22025 20th Ave SE Ste. 100 | Bothell, WA 98021 For descriptions of symbols on product labels or product documents, go to thermofisher.com/symbols-definition. The information in this guide is subject to change without notice. DISCLAIMER: TO THE EXTENT ALLOWED BY LAW, THERMO FISHER SCIENTIFIC INC. AND/OR ITS AFFILIATE(S) WILL NOT BE LIABLE FOR SPECIAL, INCIDENTAL, INDIRECT, PUNITIVE, MULTIPLE, OR CONSEQUENTIAL DAMAGES IN CONNECTION WITH OR ARISING FROM THIS DOCUMENT, INCLUDING YOUR USE OF IT.
-
Page 3: Table Of Contents
Contents ■ CHAPTER 1 Product information ..........6 Contents . - Page 4 Contents ■ CHAPTER 5 Cell count and cell viability assays ....... . 22 Count cells in brightfield .
- Page 5 Contents ■ CHAPTER 9 Maintenance ............39 Instrument care .
-
Page 6: Contents
Product information IMPORTANT! Before using this product, read and understand the information in the “Safety” appendix in this document. Contents ™ The Countess 3 Automated Cell Counter is shipped with the components listed below. Component Quantity ™ Countess 3 Automated Cell Counter 1 each Power cord with 4 adapters (for U.S./Canada/Taiwan/Japan, Europe, or UK) 1 each... -
Page 7: Upon Receiving The Instrument
Chapter 1 Product information Upon receiving the instrument Upon receiving the instrument Examine the instrument carefully for damage incurred during transit. Ensure that all parts of the instrument, including accessories listed above, are included with the product. Damage claims must be filed with the carrier;... -
Page 8: Chapter 2 Installation
Installation Operating environment • Place the instrument on a level surface away from vibrations emanating from other pieces of equipment. • Allow at least 5 cm (2 in) free space at the back of the instrument to allow for proper ventilation and prevent overheating of electronic components. -
Page 9: Sign In To The Instrument With A New Connect Account
Chapter 2 Installation Sign in to the instrument with a new Connect account 1. Turn on the instrument by flipping the power switch on the back of the instrument to the ON position. See “Exterior instrument parts” on page The instrument will walk you through an initial Out-of-Box Experience to set up the instrument for first use. - Page 10 Chapter 2 Installation Sign in to the instrument with a new Connect account 3. Choose a method to connect. • Press Mobile device. Scan the QR code on your instrument using the Instrument Connect app on your mobile device. Follow the steps shown on the page. •...
-
Page 11: Sign In To The Instrument With An Existing Connect Account
Chapter 2 Installation Sign in to the instrument with an existing Connect account Sign in to the instrument with an existing Connect account 1. Press Sign in from the Home screen. 2. Select your Username from the drop-down box. Enter your PIN. 3. -
Page 12: Chapter 3 Templates
Templates Templates screen Templates allows you to create and save customized templates. Each custom template defines the count parameters (size, brightness, and circularity) for a consistent and streamlined workflow. • Templates can be accessed from the Home and Gating screens. •... -
Page 13: Template Functions
Chapter 3 Templates Template functions Template functions The Actions screen allows you to edit, import, export, and delete templates. Edit can be used to modify the currently selected template, while Import, Export, and Delete can be used on multiple templates. Count parameters Count parameters are adjusted in the Edit template screen using the Gating sliders. -
Page 14: Load A Template
Chapter 3 Templates Load a template Load a template 1. Press Templates. 2. Press the desired template to select, then press Load. 3. To return to the previous screen without loading the new template, press Cancel or Back. The instrument will keep the saved template, but will return to the previous screen without loading Create a template 1. -
Page 15: Import A Template
Chapter 3 Templates Import a template 3. Press Edit. The Edit screen for the selected template opens. 4. Press the appropriate channel (BF or other dye) and edit the desired parameters (see “Count parameters” on page 13) to create a custom template. 5. -
Page 16: Export A Template
Chapter 3 Templates Export a template b. For USB, insert your USB drive into the slot on the front of the instrument. 5. Press Next. 6. Select one or more templates from the list. 7. Press Import. 8. Once complete, press Done. Export a template 1. - Page 17 Chapter 3 Templates Export a template b. For USB, insert your USB drive into the slot on the front of the instrument. 7. Press Export. 8. Once complete, press Done. Countess ™ 3 Automated Cell Counter User Guide...
-
Page 18: Chapter 4 Slide Preparation And Operation
Slide preparation and operation ™ ™ The Countess 3 and 3 FL cell counters accept disposable Countess Cell Counting Chamber Slides ™ and glass Countess Reusable Slides on interchangeable, slide-specific carriers. Recommendations To obtain the best results, follow these recommendations: •... - Page 19 Chapter 4 Slide preparation and operation Load Countess ™ Cell Counting Chamber Slide 3. Let the sample mixture settle in the chamber for 30 seconds, and then insert the slide into the slide adapter. You will hear a soft click once the slide is pushed in correctly. Note: The instrument reads one side of the slide at a time, so insert the sides appropriately.
-
Page 20: Load The Countess ™ Reusable Slide
Chapter 4 Slide preparation and operation Load the Countess ™ Reusable Slide ™ Load the Countess Reusable Slide 1. Before loading your sample into the Countess ™ Reusable Slide, place a cover slip on the counting chamber, making sure the cover slip is clean and free of grease. 2. - Page 21 Chapter 4 Slide preparation and operation Load the Countess ™ Reusable Slide 7. (Optional): To count the second sample present on the reusable slide, simply remove the slide from the holder, rotate, and reinsert the slide into the holder so that the second sample is aligned with the sample viewing hole.
-
Page 22: Chapter 5 Cell Count And Cell Viability Assays
Cell count and cell viability assays Count cells in brightfield Capture and count To bypass adjusting individual parameters before the brightfield count, you can select Rapid capture at the top of the Home screen. This will automatically set the parameters and perform a count as soon as the slide is inserted into the instrument. -
Page 23: Next Steps
Chapter 5 Cell count and cell viability assays Count cells in brightfield 6. Press Count. The instrument captures the image and displays the results (total concentration, percentage, and concentration of live and dead cells). For more information, see “View results” on page Next steps •... -
Page 24: View Results
Chapter 5 Cell count and cell viability assays View results View results Results screen for brightfield The Results screen for cell count and cell viability assays performed using the brightfield channel displays a composite image of the objects counted and the results of the cell count and cell viability calculations (total concentration, percentage and concentration of live and dead cells). -
Page 25: Identify Cells Counted In Cell Count And Cell Viability Assays
Chapter 5 Cell count and cell viability assays Identify objects counted Identify cells counted in cell count and cell viability assays On the Results screen, Live or Dead cells can be selected. 1. To view Live cells, press on the right panel. This marks all Live cells in green. 2. -
Page 26: Histogram Count Results
Chapter 5 Cell count and cell viability assays Histogram count results Histogram count results View histogram For cell count and cell viability assays performed in the brightfield channel, you can view the distribution of cells (live and/or dead) based on size in a graphical format. Note: You can view the histogram on the Results and Gating screens. -
Page 27: Gate Count Results
Chapter 5 Cell count and cell viability assays Save as new template Gate count results 1. On the Results screen, press Gating in the bottom right corner to open the Gating screen. 2. (Optional) Press Histogram to view the distribution of cells (live and/or dead) based on size as you gate the count results. -
Page 28: Chapter 6 Calculators
Calculators Pre-Dilution Calculator The Pre-Dilution Calculator is used to account for diluting a very concentrated sample before loading it into a sample slide for counting. For a brightfield count, this calculator also has an option to account for trypan blue use. 1. -
Page 29: Cell Splitting Calculator
Chapter 6 Calculators Cell Splitting Calculator 3. Using the keypad, enter the appropriate volumes and concentrations needed for your experiment. Press Enter after filling in both text boxes. 4. Press Calculate. The result will appear at the top of the Results screen. Cell Splitting Calculator The Cell Splitting Calculator is used to determine the amounts of sample and buffer needed to reach a desired concentration. - Page 30 Chapter 6 Calculators Cell Splitting Calculator 2. Click in one of the text fields. 3. Using the keypad, enter the appropriate volumes and concentrations needed for your experiment. Press Enter after filling in the text boxes. 4. The calculation will automatically update below the text fields. When completed, press Done. Countess ™...
-
Page 31: Chapter 7 Save Results
Save results Save screen ™ The Countess 3 and 3 FL cell counters allow you to save your data and images using a USB flash drive or link to a Thermo Fisher Connect account. To save your experiment, choose from the following options, in any combination: •... - Page 32 Chapter 7 Save results Save procedure 2. On the Results screen, press Save to view the Save screen. 3. To assign a name to your count, press the Sample name text field and enter the name. To enter symbols, press the symbol (@%&) key. To return to the keypad, press ABC. 4.
- Page 33 Chapter 7 Save results Save procedure 7. To choose a different file format, press the desired file type. Available options are JPEG, PNG, and TIFF. For CSV files, you can choose from the selections of Current Capture, Session, Yesterday, Past 3 days, Past 7 days, or All. After you make your selection, the instrument returns to the Save screen.
-
Page 34: Report
Chapter 7 Save results Report Report Report file The Report function allows you to save a printer-friendly report of the results, graphs, and images in PDF format. Report from brightfield count • The top section of the report contains a table with the results as displayed on the Results screen, showing the concentration of the sample and the percentage and number for the total, Live, and Dead channels. -
Page 35: Chapter 8 Settings Overview
Settings overview Settings screen To access the Settings screen, press Settings on the Home page. Settings allows you to perform various functions: • Perform software updates (see “Update the Countess ™ 3/3 FL Cell Counter software” on page • Set the date and time (see “Set the date and time” on page Connect to a wireless network Network connecting options... -
Page 36: Update The Countess ™ 3/3 Fl Cell Counter Software
Chapter 8 Settings overview Set the date and time Update the Countess ™ 3/3 FL Cell Counter software 1. Go to www.thermofisher.com/countessupdate, and download the latest Countess ™ 3/3 FL cell counter software version to your desktop. Note: The software update file has a version-specific name followed by the extension .exe (e.g., Countess_xxxx for software version 2.0.202). - Page 37 Chapter 8 Settings overview Set the date and time 3. Press Date and time. 4. Select the date format (Month/Day/Year, Day/Month/Year, or Year/Month/Day). 5. Press any Date text box (Month, Day, or Year) to open the Edit Date keypad. 6. Using the keypad, enter the date into the Month, Day, and Year text boxes. Press Enter. 7.
-
Page 38: Change Your Cloud Region
Chapter 8 Settings overview Change your cloud region 9. Select the time format you wish to use (12 Hours with AM or PM or 24 Hours. 10. Press Apply to set the Time and Date and return to the Instrument Settings screen. Press Cancel or Back to return to the Instrument Settings screen without saving your changes. -
Page 39: Chapter 9 Maintenance
Maintenance Instrument care General guidelines for care • Use the appropriate cleaning solutions for each component, as indicated in the cleaning procedures in “Clean the cell counter” on page • If liquid spills on the instrument, turn off the power immediately and wipe dry. Power supply Always use the correct power supply. -
Page 40: Clean The Cell Counter
Chapter 9 Maintenance Clean the cell counter Clean the cell counter Introduction ™ Clean the Countess Automated Cell Counter periodically to prevent buildup of dust and dirt that might reduce its performance and cause contamination. ™ CAUTION! To avoid electrical shock, always turn OFF the Countess Automated Cell Counter and unplug the power cord before cleaning or decontaminating the instrument. -
Page 41: Decontaminate The Instrument
Chapter 9 Maintenance Clean the cell counter Decontaminate the instrument • Wipe the instrument case of the Countess ™ Automated Cell Counter using a soft, lint-free cloth moistened with 70% alcohol. Wipe the instrument dry immediately after cleaning. • Avoid using a bleach solution, because it may leave a residue of bleach crystals on the instrument. •... -
Page 42: Appendix A Troubleshooting
Troubleshooting Observation Possible cause Recommended action Abnormally high percentage of Focus was not correct for the Ensure that the cells are focused correctly so dead cells or live cells counted sample. that live cells have bright centers and dead as dead cells are dark throughout. - Page 43 Appendix A Troubleshooting Clean the cell counter Observation Possible cause Recommended action Some cells appear in the image Brightfield or fluorescence For cell count and cell viability assays performed but are not included in the count settings were not optimal. in brightfield, adjust the size, brightness, and circularity gates for both live and dead cells to include all of the cells in the count.
- Page 44 Appendix A Troubleshooting Clean the cell counter Observation Possible cause Recommended action Variable counts when Slide was mishandled or viewed If you are counting replicates of the exact same performing replicate counts of differently multiple times. slide, visually inspect that all cells are counted the same slide correctly in the image.
-
Page 45: Appendix B Technical Specifications
Technical specifications Physical characteristics Instrument type Benchtop cell counter and suspension cell-based assay platform Instrument dimensions 9.6 (W) × 6.7 (D) × 9.4 inches (H) Weight 8 lbs Operating power 100–240 VAC, 1.0 A MAX Frequency 50/60 Hz Electrical input 12 VDC, 3 A Installation site Indoor use only, Class A Environments (i.e., non-residential or light industrial);... -
Page 46: Analysis Slide
Appendix B Technical specifications Analysis slide Analysis slide Material Poly(methyl methacrylate) (PMMA) Dimensions 25 mm (W) × 75 mm (D) × 1.7 mm (H) Chamber volume 10 µL Countess ™ 3 Automated Cell Counter User Guide... -
Page 47: Appendix C Countess ™ 3 Automated Cell Counter And Accessories
™ Countess 3 Automated Cell Counter and accessories ™ The following Countess 3 instruments and instrument accessories are available from Thermo Fisher Scientific. For more information, visit www.thermofisher.com or contact Technical Support. Product Quantity Cat. No. ™ Countess 3 Automated Cell 1 each AMQAF1000 Counter... - Page 48 Appendix C Countess ™ 3 Automated Cell Counter and accessories Accessory products (continued) Product Quantity Cat. No. Countess ™ Test Beads (1 × 10 beads/mL) 1 mL C10284 Trypan blue stain (0.4 %) 2 × 1 mL T10282 ™ Each box of Countess Cell Counting Chamber Slides contains 50 slides and 2 ×...
-
Page 49: Appendix D Csv File Format Definition
CSV file format definition Overview A comma-separated values (CSV) file stores tabular data (numbers and text) in plain-text form. Plain text means that the file is a sequence of characters, with no data that has to be interpreted as binary numbers. - Page 50 Appendix D CSV file format definition Overview (continued) Category Column Name Description BF light intensity Brightfield light intensity value from 0-100% BF LED intensity LED intensity in brightfield mode Live size min Minimum size of "live" cells in microns LIve size max Maximum size of "live"...
-
Page 51: Appendix E Safety
Safety WARNING! GENERAL SAFETY. Using this product in a manner not specified in the user documentation may result in personal injury or damage to the instrument or device. Ensure that anyone using this product has received instructions in general safety practices for laboratories and the safety information provided in this document. -
Page 52: Chemical Safety
Appendix E Safety Chemical safety Chemical safety WARNING! GENERAL CHEMICAL HANDLING. To minimize hazards, ensure laboratory personnel read and practice the general safety guidelines for chemical usage, storage, and waste provided below. Consult the relevant SDS for specific precautions and instructions: ·... -
Page 53: Biological Hazard Safety
Appendix E Safety Biological hazard safety Biological hazard safety WARNING! Potential Biohazard. Depending on the samples used on this instrument, the surface may be considered a biohazard. Use appropriate decontamination methods when working with biohazards. WARNING! BIOHAZARD. Biological samples such as tissues, body fluids, infectious agents, and blood of humans and other animals have the potential to transmit infectious diseases. -
Page 54: Appendix F Documentation And Support
Documentation and support Customer and technical support Visit thermofisher.com/support for the latest service and support information. • Worldwide contact telephone numbers • Product support information – Product FAQs – Software, patches, and updates – Training for many applications and instruments •... - Page 56 Countess III Automated Cell Counter_UG_MAN0019566-v1-GUID-E155E429- EBAF-4CA8-9CE4-7F018EEE3A3E-2020/09/08 22:16:53 en 21:11:12.359Z thermofisher.com/support | thermofisher.com/askaquestion thermofisher.com 9 November 2020...
Need help?
Do you have a question about the Invitrogen Countess 3 and is the answer not in the manual?
Questions and answers