Advertisement
Quick Links
MALONE
R
*ATTENTION CUSTOMERS*
Thank you for your recent purchase of a Malone trailer.
Please inspect all parts and hardware bags prior to assembly. If
you encounter any missing components please contact us at:
Email:technical@maloneautoracks.com
OR
Phone:(207) 774 - 9100 X215
Business Hours: Monday-Friday
9am- 5pm
Thank you from all of us at Malone
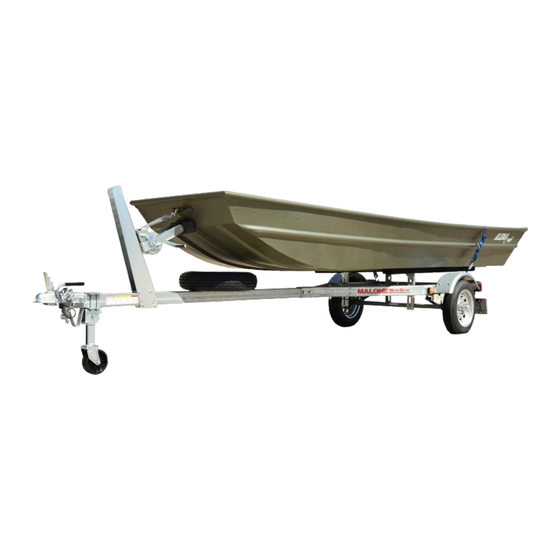
NOTE: BOAT NOT INCLUDED
MALONE
MPG461JB
R
Advertisement

Related Manuals for Malone JonBoat


Summary of Contents for Malone JonBoat
- Page 1 MALONE *ATTENTION CUSTOMERS* Thank you for your recent purchase of a Malone trailer. Please inspect all parts and hardware bags prior to assembly. If you encounter any missing components please contact us at: Email:technical@maloneautoracks.com Phone:(207) 774 - 9100 X215 Business Hours: Monday-Friday...
- Page 2 Thank you for your purchase of a Malone Product. In order to be eligible for the Malone Warranty program, we ask that you contact us by email, or online at one of the following: With-in 30 days of purchase. You can also mail this letter back to the address at the bottom.
- Page 3 MPG461JB Malone JonBoat Trailer Package Model MPG461JB Assembly Instructions Take a few moments and read through these instructions to familiarize yourself with the step by step assembly process before you begin turning wrenches. Unpack and sort the components into groups as shown in the following pages.
- Page 4 MPG461JB MPG460G Bag 11462 Group 1: Frame Components Group 2: Axle / Spring Components Bag 11476 MALONE technical@maloneautoracks.com technical@maloneautoracks.com 800-295-0042 ext 206 800-295-0042 ext. 215...
- Page 5 MPG460G Group 3: Lighting Components Bag 11468 Group 4: Bag 11464 Fender Components Group 5: Coupler Components Bag 11494 MALONE technical@maloneautoracks.com technical@maloneautoracks.com 800-295-0042 ext 206 800-295-0042 ext. 215...
- Page 6 *ATTENTION CUSTOMERS* Thank you for your recent purchase of a Malone trailer. Please inspect all parts and hardware bags prior to assembly. If you encounter any missing components please contact us at: Email:technical@maloneautoracks.com Phone:(207) 774 - 9100 X215 Business Hours: Monday-Friday...
- Page 7 3 holes on the left side. Insert the small wire protection grommet into the lower hole where shown, then push it all the way in till it snaps in place. MALONE technical@maloneautoracks.com technical@maloneautoracks.com 800-295-0042 ext 206 800-295-0042 ext. 215...
- Page 8 Assemble with washers and with the square holes in the frame. As- nuts on the inside. semble with washers and nuts on the 8. Hand tighten only. inside. Hand tighten only. MALONE technical@maloneautoracks.com technical@maloneautoracks.com technical@maloneautoracks.com 800-295-0042 ext 206 800-295-0042 ext. 215...
- Page 9 The large to the outside with the square holes in the frame rails. Hand Malone decal should be in the rear, tighten only. facing upside down. Bolt the frame rails to the cross members using 3/8” x 1”...
- Page 10 4 nuts as shown. Evenly tighten the 4 nuts. C) Tighten the two tongue bolts snug to the frame rails. DON”T overtighten, you will just crush the tongue. MALONE technical@maloneautoracks.com technical@maloneautoracks.com 800-295-0042 ext 206 800-295-0042 ext. 215...
- Page 11 Your frame assembly is now complete and should look like this. Your frame assembly is now complete and should look like this. MALONE technical@maloneautoracks.com technical@maloneautoracks.com 800-295-0042 ext 206 800-295-0042 ext. 215...
- Page 12 2. Spin the axle to fi nd the side with the spring centering holes. These holes mate with the spring center stud (shown to the left) MALONE technical@maloneautoracks.com technical@maloneautoracks.com 800-295-0042 ext 206 800-295-0042 ext. 215...
- Page 13 5. Lift the axle/spring assembly to the trailer frame and slide the slipper spring ends into the slipper spring brackets as shown. MALONE technical@maloneautoracks.com technical@maloneautoracks.com 800-295-0042 ext 206...
- Page 14 KNEES WHEN LIFTING. IF THE TRAILER IS TOO HEAVY FOR YOU TO FLIP SAFELY GET SOME FRIENDS TO ASSIST YOU. 12. Tighten the lug fi rmly to 75 to 85 foot pounds of torque. MALONE technical@maloneautoracks.com technical@maloneautoracks.com 800-295-0042 ext 206 800-295-0042 ext. 215...
- Page 15 Put the stud through the forward hole and the wire through the rear hole. Tuck the wire so the lamp sits fl ush on the frame. MALONE technical@maloneautoracks.com technical@maloneautoracks.com 800-295-0042 ext 206 800-295-0042 ext. 215...
- Page 16 Route the YELLOW/BROWN/WHITE along the drivers side as shown. 6. Next, we’ll route the wires through the cross members, One lead at a time, all the way through the trailer to the tail lights. MALONE technical@maloneautoracks.com 800-295-0042 ext. 215...
- Page 17 8. Use the clips provided to secure the wire to the inside of the frame channel as shown. NOTE: THESE UNUSED PLUGS ARE FOR AUXILIARY ACCESSORIES LIKE THE MALONE MPG543 CHARGING UNIT AND/OR MPG539 FLOOD LIGHT (NOT INCLUDED) MPG543 MPG539 MALONE technical@maloneautoracks.com...
- Page 18 Assemble with the nuts to the inside of the fenders as shown. No washers here. Fully tighten all 8 screws and nuts. Note: fenders are symmetrical and fi t on either side of the trailer. MALONE technical@maloneautoracks.com technical@maloneautoracks.com 800-295-0042 ext 206 800-295-0042 ext. 215...
- Page 19 NOTE you will use the center hole in the bracket and the outside two slotted holes in the frame. 5. Tighten bolts fully and repeat for other side. MALONE technical@maloneautoracks.com technical@maloneautoracks.com 800-295-0042 ext 206 800-295-0042 ext. 215...
- Page 20 2. Assemble the tongue skid and safety chain assembly with a 3/8” x 1-1/2” bolt as shown. Use washers above and below the chain ends. technical@maloneautoracks.com 800-295-0042 ext 206 MALONE technical@maloneautoracks.com technical@maloneautoracks.com 800-295-0042 ext 206 800-295-0042 ext. 215...
- Page 21 WILL PREVENT THE tongue as shown. Then COUPLER LATCH FROM tighten until the coupler FUNCTIONING PROPERLY. fi rmly grips the tongue. Don’t over tighten and crush the tongue. MALONE technical@maloneautoracks.com technical@maloneautoracks.com 800-295-0042 ext 206 800-295-0042 ext. 215...
- Page 22 MALONE MPG461JB (Group 7) Wheeled Kick Stand (1) Mounting Hardware To help with the installation place the trailer on the vehilces ball, or rest a milk crate underneath the the tongue. Next, Place the KickStand just behind the skid plate and mount the Jack Stand using the provided brackets and hardware.
- Page 23 3. Place the carpeted bunk in place and measure the over-hang past the swivel bracket and make the distance equal on both ends. 4. Use the wood screws and secure fully. Repeat for second bunk to complete installation. MALONE technical@maloneautoracks.com 800-295-0042 ext. 215...
- Page 24 9. Align with hole at chosen height on winch stand and add nylock nut. Insert another bolt through the bottom of the assembled bracket. Secure with nylock nut. 10. Half way between the trailer frame and the winch stand add the keel roller as shown. MALONE technical@maloneautoracks.com 800-295-0042 ext. 215...
- Page 25 Every boat scenario (hull shape) is different and these are general guide lines for installation. width maloneautoracks.com Visit us at for more fi ne products and accessories. NOTE: BOAT NOT INCLUDED technical@maloneautoracks.com 800-295-0042 ext 206 MALONE technical@maloneautoracks.com 800-295-0042 ext. 215...
- Page 26 MALONE Trailer Checklist & Maintenance Manual MPG525G XtraLight MPG460G MicroSport Base MPG460XT MicroSport MPG535G MegaSport MALONE...
- Page 28 Congratulations on your new Malone trailer! Take a couple minutes to read through this manual for commonly asked questions and some basic trailer maintenance that will ensure your trailer is preforming at its best. And as always please free to contact us with any questions you may have.
- Page 29 Some trailers now have an integrated ‘zerk’ on the backside of the hub. For the customer it means they can do periodic grease “freshenings” without disassembly of the hubs. Procedure for hub with integrated zerk fitting: Prepare a disposable container for the old grease to fall into. Remove the wheel and dust cap.
- Page 30 Adding your own Zerk fitting to avoid the previous steps above: You can add your own zerk fitting to the front of your hub by adding a Bearing Buddy ® Protector. Look for Model# 1980A and follow the manufactures instructions for use. Type of grease to use: Automotive bearing grease is OK in a pinch, marine wheel-bearing grease is better, and synthetic marine-wheel bearing grease is best.
- Page 31 Damaged Bearings? Replace them right away. Continued Procedure: Continued Install the grease seal. Don’t hammer directly on the seal. Use a block of wood. Take care to drive the seal in straight. Seal should be flush to the outside surface of the hub. Fill the hub, in behind the seal, with grease then slide the hub over the spindle being careful not to damage the seal against the spindle.
- Page 32 Tire PSI: a general PSI of This can vary depending on loads, roads and weather temps. For most, 35-40PSI should suffice. We may want to increase this PSI in very cold weather (freezing temps) to as much as 60PSI if were approaching the maximum load limits of trailer. Towing Speeds/Tips: The hubs on your trailer are already fulled packed with a high-speed, high-temp grease, safely tow at any posted speed limit.
- Page 33 Having a level trailer tongue will also insure your trailer tows properly. This figure can vary depending on the trailer in tow. Below are some figures to help. Measuring from the ground to the top of the ball. MPG525 XtraLight Trailer ~15.5”...
- Page 34 Electrical/Lighting Properly functioning trailer lights are a must for safety, so check your lights every time you use your trailer. Some problems, such as a burned-out bulb or a bad ground wire, can be a snap to fix—others can be a real pain to diagnose and repair. Wiring Diagram For Trailer Lights Trailer Wiring Assembly Note: Wiring colors are the same from incandescent lights and LED light kits.
- Page 35 Electrical/Lighting Continued We can’t cover every scenario in this manual but here’s some trouble shooting we can do to help get your trailer back in top condition. Having a helper standing behind the vehicle to see if the lights are working will make the process go a lot quicker..and save you from running back and forth.
- Page 36 If the original retail purchaser is unable to contact the Malone dealer, or the dealer is not able to remedy the defect, the original retail purchaser should contact Malone by email at technical@maloneautoracks.com.
Need help?
Do you have a question about the JonBoat and is the answer not in the manual?
Questions and answers