Franke Aquatimer A3000 Installation And Operating Instructions Manual
Hide thumbs
Also See for Aquatimer A3000:
- Installation and operating instructions manual (64 pages) ,
- Installation and operating instructions manual (56 pages)
Table of Contents
Advertisement
Available languages
Available languages
Quick Links
Installation and operating instructions
Notice de montage et de mise en service
Instrucciones de montaje y uso
EA-Nr.:
FAR-Best.-Nr.:
EA-Nr.:
FAR-Best.-Nr.:
7612982217722
2030019480
AT3O0039
7612982217883
2030019650
AT3O0041
Istruzioni per il montaggio e l'uso
Montage- en bedrijfsinstructies
DE
EN
FR
ES
IT
NL
Advertisement
Chapters
Table of Contents

Subscribe to Our Youtube Channel
Related Manuals for Franke Aquatimer A3000


Summary of Contents for Franke Aquatimer A3000
- Page 1 Installation and operating instructions Istruzioni per il montaggio e l’uso Notice de montage et de mise en service Montage- en bedrijfsinstructies Instrucciones de montaje y uso EA-Nr.: 7612982217722 FAR-Best.-Nr.: 2030019480 AT3O0039 EA-Nr.: 7612982217883 FAR-Best.-Nr.: 2030019650 AT3O0041...
- Page 2 ..................3 Please refer to the graphics in the German Installation and Operating Instructions..................17 Les graphiques sont disponibles dans la notice de montage et de mise en service allemande..................32 Por favor, consulte los gráficos en las instrucciones alemanas de montaje y uso.
-
Page 3: Table Of Contents
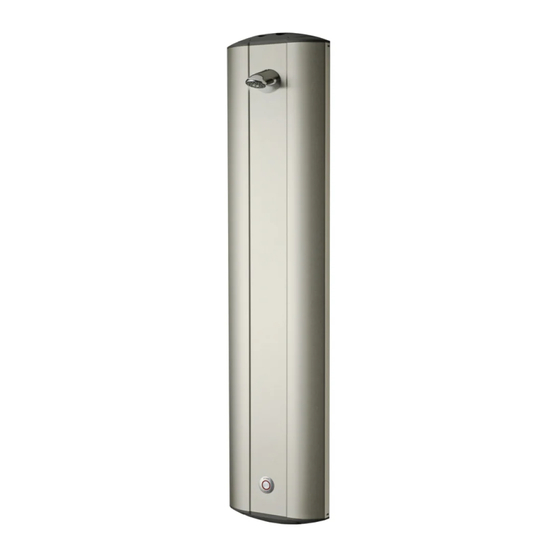
0English AQUATIMER - A3000 open shower panel made of stainless steel with 24 V DC thermostat AT3O0039 AT3O0041 ....with integrated tray for shower gel Please refer to the graphics in the German installation and operating instructions. Table of contents Abbreviations and units . -
Page 4: Abbreviations And Units
Earth leakage circuit breaker SELV Safety extra low voltage EA-Nr. European article number FAR-Best.-Nr. Franke Aquarotter order number Conversion 1 mm = 0.03937 inches 1 inch = 25.4 mm All length specifications in the graphics are in mm. Warning! Failure to observe can result in bodily injury or even death. -
Page 5: Application
Application AQUATIMER - A3000 open stainless steel shower panel for surface installation, with electronic timer, DN 15 thermostat battery and the option of prepaid water dispensing by AQUAPAY coin contactors and external controls, such as fitting adjustment and communication via ECC function controllers. For connection to hot and cold water supply. -
Page 6: Scope Of Delivery
Scope of delivery Quantity Name Stainless steel shower panel with: Thermostat, electronic module M1, piezo button, solenoid valve cartridge, lockable water volume regulators, connection pipes and AQUAJET Slimline shower head Wood screw, wall plug Suspension rail Connection bracket 0.15 l/s flow rate regulator Installation and operating instructions Dimensions 10. - Page 7 12.1 Only for water connection from the rear: Install the connection brackets (a) leak-tight. 12.2 Screw in the water volume regulators (b) leak-tight. 12.3 Align the water volume regulators so that the locking screw and operating element are freely accessible. 12.4 For a shower head height of 2.10 m to 2.30 m, mark drill holes for installation at a height (c) of 2.14 m to 2.34 m from the top of the finished floor.
-
Page 8: Function
Caution! Note the polarity. The same wire colour must be in the same wire guide for both union nuts. ☞ When tightening the union nut, the electrical contact and tension relief are created automatically. Special seals act as protection from dust and water. 12.19 Connect the wires between the electronic module, the solenoid valve cartridge and the piezo button. -
Page 9: Thermal Disinfection -Manual
14. Thermal disinfection -manual- This shower fitting offers thermal disinfection to reduce the risk of a legionella infection. The thermal disinfection process is triggered by overturning the thermostat. Warning! Personal protective measures (scald protection) must be implemented for the duration of the thermal disinfection. This might include cordoning off the shower facilities. -
Page 10: Thermal Disinfection -With Solenoid Valve Cartridge
15. Thermal disinfection -with solenoid valve cartridge- Caution! The directions in the Thermal Disinfection Planning Aid (01805618) must be adhered to. Required accessories ECC2 function controller (60 W) with Ethernet connection ..2000108123 Bypass solenoid valve cartridge ..2000100431 16. -
Page 11: Maintenance And Care
19. Maintenance and care The fitting must be checked and maintained at regular intervals, depending on the water quality and in accordance with the local conditions and rules and regulations applicable at the site. Maintain the following components: • Shower head (see Chapter 20.) •... -
Page 12: Replacing The Filters
21. Replacing the filters Water volume regulator filters 21.1 Remove the shower panel (see Chapter 19.). 21.2 Unscrew the locking screws (a) on the water volume regulators. 21.3 Replace the filters (b). ☞ Important! Note the installation position of the filters. 21.4 Reassemble in reverse order. -
Page 13: Replacing The Flow Rate Regulator
Caution! Apply the pliers to the area with the largest diameter (a) behind the small sprocket wheel. If the sprocket wheel is damaged, the temperature selector cannot be installed. 23.5 Use pliers to remove the thermal element (c). ☞ Important! Note the installation position of the thermal element. -
Page 14: Replacing The Non-Return Valve
25. Replacing the non-return valve Warning! All non-return valves must be replaced at the same time. Failure to observe this instruction can result in an increased germ load in the drinking water and thus pose a health or mortality risk. 25.1 Remove the shower panel (see Chapter 19.). -
Page 15: Troubleshooting
26. Troubleshooting Fault Cause Remedy ➯ Restore it Water does not flow – Water supply interrupted ➯ Open it – Water volume regulator closed ➯ Restore it – Power supply interrupted ➯ Replace it – Solenoid valve cartridge faulty ➯ Replace it –... -
Page 16: Spare Parts
27. Spare parts Accessories Order No. Description Order No. 1 Cover platelet ....2030031443 Temperature sensor red ...2000100972 2 Temperature selector. - Page 17 0Français Panneau de douche AQUATIMER - A3000 open en acier inoxydable avec thermostat, 24 V DC AT3O0039 AT3O0041 ....avec support pour gel de douche intégré Les graphiques figurent dans la notice de montage et de mise en service allemande. Table des matières Abréviations et unités .
-
Page 18: Abréviations Et Unités
Safety Extra Low Voltage, très basse tension de sécurité EA-Nr. Numéro d'article européen FAR-Best.-Nr. Référence de commande Franke Aquarotter Conversion 1 mm = 0,03937 pouce 1 pouce = 25,4 mm Sur les graphiques, toutes les longueurs sont exprimées en mm. -
Page 19: Application
• Les prescriptions techniques des sociétés de distribution d'eau et d'électricité doivent également être respectées. • En cas de distribution d'eau payante avec les monnayeurs AQUAPAY, suivre les consignes de raccordement de la notice d'utilisation du monnayeur AQUAPAY. • Effectuez tous les travaux quand le dispositif est hors tension. •... -
Page 20: Contenu De La Livraison
ID 06210 Contenu de la livraison Pièce Désignation Panneau de douche en acier inoxydable avec : thermostat, module électronique M1, bouton piézo, cartouche d'électrovanne, régulateurs du débit d'eau verrouillables, tuyaux de raccor- dement et pommeau de douche AQUAJET Slimline Vis à bois, cheville Barre de suspension Equerre d'assemblage Régulateur de débit 0,15 l/s... - Page 21 ☞ Pour protéger les carreaux en céramique lors du marquage et du perçage, utiliser une bande crêpée. Percer à faible vitesse. ☞ En fonction de la constitution du mur, il peut s'avérer nécessaire d'utiliser des chevilles spéciales (à fournir par le client). ☞...
- Page 22 Montage de la jonction électronique en T ☞ Important ! Les composants de la jonction électronique en T doivent impérativement être hors tension lors du montage. ☞ Câbles système recommandés voir Chapitre 27., accessoires. En cas d'utilisation d'autres câbles, tenir compte de la modification du code couleur. Le diamètre extérieur ne doit pas dépasser 7,5 mm.
-
Page 23: Fonctionnement
12.20 Uniquement dans le cas d'un raccordement à l'alimentation en eau par l'arrière : Procéder à présent aux étapes 12.22 à 12.24. 12.21 Accrocher le panneau de douche dans la barre de suspension et le visser à fond. 12.22 Etablir les raccordements à l'eau. 12.23 Ouvrir les régulateurs du débit avec une clé... -
Page 24: Désinfection Thermique -Manuelle
14. Désinfection thermique -manuelle- Ce type de robinetterie de douche permet d'effectuer une désinfection thermique afin de réduire le risque d'infection causée par les légionelles ! Le déclenchement de la désinfection thermique s'effectue en tournant le thermostat à fond. Avertissement ! Pendant la durée de la désinfection thermique, il convient de prendre des mesures de protection personnelle (protection contre les brûlures), par exemple barrer l'accès aux sanitaires. -
Page 25: Désinfection Thermique -Avec Cartouche D'électrovanne
15. Désinfection thermique -avec cartouche d'électrovanne- Attention ! Respecter les indications figurant dans l'aide à la conception Désinfection thermique (01805618). Accessoires requis Contrôleur de fonction ECC2 (60 W) avec connexion Ethernet ..2000108123 Cartouche d'électrovanne de dérivation2000100431 16. -
Page 26: Réglage Du Rinçage Hygiénique
18. Réglage du rinçage hygiénique Le rinçage hygiénique peut être réglé à l'aide d'un contrôleur de fonction ECC2 via une application Web. 19. Maintenance et entretien En fonction de la qualité de l'eau ainsi que des conditions et des dispositions locales, il convient de contrôler et d'entretenir la robinetterie à... -
Page 27: Nettoyage De La Base De La Pomme De Douche
20. Nettoyage de la base de la pomme de douche 20.1 Desserrer la vis avec une clé Allen. 20.2 Lever la base avec précaution à l'aide d'un tournevis. 20.3 Nettoyer la base de la pomme de douche. 20.4 L'assemblage s'effectue dans l'ordre inverse. 21. -
Page 28: Remplacer Le Thermocouple
23. Remplacer le thermocouple Avertissement ! Régler la protection contre les brûlures après avoir monté la robinetterie ou démonté le thermocouple. Le non-respect de cette consigne peut entraîner des brûlures. 23.1 Fermer les régulateurs du débit d'eau (voir Etape 12.23). 23.2 Déclencher la robinetterie. -
Page 29: Remplacement Des Clapets De Non-Retour
25. Remplacement des clapets de non-retour Avertissement ! Les clapets de non-retour doivent toujours être tous remplacés. Le non-respect de cette consigne peut entraîner une augmentation de la concent- ration en germes dans l'eau potable et générer un risque pour la santé, voire un danger de mort. -
Page 30: Dépannage
26. Dépannage Dysfonctionnement Cause Solution ➯ Rétablir L'eau ne coule pas – Alimentation en eau interrompue ➯ Ouvrir – Régulateur du débit d'eau fermé ➯ Rétablir – Alimentation en tension coupée ➯ Remplacer – Cartouche d'électrovanne défec- tueuse ➯ Remplacer –... -
Page 31: Pièces De Rechange
Dysfonctionnement Cause Solution ➯ Ouvrir Débit d'eau trop faible – Régulateur du débit d'eau pas complètement ouvert ➯ Nettoyer – Pommeau de douche entartré ➯ Nettoyer et – Filtres/clapets de non-retour encrassés remplacer le cas échéant ➯ Contrôler – Pression d'alimentation trop faible ➯... - Page 32 0Español Panel de ducha AQUATIMER - A3000 open de acero inoxidable con termostato, 24 V CC AT3O0039 AT3O0041 ....con compartimento integrado para gel Puede consultar los gráficos en las instrucciones de instalación y funcionamiento alemanas. Índice Abreviaturas y unidades ........33 Aclaración de símbolos .
-
Page 33: Abreviaturas Y Unidades
Safety Extra Low Voltage, baja tensión de protección EA-Nr. Número de artículo europeo FAR-Best.-Nr. Número de pedido de Franke Aquarotter Conversión 1 mm = 0,03937 pulgadas 1 pulgada = 25,4 mm Todos los datos de longitudes de los gráficos se indican en mm. -
Page 34: Indicaciones Importantes
Indicaciones importantes • La instalación, la puesta en servicio y el mantenimiento deben ser efectuados únicamente por personal especializado y según las instrucciones suministradas, de conformidad con la normativa local vigente y las buenas prácticas de ingeniería. • Cumplir las condiciones de conexión de la empresa de suministro de agua y energía local. -
Page 35: Datos Técnicos
Datos técnicos Presión mínima de flujo: 1,0 bar Presión de flujo 1–5 bar recomendada: Presión de servicio 10 bar máxima: Caudal de cálculo: 0,15 l/s 0,15 l/s Caudal volumétrico: Grifería: 0,20 l/s con presión de flujo de 3 bar Derivación: 0,06 l/s con presión de flujo de 3 bar Tiempo de flujo: 30 s... -
Page 36: Montaje
12. Montaje ¡Advertencia! Utilizar la grifería únicamente con las válvulas de retención y los filtros previstos. De lo contrario, el agua potable puede resultar contaminada por gérmenes, lo cual puede representar un peligro para la salud y la vida. ¡Advertencia! •... - Page 37 Montar el distribuidor eléctrico en T ☞ ¡Importante! Los componentes del distribuidor eléctrico en T solamente se pueden montar en un estado sin tensión. ☞ Cable del sistema recomendado véase el capítulo 27., Accesorios. En caso de utilizar otro cable como cable del sistema, tener en cuenta el código de colores modificado.
-
Page 38: Funcionamiento
12.20 Solo con toma de agua desde atrás: Dar preferencia a los pasos de trabajo 12.22 a 12.24. 12.21 Colgar el panel de ducha en el listón de sujeción y atornillarlo. 12.22 Establecer las conexiones de agua. 12.23 Abrir los reguladores del flujo de agua mediante una llave Allen. a: cerrado b: abierto 12.24 Comprobar la estanqueidad de las tomas de agua. -
Page 39: Desinfección Térmica -Con Cartucho De La Válvula Electromagnética
14.1 Colocar una tubería de ducha (p. ej. tubería de alta temperatura, d = 100 mm) bajo el cabezal de la ducha para desviar el agua caliente, con el fin de evitar escalda- duras durante la desinfección térmica. 14.2 Girar el mango selector de temperatura (a) hasta el tope del agua caliente. 14.3 Introducir el tope presionándolo con una llave Allen. -
Page 40: Ajuste De La Protección Contra Escaldaduras
16. Ajuste de la protección contra escaldaduras ¡Advertencia! Si la temperatura del suministro de agua caliente es superior a 45 °C, ajustar la protección contra escaldaduras. De lo contrario, se pueden producir lesiones por escaldadura. ☞ La protección contra escaldaduras (tope de agua caliente) está preajustada de fábrica a 38 °C. -
Page 41: Limpieza De La Parte Inferior Del Cabezal
Aplicar correctamente productos de limpieza adecuados y no agresivos para la grifería, y aclarar después del uso. No se deben utilizar limpiadores a alta presión para la limpieza. Retirar el panel de ducha Para algunos trabajos de mantenimiento es necesario retirar el panel de la ducha. ¡Atención! Evitar que el panel de ducha quede colgando de los tubos de conexión. -
Page 42: Cambio De Filtros
21. Cambio de filtros Filtros de los reguladores del flujo de agua 21.1 Retirar el panel de ducha (véase el capítulo 19.). 21.2 Desenroscar los tornillos de cierre (a) de los reguladores del flujo de agua. 21.3 Cambiar los filtros (b). ☞... -
Page 43: Cambio Del Regulador De Caudal De Agua
24. Cambio del regulador de caudal de agua 24.1 Desenroscar el tornillo prisionero con una llave Allen. 24.2 Retirar el cabezal de ducha del racor. 24.3 Retirar el anillo de retención con los alicates para anillos de retención correspon- dientes. 24.4 Extraer el regulador del caudal de agua con unos alicates planos. -
Page 44: Subsanación De Averías
26. Subsanación de averías Avería Causa Subsanación ➯ Restablecer El agua no fluye – Interrupción del suministro de agua ➯ Abrir – Regulador del flujo de agua cerrado ➯ Restablecer – Interrupción de la alimentación de tensión ➯ Cambiar – Cartucho de la válvula electromag- nética defectuoso ➯... -
Page 45: Piezas De Repuesto
Avería Causa Subsanación ➯ Abrir Escaso flujo de agua – Regulador del flujo de agua no abierto totalmente ➯ Limpiar – Cabezal con cal ➯ Limpiar o – Filtros/válvula de retención con suciedad cambiar si es necesario ➯ Comprobar – Presión de suministro demasiado baja ➯... - Page 46 0Italiano Pannello doccia AQUATIMER - A3000 open in acciaio inox con termostato, 24 V CC AT3O0039 AT3O0041 ....con ripiano integrato Per le figure consultare le istruzioni di montaggio e uso in tedesco. Indice Abbreviazioni e unità ........47 Spiegazione dei simboli .
-
Page 47: Abbreviazioni E Unità
Safety Extra Low Voltage, bassissima tensione di sicurezza EA-Nr. Codice articolo europeo FAR-Best.-Nr. Codice ordinazione Franke Aquarotter Conversione 1 mm = 0,03937 pollici 1 pollice = 25,4 mm Tutte le indicazioni di lunghezza nelle figure sono in mm. Spiegazione dei simboli Avvertenza! La mancata osservanza può... -
Page 48: Indicazioni Importanti
Indicazioni importanti • Per il montaggio, la messa in servizio e la manutenzione incaricare solo un tecnico specializzato, nel rispetto delle istruzioni fornite, delle norme di legge e delle norme tecniche riconosciute. • Attenersi alle disposizioni tecniche di allacciamento degli enti erogatori di acqua ed energia locali. -
Page 49: Dati Tecnici
Dati tecnici Pressione minima del flusso: 1,0 bar Pressione del flusso raccomandata: 1–5 bar Pressione d'esercizio massima: 10 bar Portata nominale: 0,15 l/s 0,15 l/s Portata in volume: Apparecchio: 0,20 l/s con pressione del flusso di 3 bar Bypass: 0,06 l/s con pressione del flusso di 3 bar Durata del flusso: 30 sec. -
Page 50: Montaggio
12. Montaggio Avvertenza! Utilizzare la rubinetteria solo con le valvole di non ritorno e i filtri previsti. La mancata osservanza può causare una maggiore formazione di germi nell'acqua potabile e conseguenti rischi per la salute o pericolo di morte. Avvertenza! •... - Page 51 Montaggio del distributore elettrico a T ☞ Importante! I componenti del distributore elettrico a T vanno montati solo in assenza di tensione. ☞ Cavo di sistema raccomandato vedere capitolo 27., accessori. Se come cavo di sistema si usano altri cavi, prestare attenzione ad eventuali cambi- amenti del codice cromatico.
-
Page 52: Funzionamento
13. Funzionamento Attivazione del flusso d'acqua 13.1 Premere il pulsante piezoelettrico. • L'acqua scorre. • Il flusso d'acqua si arresta automaticamente al termine della durata impostata del flusso o dopo aver premuto nuovamente il pulsante piezoelettrico. Durata del flusso La durata del flusso è impostata di fabbrica su 30 sec. È possibile cambiare durata del flusso a passi di 0,1 secondi da 1 a 6500 sec. -
Page 53: Disinfezione Termica -Con Cartuccia Della Valvola Elettromagnetica
14.3 Con la brugola premuta, girare la manopola di selezione della temperatura (a) oltre la battuta. 14.4 Premere la battuta con una brugola. 14.5 Girare la manopola di selezione della temperatura (a) in senso antiorario fino alla battuta. 14.6 Attivare l'apparecchio. 14.7 Misurare la temperatura dell'acqua calda. -
Page 54: Regolazione Della Protezione Dalle Scottature
16. Regolazione della protezione dalle scottature Avvertenza! Regolare la protezione dalle scottature quando la temperatura di erogazione dell'acqua calda supera i 45 °C. La mancata osservanza può comportare lesioni dovute a scottature. ☞ La protezione dalle scottature (arresto dell'acqua calda) è preimpostata di fabbrica su 38 °C. -
Page 55: Manutenzione E Cura
19. Manutenzione e cura Controllare e sottoporre a manutenzione l'apparecchio ad intervalli regolari, in funzione della qualità dell'acqua, delle caratteristiche locali e delle vigenti disposi- zioni locali. Sottoporre a manutenzione i seguenti componenti: • doccetta (vedere capitolo 20.) • filtri (vedere capitolo 21.) •... -
Page 56: Sostituzione Dei Filtri
21. Sostituzione dei filtri Filtri dei regolatori della quantità d'acqua 21.1 Togliere il pannello doccia (vedere capitolo 19.). 21.2 Svitare i tappi a vite (a) dei regolatori della quantità d'acqua. 21.3 Sostituire i filtri (b). ☞ Importante! Prestare attenzione alla posizione di montaggio dei filtri. 21.4 Il montaggio avviene in sequenza inversa. -
Page 57: Sostituzione Del Regolatore Di Portata
Attenzione! Applicare la pinza al diametro più grande (a) dietro la corona dentata piccola. Se si danneggia la corona dentata, non è possibile montare la manopola di selezione della temperatura. 23.5 Estrarre il termoelemento (c) con una pinza. ☞ Importante! Prestare attenzione alla posizione di montaggio del termoelemento. -
Page 58: Sostituzione Della Valvola Di Non Ritorno
25. Sostituzione della valvola di non ritorno Avvertenza! Sostituire sempre tutte le valvole di non ritorno. La mancata osservanza può causare una maggiore formazione di germi nell'acqua potabile e conseguenti rischi per la salute o pericolo di morte. 25.1 Togliere il pannello doccia (vedere capitolo 19.). - Page 59 Anomalia Causa Rimedio ➯ Sostituire L'acqua scorre ininter- – Cartuccia della valvola elettromag- rottamente netica guasta ➯ Pulire o eventu- – Il regolatore di portata nella doccetta è incrostato di calcare almente sosti- tuire ➯ Regolare Acqua troppo calda – Protezione dalle scottature regolata in modo scorretto ➯...
-
Page 60: Ricambi
27. Ricambi Accessori Cod. Art. Denominazione Cod. Art. Sensore di temperatura rosso ..2000100972 1 Piastrina di copertura ... . 2030003258 Sensore di temperatura blu ..2000100976 2 Manopola di selezione della temperatura . - Page 61 0Nederlands AQUATIMER - A3000 open douchepaneel van roestvrij staal met thermostaat, 24 V DC AT3O0039 AT3O0041 ....met geïntegreerde douchegelhouder De tekeningen kunt u vinden in de Duitstalige montage- en gebruikshandleiding. Inhoudsopgave Afkortingen en eenheden ....... 62 Verklaring van de symbolen .
-
Page 62: Afkortingen En Eenheden
SELV Safety Extra Low Voltage, zeer lage veiligheids- spanning EA-Nr. Europees artikelnummer FAR-Best.-Nr. Franke Aquarotter-bestelnummer Omrekening 1 mm = 0,03937 inch 1 inch = 25,4 mm Alle lengtegegevens in tekeningen zijn in mm aangegeven. Verklaring van de symbolen Waarschuwing! Veronachtzaming van de instructie kan levensgevaar of lichamelijk letsel veroorzaken. -
Page 63: Belangrijke Aanwijzingen
Belangrijke aanwijzingen • Montage, inbedrijfstelling en onderhoud mogen alleen door een vakman volgens de meegeleverde instructies en volgens de wettelijke voorschriften en erkende regels van de techniek worden uitgevoerd. • De technische voorwaarden voor aansluiting van de plaatselijke water- en energiebedrijven moeten in acht worden genomen. -
Page 64: Technische Gegevens
Technische gegevens Minimale dynamische druk: 1,0 bar Aanbevolen dynamische druk: 1-5 bar Maximale werkdruk: 10 bar Berekeningsdebiet: 0,15 l/s 0,15 l/s Volumestroom: Armatuur: 0,20 l/s bij 3 bar dynamische druk Omleiding: 0,06 l/s bij 3 bar dynamische druk Stromingstijd: 30 s Aansluitspanning: 24 V DC Opgenomen vermogen:... -
Page 65: Montage
12. Montage Waarschuwing! De armatuur alleen met keerkleppen en de daarvoor bedoelde zeven gebruiken. Veronachtzaming kan tot een hogere bacteriële belasting van het drinkwater leiden, de gezondheid schaden of levensgevaar veroorzaken. Waarschuwing! • Gebruik het product alleen met zeer lage veiligheidsspanning (SELV). De onder- delen mogen niet worden geaard. - Page 66 Elektrische T-verdeler monteren ☞ Belangrijk! De componenten van de elektrische T-verdeler mogen alleen in spanningsloze toestand worden gemonteerd. ☞ Aanbevolen systeemkabel siehe Kapitel 27., Toebehoren. Bij gebruik van andere kabels als systeemkabel op de gewijzigde kleurcode letten. De buitendiameter mag niet groter zijn dan 7,5 mm. 12.14 De ommanteling (d) van de systeemkabel verwijderen (ca.
-
Page 67: Werking
12.20 Alleen bij wateraansluiting aan de achterkant: Voer eerst stappen 12.22 t/m 12.24 uit. 12.21 Haak het douchepaneel in de inhaaklijst in en schroef het vast. 12.22 De wateraansluitingen realiseren. 12.23 De waterhoeveelheidreguleringen met een inbussleutel openen. a: gesloten b: open 12.24 De wateraansluitingen op lekkages controleren. -
Page 68: Thermische Desinfectie -Handmatig
14. Thermische desinfectie -handmatig- Bij deze douchearmatuur kan met de thermische desinfectie het risico op legionella- infectie worden verminderd! De thermische desinfectie wordt geactiveerd door de thermostaat door te draaien. Waarschuwing! Tijdens de thermische desinfectie moeten persoonlijke veiligheidsmaatregelen (bescherming tegen brandwonden) worden getroffen, bijv. blokkeren van de sanitaire ruimte. -
Page 69: Thermische Desinfectie -Met Magneetklepcartouche
15. Thermische desinfectie -met magneetklepcartouche- Attentie! De gegevens in de Planningshulp Thermische Desinfectie (01805618) in acht nemen. Benodigde toebehoren ECC2-functiecontroller (60 W) met ethernetaansluiting ..2000108123 Bypassmagneetklepcartouche ..2000100431 16. -
Page 70: Hygiënische Spoeling Instellen
18. Hygiënische spoeling instellen De hygiënische spoeling kan met een ECC2-functiecontroller via de onlinetoe- passing worden ingesteld. 19. Onderhoud en verzorging Afhankelijk van de waterkwaliteit, de plaatselijke omstandigheden en de plaatselijke voorschriften de armatuur regelmatig controleren en onderhouden. Onderhoud aan de volgende onderdelen: •... -
Page 71: Straalbodem Reinigen
20. Straalbodem reinigen 20.1 Draai de schroef met een inbussleutel los. 20.2 Til de straalbodem er voorzichtig met een schroevendraaier uit. 20.3 Reinig de straalbodem. 20.4 De montage gebeurt in omgekeerde volgorde. 21. Zeven vervangen Zeven bij waterhoeveelheidreguleringen 21.1 Haal het douchepaneel weg (siehe Kapitel 19.). -
Page 72: Thermo-Element Vervangen
23. Thermo-element vervangen Waarschuwing! Stel na montage van de armatuur of demontage van het thermo-element de bevei- liging tegen brandwonden in. Veronachtzaming kan lichamelijk letsel door brandwonden veroorzaken. 23.1 Sluit de waterhoeveelheidreguleringen (zie Arbeitsschritt 12.23). 23.2 Activeer het armatuur. 23.3 De keuzegreep voor temperatuur weghalen (siehe Kapitel 16.). -
Page 73: Keerkleppen Vervangen
25. Keerkleppen vervangen Waarschuwing! Alle keerkleppen moeten altijd worden vervangen. Veronachtzaming kan tot een hogere bacteriële belasting van het drinkwater leiden, de gezondheid schaden of levensgevaar veroorzaken. 25.1 Haal het douchepaneel weg (siehe Kapitel 19.). 25.2 De wartelmoeren (b) losdraaien. 25.3 Demonteer de slangen (a). -
Page 74: Verhelpen Van Storingen
26. Verhelpen van storingen Storing Oorzaak Remedie ➯ Herstellen Water stroomt niet – Watertoevoer onderbroken ➯ Openen – Waterhoeveelheidregulering gesloten ➯ Herstellen – Stroomvoorziening onderbroken ➯ Vervangen – Magneetklepcartouche defect ➯ Vervangen – Piëzo-druktoets defect ➯ Vervangen – Elektronische module defect ➯... -
Page 75: Reserveonderdelen
27. Reserveonderdelen Accessoires Bestelnr. Aanduiding Bestelnr. Temperatuursensor rood ..2000100972 1 Dekplaatjes ....2030031443 Temperatuursensor blauw . - Page 76 Phone +49 3378 818 530 Phone +41 62 787 3131 Italy Turkey Franke Water Systems AG Franke Mutfak ve Banyo Sistemleri 4663 Aarburg, Switzerland Sanayi ve Ticaret A.S. 41400 Gebze Kocaeli Numero Verde 800 789 233 Phone +90 262 644 6595...
Need help?
Do you have a question about the Aquatimer A3000 and is the answer not in the manual?
Questions and answers