Table of Contents
Advertisement
GENERAL INFORMATION
This manual applies to the following Mean Green Products equipment lines:
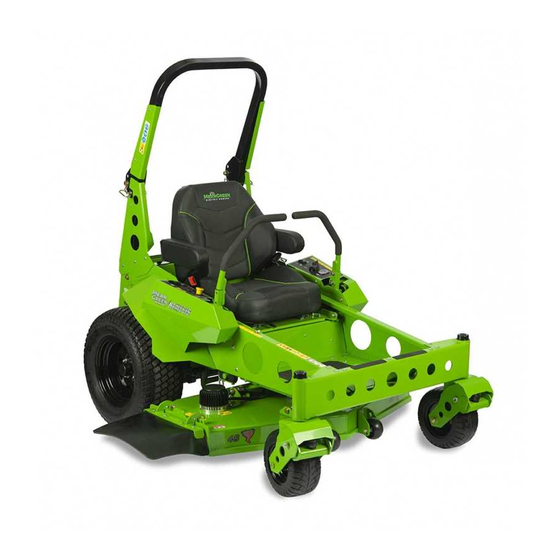
Mean Green Mowers – 48"- 52" Nemesis NXR Zero Turn Model
To the new owner
The purpose of this manual is to assist owners and operators in maintaining and operating the mower.
Please read it carefully; information and instructions furnished can help you achieve years of
dependable performance. It is the owner's responsibility to make certain that the operators and
mechanics read and understand this manual and all decals before operating this machine. It is also the
owner's responsibility to make certain that the operators and mechanics are qualified and physically
able individuals, properly trained in the operation of this equipment. All operators and mechanics must
become familiar with the safe operation of the equipment, operator controls and safety signs. Never let
children or untrained people operate or service the equipment. Local regulations may restrict the age of
the operator. The owner/user can prevent and is responsible for accidents or injuries occurring to
themselves, other people or property.
Using this manual
General operation, adjustment and maintenance guidance is outlined for both the experienced and
novice Mean Green Mower user. Operating conditions vary considerably and cannot all be addressed
individually. Through experience, however, operators should find no difficulty in developing good
operating skills suitable to most conditions. Directions used in this manual, for example RIGHT or
LEFT, refer to directions when seated on the mower/standing facing forward, unless otherwise stated.
Photographs and illustrations used were current at the time of printing, but subsequent production
changes may cause your machine to vary slightly in detail. Mean Green Products reserves the right to
redesign and change the machine as deemed necessary, without notification. If a change has been made
to your machine which is not reflected in this owner's manual, or the parts manual, see your Mean
Green Products dealer for current information and parts.
Warranty registration
The Owner must register the unit by filling out the Warranty Registration Form, provided in the
owner's packet, to validate your warranty protection. As the new equipment owner, you are
expected to see that this is done at the time of delivery. If using the Warranty Registration Form, it
MUST be completed and signed by the authorized dealer and original purchaser.
Be sure to register the mower plus each attachment that displays a model and serial identification
number plate with Mean Green Products.
IMPORTANT:
Any unauthorized modification, alteration, or use of non-approved attachments voids the
warranty and releases Mean Green Products from any liability arising from subsequent use of this
equipment.
Model and serial number
The mower serial number is found on the serial identification plate located on the right inside
wall of the electronics compartment of the mower under the seat. The model is the type of Mean
Green Mower purchased i.e. MGP-20, CXR-52, SK-48 etc. The serial numbers and model are required
on the Warranty Registration form. They will also assure you of the correct service parts when
replacement becomes necessary.
Parts and service
All warranty repair and service must be handled through an
authorized Mean Green Products dealer. Arrangements should be made
through your local service center.
1
Advertisement
Table of Contents

Related Manuals for Mean Green Products Nemesis NXR


Summary of Contents for Mean Green Products Nemesis NXR
- Page 1 Photographs and illustrations used were current at the time of printing, but subsequent production changes may cause your machine to vary slightly in detail. Mean Green Products reserves the right to redesign and change the machine as deemed necessary, without notification. If a change has been made to your machine which is not reflected in this owner’s manual, or the parts manual, see your Mean...
-
Page 2: Safety Precautions
SAFETY PRECAUTIONS This safety alert symbol is used to call attention to a message intended to provide a reasonable degree of PERSONAL SAFETY for operators and other persons during the normal operation and servicing of this equipment. DANGER – denotes immediate hazards which WILL result in severe personal injury or death. - Page 3 DANGER: Rotating blades! (fig.1A) * Keep shields and covers in place while machine is in operation * Keep hands, feet and clothing away from rotating blades Warning: Do Not Step! (fig.1B) *Fall Hazard* Keep Hands & Feet Away When Mower Is In Operation! Important: Deck Height Indicator (fig.1D) Shows mowing height level from 1”...
- Page 4 DANGER: Do Not Sit OR Ride! (fig.1E) Do Not Carry Passengers Ejection Warning! DANGER: Safety Precautions!: (fig.2A) (right side control panel) Read Owner’s Manual Before Operation Keep Hands, Feet, And Clothing Away From Rotating Blades Maintain Safe Distance From People And Pets Roll Over Warning –...
- Page 5 Important: Control Buttons – Right Side Control Panel (With Operator Seated) Fig.3A: Hi/Low Blades Switch: High Blade Mode is higher blade speed for cutting thicker grass. Low Blade Mode provides lower blade speed used for lower battery consumption on thinner dry grass areas. NOTE: Mowing time may be increased up to 15% when mowing in low blade mode when practical.
- Page 6 to run enabling driver to continue to drive unit. When the batteries discharge to this point they require recharging. The unit should immediately be returned to the battery charging area and the unit connected to the battery charger. Fig.4B: Master Power Ignition Switch – A two position switch Off and On.
- Page 7 GREEN Light: Operator can maintain speed and the cutting height is accurate for optimal performance. As the operator enters thicker grass, a light or lights (depending on which blade is cutting the thickest grass) will be YELLOW. If this occurs, it is best to slow speed and allow blades to return to GREEN.
-
Page 8: Operation
OPERATION Safe Operating Practices This product is capable of amputating hands and feet and throwing objects. Always follow all safety instructions to avoid serious injury or death. Operation Evaluate the terrain to determine what accessories and attachments are needed to properly and safely perform the job. -
Page 9: Using A Ramp
Slow down before turning. Turn the key to the OFF position, remove key and disconnect battery cables by pulling rearward on LARGE battery quick disconnect in battery box compartment before removing the grass catcher or unclogging the discharge chute. Never clear the discharge chute with the machine running. Turn the key to the OFF position, remove key, and make sure the blades have stopped before cleaning. - Page 10 Use a walk behind, push mower or hand-held trimmer on slopes and near drop-offs, retaining walls, drainage ditches, embankments and water to avoid machine rollover and serious injury or death. Do not mow on wet grass. Reduced traction could cause sliding and loss of steering control.
- Page 11 5. Slowly raise off of the seat. The deck blade system should stop. 6. If the deck blade system fails to stop when the operator is off of the seat and if the cause can not be determined, contact your Mean Green Products Dealer immediately.
-
Page 12: Driving The Mower
2. Push down on Deck Blades On/Off Switch to turn OFF the blades. 3. Push Drive Control Bars outward into the neutral slots. After 1.5 seconds brakes will engage. 4. Rotate key in Master Power Ignition Switch counter clockwise to the OFF position. NOTE: If operator leaves seat with key in the “ON”... - Page 13 SMOOTH TRAVEL The lever controls of the Zero Turn are responsive! The BEST method of handling the ground speed control levers is in three steps – as shown in Figure 11. FIRST place your hands onto the levers as shown. SECOND, to go forward gradually push the levers forward with your palms.
-
Page 14: Advanced Driving
Advanced Driving EXECUTING AN END OF ROW ZERO TURN Your Zero Turn Mower’s unique ability to turn in place allows you to turn around at the end of a cutting row rather than having to stop and Y-turn before starting a new row. - Page 15 WARNING: If you lose steering control while operating the machine on a slope, TURN BLADES OFF, return Steering Control Bars to NEUTRAL position for brakes to engage, and Turn key to OFF position. Call your Mean Green Products dealer to resolve problem before continuing to operate.
-
Page 16: Deck Cutting Height Adjustment
means using a pattern utilizing left turns because side discharge is to right. In any case, avoid throwing grass discharge onto un-mowed area because grass is then mowed “twice”. Mowing twice puts an unnecessary load on the unit and reduces mowing efficiency. When mowing a lawn for the first time cut grass slightly longer than normal to avoid scalping uneven terrain. - Page 17 IMPORTANT Emergency Drive Brake Release Levers READ!! If towing or manual pushing is needed: Located beneath the battery compartment and at the end of each drive motor - each levers (accessible from rear of mower) (Fig.6A) PUSH (2) each levers Outward and Down until secured completely into locking notch. (Fig.6B) PUSH (2) each levers UP and INWARD to re-engage drive levers.(Fig.6A) NOTE: Never drive mower with levers released.
-
Page 18: Maintenance And Adjustments
MAINTENANCE & ADJUSTMENTS Safe Servicing Practices This product is capable of amputating hands and feet and throwing objects. Always follow all safety instructions to avoid serious injury or death. NOTE: Always remove key and disconnect battery cables by pulling rearward on LARGE RED battery quick disconnect in battery box compartment when any maintenance... -
Page 19: Regular Maintenance
Failure to correctly torque these items may result in the loss of a wheel or blade, which can cause serious damage or personal injury. Call your Mean Green Products Dealer for assistance. Torque values are given below:... -
Page 20: Seat Adjustment
Ft.-lbs. Wheel (lug) Nuts………65-75 Blade spindle bolt bottom..30 Lug nuts only - It is recommended that these be checked after the first 2 hours of operation, initially, every 100 hours and following removal for repair or replacement. Tires It is important for level mowing that the rear tires have the same amount of air pressure. - Page 21 Seat Release Knob (Fig.5E) (located behind seat) 1. Remove knob by turning counterclockwise 2. Move seat completely REARWARD 3. Flip seat forward exposing electrical system of mower. IMPORTANT: NEVER expose electrical system to water when seat is in the UP position! Seat Note: Move seat completely...
-
Page 22: Mower Blade Maintenance
Mower blade maintenance Check the mower blades daily, they are the key to power efficiency and well-groomed turf. Keep them sharp, a dull blade will tear rather than cut the grass, leaving a brown ragged top on the grass within a few hours. A dull blade also requires more power. -
Page 23: Electrical System
IMPORTANT: Maintenance for the various electrical components found on the Mean Green Mower should only be performed by a Mean Green Products trained technician. IMPORTANT: When battery voltage becomes low, the mower blades will stop, although the drive motors will continue to run enabling driver to continue to drive unit. - Page 24 WARNING: Charge only with a Mean Green Mower approved charger. Do not use battery chargers other than those recommended by Mean Green Products. Incorrect battery charging will void warranty and can lead to equipment damage, fire, serious injury or death.
- Page 25 To use chargers at 35 amps, you will need to connect to a 220-240 Volt outlet. This will allow the LEMC3548 to charge your mower at 35 amp-48V (standard) and the LEMC4548 at 45 amp-48V (fast). The charger will sense the 220-240 voltage change automatically. This will require a certified electrician to change the 110-120V plug on the charger power cord to the 220-240V plug.
- Page 26 2) When unit is fully charged, the light will turn GREEN and cooling fan will turn off. To disconnect the charger, unplug charger from outlet FIRST then proceed to unplug the charger from mower charging port. IMPORTANT: IF YOU DO NOT UNPLUG CHARGER FROM WALL OUTLET FIRST, the GREEN light will stay on and the charger will not reset for the next charge.
- Page 27 Reconnecting the Batteries (Lithium Modules) 1. Open battery compartment and lift up battery cover to expose Lithium Modules. 2. Grasp BATTERY QUICK DISCONNECT LEVER (Fig.F) 3. Push lever INWARD into battery compartment wall plug until “CLICK” is heard with complete connection. 4.
-
Page 28: Troubleshooting
The blade(s) are not sharp. Sharpen the blades. A cutting blade(s) is/are bent. Install new cutting blade(s). The deck is not level - Contact your Mean Green Products Dealer. The underside of the deck is dirty. Clean the underside of the deck. -
Page 29: New Season Preparation
2. Check thoroughly for any worn or damaged parts that need replacing and order them from your dealer. 3. Thoroughly lubricate wheel bearings, according to lubrication instructions. 4. Fully charge batteries. 5. Do not deflate tires. 6. The mower should be stored in a well ventilated, clean and dry place as the battery charger cannot be used in a wet environment. - Page 30 Lithium Energy Module Maintenance and Care IMPORTANT: In order to prolong the battery module cycle life and make sure the module stays in good condition, please read the following instructions: 1. Whenever a battery pack is fully discharged and turned off, DO NOT USE IT AGAIN until it is recharged.
Need help?
Do you have a question about the Nemesis NXR and is the answer not in the manual?
Questions and answers