Table of Contents
Advertisement
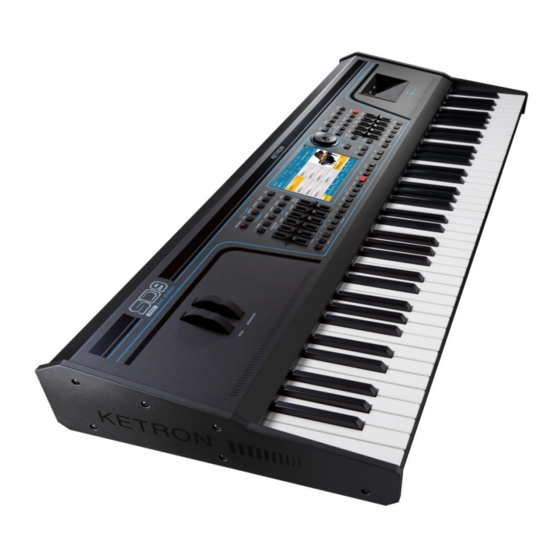
Welcome!
Thank you for purchasing the Ketron SD9 Multimedia Player! This "Instruction Manual" describes what you need to
do to use your Multimedia Keyboard immediately. Please read this Instruction Manual carefully to ensure that you
obtain the best performance from your instrument either live or in a recording studio.
SD9 revolutionises the way you use this instrument thanks to its new wide colour Touch Screen. Most of the
functions may in fact be enabled with just a "touch" of the keys on the screen.
https://www.ketron.it/images/ketron/Manuali_HTML/SD9/english/01_benvenuti.html[12/05/2020 15:50:26]
Welcome!
Advertisement
Table of Contents

Related Manuals for KETRON SD9


Summary of Contents for KETRON SD9
- Page 1 SD9 revolutionises the way you use this instrument thanks to its new wide colour Touch Screen. Most of the functions may in fact be enabled with just a “touch” of the keys on the screen.
-
Page 2: Specifications
Echo Delay, Tap Delay, Equalizer, Distorsion, Amp simulator, Compressor, Filter. 64 Insert EFX Chains (10 User programmable ). Recording : HD Recording. 1 Stereo track. Loop. Audio Edit with Cut, Normalize. Midi Recording with Phrase and Song. User Memory : up to 400 MB free User programmable. https://www.ketron.it/images/ketron/Manuali_HTML/SD9/english/00_specifications.html[12/05/2020 15:52:50]... - Page 3 • If necessary, disconnect the instrument using the power supply switch on the back panel. When positioning the instrument, always ensure that this switch is easy to reach. • Take the instrument to a service centre if: a. the power supply cable or plug are damaged. https://www.ketron.it/images/ketron/Manuali_HTML/SD9/english/00_specifications.html[12/05/2020 15:52:50]...
- Page 4 The instrument should never be subjected to strong shocks. CURRENT ADAPTERS When connecting this instrument to the mains socket, use only the KETRON current adapter supplied with the instrument. The use of different current adapters may damage the power supply circuits of the instrument. It is therefore of fundamental importance to use only an original adapter, requesting the correct model when ordering a new adapter.
- Page 5 Unauthorised disposal of the product by the user entails the application of administrative penalties. https://www.ketron.it/images/ketron/Manuali_HTML/SD9/english/00_specifications.html[12/05/2020 15:52:50]...
- Page 6 VIDEO DVI Digital video interface for connection to an external video monitor. USB DEVICE This is used to connect a computer USB device or other devices to manage the SD9 as an external removable unit. FOOTSWITCH Standard multi-pin plug for connection of an optional pedal to control a number of internal functions.
- Page 7 Standard mono jack for connection of auxiliary other instrument such Keyboard, Expander, Guitar or Dynamic Microphone On the right of the instrument you will find 3 USB Hosts for connection to external USB devices such as Pen drives, HD etc. https://www.ketron.it/images/ketron/Manuali_HTML/SD9/english/02_connessioni.html[12/05/2020 15:54:12]...
- Page 8 NEXT To pass immediately to the next song, select and the next song will start to play at the end of the current beat of the file you are playing. PLAYER GM https://www.ketron.it/images/ketron/Manuali_HTML/SD9/english/49_syncnext.html[12/05/2020 15:54:52]...
- Page 9 The Introduction screen (HOME) is displayed automatically when you turn on the instrument and provides access to the main functions, such as: SOUND FAMILY SELECTION Press this icon to select page of the families of sound that will appear in this way: https://www.ketron.it/images/ketron/Manuali_HTML/SD9/english/04_intro.html[12/05/2020 15:55:34]...
- Page 10 Intro SINGLE STYLE SELECTION Press this icon to select different Styles from selected family Style: STYLE FAMILY SELECTION Press this icon to select Styles groups page as shown in the image below: MENU CONTROL AREA https://www.ketron.it/images/ketron/Manuali_HTML/SD9/english/04_intro.html[12/05/2020 15:55:34]...
- Page 11 Intro In this area you can access to different menu on the Arranger Menu which will be explained in detail on the ARRANGER dedicated section . https://www.ketron.it/images/ketron/Manuali_HTML/SD9/english/04_intro.html[12/05/2020 15:55:34]...
- Page 12 3. The Exit key to escape from folders and back root. 4. The Enter key to enter the folder selected rather than double clicking on the Touch screen. When you touch the file, it will be selected and highlighted in orange and loaded in player 1. https://www.ketron.it/images/ketron/Manuali_HTML/SD9/english/05_player.html[12/05/2020 15:55:58]...
- Page 13 Player SD9 is now ready for you to play! Press START/STOP to start reproduction or touch the filename selected a second time or press Enter. When the file is in play, the red light of the START /STOP key lights up.
- Page 14 .txt file in Player mode, then press Style and save the Registration. In this way the .txt file will be stored in Registration so that if it is accidentally deleted from the disk, the lyrics file will in any case be saved in Registration. The bottom bar allows you to enter other functions, such as the following: https://www.ketron.it/images/ketron/Manuali_HTML/SD9/english/05_player.html[12/05/2020 15:55:58]...
- Page 15 These functions may be selected while the song is playing and the lyrics are scrolling on the screen, or even on Stop mode. The default screen displays the following: https://www.ketron.it/images/ketron/Manuali_HTML/SD9/english/05_player.html[12/05/2020 15:55:58]...
- Page 16 : Restores the original settings of the colours and Karaoke desk, if these have been modified. If a standard Midi file or ".kar" (karaoke) file is loaded on player, all the 16 Midi tracks of the song may be https://www.ketron.it/images/ketron/Manuali_HTML/SD9/english/05_player.html[12/05/2020 15:55:58]...
- Page 17 MEDIA : Use this key to access the internal Hard Disk and all the external mass memories connected. MENU : Allows you to access the full settings menu of SD9. JUKE BOX Finally, files may be replayed in standard modes by pressing the relevant keys on the...
- Page 18 Style Style SD9 is also an Arranger and therefore features an entire section dedicated to automatic accompaniments called Styles. Here will be treated menus and dedicated keys that affect both the Style that the Arranger Menu Each Style has: Two tracks for drums (AUDIO DRUM) and percussions on Midi channels 9 and 10.
- Page 19 On the right are displayed Styles belonging to the selected category. 8 BEAT 1 is selected as default. Down here the direct access buttons for the Style and Arranger management plus and other functions available also from the Touch screen display: https://www.ketron.it/images/ketron/Manuali_HTML/SD9/english/06_style.html[12/05/2020 15:56:20]...
- Page 20 : (Delaying): Decreases the speed of the file you are playing at steps of 5 BPM : (Tapping): To synchronise the time with the “tapping” of your fingers. EDIT -DRUM ON -RESTYLE RESTYLE : These button allow to go thru EDIT menu of https://www.ketron.it/images/ketron/Manuali_HTML/SD9/english/06_style.html[12/05/2020 15:56:20]...
- Page 21 On the panel are also functions associated with the management of the Style and / or the Arranger: DRUMS BASS On the front panel of SD9 are always active cursors to adjust the volume of part , harmonic CHORD LOWER...
- Page 22 Style https://www.ketron.it/images/ketron/Manuali_HTML/SD9/english/06_style.html[12/05/2020 15:56:20]...
-
Page 23: Voice Mode
The instrument can overlap up to 4 sounds over the full range of the keyboard or in the Upper section on the right of the split point. The fourth layer is called 2nd Voice and may be enabled or disabled quickly directly from the main screen of Voice mode, by selecting the virtual key https://www.ketron.it/images/ketron/Manuali_HTML/SD9/english/07_modo_voice.html[12/05/2020 15:56:51]... - Page 24 Voice Mode or directly from Touch Screen view: The Voices that eventually you are going to change will be saved in the USER location to avoid mistakenly overwrite the original Voices (Factory Set) Front Panel https://www.ketron.it/images/ketron/Manuali_HTML/SD9/english/07_modo_voice.html[12/05/2020 15:56:51]...
- Page 25 SSD of the instrument and the internal optional Hard Disk that may be installed in the SD9 as well as any devices connected to the instrument via the USB Host ports, such as a Pen Drive.
- Page 26 : Carries out another scan of all the disks and USB peripherals connected. If the machine does not automatically read a connected USB pen drive, this function restarts detection of the peripherals and devices connected. MENU PLAYER GM Front Panel https://www.ketron.it/images/ketron/Manuali_HTML/SD9/english/08_media.html[12/05/2020 15:57:16]...
-
Page 27: Play Modes
AUDIO / SAMPLE : Opens the page to edit audio files in.wav format. and SAMPLE EDITOR MANUAL : Instruction Manual of the SD9. PREFERENCES : Opens a page on which a number of system preferences may be set, such as the language, date etc. - Page 28 Menu Front Panel PLAYER GM https://www.ketron.it/images/ketron/Manuali_HTML/SD9/english/09_menu.html[12/05/2020 15:57:35]...
- Page 29 This menu allows the management in real time by slider dedicated to some special parameters suitable on selected sections. The sliders are with ther placed on the right side of the SD9 display (Q, FC ). Press the FILTER tab to enables the function (mode ON) .that appears on the main screen in the icon overlay which usually represents the...
- Page 30 In Filter mode the modulation wheel controls the FC slider. If the LFO rate (Slider 1) falls below the minimum value (10) it will automatically be set as Tap Lfo mode, adjusting to the BPM of the style. https://www.ketron.it/images/ketron/Manuali_HTML/SD9/english/10_filter.html[12/05/2020 15:58:00]...
- Page 31 Live FX Info: FILTER tab when On / Off is switching reload last Edited parameter. https://www.ketron.it/images/ketron/Manuali_HTML/SD9/english/10_filter.html[12/05/2020 15:58:00]...
- Page 32 Registration of your choice with the Touch Screen on the following window that is displayed, or select the Numeric Pad and enter the location number of the Registration you wish to load. REGISTRATION To save your Registration simply press the Save key on the panel and then select the dialogue window displayed. https://www.ketron.it/images/ketron/Manuali_HTML/SD9/english/41_registration.html[12/05/2020 15:58:25]...
-
Page 33: Registration Setup
, select picture (or Pdf), than press tab. Select your own rhythm .Press REGISTRATION tab and save your Registration.. In case you would add audio file or midi on this registration follows this procedure : 1. Select file: https://www.ketron.it/images/ketron/Manuali_HTML/SD9/english/41_registration.html[12/05/2020 15:58:25]... -
Page 34: Press Save
Registration SAVE REGISTRATION. 2. Press than select Save As 3.Confirm and save with a name ( https://www.ketron.it/images/ketron/Manuali_HTML/SD9/english/41_registration.html[12/05/2020 15:58:25]... - Page 35 Registration ENTER 4. For example "MP3 to reg". Complete operation by pressing REGISTRATION 5. Recall this file from menu. Info: In order to play immediately a file set on Registration menu function "Player Autoplay" from REGS.SET UP/PLAY MODE. https://www.ketron.it/images/ketron/Manuali_HTML/SD9/english/41_registration.html[12/05/2020 15:58:25]...
- Page 36 First, we need to have a TXT (can contain lyric or any text information) inside the SD 9 memory, ( I.e.. prova.txt) Now select the style we want to store in the Registration with the desired txt.(Es Swing Pop). https://www.ketron.it/images/ketron/Manuali_HTML/SD9/english/41_registration.html[12/05/2020 15:58:25]...
- Page 37 Registration Press STYLE again to enter on MEDIA mode and choose the Txt you want Once selected, press ENTER to display the TXT. https://www.ketron.it/images/ketron/Manuali_HTML/SD9/english/41_registration.html[12/05/2020 15:58:25]...
- Page 38 At this point, press the REGISTRATION button (the text will be hidden). Press the LYRICS button to display the TXT again. Press the SAVE tab Then type in a desiderated title and STORE it as a New REGISTRATION. https://www.ketron.it/images/ketron/Manuali_HTML/SD9/english/41_registration.html[12/05/2020 15:58:25]...
- Page 39 (Midi Mp3 wave) most used in the performance. This will avoid going out and entering different Menus (such as Player and Registration) and having your most important files at your fingertips Pressing the PLAYBOX tab the display shows the following: https://www.ketron.it/images/ketron/Manuali_HTML/SD9/english/41_registration.html[12/05/2020 15:58:25]...
- Page 40 PLAYBOX (root) that contains the 4 folders Playbox 1,2,3,4 Through the menu DISK you can copy your files (or import them from another device) and allocate them in the 4 folders Playbox 1,2,3,4 available. Front Panel https://www.ketron.it/images/ketron/Manuali_HTML/SD9/english/41_registration.html[12/05/2020 15:58:25]...
-
Page 41: Voice Setting
Select as usual by first selecting the category EXIT and then the sound to assign to the layer selected. Press to return to the previous screen. Arranger Setting STYLE https://www.ketron.it/images/ketron/Manuali_HTML/SD9/english/11_4%20voice%20set.html[12/05/2020 15:59:15]... - Page 42 Style the sound on the keyboard is the first of the 4, but it is possible to quickly change this by selecting the other 3 icons of the top row. Each Style has already been saved by KETRON with these 4 sounds for quick loading into the Lead section, but you may save the Style with 4 different sounds with respect to those saved by KETRON.
-
Page 43: Voice Set
: When Style is running, with the command REINTRO enabled, if you press one of three END buttons SD9 run again the intro instead of going to the END. If the REINTRO button is active as well K.Stop , pressing one of the Intro / Ending SD9 performs Ending instead of Intro... - Page 44 Are present in this screen all commands to direct access to the functions of Fill1, Fill2, Fill3, Fill4, Break1, Break2, Break3, Break4 : This tab allows you to enter the third page of the Arranger section that looks like this: https://www.ketron.it/images/ketron/Manuali_HTML/SD9/english/13_arranger_setting.html[12/05/2020 15:59:38]...
- Page 45 Pop Up menu .Press User Tab to program and choose the function from the pop up menu. Then press Exit to confirm this choice This information can be saved in the STARTUP menu We also find other commands you can use in Arranger Style available directly from the panel: https://www.ketron.it/images/ketron/Manuali_HTML/SD9/english/13_arranger_setting.html[12/05/2020 15:59:38]...
-
Page 46: Play Mode
: Sets the Manual Bass for the left hand. ORGAN : Pressing this button for a few seconds, you access the control pedals menu and other functions PLAY MODE used on vintage organ style. On find detailed features of these functions available. STYLE https://www.ketron.it/images/ketron/Manuali_HTML/SD9/english/13_arranger_setting.html[12/05/2020 15:59:38]... - Page 47 The Bassist function allows you to play the Manual Bass on the left section of the keyboard while controlling the Arranger and song line at the same time on the right section. EASY EXPERT EDIT This function has 2 playing modes: . To display the 2 Modes, simply press PIANIST & BASSIST. and insert https://www.ketron.it/images/ketron/Manuali_HTML/SD9/english/47_style_playmode.html[12/05/2020 16:01:37]...
-
Page 48: Sustain Pedal
A new tone may be set whenever you release the Sustain Pedal. SUSTAIN PEDAL : As in Pianist Mode, even in Bassist mode the Sustain Pedal option allows you to enable/disable Sustain on the Song voices when you press the pedal. Arranger Setting STYLE https://www.ketron.it/images/ketron/Manuali_HTML/SD9/english/47_style_playmode.html[12/05/2020 16:01:37]... - Page 49 On this window you may also use a number of sound effects by selecting the key which you will find on the right at the bottom of the display. The following page opens where each tab enables the sound effect indicated. https://www.ketron.it/images/ketron/Manuali_HTML/SD9/english/27_jukebox.html[12/05/2020 16:02:00]...
- Page 50 Jukebox PLAYER GM Front Panel https://www.ketron.it/images/ketron/Manuali_HTML/SD9/english/27_jukebox.html[12/05/2020 16:02:00]...
- Page 51 Midifile. If however the first file is an audio file, the instrument cannot read the rhythm of the measure and the TAP window (see below) will open with a virtual pad to start the https://www.ketron.it/images/ketron/Manuali_HTML/SD9/english/17_dj.html[12/05/2020 16:02:24]...
- Page 52 : This works only with audio files and opens a small box with the following effects: Pitch, Cutoff and Filter Resonance, and finally the tempo. These effects may be regulated with the corresponding sliders on the instrument panel. These effects may be regulated with the corresponding sliders on the instrument panel. https://www.ketron.it/images/ketron/Manuali_HTML/SD9/english/17_dj.html[12/05/2020 16:02:24]...
- Page 53 RESET : Restores the default conditions of the file, cancelling the modifications made on this page. BRAKE : Ends reproduction by suddenly decreasing the speed and tone of the song. PLAYER GM Front Panel https://www.ketron.it/images/ketron/Manuali_HTML/SD9/english/17_dj.html[12/05/2020 16:02:24]...
- Page 54 Footswitch Footswitch Many functions of the SD9 may be assigned to optional footswitch controls FS6 (6 switches) or FS13 (13 switches). These controls offer guitarists, keyboard and accordion players incredible advantages. To assign a control to a footswitch simply select the footswitch on the screen. A list of functions will be displayed that may be selected directly on the screen or scrolled and selected with the Dial.
- Page 55 Controls Controls GLOBAL : Allows you to tune the SD9 and modify Modulation sensitivity. To modify the tone, simply touch TUNE the box or the corresponding virtual knob and change the numeric value with the Dial. In the same way, MOD.
-
Page 56: Main Level
: On this menu you may adjust the volume of the headphones or Mute them, following the steps described for the Main Level. FADE: Inserted MENU → CONTROLS → Fade Mode function that sets different fading speeds, Normal, Slow1, Slow2, Fast1, Fast2. Can be saved on Custom start up. MENU https://www.ketron.it/images/ketron/Manuali_HTML/SD9/english/15_controls.html[12/05/2020 16:11:24]... - Page 57 The display shows the 10 icons of the percussion instruments. These may be muted individually by tapping the icon. A box for volume and reverb adjustments is displayed next to each icon. To do this, simply tap the box and change the value with the Dial. Arranger Setting https://www.ketron.it/images/ketron/Manuali_HTML/SD9/english/18_drum_mixer.html[12/05/2020 16:11:41]...
- Page 58 When you select the percussion instrument, this will replace the previous instrument. REMAP On the right of the box which displays the name of the percussion instrument there is a box indicating the original Drum Set. To change it simply select the box. https://www.ketron.it/images/ketron/Manuali_HTML/SD9/english/19_drum_set.html[12/05/2020 16:11:58]...
- Page 59 Drum Kits is displayed. Press on the panel to save the modifications in the current User Style. If you are on GM menu to save the modifications in the Midifile display will show MIXER Tab as on picture below: Front Panel https://www.ketron.it/images/ketron/Manuali_HTML/SD9/english/19_drum_set.html[12/05/2020 16:11:58]...
- Page 60 On this page you may save the modifications made to a Registration or User Style. To save the modifications with SAVE SAVE AS the current name of the Style or Registration press , or enter a new name with : in this case https://www.ketron.it/images/ketron/Manuali_HTML/SD9/english/42_save.html[12/05/2020 16:12:11]...
- Page 61 In some menus like Footswitch, Accordion etc., the key allows you to save specific functions on the corresponding menu. The save procedures are described in the section of this Manual relevant to the menu in question. Front Panel https://www.ketron.it/images/ketron/Manuali_HTML/SD9/english/42_save.html[12/05/2020 16:12:11]...
- Page 62 Save PLAYER GM https://www.ketron.it/images/ketron/Manuali_HTML/SD9/english/42_save.html[12/05/2020 16:12:11]...
- Page 63 Front Panel on the right of the display, opens a window that displays the effects available on your SD9. The display shows the 8 effects from top to bottom, which may be enabled with the virtual key...
- Page 64 : The INS EFX 2 is the same as effect INS EFX1 with the only difference that it does not have a different distorting module. It works on the GM and the Arranger. EQUALIZER : Main parameter equalizer. This has 2 bands that work on the output data as a global master effect. https://www.ketron.it/images/ketron/Manuali_HTML/SD9/english/20_dsp.html[12/05/2020 16:12:34]...
- Page 65 It get new EQ featuring with middle or bass frequency boost. The modifications made to the equalizer may be saved only as Custom Startup, namely as a setting that will be present when you switch on the instrument. https://www.ketron.it/images/ketron/Manuali_HTML/SD9/english/20_dsp.html[12/05/2020 16:12:34]...
-
Page 66: Load Image
: Press this function to load a customised image on the instrument which you may use as a preset background of the display. FACTORY LOGO : This function sets the factory logo as background of the display. MENU https://www.ketron.it/images/ketron/Manuali_HTML/SD9/english/52_video.html[12/05/2020 16:12:54]... -
Page 67: Noise Gate
Pop up window with the different presets that may be selected on the Touch Screen. To go back to the EDIT EXIT MICRO page simply press on the panel. NOISE GATE has 4 presets: EQUALIZER : The parameter equalizer for the Micro has 4 bands, 4 presets and 2 user presets that may be saved by the user. https://www.ketron.it/images/ketron/Manuali_HTML/SD9/english/21_edit_micro1.html[12/05/2020 16:13:15]... - Page 68 Simply SAVE press on the panel and confirm with COMPRESSOR : The Compressor/Limiter has 4 presets for the Compressor and 2 for the Limiter. https://www.ketron.it/images/ketron/Manuali_HTML/SD9/english/21_edit_micro1.html[12/05/2020 16:13:15]...
-
Page 69: Pitch Shift
: The effect Echo, also known as Delay, has 6 presets: PITCH SHIFT : Voice processor which may be used for transposition with 6 preset effects: TALK : The last effect on the list is that used for the Talk function, which may be enabled with the https://www.ketron.it/images/ketron/Manuali_HTML/SD9/english/21_edit_micro1.html[12/05/2020 16:13:15]... - Page 70 The display allows you to select the target destination (Select destination ) and assign a name to the preset SAVE AS with (in this case the alphanumeric keypad is displayed on which you may enter the name of the new microphone preset). https://www.ketron.it/images/ketron/Manuali_HTML/SD9/english/21_edit_micro1.html[12/05/2020 16:13:15]...
- Page 71 Edit Micro https://www.ketron.it/images/ketron/Manuali_HTML/SD9/english/21_edit_micro1.html[12/05/2020 16:13:15]...
- Page 72 ON/ Off The Voicetron processor may be connected to an equalizer if the box of the diagram is ON. EQUALIZER The presets of the equalizer are displayed in the box and may be selected on the Pop up window. https://www.ketron.it/images/ketron/Manuali_HTML/SD9/english/22_edit_voicetron.html[12/05/2020 16:13:32]...
- Page 73 Once you have selected the virtual knobs and modified the value with the Dial, you can save the current preset of the SAVE equalizer by pressing the key on the panel and confirming with https://www.ketron.it/images/ketron/Manuali_HTML/SD9/english/22_edit_voicetron.html[12/05/2020 16:13:32]...
- Page 74 Touch the corresponding box to assign the relevant preset to the 4 Arranges. Off disables harmonisation. STOP box at the bottom allows you to disable the harmonizer when the Style is on Stop. SAVE You can save the preset of the Voicetron on the edit page by pressing the key on the panel. https://www.ketron.it/images/ketron/Manuali_HTML/SD9/english/22_edit_voicetron.html[12/05/2020 16:13:32]...
- Page 75 Pop up. SAVE : Saves the preset with the same name. SAVE AS : Opens an alphanumeric keypad that allows you to assign a new name to the Preset. CANCEL : Cancels save. Micro 1 Front Panel https://www.ketron.it/images/ketron/Manuali_HTML/SD9/english/22_edit_voicetron.html[12/05/2020 16:13:32]...
- Page 76 NEXT To pass immediately to the next song, select and the next song will start to play at the end of the current beat of the file you are playing. PLAYER GM https://www.ketron.it/images/ketron/Manuali_HTML/SD9/english/49_syncnext.html[12/05/2020 16:13:52]...
- Page 77 NEXT To pass immediately to the next song, select and the next song will start to play at the end of the current beat of the file you are playing. PLAYER GM https://www.ketron.it/images/ketron/Manuali_HTML/SD9/english/49_syncnext.html[12/05/2020 16:14:56]...
- Page 78 The 9 Midi KETRON settings are displayed at the centre of the screen. STANDARD : In this mode the SD9 may be controlled by an external Midi controller (via the Midi In) above all to play the Styles and Voices of the Arranger sound module.
-
Page 79: Clock Out
Midi channels used during reception and transmission from the sound module built into the Arranger of the instrument. CLOCK IN : When this is enabled (yellow) the SD9 accepts the Clock command from external Midi appliances and may be synchronised with an external Sequencer / Controller. CLOCK OUT : When this is enabled (yellow), the SD9 transmits the Clock to External Midi appliances (Sequencer/Controller). - Page 80 Midi https://www.ketron.it/images/ketron/Manuali_HTML/SD9/english/35_midi.html[12/05/2020 16:15:15]...
- Page 81 You may manage your preferred folders by selecting You may perform important activities on this page. EMPTY You may create a Myfolder directory by selecting , and then hitting to confirm the request displayed in the dialogue window. https://www.ketron.it/images/ketron/Manuali_HTML/SD9/english/36_myfolder.html[12/05/2020 16:15:33]...
-
Page 82: Remove Function
Finally, you may also delete a directory in Myfolder by selecting the required directory and then the REMOVE function. Info: Since these are simply “directory links” if you accidentally delete a directory in Myfolder the “real” directory and the files it contains are not deleted. PLAYER GM https://www.ketron.it/images/ketron/Manuali_HTML/SD9/english/36_myfolder.html[12/05/2020 16:15:33]... - Page 83 Pic & Movie The Pic & Movie key opens a window with a number of KETRON default files. With this function you may display the Pic & Movie on these Devices, using other external devices like Usb stick, Hd, etc.
- Page 84 Pic & Movie https://www.ketron.it/images/ketron/Manuali_HTML/SD9/english/37_pic_movie.html[12/05/2020 16:15:54]...
- Page 85 ( Intro, verse, chorus, etc ... ) by pressing the references displayed in the corresponding pop up. Info: The markers may not be installed in the actual SD9 but may only be installed with specific music software. PLAYER GM...
-
Page 86: Player Menu
Nevertheless Pop Up menu that appears for a few seconds by pressing the two buttons at the same time will be slightly different for the two menu. PLAYER MENU You can view in two differen way depending on the chosen PLAYER menu view (Player or Player + Voice): MENU PLAYER #1 MENU PLAYER (HOME) https://www.ketron.it/images/ketron/Manuali_HTML/SD9/english/50_tempo.html[12/05/2020 16:16:35]... - Page 87 If selected, the Accellerando / Ritardando step can be changed Range from 1 to 20 (bar) means that the time is adjusted to the amount set for each measurement. Range from 1 to 20 (beat) means that the time is adjusted to the amount set each quarter. https://www.ketron.it/images/ketron/Manuali_HTML/SD9/english/50_tempo.html[12/05/2020 16:16:35]...
-
Page 88: Lower Limit
The values set by Accellerando / Ritardando can also be saved in any style for which the values saved in the Custom Startup (or Default) apply, unless a style has the saved values inside it. : (Available only in the mode 'STYLE) (Tapping): To synchronize the time with the "drumming" of fingers. PLAYER GM Front Panel https://www.ketron.it/images/ketron/Manuali_HTML/SD9/english/50_tempo.html[12/05/2020 16:16:35]... - Page 89 Transposer Related functions on Transposer are controlled by these buttons on the layout. Transposer on Style and Voice Mode allows the transposition of the entire SD9. Transposer allows a more detailed features through the display and by using Alpha Dial.
- Page 90 : Applies transposition to the file and keyboard; it is not sensitive to the initial Song Reset of the file and may not be saved on the file. - ARRANGER: Applies transposition on Arranger Section avoid to affect Player mode. https://www.ketron.it/images/ketron/Manuali_HTML/SD9/english/51_transposer.html[12/05/2020 16:16:58]...
- Page 91 Transposer PLAYER GM Front Panel https://www.ketron.it/images/ketron/Manuali_HTML/SD9/english/51_transposer.html[12/05/2020 16:16:58]...
-
Page 92: Voice Edit
INSERT for each layer and also enable an effect on the first 3 layers. INSERT TYPE To select the Insert effect, press the box that will open the following page on which you may select the effect. https://www.ketron.it/images/ketron/Manuali_HTML/SD9/english/53_voice_edit.html[12/05/2020 16:17:23]... -
Page 93: Split Octave
: Lowers the Upper sound by an octave when the split point is above C1 O the right of the display you will find the number of the Edit page displayed together with 2 keys to scroll the pages forwards (double right arrow) or backwards (double left arrow). https://www.ketron.it/images/ketron/Manuali_HTML/SD9/english/53_voice_edit.html[12/05/2020 16:17:23]... - Page 94 PITCH AFTERTOUCH and Modulation wheel is applied), and the parameters of the . The SLIDE function is also available for the first three layers, where you may set the Threshold value, namely the efficiency threshold of the slide. https://www.ketron.it/images/ketron/Manuali_HTML/SD9/english/53_voice_edit.html[12/05/2020 16:17:23]...
- Page 95 - The last effect is which is automatically assigned on all Voices -DOWN: Adds an octave below on the note played of the selected Voice -UP: Adds an octave up on the note played of the selected Voice https://www.ketron.it/images/ketron/Manuali_HTML/SD9/english/53_voice_edit.html[12/05/2020 16:17:23]...
-
Page 96: Voice Mode
V-Tone on the icon inside of the Voice on which you are working (obviously if predisposed to this function) will appear a tiny V just to indicate the activation of this feature. Meanwhile this symbol will be displayed on the other Voices also just to show feature available. https://www.ketron.it/images/ketron/Manuali_HTML/SD9/english/53_voice_edit.html[12/05/2020 16:17:23]... - Page 97 : Delay time of Vibrato LFO-RATE : Frequency of Oscillator. LFO-TVF : LFO amount on Filter. LFO-TVA : LFO amount on Amplitude. SAVING VOICE : Once you finished you can save the changes on VOICE in this way https://www.ketron.it/images/ketron/Manuali_HTML/SD9/english/53_voice_edit.html[12/05/2020 16:17:23]...
- Page 98 The display will show:: -YES : Save VOICE with same name on same original location (PRESET) . -NO : Clear SAVE operation RESTORE In case you got a mistake or simply would restore VOICE modified to the original version press https://www.ketron.it/images/ketron/Manuali_HTML/SD9/english/53_voice_edit.html[12/05/2020 16:17:23]...
- Page 99 Voice Edit FACTORY tab. The display will present 'in this way: -YES : Restore selected VOICE with original parameters. : Clear SAVE operation VOICE https://www.ketron.it/images/ketron/Manuali_HTML/SD9/english/53_voice_edit.html[12/05/2020 16:17:23]...
- Page 100 If you make an error, go back by pressing the DELETE key on the right at the top. Pressing on the icons of the two keypads the display will show in this way: File Search: https://www.ketron.it/images/ketron/Manuali_HTML/SD9/english/43_search.html[12/05/2020 16:17:45]...
- Page 101 Search Numeric Search: Front Panel PLAYER GM https://www.ketron.it/images/ketron/Manuali_HTML/SD9/english/43_search.html[12/05/2020 16:17:45]...
- Page 102 Tuner can operate in two modes: Tone Generator or Tuner detection. In this mode by tapping on the virtual strings represented by the display you can hear the notes produced by SD9 such 6 string guitar reference (E A D G B e).
- Page 103 (MICRO 2) you can check on display current status of tuning. The bar with the GREEN colour will indicate perfect tuning. BLUE or RED colour (related of tolerance tuning) will suggest how to correct your instrument tuning. https://www.ketron.it/images/ketron/Manuali_HTML/SD9/english/32_input.html[12/05/2020 16:18:10]...
-
Page 104: Guitar Setup
Guitar setups. EDIT Finally, each guitar effect may be edited by pressing the key. SAVE Any the changes made to the effect may be saved in a Setup by pressing the key on the panel. The display https://www.ketron.it/images/ketron/Manuali_HTML/SD9/english/32_input.html[12/05/2020 16:18:10]... - Page 105 SAVE AS to open the alphanumeric keypad on which you may save the setup with a new file name. Front Panel https://www.ketron.it/images/ketron/Manuali_HTML/SD9/english/32_input.html[12/05/2020 16:18:10]...
- Page 106 VOICE SELECT 1/2 : This function ( Mode #2) can "remember" last selection made VOICE family. Whenever you choose a Voice "browsing" between the various families SD9 will show last selection made. In Mode # 1 this feature will be ignored.
- Page 107 : Sets the output mode of the metronome. After selecting this function with the Dial you may set it on "SOLO" mode that plays only the metronome through the headphones without music or other resources generated by the SD9 or on ALL mode where you will hear both the metronome and music through the headphones.
-
Page 108: Save/ Restart
OS DISPLAY SKIN : SD9, as well many devices of our time, allows you to modify some aspects of the global graphics tool (SKIN). Pressing this button gives access to a selection page with different SKIN suggested by KETRON: https://www.ketron.it/images/ketron/Manuali_HTML/SD9/english/39_preferences.html[12/05/2020 16:18:42]... - Page 109 Preferences Once you select your new preference and then pressing the Close command will appear the following screen: MENU Front Panel https://www.ketron.it/images/ketron/Manuali_HTML/SD9/english/39_preferences.html[12/05/2020 16:18:42]...
- Page 110 ( Intro, verse, chorus, etc ... ) by pressing the references displayed in the corresponding pop up. Info: The markers may not be installed in the actual SD9 but may only be installed with specific music software. PLAYER GM...
-
Page 111: Factory Restore
Finally, the entire chain of effects may be excluded with the key that you will find in the bottom right hand corner of the display. You can produce a new chain of effects and save them in a single preset (User). https://www.ketron.it/images/ketron/Manuali_HTML/SD9/english/23_efx1_edit.html[12/05/2020 16:20:13]... -
Page 112: Select All
: Allows you to copy one or more files that you have selected. In this case select the folder in which to COPY copy the files and press Paste. As soon as you select the folder in which to copy the files, the key turns PASTE into the key as show below. https://www.ketron.it/images/ketron/Manuali_HTML/SD9/english/16_disk_edit.html[12/05/2020 16:20:40]... - Page 113 : It allows you to copy one or more files previously selected. Pressing esactly over of the icon of the folder you have selected the entire folder (or more) to be copied. The procedure for save it in another location (or delete) is the same used previously for the single file. https://www.ketron.it/images/ketron/Manuali_HTML/SD9/english/16_disk_edit.html[12/05/2020 16:20:40]...
- Page 114 RENAME by enabling a virtual alphanumeric keypad on which to write the name, confirming this by pressing CONFIRM. The correct name of the file or current names of the files selected are displayed in the Rename box. The modified name or names will be displayed in the box below (To:). https://www.ketron.it/images/ketron/Manuali_HTML/SD9/english/16_disk_edit.html[12/05/2020 16:20:40]...
- Page 115 Here again, the dialogue box which appears at the centre of the display allows you to confirm or cancel the operation. MEDIA Press the key again to return to the main screen of MEDIA mode. MEDIA When you are in Disk Edit, the led of the key will flash. https://www.ketron.it/images/ketron/Manuali_HTML/SD9/english/16_disk_edit.html[12/05/2020 16:20:40]...
- Page 116 Lyrics & Score SD9 can manage files of different formats in order to show Lyrics, Score and more in different ways. These features make the SD9 even more versatile multimedia device where application such text, lyrics and Score notation can be really important.
- Page 117 This feature is suitable from Preferences page with Chord Lyric tab . ENTER By selecting a PDF file (file format that can contain both text and images, etc.) and then pressing will have as well the chance to view its contents directly on the display or external monitor. https://www.ketron.it/images/ketron/Manuali_HTML/SD9/english/54_lyrics_score.html[12/05/2020 16:21:04]...
- Page 118 In this way, the file can be shown on the display of' SD9 or on the external monitor. PDF scroll can be managed by Pop Up menu : From PLAYER menu you can control these information : Displays number of available pages of the selected PDF.
-
Page 119: Page Up/Down
If instead we use the functions pages will "browse" button continuously until the switch will be hold on. If we use TXT format (for lyrics or other text information, signs agreement, reminder etc.) we can handle it in https://www.ketron.it/images/ketron/Manuali_HTML/SD9/english/54_lyrics_score.html[12/05/2020 16:21:04]... - Page 120 Warning: If you attempt to play Mp3 with TXT synchronized from previous Ketron instruments (Midjay and Midjay Plus) you can achieve compatibility in sync TXT just only if the MP3 is a Fixed Bit Rate feature and does not contain Meta Event inside.
- Page 121 Lyrics & Score https://www.ketron.it/images/ketron/Manuali_HTML/SD9/english/54_lyrics_score.html[12/05/2020 16:21:04]...
- Page 122 After selecting desired Split Point release Split tab to return to the previous menu. The Split selection done will SAVE remain available until the next power on of SD9. To store this setting it will be necessary using the CUSTOM / FACTORY STARTUP feature.
- Page 123 Audio Multitrack Mode SD9 is able to play WAVE files (44.100 kHz - 16 bit) with properties as used in multichannel mode called Surround ® 5 + 1. This means preparing a multichannel audio files with these characteristics SD9 can manage the various tracks independently (on volume) and in case of a specific track (always the last in numerical order of the project) on its individual output.
- Page 124 ) on separate Out manageable also for multiple uses (Drummer Headphone, Single Out, Power Headphones split, etc). In this mode, which we believe are truly innovative in this kind of instrument, SD9 becomes an unprecedented multitracks Audio device. This feature will allow to use PLAYER in all those music needs (stage, recording and more) where management Audio editable in real time as "Multi Purpose"...
- Page 125 Multitrack https://www.ketron.it/images/ketron/Manuali_HTML/SD9/english/59_multitrack.html[12/05/2020 16:21:45]...
-
Page 126: Midi Recording
Midi Recording From this menu SD9 can record on Midi mode (and Audio also) everything is played in real time from the keyboard (Left part, Right part or Full Keyboard) .In addition can record ARRANGER section also. The mode displayed on this picture is called SONG Mode. - Page 127 During this perform, even if you already recorded some notes freely if Start of the Style will be activated SD9 will continue recording by adding precisely style with the arranger section.
- Page 128 Midi Recording needs to be saved by pressing the SAVE button however . SD9 sets a default name (ordered chronologically ) after confirmation User can rename file and assign on SD9 memory. At this point, created midi recording file will be playable on Player menu.
- Page 129 Pressing the Record icon to access on Audio or MIDI recording (Song or Phrase )mode (flashing icon). Once activated SD9 can begin to record immediately all data . In case of Style Sync recording will begin when Arranger Start will be activated. Record function is also triggered by Footswitch.
- Page 130 Phrase or repeated as LOOP mode. If set, as showed on picture, a number of 8 measures by using Bar tab on PHRASE mode SD9 will record just only up to 8 measures. This action will force to exit automatically from the method RECORD when 8 measure bar will be...
- Page 131 To save the recording press SAVE and confirm with the default name or with your own name. SD9, related of Phrase mode used, will apply by default a suffix (L) as meaning of Loop. When procedure is completed file will be available with suffix (L) as showed.
-
Page 132: Audio Recording
Midi Recording Info: In Midi Record (Phrase or Song) mode record from the source player to 1will be unavailable . However SD9 will show a warning message. AUDIO RECORDING https://www.ketron.it/images/ketron/Manuali_HTML/SD9/english/56_midi_recording.html[12/05/2020 16:22:16]... - Page 133 Audio Recording From this menu SD9 can record on Midi mode (and Audio also) everything is played in real time from the keyboard (Left part, Right part or Full Keyboard) .In addition can record ARRANGER section also. The mode displayed on this picture is called SONG Mode.
- Page 134 Audio Recording Once file is selected SD9 will be back on RECORD menu to start recording by pressing REC icon Once completed press REC icon again. So now on display will appear a Waveform icon type (to represent the flow Audio just recorded) and PLAY icon lets here listen recorded file just without leaving AUDIO RECORDING menu.
- Page 135 Or saving SONG by pressing Save button on the right side of the display. SD9 sets a default name (ordered chronologically ) after confirmation User can rename file and assign on SD9 memory. https://www.ketron.it/images/ketron/Manuali_HTML/SD9/english/57_audio_recording.html[12/05/2020 16:22:48]...
- Page 136 Pressing the Record icon to access on Audio or MIDI recording (Song or Phrase )mode (flashing icon). Once activated SD9 can begin to record immediately all data . In case of Style Sync recording will begin when Arranger Start will be activated. Record function is also triggered by Footswitch.
- Page 137 PHRASE mode. This feature is designed to record a sequence with a predetermined number of measure to play as a single Phrase or repeated as LOOP mode.. As showed on picture SD9 is set on PHRASE recording Mode. Press RECORD to start on record .
- Page 138 Just to save you music work press SAVE tab and confirm with default name or your own title. SD9, related of Phrase mode used, will apply by default a suffix (L) as meaning of Loop. When procedure is completed file will be available with suffix (L) as showed...
- Page 139 Audio Recording This feature will be recognized automatically on SD9 that will play LOOPED automatically. Warning : Mistakenly assuming that no audio signal is routed to Record Audio, ( Song or Phrase mode ) following screen will appear as below Warning : Audio record mode is not available while you are using the Player 2.
- Page 140 Audio Recording Info: Recording Audio for matter of Edit and memory allocation can not exceed over 10 minutes of duration MIDI RECORDING https://www.ketron.it/images/ketron/Manuali_HTML/SD9/english/57_audio_recording.html[12/05/2020 16:22:48]...
- Page 141 Both elements are now being carried out simultaneously giving the possibility to customize your Midi file by adding the variations (A / B / C / D) or Fill / Break / End of the chosen style. SD9 by default is set as mode which allows you to record all changes in the style that you are going to perform.
- Page 142 Variation A / B / C / D / Fill, Break and End as well a new entry Style from other Family Style. When recording is completed, press SAVE tab to save your project as Drum RESTYLE file. This is screen view showed : https://www.ketron.it/images/ketron/Manuali_HTML/SD9/english/60_drum_restyle.html[12/05/2020 16:23:11]...
- Page 143 Confirming again with the SAVE tab SD will ask to renamesyour own file as shown in the following screen: If press CANCEL instead of it procedure will be cleared . SD9 as default carry same original midi files name in use allowing you to overwrite it directly or renaming it with a different name.
- Page 144 Drum Restyle Confirming with YES SD9 prepares the file to the new recording or the total cancellation of the previous DRUM RESTYLE feature. https://www.ketron.it/images/ketron/Manuali_HTML/SD9/english/60_drum_restyle.html[12/05/2020 16:23:11]...
-
Page 145: Launch Pad
”your imagination”. In detail this work surface can manage audio loops, instrumental phrases created by you or imported by the huge internal archive made available by Ketron. Just to give you few examples, you can create something with same way used in Arranger Section with all midi resources and therefore controllable in terms Time and Tune but outside the harmonics conflicts that unfortunately the arranger sometimes imposes. -
Page 146: Main Feature
:Below the display there are buttons that allow you to select one of the 6 scenes available. On Start mode , the active pads of the scene, come into play at the beginning of the new measure at the same time (as works on Arranger Style. https://www.ketron.it/images/ketron/Manuali_HTML/SD9/english/78_launchpad.html[12/05/2020 16:24:01]... - Page 147 6) User Tables recorded or saved by the user (0 midi file format, single channel, 480 ticks / quarter note resolution). 7) Wave Files (up to a maximum of 3 per scene). All types of tables are divided into families based on the represented musical genres. CLEAR button remove table assigned on pad. Audiodrum: https://www.ketron.it/images/ketron/Manuali_HTML/SD9/english/78_launchpad.html[12/05/2020 16:24:01]...
- Page 148 Selecting this item leads to a list of drum instruments Kick, Hi-Hat, Clap, Rimshot, Snare, Tom in different cadences taken from various musical genres. It allows you to create a drum set using several pads where each one is associated with a drum instrument. Each tool https://www.ketron.it/images/ketron/Manuali_HTML/SD9/english/78_launchpad.html[12/05/2020 16:24:01]...
- Page 149 :you can assign a time signature for each scene. - SONG MODE: If "On" it allows timing the scenes in order to create your own song. Using the EDIT key opens the menu which allows timing of the different scenes https://www.ketron.it/images/ketron/Manuali_HTML/SD9/english/78_launchpad.html[12/05/2020 16:24:01]...
-
Page 150: Single / Loop
This button confirm all edited parts and leave main Edit menu At this point, putting to "On" the Song Mode and giving start on LAUNCH PAD, these parts of the scenes are performed in succession as set on edit. https://www.ketron.it/images/ketron/Manuali_HTML/SD9/english/78_launchpad.html[12/05/2020 16:24:01]... - Page 151 : Open a menu where choose style section to import INTROS, ENDING, FILLS, ARR.. - Discard : Discard all operations and leave this Edit menu - OK : Once extract leave Edit menu and combine every midi table of the style on Pad as set on previously. https://www.ketron.it/images/ketron/Manuali_HTML/SD9/english/78_launchpad.html[12/05/2020 16:24:01]...
- Page 152 LaunchPad PAD PARAMETERS CONTROLS https://www.ketron.it/images/ketron/Manuali_HTML/SD9/english/78_launchpad.html[12/05/2020 16:24:01]...
- Page 153 Voice Change and Original Voice. - PLAY MODE :You can select between Loop, Single, Key Mode.: - LOOP : Sequence is played repeatedly by recycling from the start until the Stop button is pressed https://www.ketron.it/images/ketron/Manuali_HTML/SD9/english/78_launchpad.html[12/05/2020 16:24:01]...
-
Page 154: Key Mode
: Pad follows sequence as well is done without any kind of chord adaptation Only on Melodic mode Root selection is allowed by Trnsp button -PARALLEL/CLOSE: Only on Harmonic mode user can select Close or parallel Chord recognition (see on Style section). https://www.ketron.it/images/ketron/Manuali_HTML/SD9/english/78_launchpad.html[12/05/2020 16:24:01]... -
Page 155: Voice Change
If Pad is already assigned as sequence a pop-up s shown if delete ( or keep) sequence recorded previously just in case of overdub mode. (Sequence is erased only from the pad memory. It still remain available in the menu). Here you can assign a timbre on pad to record using the Voice button Change. https://www.ketron.it/images/ketron/Manuali_HTML/SD9/english/78_launchpad.html[12/05/2020 16:24:01]... -
Page 156: Start To Record
LIVE MODELING. from This menu will allow you 'to use these variation on this platform in the same mode as well you operate on Arrangments section with chord recognition mode Here's how: Choose the style you want to export: https://www.ketron.it/images/ketron/Manuali_HTML/SD9/english/78_launchpad.html[12/05/2020 16:24:01]... - Page 157 With the YES command you export all parts of the style in a new project NO tab clear the operation. LAUNCH PAD After pressing YES, SD 9 show the environment with all parts exported on 4 differents SCENE https://www.ketron.it/images/ketron/Manuali_HTML/SD9/english/78_launchpad.html[12/05/2020 16:24:01]...
- Page 158 LaunchPad https://www.ketron.it/images/ketron/Manuali_HTML/SD9/english/78_launchpad.html[12/05/2020 16:24:01]...
- Page 159 Then press the SAVE tab to store what you have done in SD 9 You can assign a name that will be saved with the extension. : (Launch Pad Project) https://www.ketron.it/images/ketron/Manuali_HTML/SD9/english/78_launchpad.html[12/05/2020 16:24:01]...
- Page 160 LAUNCH PAD / projects should be allocated in the folders belonging to the path folder RESOURCES of the internal memory. Create a subfolder where neatly allocate all the resources that are part of the working project . Arranger Setting https://www.ketron.it/images/ketron/Manuali_HTML/SD9/english/78_launchpad.html[12/05/2020 16:24:01]...
- Page 161 LaunchPad https://www.ketron.it/images/ketron/Manuali_HTML/SD9/english/78_launchpad.html[12/05/2020 16:24:01]...
- Page 162 My List As already mentioned on STYLES page SD9 offers a new feature that we really useful for the management of Styles. MY LIST menu allows you to allocate the Styles that use more frequently on 64 locations "ready to use".
- Page 163 MY LIST. By this way you can allocate as way order your Style set up to 64 favourite locations scrollable with the alpha Dial. Of course what has been done is temporarily stored in the MY LIST and must be confirmed with the SAVE feature. https://www.ketron.it/images/ketron/Manuali_HTML/SD9/english/62_mylist.html[12/05/2020 16:24:26]...
- Page 164 In the other hand, pressing the EXIT command, you'll come out from MY LIST menu and all informations will not be stored. Info: MY LIST data are saved in the internal memory of SD9 just after pressing the SAVE command. In this way will never be deleted at shutdown of SD9 or altered thru Update procedure.
-
Page 165: Voice List
VOICE LIST SD9 offers this feature really useful for the management of the Voice. The VOICE LIST menu allows you to allocate the Voice that you use most often on 24 locations at hand. This will avoid frantic search in the various families VOICE to call just one or ones VOICES who are more used to use in your Performance. - Page 166 Info: Information on the VOICE LIST are saved in the internal memory of the instrument just only after pressing the SAVE command. In this way will not be deleted at shutdown of SD9 or altered in any further Update procedures.
- Page 167 Voice List https://www.ketron.it/images/ketron/Manuali_HTML/SD9/english/63_voicelist.html[12/05/2020 16:24:48]...
- Page 168 HARMONY presets, as showed above, perform special effects respectively on the VOICE that are used on SPLIT Mode. HARMONY take reference from chord played on LEFT part of the keyboard. It will execute harmonic intervals (dictated by the chosen preset) with the tone you are using as RIGHT VOICE. https://www.ketron.it/images/ketron/Manuali_HTML/SD9/english/64_harmony.html[12/05/2020 16:25:09]...
- Page 169 Harmony https://www.ketron.it/images/ketron/Manuali_HTML/SD9/english/64_harmony.html[12/05/2020 16:25:09]...
-
Page 170: Key Control
Adds an octave (up or below) on the note played of the selected Voice. Octave type is assigned on menu 4 of 6 on EDIT VOICE -EFX Type: Enable by a Pop Up menu selection of EFX to insert on Edited VOICE. https://www.ketron.it/images/ketron/Manuali_HTML/SD9/english/65_keyc.html[12/05/2020 16:25:33]... - Page 171 Double By pressing SAVE button will be stored such your own USER EFX . - EFX ON: Enable Effect https://www.ketron.it/images/ketron/Manuali_HTML/SD9/english/65_keyc.html[12/05/2020 16:25:33]...
- Page 172 Double https://www.ketron.it/images/ketron/Manuali_HTML/SD9/english/65_keyc.html[12/05/2020 16:25:33]...
- Page 173 XFADE feature is set from the FUNCTION menu where you can select different speeds such: Normal, Slow1, Slow2, Fast1, Fast2. When used in DJ mode XFADE show an additional touch screen view during play for manual control and visualization. https://www.ketron.it/images/ketron/Manuali_HTML/SD9/english/66_xfade.html[12/05/2020 16:26:08]...
- Page 174 XFade Info: The function XFADE is not available on Video file . https://www.ketron.it/images/ketron/Manuali_HTML/SD9/english/66_xfade.html[12/05/2020 16:26:08]...
-
Page 175: Edit Pattern
4 Fill; 4 Break. STYLE Menu is available by the TAB VIEW located on main page of Once selected, at the bottom right of the display (selection area Style menu), you will have access to the EDIT selection https://www.ketron.it/images/ketron/Manuali_HTML/SD9/english/67_pattern_edit.html[12/05/2020 16:26:32]... - Page 176 STYLE recorded or allows you to return just only to the previous situation selecting step you think most suitable. The UNDO instead found on the TAB MENU works exclusively for the selected function. MUTE : Put on MUTE (silenced) selected track. CLICK : Allows to activate Click (metronome) for recording procedure. https://www.ketron.it/images/ketron/Manuali_HTML/SD9/english/67_pattern_edit.html[12/05/2020 16:26:32]...
- Page 177 : Allows to RECORD selected part of STYLE Important: RECORD mode affects on all available sections of PATTERN. Exception is done for the track AUDIO DRUM Instead of Audio Drum you can use a conventional Drum Set. Arranger Setting https://www.ketron.it/images/ketron/Manuali_HTML/SD9/english/67_pattern_edit.html[12/05/2020 16:26:32]...
- Page 178 Style https://www.ketron.it/images/ketron/Manuali_HTML/SD9/english/67_pattern_edit.html[12/05/2020 16:26:32]...
- Page 179 Hard disk or else On this menu you'll find just 4 PLAYBOX Folders placed on Main root of your SD 9 internal memory. REGISTRATION Once you have placed files on these 4 FOLDER you'll recall by pressing button where Playbox feature is fitted. Info: User cannot create further Playbox folders . Front Panel https://www.ketron.it/images/ketron/Manuali_HTML/SD9/english/61_playbox.html[12/05/2020 16:27:07]...
- Page 180 Registration https://www.ketron.it/images/ketron/Manuali_HTML/SD9/english/61_playbox.html[12/05/2020 16:27:07]...
- Page 181 FILB.wav = Fill B FILC.wav = Fill C FILD.wav = Fill D BRKA.wav = Break A BRKB.wav = Break B BRKC.wav = Break C BRKD.wav = Break D INT1.wav = Intro 1 INT2.wav = Intro 2 INT3.wav = Intro 3 https://www.ketron.it/images/ketron/Manuali_HTML/SD9/english/79_useraudiodrum.html[12/05/2020 16:27:48]...
- Page 182 These files must be saved in a folder with its name (eg: MyStyle_140) in SD 9 directory in the following root: USER_Live Modeling / Live Drum Info:The number following the underscore to the folder name (_140) refers to the BPM of audio drum. SD9 will use as reference of original BPM...
- Page 183 Modeling Once you inserted these files SD9 must be restarted so thats files and related parameters are "recognized". So turn Live Modeling Off and On SD 9, to select these file on Users page Audio Drum. You can verify the properly content on related environment and then manage them on VIEW Arranger page: This feature will allow the user to customize their own arrangements with "cadences"...
- Page 184 Modeling https://www.ketron.it/images/ketron/Manuali_HTML/SD9/english/79_useraudiodrum.html[12/05/2020 16:27:48]...
- Page 185 This feature allows any inexperienced user to customize easily their arrangements (Drum, Bass, Chord, Live Guitar, Lower) in an unprecedented way. SD9 allows an huge database of pattern library regarding all sections of the Arranger in several kinds of styles. These available pattern , then we will examine in detail, were made precisely in order to "cover"...
- Page 186 Info: Chord, Bass, Drum, etc etc selection icon has a dual propriety .On / Off operation at the first contact. If pressed for a while allows access to the selection of the Live Modeling files. By pressing GROOVE Tab display will show a pop up menu with folders and file available for Live Modeling. https://www.ketron.it/images/ketron/Manuali_HTML/SD9/english/55_modeling.html[12/05/2020 16:29:32]...
- Page 187 Groove excluding automatically all other parts of Bass, Drum and Chord ORIGINAL: Using this Tab original set will be restored . These command are present on others section plus the VOICE CHANGE tab which allows to change the Voice on the desiderated harmonic section. https://www.ketron.it/images/ketron/Manuali_HTML/SD9/english/55_modeling.html[12/05/2020 16:29:32]...
- Page 188 Guitar / Orchestral even GROOVE arrangements on selected CHORD section (up to 5). This feature allows the user to manage CHORD environments with more flexibility and creativity. Info: Live Modeling files are unavailable on Lower 1 and Lower 2 section. You can only use Voice Change, Reverb Volume, and Chorus. https://www.ketron.it/images/ketron/Manuali_HTML/SD9/english/55_modeling.html[12/05/2020 16:29:32]...
-
Page 189: User Style
To end the lights turn on REINTRO. With Save tab you can save the style with the changes made on the modeling. Once changes are completed, you can save what was done by pressing SAVE button. SD9 will show the following USER STYLE... - Page 190 Modeling as a midi file format with single track containing reference data for this purpose (Note, Pr C, Controllers, Root) https://www.ketron.it/images/ketron/Manuali_HTML/SD9/english/55_modeling.html[12/05/2020 16:29:32]...
- Page 191 Whole Disk Check Pressing both the Talk & Fade buttons simultaneously and pressing Enter enables the SD9 Pro to do a complete disk check. This function takes quite some time and so the instrument should not be switched off during this procedure.
-
Page 192: Sample Editor
MEDIA menu or from the main menu select the UserFs / HD button which alternately selects the two devices. The INSTRUMENT and / SAMPLE folders will be created automatically when you first log in to the Edit Sample. NOTE: For safety reasons it is not possible to work with removable USB devices. DEVICE SELECTION https://www.ketron.it/images/ketron/Manuali_HTML/SD9/english/82_sample_editor.html[12/05/2020 16:30:30]... - Page 193 The Sample Edit is browsed from MENU → AUDIO / SAMPLE. In the pop up choose SAMPLE EDIT DIT FIRST ACCESS (INITIALIZATION) USER SOUND BANK WILL BE INITIALIZED FOR FIRST TIME. The first time you access Sample Edit, you will be asked to initialize the sound bank in flash of the sounds. Press CONTINUE to format https://www.ketron.it/images/ketron/Manuali_HTML/SD9/english/82_sample_editor.html[12/05/2020 16:30:30]...
- Page 194 It is written (NO-NAME) if no instrument has been loaded / saved. Right area contains the folder of the disk from which it is navigated (with DIAL, ENTER, EXIT or Touch), you can select the wav files that will compose the instrument (INSTRUMENT). ADD SAMPLE https://www.ketron.it/images/ketron/Manuali_HTML/SD9/english/82_sample_editor.html[12/05/2020 16:30:30]...
- Page 195 The Key, k.low k.high fields are automatically assigned if the reference note is found in the wav file name, or within the wave file (chunck smpl). If the reference note is not found in the key field, the value C3 is assigned by default. PARAMETERS EDIT Turning off the ADD SAMPLE box accesses the Edit menu https://www.ketron.it/images/ketron/Manuali_HTML/SD9/english/82_sample_editor.html[12/05/2020 16:30:30]...
- Page 196 Tracking: Allows the sample to be tracked in the extension of the keyboard. This means that the Sample will undergo chromatic variations of an instrument tuned to semitone heights Fixed: The sample is not tracked so it always remains with the original tuning (method used for percussive sounds, efx or similar) https://www.ketron.it/images/ketron/Manuali_HTML/SD9/english/82_sample_editor.html[12/05/2020 16:30:30]...
- Page 197 The instrument is a GM sound with bank = 100 and pch 0-30. To access the selection of the family there must be at least one sample in the Sample editing list. DRUMSET: Allows to assign the instrument to the drum set. https://www.ketron.it/images/ketron/Manuali_HTML/SD9/english/82_sample_editor.html[12/05/2020 16:30:30]...
-
Page 198: Audio Edit
SAMPLE START starting point of the sample END LOOP conclusive point of the sample START LOOP loop point. Locators can be moved using the dial or touch at the desired point in the sample graph. ORIGINAL Resumes the original START, END, LOOP settings. https://www.ketron.it/images/ketron/Manuali_HTML/SD9/english/82_sample_editor.html[12/05/2020 16:30:30]... - Page 199 If the loop point is near the end point it is convenient to lower the duration. NOTE: Creating good loops requires time and patience to perform several tests. The AUTOLOOP and CROSS FADE functions help the user, but they are not always decisive. EXIT Return to the main menu. NEW EDIT. https://www.ketron.it/images/ketron/Manuali_HTML/SD9/english/82_sample_editor.html[12/05/2020 16:30:30]...
- Page 200 If a tool with the same name already exists in the flash it will be overwritten. Saving takes some time proportional to the number of splits. LOAD INSTRUMENT Load an instrument (MS2 or SOUNDFONT) from disk and transfer it to the edit area. By default, the INSTRUMENT folder is set. https://www.ketron.it/images/ketron/Manuali_HTML/SD9/english/82_sample_editor.html[12/05/2020 16:30:30]...
- Page 201 The note range where each sample is played and the note of the reference pitch is also imported. EXTRACT: The samples are extracted from the Soundfont and saved in the wav file format in a folder named derived from the instrument name, NOW RESIDENT IN ADD SAMPLE https://www.ketron.it/images/ketron/Manuali_HTML/SD9/english/82_sample_editor.html[12/05/2020 16:30:30]...
- Page 202 Utility SOUND BANK VIEW https://www.ketron.it/images/ketron/Manuali_HTML/SD9/english/82_sample_editor.html[12/05/2020 16:30:30]...
- Page 203 A pop-up opens in which all the instruments present in the sound bank are displayed Selecting the sound will be loaded in the Edit area.it. CLEAR INSTRUMENT: It allows to delete an instrument present in the sound bank and in the Flash memory https://www.ketron.it/images/ketron/Manuali_HTML/SD9/english/82_sample_editor.html[12/05/2020 16:30:30]...
- Page 204 The transfer takes some time proportional to the total number of splits of all the flash instruments. With this procedure it is possible to have more Sound Bank available on disk. CLEAR SOUND BANK Clear all the instruments in the Sound Bank from the flash memory. (Formatting). https://www.ketron.it/images/ketron/Manuali_HTML/SD9/english/82_sample_editor.html[12/05/2020 16:30:30]...
- Page 205 They can therefore be treated like any GM sound and assigned to the voices or parts of Launchpad or midifile. The Bank is 100 PrCh ranges from 0-29. Drum set: They are visible in the Drum list and can be assigned to the style, launchpad, midifile. MS2 assignment as Drumset. https://www.ketron.it/images/ketron/Manuali_HTML/SD9/english/82_sample_editor.html[12/05/2020 16:30:30]...
- Page 206 Utility ( * HDD INTERNO OPTIONAL ) https://www.ketron.it/images/ketron/Manuali_HTML/SD9/english/82_sample_editor.html[12/05/2020 16:30:30]...
- Page 207 If a drumset is selected in the current style, it will be the default drumset that will be edited. With the START, ARRANGE FILL BREAK keys, you can listen to changes in real time of the User Drumset. https://www.ketron.it/images/ketron/Manuali_HTML/SD9/english/83_edit_user_drum.html[12/05/2020 16:30:57]...
- Page 208 Utility EDIT page Drumset selection for edit purpose. It is accessed by pressing the Drumset box. Target Drumset, which is the location where the edited drumset will be saved It is accessed from the SAVE TO box. https://www.ketron.it/images/ketron/Manuali_HTML/SD9/english/83_edit_user_drum.html[12/05/2020 16:30:57]...
- Page 209 At the bottom of the pop up Group, there are any MS2 drumsets created by Sample Edit. Pressing the Instrument box accesses the pop-up of choice of the instrument belonging to the selected group, to replace the key note that is being edited. https://www.ketron.it/images/ketron/Manuali_HTML/SD9/english/83_edit_user_drum.html[12/05/2020 16:30:57]...
- Page 210 You can change the Volume, Reverb, Pan, Coarse Tune (semitone) and Fine Tune (cents.) Values to the edited note. The Original and Default keys restore the initial and default settings of the parameters. By Save button you can save the User drumset edited . With Save As you can change its name. https://www.ketron.it/images/ketron/Manuali_HTML/SD9/english/83_edit_user_drum.html[12/05/2020 16:30:57]...
Need help?
Do you have a question about the SD9 and is the answer not in the manual?
Questions and answers