Advertisement
Quick Links
Advertisement

Subscribe to Our Youtube Channel
Related Manuals for GSS STS 1916 IPSR CT CI

Summary of Contents for GSS STS 1916 IPSR CT CI
- Page 1 STS 1916 IPSR CT CI Default access data (HTML + SFTP): 192.168.0.120 User: admin Password: geheim...
- Page 2 Configuration menus "SAT -> IP" part ............25 Input ....................25 Output .....................27 CA ....................36 Overview window "IP -> CT" part .............39 Configuration menus "IP -> CT" part ............40 Input ....................40 Output .....................42 Multiplex ..................46 - 2 - STS 1916 IPSR CT CI...
- Page 3 Upload a link to the M3U List to the TV sets ..........71 Configuration steps at the Panasonic VIERA TV Sets ........71 Enable DVB-via-IP reception ..............72 DVB-via-IP – Update the M3U-Liste or Link ..........72 Channel and frequency tables ................73 - 3 - STS 1916 IPSR CT CI...
- Page 4 • Do not cover the ventilation openings! • Do not install the head end in cabinets or recesses which are not ventilated. • Do not place any vessels containing liquids on the head-end station. - 4 - STS 1916 IPSR CT CI...
- Page 5 January 27, 2003 which addresses old electronic and electrical devices, such devices must be disposed of at a designated collection facility. At the end of its service life, please take your device to one of these public collection facilities for proper disposal. - 5 - STS 1916 IPSR CT CI...
- Page 6 2.1 P aC k i n g C o n t e n t s 1 STS 1916 IPSR CT CI 1 LAN cable 1 Brief assembly instructions 2 Mains cables 2.2 m...
- Page 7 Types of modulation: ........QPSK, 16 QAM, 64 QAM Transmission modes ................2k Code rates ............1/2, 2/3, 3/4, 5/6, 7/8 Guard intervals ............ 1/4, 1/8, 1/16, 1/32 Output level: ..............80…96 dBμV Output impedance: ................. 75 Ω - 7 - STS 1916 IPSR CT CI...
- Page 8 Mains voltage: ............100…240 V, 50/60 Hz Maximum Power consumption ............100 W Admissible ambient temperature: ..........0 … +50 °C Dimensions (WxHxD): ....... 483 mm x 44,5 mm (1HE) x 490 mm Weight: ..................5.5 kg - 8 - STS 1916 IPSR CT CI...
- Page 9 The two parts are connected via an internal switch, to which two data inter- faces are also connected (maximum total data rate 820 MBit/s). lo C k d i ag r a m STS 1916 IPSR CT CI SAT IN 1 Option dCSS/Unicable II 128 x SPTS Tuner "1"...
- Page 10 The two configuration inputs are connected via an internal switch. Several sta- tions can thus be cascaded for configuration. STS 1916 IPSR CT CI STS 1916 IPSR CT CI —> The two Control interfaces must not be connected to an external switch at the same time (looping).
- Page 11 The user gast has access to (almost) all menus, but may not make any changes. —> The default password for the user gast is gast. A guest access is shown in all menus: The button has no function! - 11 - STS 1916 IPSR CT CI...
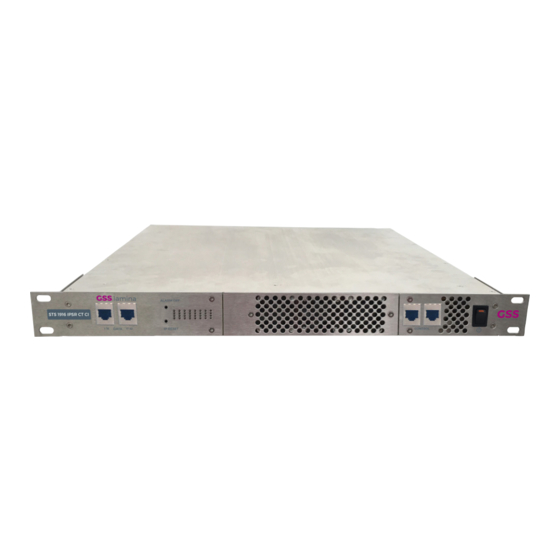
- Page 12 3.1 d e v i C e ov e rv i e w STS 1916 IPSR CT CI 10 11 STS 1916 IPSR CT CI 14 15 16 14 15 16 CI 3...
- Page 13 We recommend the use of lateral slide rails/component carriers in order to relieve the front panel. • Screw the unit with the mounting screws and the washer to the four cage nuts STS 1916 IPSR CT CI - 13 - STS 1916 IPSR CT CI...
- Page 14 6…4 can be assigned to the tuners 1…3 additional: – Module 1 + 6 for tuner 1, – Module 2 + 5 for Tuner 2 and – Module 3 + 4 for Tuner 3. - 14 - STS 1916 IPSR CT CI...
- Page 15 DC voltages! For a complete disconnection from the mains, both mains plugs must be pulled out of the mains sockets. Ensure that the mains plugs can be pulled out without difficulties. - 15 - STS 1916 IPSR CT CI...
- Page 16 • Insert the new power module. —> Make sure that it is locked. • Connect the new power module to the mains cable and check whether the status LED lights green. - 16 - STS 1916 IPSR CT CI...
- Page 17 – the yellow wire on the upper terminal (3 x monitoring terminal • Mount the fan panel (2 screws —> Make sure that no wires will be clamped between fan and housing. - 17 - STS 1916 IPSR CT CI...
- Page 18 The STS 1916 IPSR CT CI is configured via the web interface (HTML user inter- face) in two parts!. Access is provided for each part via a separate IP address! —>...
- Page 19 —> Example for IP address setting with Windows 7 operating system: • For the initial setup open the properties for TCP/IPv4 of the PC: > Control Panel > Network and Sharing Center > LAN connection > Properties - 19 - STS 1916 IPSR CT CI...
- Page 20 > Internet Protocol Version 4 (TCP/IPv4) > Properties • Activate point "Use the following IP address". • Enter e.g. 192.168.0.2 for the IP address. • Enter for the Subnet mask 255.255.255.0. • Confirm the setting with "OK". - 20 - STS 1916 IPSR CT CI...
- Page 21 First, an "empty" table is displayed (as with all menus). While the data is read from the device ... … is displayed. —> Changes in the menus are only transmitted to the head-end station when you click the button! - 21 - STS 1916 IPSR CT CI...
- Page 22 - Notification (page 55); - Network (only in the "SAT -> IP" part for both parts; page 57); - OpenVPN (page 59); - Security (page 60); - Firmware (page 61); - User (page 64). - 22 - STS 1916 IPSR CT CI...
- Page 23 For entering/indication of the different IDs the number format can be set to hexadecimal or decimal in menu System > Firmware. - 23 - STS 1916 IPSR CT CI...
- Page 24 —> From this protocol file e.g. a list of the programmed stations can be prepared using e.g. a text editor. If notes are entered in the System > User menu, they are displayed here. - 24 - STS 1916 IPSR CT CI...
- Page 25 II mode from page 65 on. In column Name, enter a personal input name. —> If dCSS/Unicable II is activated you can assign the four levels of a satellite to each input. - 25 - STS 1916 IPSR CT CI...
- Page 26 20.0dB at DVB-S2. This means the actual value is ≥15/20dB. Before leaving the menu, changes must be transferred to the head-end station! • Therefore click on button —> After that is displayed for a short time in the upper right corner. - 26 - STS 1916 IPSR CT CI...
- Page 27 Herein you can switch off the transmission of the EPG data (Electronic Programme Guide), in order to reduce data rate for more services. —> 1.5Mbit/s for EPG per service are quite possible! EIT = Event Information Table - 27 - STS 1916 IPSR CT CI...
- Page 28 For x use only the range of 1…127. The range 0 ... 255 is available for y and z. —> You will find descriptions to important terms for configuring a streaming network in menu Help > Multicast Setup. - 28 - STS 1916 IPSR CT CI...
- Page 29 This number is then increased by 1 in each additional row. Entries in the fields "Port" and "SAP Group" are transferred to all fields in the columns. • Click on "accept", check the information and confirm with "OK". Example: - 29 - STS 1916 IPSR CT CI...
- Page 30 If the protocol settings are different, only the services with the proto- col settings of this station are taken over. —> Changes at the parallel stations are not imported for until is executed. - 30 - STS 1916 IPSR CT CI...
- Page 31 —> Please also note GSS DRIP 1000 devices: Here you can download the service list (drip1000.m3u) for GSS DRIP 1000 devices. Alternatively, note the path (Server URL) to the service list for the configura- tion or streaming interface. You can enter this path in the clients. In this way, future changes to the service list are automatically adopted by the client.
- Page 32 If changes are made, the version is changed automati- cally. If you want to integrate the head-end station into an existing TV network, you can adjust the value to the TV sets in the Channel- ListVersion input field. BEWATEC IPTV-Geräte: - 32 - STS 1916 IPSR CT CI...
- Page 33 —> The clients require a permanent connection to the head station. Se- lect the path for the interface with the corresponding IP range. - 33 - STS 1916 IPSR CT CI...
- Page 34 Stream IP (analogous to Under Port enter (analogous to ) the output port. Under SID, TS-ID and ON-ID, enter the values that you also entered when creating the *ts file (Media2TS > Configuration; page 69). - 34 - STS 1916 IPSR CT CI...
- Page 35 Press the Cancel button to cancel the entry. Reset button resets the entries for Service, Ch.-No. and SAP group. —> The Delete button and the Source IP and Type input fields have no function here. - 35 - STS 1916 IPSR CT CI...
- Page 36 Line 1 1–>1+6; 2–>2+5; 3–>3+4 CI 1+6 —> line 1; Line 3 Line 2 Line 1 CI 2+5 —> line 2; CI 3+4 —> line 3 Line 3 Line 2 Line 1 - 36 - STS 1916 IPSR CT CI...
- Page 37 Herein you can select whether only one line is displayed or all lines are displayed. Indication of TS-/ON-ID. —> For entering/indication of the different IDs the number format can be set to hexadecimal or decimal in menu System > Firmware. - 37 - STS 1916 IPSR CT CI...
- Page 38 Before leaving the menu, changes must be transferred to the head-end station! • Therefore click on button —> After that is displayed for a short time in the upper right corner. - 38 - STS 1916 IPSR CT CI...
- Page 39 —> From this protocol file e.g. a list of the programmed stations can be prepared using e.g. a text editor. If notes are entered in the System > User menu, they are displayed here. - 39 - STS 1916 IPSR CT CI...
- Page 40 In the Port column, type the port to the multicast IP address of the IP stream. The TS and ON IDs of the stream are displayed in the TS / ON ID column. - 40 - STS 1916 IPSR CT CI...
- Page 41 Sum of the input data rates of all activated input lines. Before leaving the menu, changes must be transferred to the head-end station! • Therefore click on button —> After that is displayed for a short time in the upper right corner. - 41 - STS 1916 IPSR CT CI...
- Page 42 Line indicates an output data overflow. In this case change the output settings or remove stations from the data stream in menu Multiplex. In column Modulator, switch on or off the modulators of the individual lines. - 42 - STS 1916 IPSR CT CI...
- Page 43 For COFDM: QPSK, 16 QAM, 64 QAM —> The background colour in column Line indicates an output data overflow. In this case change the output settings or remove stations from the data stream in menu Multiplex. - 43 - STS 1916 IPSR CT CI...
- Page 44 To transmit the output signal in the channel range of S21 to C69 a band- width of 8 MHz can be used. In the channel range of C5 to C12 a bandwidth of ≤ 7 MHz must be set. - 44 - STS 1916 IPSR CT CI...
- Page 45 Therefore click on button Before leaving the menu, changes must be transferred to the head-end station! • Therefore click on button —> After that is displayed for a short time in the upper right corner. - 45 - STS 1916 IPSR CT CI...
- Page 46 Make sure you have sufficient reserves for dynamic data rates! The original SIDs are displayed in the SID column. You can change the SIDs in the New SID column. - 46 - STS 1916 IPSR CT CI...
- Page 47 Before leaving the menu, changes must be transferred to the head-end station! • Therefore click on button —> After that is displayed for a short time in the upper right corner. - 47 - STS 1916 IPSR CT CI...
- Page 48 Herein you can enter a NIT version. —> The maximum possible value is 1F/31. Herein you can enter a network name. Button Load resets the network ID, the version and the network name to default. - 48 - STS 1916 IPSR CT CI...
- Page 49 , all related LCNs will also be deleted. Indication of Code rate, Guard interval, Bandwidth and Mode of COFDM transponders Create the NIT —> Manually added ( ) or imported ( ) transponders will not be deleted. - 49 - STS 1916 IPSR CT CI...
- Page 50 (*.bin). —> You can also add an "*.oni" file, which you had generated with a PSW 1000 (from version 61 on) or a PSW 160 (from version 17 on). - 50 - STS 1916 IPSR CT CI...
- Page 51 • Click on button Before leaving the menu, changes must be transferred to the head-end station! • Therefore click on button —> After that is displayed for a short time in the upper right corner. - 51 - STS 1916 IPSR CT CI...
- Page 52 Herein you can switch on or off the "Private Data Specifier". —> If you use HD-LCN, this must be switched on. "Private Data Specifier" value —> For "Private Data Specifier" IEC 62216-1 recommends the value 0x00000028. - 52 - STS 1916 IPSR CT CI...
- Page 53 Before leaving the menu, changes must be transferred to the head-end station! • Therefore click on button —> After that is displayed for a short time in the upper right corner. - 53 - STS 1916 IPSR CT CI...
- Page 54 Via this button you can refresh the indication. —> Please also note the items in the Notification menu (page 55) —> The logbook is included in the protocol file (page 24/39)! - 54 - STS 1916 IPSR CT CI...
- Page 55 Herein enter the password for the outgoing mail server of your e-mail account. Herein enter the outgoing mail server of your e-mail account. Herein enter the port of the outgoing mail server of your e-mail account. - 55 - STS 1916 IPSR CT CI...
- Page 56 —> The default port for Syslog server is 514. Before leaving the menu, changes must be transferred to the head-end station! • Therefore click on button —> After that is displayed for a short time in the upper right corner. - 56 - STS 1916 IPSR CT CI...
- Page 57 100-Base-T Switch Switch STS 1916 IPSR CT CI —> The two streaming ports (DATA) are connected to the streaming in- terfaces via an internal 1000-BASE-T switch. If a DHCP server is active in the network, an IP address is assigned to this switch.
- Page 58 You can use the Hostnames to call up the user interfaces without entering the IP address. To do this, enter the host name followed by ".local" in the browser (e.g. gss.local). If you operate several head stations in the network, you must enter different names here.
- Page 59 —> Before leaving the menu, changes must be transferred to the head- end station! Therefore click on button —> After that is displayed for a short time in the upper right corner. - 59 - STS 1916 IPSR CT CI...
- Page 60 —> If you have forgotten your admin password, you can reset the network settings and the admin password by the reset button ( page 12)! - 60 - STS 1916 IPSR CT CI...
- Page 61 Herein select the kind of output modulation for the whole head-end sta- tion – QAM or COFDM… —> By default QAM modulation is set for the output. … and confirm a change in the output modulation by button —> The station restarts! - 61 - STS 1916 IPSR CT CI...
- Page 62 —> During the update this warning is displayed. After a few minutes the LEDs be- come off, shortly after that the LED for line 1 flashes (update is being installed). - 62 - STS 1916 IPSR CT CI...
- Page 63 —> If you have forgotten your password or IP address, you can reset the network settings and the password by the reset button (hold depressed for more than 5 seconds; page 12)! - 63 - STS 1916 IPSR CT CI...
- Page 64 —> Before leaving the menu, changes must be transferred to the head- end station! Therefore click on button —> After that is displayed for a short time in the upper right corner. - 64 - STS 1916 IPSR CT CI...
- Page 65 12V DC OUT 1 16 UB Potenzialausgleichsschiene SDUC 516 OUT 2 2 x 16 USER BANDS 16 UB Potential equalisation rail GSS Grundig Systems GmbH 90471 Nuernberg - Germany LNB OUTPUTS HIGH - 65 - STS 1916 IPSR CT CI...
- Page 66 "dCSS/Unicable II" switch in the input settings must be set to "ON". As a result the preprogrammed frequencies of the SDUCs are set at the inputs of the head station. dCSS/Unicable II Mode - 66 - STS 1916 IPSR CT CI...
- Page 67 Make a potential equalisation (PE) according to IEC/EN/DIN EN 60728-11. • Connect the PE connection terminal of the SDUC 516 to a PE rail (sup- plied by customer) using the PE wire (Cu 4…5 mm - 67 - STS 1916 IPSR CT CI...
- Page 68 • Screw the DC adapter onto the DC input • Connect the power supply unit to the DC adapter. • Connect the power supply unit to a mains socket. - 68 - STS 1916 IPSR CT CI...
- Page 69 • Note the values TS-ID, ON-ID, Service ID and the Service-Name for the inte- gration into the M3U list (default values: TS-ID = 0xEEEE, ON-ID = 0xEEEE, SID = 1; Service-Name = MediaPlayer). - 69 - STS 1916 IPSR CT CI...
- Page 70 When the connection was estab- lished you will find the directory of you PC on the left, the directory of the head-end station on the right. • Copy the video file into directory mediaplayer. - 70 - STS 1916 IPSR CT CI...
- Page 71 The following configuration steps must be done at the VIERA TV Sets. • Connect the USB stick with the M3U list / configuration file to the USB socket of the TV set. - 71 - STS 1916 IPSR CT CI...
- Page 72 —> In the right information section you will find a hint that the M3U list was found on the stick / head-end station. • Select Search Channels and press OK to access. - 72 - STS 1916 IPSR CT CI...
- Page 73 C 58 770.00 C 68 850.00 C 29 538.00 C 39 618.00 C 49 698.00 C 59 778.00 C 69 858.00 C 30 546.00 C 40 626.00 C 50 706.00 C 60 786.00 - 73 - STS 1916 IPSR CT CI...
- Page 74 Declaration of CE conformity GSS Grundig Systems GmbH • Beuthener Straße 43 • D-90471 Nuremberg Phone: +49 (0) 911 / 633 240 0 • Fax: +49 (0) 911 / 633 240 98 www.gss.de/en • info@gss.de CLASS CLASS Service: Phone: +49 (0) 911/ 633 240 90 • service@gss.de Alterations reserved.
Need help?
Do you have a question about the STS 1916 IPSR CT CI and is the answer not in the manual?
Questions and answers