Table of Contents
Advertisement
Quick Links
Advertisement
Table of Contents
Troubleshooting

Related Manuals for 3D Histech Pannoramic DESK 1.20


Summary of Contents for 3D Histech Pannoramic DESK 1.20
- Page 1 Pannoramic DESK 1.20 User’s Guide October 9, 2015 Rev. 1 PD120-UG-Rev1...
-
Page 2: Table Of Contents
Pannoramic DESK 1.20 User’s Guide Contents Disclaimer........................4 Declaration Of Conformity....................6 Character Formats and Symbols..................7 Notes Regarding Operational Safety................8 Notes on Warranty......................10 Terms and Abbreviations....................11 1 Product Description....................12 1.1 Product Overview........................12 1.1.1 Intended Use..............................12 1.1.2 Features and Benefits.............................12 1.1.3 Warning and Information Labels........................13... - Page 3 Pannoramic DESK 1.20 User’s Guide 4.3.4 Preview area scanned by preview camera.....................45 4.3.5 Focus tab................................51 4.3.6 Service tab..............................53 4.3.7 Display field and toolbar for live images......................54 4.3.8 Start Scan................................56 4.4 Scan To Server..........................56 4.5 Using Profiles...........................61 5 Troubleshooting and Maintenance................62 5.1 Safety Information........................62...
-
Page 4: Disclaimer
Pannoramic DESK 1.20 User’s Guide Disclaimer Copyright © 2001-2015 3DHISTECH Ltd. All rights reserved. Intellectual property related to the 3DHISTECH products are as follows: EP 1,789,831; US 7,663,078; EP 2,024,772; JP 2009-512685; US 12/301,781; EP 1,644,767; JP 2007- 516451; US7,327,515; EP 1,994,398; JP 2008-557835; US 12/281,566; U0700210; US 6,246,785;... - Page 5 Pannoramic DESK 1.20 User’s Guide Third-Party Disclaimer (LibTIFF – TIFF Library and Utilities) 3DHISTECH Ltd. is not liable for damage of whatever nature (including, but not limited to, general or specific damage, indirect damage, consequential damage or incidental damage, including damage...
-
Page 6: Declaration Of Conformity
Pannoramic DESK 1.20 User’s Guide Declaration Of Conformity 3DHISTECH Ltd. declares that the product Pannoramic DESK slide scanner is designed and produced with consideration of specified requirements according to the ISO 13485:2003 and IEC 61326-2- 6:2005 standards, and conforms to the directives and other standards listed below: IEC 61010-1:2001 (ed. -
Page 7: Character Formats And Symbols
Pannoramic DESK 1.20 User’s Guide Character Formats and Symbols Example Words or characters that appear on the screen. These include field names, screen and window titles, push-button and menu names, paths or options. Keys on the keyboard. For example, function keys (such as F11) or the Ctrl+M key combination. -
Page 8: Notes Regarding Operational Safety
Pannoramic DESK 1.20 User’s Guide Notes Regarding Operational Safety The below section of this User’s Guide contains information and warnings of a kind that must be followed by owner/operator personnel. Warning and advisory symbols which are used on the base unit of the Pannoramic DESK and in the section 1.1.3 Warning and Information Labels have the following meanings:... - Page 9 Pannoramic DESK 1.20 User’s Guide Remember to unplug the power cord before you open the Pannoramic DESK device. Disconnect plug! Only connect external devices that are safety extra low voltage rated to the Warning! instrument to avoid the risk of electrical shock.
-
Page 10: Notes On Warranty
Pannoramic DESK 1.20 User’s Guide Notes on Warranty 3DHISTECH Ltd. – as the Product Manufacturer – warrants the Pannoramic DESK to be free from faults in material and workmanship at the moment of installation. Defects must be notified immediately on identification and maximum efforts must be undertaken in order to the amount of damage as small as possible. -
Page 11: Terms And Abbreviations
Pannoramic DESK 1.20 User’s Guide Terms and Abbreviations Comma Separated Value Field of View Numerical Aperture Virtual Slide / Slide A digital image of a thin glass plate on which specimens are mounted for microscopic study: a dynamic, interactive image that you can manage, save, magnify, zoom, name, evaluate, annotate, mark and comment, send to a colleague electronically for co- operation or advice, and so on. -
Page 12: Product Description
Pannoramic DESK 1.20 User’s Guide 1 Product Description 1 Product Description 1.1 Product Overview 1.1.1 Intended Use Pannoramic DESK is designed to use transmitted light to digitize biological samples and specimens (histological sections, typically). The target users of the product can work for example, in education, research, industrial, or medical sectors. -
Page 13: Warning And Information Labels
Pannoramic DESK 1.20 User’s Guide 1 Product Description 1.1.3 Warning and Information Labels The following figure contains the labels used on the Pannoramic DESK main unit and the external mains power supply unit. Figure 1 – Warning and information labels October 9, 2015 –... -
Page 14: Base Unit
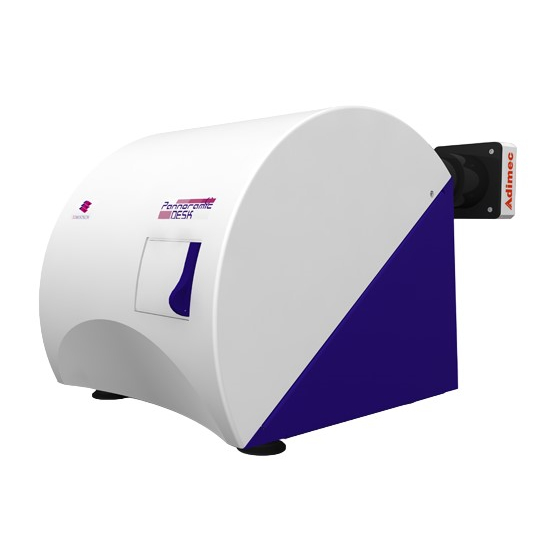
Pannoramic DESK 1.20 User’s Guide 1 Product Description 1.1.4 Base Unit The following figure shows the main parts of the base unit. Figure 2 – Main parts of the base unit 1. Protective cover 2. Protection rail 3. Scan camera 4. -
Page 15: System Overview
Pannoramic DESK 1.20 User’s Guide 1 Product Description 1.2 System Overview The standard scope of delivery of the product includes the following hardware and software items. 1.2.1 Pannoramic DESK system The following figure shows the main components of the Pannoramic DESK system. -
Page 16: Hardware Options
Pannoramic DESK 1.20 User’s Guide 1 Product Description 1.2.2 Hardware Options The configuration of the control computer and monitor can vary depending on the product order. Cameras Stingray F146C IRF Medical camera 1 CCD camera for normal brightfield application. CIS VCC-FC60FR19CL CMOS camera for high-quality brightfield applications allowing fast scanning. -
Page 17: Control Software
Pannoramic DESK 1.20 User’s Guide 1 Product Description Warning! The installation of the cameras in Pannoramic DESK must be carried out by trained professionals! In any other case the warranty will be automatically voided. The supplier or distributor is not liable for any damages caused by an installation carried out by an unauthorized person. - Page 18 Pannoramic DESK 1.20 User’s Guide 1 Product Description Pannoramic Viewer software (fully functional) Optional: CaseCenter • Pannoramic Viewer TMA module • 3D Reconstruction module • QuantCenter, HistoQuant, NuclearQuant, MembraneQuant, and DensitoQuant modules • TumorBoard module • E-School Encoder • October 9, 2015 – Rev. 1 3DHISTECH Ltd.
-
Page 19: Installation
Pannoramic DESK 1.20 User’s Guide 2 Installation 2 Installation Warning! The installation of Pannoramic DESK must be carried out by a trained professional! In any other case the warranty will be automatically voided. The supplier or distributor is not liable for any damages caused by an installation carried out by an unauthorized person. -
Page 20: Connectors And Cables
Pannoramic DESK 1.20 User’s Guide 2 Installation 1. Status display 2. DVD drive (RW) 3. Power on/off button 4. Earphone and microphone 3.5mm Jack ports 5. 2x USB port 6. Power supply connector 7. PS/2 mouse port 8. PS/2 keyboard port 9. -
Page 21: Preparing Slides
Pannoramic DESK 1.20 User’s Guide 3 Preparing Slides 3 Preparing Slides You can use all slides and cover slips that meet the following specifications: Slides Cover slips Length 75.0 to 76.2 mm max. 50 mm Width 25.0 to 26.0 mm max. -
Page 22: Affixing Barcode Stickers To Slides
Pannoramic DESK 1.20 User’s Guide 3 Preparing Slides 3.1 Affixing Barcode Stickers to Slides This section describes how to affix barcode stickers to slides. Barcodes enable virtual slide identification. Figure 5 – Slide with a barcode sticker The label area (1) is recorded by the preview camera, and can be displayed by the control and viewer software. -
Page 23: Inserting And Removing Slides
Pannoramic DESK 1.20 User’s Guide 3 Preparing Slides 3.2 Inserting and Removing Slides Pannoramic DESK features a manual feed for one single slide. To insert a slide Caution! Incorrect slide insertion may break the glass. Always make sure that slides are correctly inserted in the tray. The edge of the broken area of... - Page 24 Pannoramic DESK 1.20 User’s Guide 3 Preparing Slides Note: The cover slip and the label area should be on the top, with the label area pointing towards the slide insert door. Warning! To avoid jamming or breaking slides, ensure that the slide is not tilted and that it rests perfectly horizontally on the specimen holder.
- Page 25 Pannoramic DESK 1.20 User’s Guide 3 Preparing Slides To remove a slide: 1. Click in Pannoramic DESK control software. The specimen holder moves to the load/unload position 2. Open the slide insert door (1) by pushing it to the left.
-
Page 26: Software Description
Pannoramic DESK 1.20 User’s Guide 4 Software Description 4 Software Description 4.1 Starting / Exiting Pannoramic DESK Software Application 4.1.1 Starting the software At the startup of the program you can select the manual scanning mode for the scan software. -
Page 27: Barcode Settings
Pannoramic DESK 1.20 User’s Guide 4 Software Description 4.2.1 Barcode Settings Figure 9 – Barcode settings Barcode settings can be modified in the Barcode Settings window. By predefining the barcode type, foreground color (black or white – the color of the barcode), and other settings, you enable the Read Barcode option when using the control software. - Page 28 Pannoramic DESK 1.20 User’s Guide 4 Software Description Functions To move the specimen holder to load/unload position, click . You can replace the • slide when it is in this position. Caution! Ensure that the slide is not tilted, and that it rests perfectly horizontally on the stage.
- Page 29 Pannoramic DESK 1.20 User’s Guide 4 Software Description 2D Barcode Types You can select the following 2D barcode types: Data Matrix • PDF417 • MicroPDF417 • Maxicode • QR code • 1D barcodes with check digit (CDV) You can select the following 1D barcodes with check digit (CDV): Code 39 •...
-
Page 30: Image Compensation
Pannoramic DESK 1.20 User’s Guide 4 Software Description 4.2.2 Image Compensation You can use a saved compensation image whenever compensation-related issues occur (deriving from the slide, illumination, staining or embedding medium irregularities). To set compensation parameters properly, follow the instructions below. - Page 31 Pannoramic DESK 1.20 User’s Guide 4 Software Description Preview Settings There might be specks or minor etches on the surface of the compensation slide that require modifying the threshold settings. Therefore, the scanner will not use those areas for the creation of the compensation images.
-
Page 32: Microscope Settings
Pannoramic DESK 1.20 User’s Guide 4 Software Description 4.2.3 Microscope Settings By moving the mouse over the buttons, the software displays information about the setting you are interested in. Base Settings Figure 12 – Base settings Objective type You can select the type and the magnification level of the objectives. - Page 33 Pannoramic DESK 1.20 User’s Guide 4 Software Description Filter Settings Figure 13 – Filter settings The settings on this panel apply to Fluorescent mode, therefore irrelevant and inactive. October 9, 2015 - Rev. 1 3DHISTECH Ltd. 33(76)
- Page 34 Pannoramic DESK 1.20 User’s Guide 4 Software Description Camera Rotation Figure 14 – Camera rotation Caution! If you have transported the product, or changed the camera, there is a possibility, that the camera does not display the images properly. If you experience such problems, contact service support.
-
Page 35: Event Call Settings
Pannoramic DESK 1.20 User’s Guide 4 Software Description 4.2.4 Event Call Settings Figure 15 – Event Call Settings By moving the mouse cursor over the buttons, the software displays information about the setting you are interested in. Two of the three settings are responsible for opening external applications (.exe or .bat) as defined (for example, Pannoramic Viewer software can be opened after... - Page 36 Pannoramic DESK 1.20 User’s Guide 4 Software Description Run defines the window mode that the external application will start in. The following window modes can be set: Normal window • Minimized • Maximized • You can test whether the Scanning Error Occurred settings work by clicking In the Message Call section of the window complex messaging functions can be defined.
- Page 37 Pannoramic DESK 1.20 User’s Guide 4 Software Description In the Messenger Setup window the following parameters can be set: Message Type – E-mail (SMTP) • Host Address • Authentication – User ID and User Password are required. • Secure connection (SSL) – If activated, the messages will be sent through secured •...
-
Page 38: Using Brightfield Manual Mode
Pannoramic DESK 1.20 User’s Guide 4 Software Description 4.3 Using Brightfield Manual Mode The Brightfield Manual mode is perfect for digitizing slides that require unique settings, or single slides. You can use this mode to set the scanning, preview, and image quality settings. You can also set profile settings here, and start scanning in Brightfield Manual mode. -
Page 39: Routine Work Tab
Pannoramic DESK 1.20 User’s Guide 4 Software Description 4.3.1 Routine work tab Figure 19 – Routine work tab The Routine work tab provides the following basic digitization functions: To insert and remove slides To move the specimen holder to load/unload position, click •... -
Page 40: Scan Options Window
Pannoramic DESK 1.20 User’s Guide 4 Software Description To administer profiles, use the Scan Profiles field. The current profile name is displayed at the bottom left corner of the screen. • To save the current profile, click Save. • To select an existing profile from the selection menu, click Load. - Page 41 Pannoramic DESK 1.20 User’s Guide 4 Software Description These settings will determine the resulting quality and storage location of the virtual slide. You can choose the following image formats in the Image Encoding field: JPEG – The quality can be adjusted with the JPEG quality factor slider. Greater values result •...
-
Page 42: Preview Tab
Pannoramic DESK 1.20 User’s Guide 4 Software Description The Scanned slide destination field determines where to digitize the virtual slides. To be able to choose the Scan To CaseCenter function, you have to install the ScanToServer • application. For information on how to install and use the ScanToServer application, see section 4.4 Scan To... - Page 43 Pannoramic DESK 1.20 User’s Guide 4 Software Description Use threshold Scan specimen with auto threshold – This automatically detects the specimen in the preview • image. Important! Make sure that the detection result is acceptable for you. Otherwise set the threshold value manually or append missing areas with the help of Scanned function located at the preview toolbar.
- Page 44 Pannoramic DESK 1.20 User’s Guide 4 Software Description Remove coverslip – If selected, the edges of the coverslip are not detected as specimen to • be scanned. Depending on the threshold level, it is possible that the edges of the coverslip are detected as areas to be digitized.
-
Page 45: Preview Area Scanned By Preview Camera
Pannoramic DESK 1.20 User’s Guide 4 Software Description Use saved scan area This function is useful if the slides contain areas of interest that cannot be detected by the preview camera. This function along with saving profiles helps to scan all slides with the most adequate settings. - Page 46 Pannoramic DESK 1.20 User’s Guide 4 Software Description Areas that will be scanned These areas are digitized on the basis of user settings (for example, Fill holes in scan area) and not detected by the selected threshold value. Detected sample areas that will be scanned These areas are digitized.
- Page 47 Pannoramic DESK 1.20 User’s Guide 4 Software Description Navigation Tool: This tool offers easy and punctual slide navigation in distictive steps. Set Step Size (FoV) – 1, ½, or ¼ to determine the size of movement in proportion of one FOV. Click an arrow to move to the required direction with the set step size.
- Page 48 Pannoramic DESK 1.20 User’s Guide 4 Software Description TMA tool TMA tool is used for selecting TMA spots on TMA slides. You can set the selection settings on the following four tabs: Select tab Figure 28 – TMA tool: Select To create a new TMA object, click New.
- Page 49 Pannoramic DESK 1.20 User’s Guide 4 Software Description 1. Select the shape of the TMA spots (Rectangle spots or Circle spots). 2. Enter the number of rows and columns in the Rows and Columns fields or select the appropriate values with the arrows.
- Page 50 Pannoramic DESK 1.20 User’s Guide 4 Software Description Figure 31 – TMA tool Move tab with preview October 9, 2015 - Rev. 1 3DHISTECH Ltd. 50(76)
-
Page 51: Focus Tab
Pannoramic DESK 1.20 User’s Guide 4 Software Description Label area To rotate the label area by 180°, select the Rotate image by 180 degrees checkbox. Figure 32 – Label area 4.3.5 Focus tab Figure 33 – Focus tab October 9, 2015 - Rev. 1 3DHISTECH Ltd. - Page 52 Pannoramic DESK 1.20 User’s Guide 4 Software Description Live To display a live image of the current specimen in the Live image display field, click . It will work only if you select an area in the preview image with the Position sample.
-
Page 53: Service Tab
Pannoramic DESK 1.20 User’s Guide 4 Software Description Figure 34 – Focus level and step size 4.3.6 Service tab Figure 35 – Service tab This tab contains control and maintenance functions. Show images during scanning If you select this option, you will be able to see the currently scanned image field during scanning in the live image display field. -
Page 54: Display Field And Toolbar For Live Images
Pannoramic DESK 1.20 User’s Guide 4 Software Description 4.3.7 Display field and toolbar for live images The display field for live images displays images of the scan camera. The live image is displayed if no current digitization process is running or Show images during scanning option is enabled. - Page 55 Pannoramic DESK 1.20 User’s Guide 4 Software Description Toolbar for live images The toolbar is only available for the displayed live image, but not available for camera images during digitization. – Zoom in • – Zoom out • – One pixel on the monitor corresponds to one pixel on the camera •...
-
Page 56: Start Scan
Pannoramic DESK 1.20 User’s Guide 4 Software Description 4.3.8 Start Scan To start digitization process, click after checking all settings. Caution! Before starting digitization process ensure that you have enough free space on the destination drive. You can check the available free disk space in the last line (Available disk space) of the information area of Scan Progress. - Page 57 Pannoramic DESK 1.20 User’s Guide 4 Software Description 2. Select the Scan to CaseCenter option in the Scan Option window, then click Connect. Figure 38 – Scan to CaseCenter option 3. Type in or select the server address from the Connect to: drop-down list, and give the User name and Password.
- Page 58 Pannoramic DESK 1.20 User’s Guide 4 Software Description 4. Click the Connect button in the Scan Options window to connect to the server. If the connection is established the server status will be modified from Not connected to Connected. Figure 40 – Server connection established 5.
- Page 59 Pannoramic DESK 1.20 User’s Guide 4 Software Description Use masks for automatic fills. Activate the Use mask option and the mask fields • turn fillable. To save masks, click the Save Mask button, then fill the slide data fields. To modify masks click Set Mask.
- Page 60 Pannoramic DESK 1.20 User’s Guide 4 Software Description To erase/reset fields to default, click the Reset all button. • If modification is done to the folder tree of the CaseCenter server while the Scan To • Server window is open, click Update Tree to refresh the tree view.
-
Page 61: Using Profiles
Pannoramic DESK 1.20 User’s Guide 4 Software Description 4.5 Using Profiles Note: Saved profile settings cannot be applied if using a different type of Pannoramic scanner. The following settings are saved in a profile: Scan Mode Brightfield • Scan Options Focus frequency •... -
Page 62: Troubleshooting And Maintenance
Pannoramic DESK 1.20 User’s Guide 5 Troubleshooting and Maintenance 5 Troubleshooting and Maintenance 5.1 Safety Information Check cables, plugs and connections before operation, and if defective or cannot be replaced, contact 3DHISTECH Service for support. Check whether the device is compatible with your local line voltage. It can operate at line voltages 100V to 240V and 50/60 Hz. -
Page 63: Preventive Maintenance
Pannoramic DESK 1.20 User’s Guide 5 Troubleshooting and Maintenance 5.1.2 Preventive maintenance To prevent fungus growth Do not leave the equipment in an unconditioned environment with a storage temperature • above 60°C (140°F) or below 0°C (32°F), which may damage the equipment. - Page 64 Pannoramic DESK 1.20 User’s Guide 5 Troubleshooting and Maintenance 5. Reattach protective covers. 6. Connect power plug and turn power supply on. 7. Launch the scanner software. Black image – Illumination error! Probably the lamp has burned out. Please turn off the scanner...
- Page 65 Pannoramic DESK 1.20 User’s Guide 5 Troubleshooting and Maintenance Slide is often positioned incorrectly Guiding fault in transport system • Contact 3DHISTECH Service for support. • Digitization process is extremely slow Extended focusing option is activated • Deactivate the Extended focusing option if not required.
-
Page 66: Maintenance
Pannoramic DESK 1.20 User’s Guide 5 Troubleshooting and Maintenance 5.3 Maintenance This section describes the most common maintenance solutions that can be performed by the user of the product. For maintenance solutions not described in this manual, contact the service personnel. -
Page 67: Replacing The Halogen Lamp
Pannoramic DESK 1.20 User’s Guide 5 Troubleshooting and Maintenance 1. Remove both Allen screws (2) located at the left and right sides of the cover (1) by using an Allen screwdriver (3). 2. Carefully push the cover (5) horizontally frontward with light pressure until it can be removed completely from the basic unit (4). - Page 68 Pannoramic DESK 1.20 User’s Guide 5 Troubleshooting and Maintenance Warning! Hot surface! Wait for the lamp surface to cool down. Keep a cool-down time of approximately 15 minutes. When changing the lamp, avoid touching the replacement bulb with the bare fingers! 1.
-
Page 69: Removing A Slide
Pannoramic DESK 1.20 User’s Guide 5 Troubleshooting and Maintenance 5.3.3 Removing a slide If a slide got jammed or has suffered breakage during the process of digitization, stop the process and, if possible, move the slide holder to a position where the slide can be easily removed. -
Page 70: Transporting Pannoramic Desk
Pannoramic DESK 1.20 User’s Guide 5 Troubleshooting and Maintenance Warning! If the slide is broken, make sure to remove all pieces completely from the device. The edge of the broken area of the slide is sharp and it can lead... - Page 71 Pannoramic DESK 1.20 User’s Guide 5 Troubleshooting and Maintenance To transport Pannoramic DESK do the following: 1. Turn power supply off and detach all cables. 2. Transport Pannoramic DESK. 3. After finishing transportation, reestablish cable connections. Caution! Readjust camera angle if necessary after transporting and reinstalling the Pannoramic DESK! October 9, 2015 - Rev.
-
Page 72: Technical Data
Pannoramic DESK 1.20 User’s Guide 6 Technical Data 6 Technical Data Dimensions (width x depth x height) Base unit approx. 266 mm (W) x 306 mm (D) x 249 mm (H) 24V 100W power supply approx. 189 mm x 90 mm x 44 mm... - Page 73 Pannoramic DESK 1.20 User’s Guide 6 Technical Data Operating data Intended site closed room facilities Electrical protection class Internal protection degree IP 20 Electrical safety in compliance with DIN EN 61010-1:2001, DIN EN 61010-2- 101:2002 (IEC 61010-1:2001, IEC 61010-2-101:2002) Over-voltage category...
- Page 74 Pannoramic DESK 1.20 User’s Guide 6 Technical Data Slide identification Slides are identified by a VRmagic VRmC-8+ PRO preview camera. Label area is saved as an image and the barcode is interpreted as a character string, with capability for interpretation of the following...
- Page 75 Pannoramic DESK 1.20 User’s Guide 6 Technical Data CIS VCC-FC60FR19CL camera Global Shutter Type CMOS (Diagonal 15.930mm) Pixel size 5.5µm × 5.5µm Camera resolution 2048(H) × 2048(V) pixel Frame rates 17fps / 34fps / 68fps / 135fps Bit-depth 10 bit Pixel resolution with 20x objective and 1x C-mount adapter 0.24µm...
-
Page 76: Index
Pannoramic DESK 1.20 User’s Guide Index Index Barcode.................17, 22, 24, 27, 28, 29, 39, 58, 59, 60, 74 Brightfield....................12, 16, 17, 26, 30, 38, 41, 61 CaseCenter........................18, 42, 57, 60 CIS.........................9, 16, 17, 20, 73, 75 Compensation image....................29, 30, 31, 41, 61 Control software..............17, 23, 24, 25, 27, 38, 63, 66, 68, 69, 70...
Need help?
Do you have a question about the Pannoramic DESK 1.20 and is the answer not in the manual?
Questions and answers