Advertisement
Quick Links
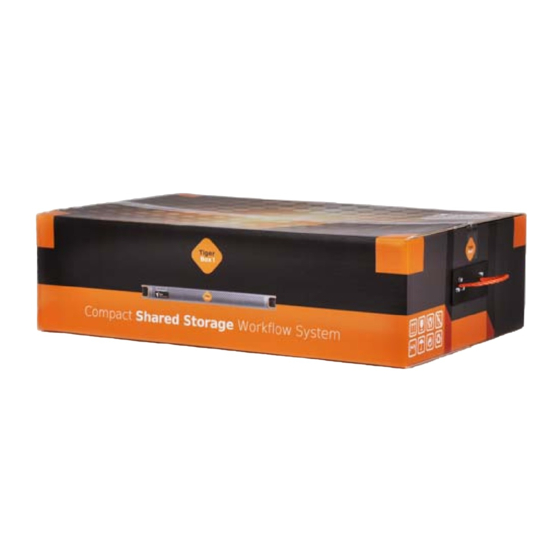
Tiger Box 1U4 Assembly Guide
Product Overview . . . . . . . . . . . . . . . . . . . . . . . . . . . . . . . . . 3
Site Installation . . . . . . . . . . . . . . . . . . . . . . . . . . . . . . . . . . . 5
Hardware Monitoring . . . . . . . . . . . . . . . . . . . . . . . . . . . . . . . 18
Post Installation Maintenance . . . . . . . . . . . . . . . . . . . . . . . . . 21
System Restore . . . . . . . . . . . . . . . . . . . . . . . . . . . . . . . . . . . 23
Initial Setup of the Appliance . . . . . . . . . . . . . . . . . . . . . . . . . 24
Advertisement

Related Manuals for Tiger Technology Tiger Box 1U4


Summary of Contents for Tiger Technology Tiger Box 1U4
-
Page 1: Table Of Contents
Tiger Box 1U4 Assembly Guide Product Overview ....... . . 3 Site Installation . - Page 2 TO THE TIGER TECHNOLOGY PRODUCTS, AND SPECIFICALLY DISCLAIM THE IMPLIED WARRANTIES OR CONDITIONS OF MERCHANTABILITY, Tiger Technology reserves the right to revise and improve its products as it sees fit. SATISFACTORY QUALITY, AND FITNESS FOR A PARTICULAR PURPOSE. This publication describes the state of this product at the time of its publication, and may not reflect the product at all times in the future.
-
Page 3: Product Overview
1GbE, depending on the model (see “Cabling Tiger Box” on page 15). Technology’s all-in-one shared storage appliance. This manual describes how to install and connect Tiger Box 1U4 at your site - from unpacking the appliance to Perform the initial setup of the appliance (see “Initial Setup of the Appliance” on powering on the system and setting it up. - Page 4 • 1 x system restore USB flash drive following dimensions: Important: If any of the components listed above is missing from your shipment, please contact your reseller or Tiger Technology support immediately. Important: Check if both warranty stickers at the back of the chassis are intact.
-
Page 5: Site Installation
Tiger Box 1U4 Assembly Guide Site Installation: Site Installation Front View The back of the appliance features the following elements: • 2 x power supply modules • System power button and system reset button • 2 x SAS port for directly connecting a Tiger Box expansion chassis •... - Page 6 Tiger Box 1U4 Assembly Guide Site Installation: Unpack Tiger Box Tip: It is advisable to keep all packaging components until the warranty of Cut the straps of the box, cut or remove the tape and open the flaps. your appliance expires.
- Page 7 Tiger Box 1U4 Assembly Guide Site Installation: Unpack Tiger Box Take out the foam case with the appliance and the bezel, holding it at each side, and Take out the cases with the rack rails kit and the cables. place it on a surface, ensuring that the system remains stable.
- Page 8 Install Tiger Box on a Table Top If you do not plan to install your Tiger Box 1U4 in a rack, and you opt for tabletop installation, ensure that: • the surface is clean and in a safe location;...
- Page 9 Tiger Box 1U4 Assembly Guide Site Installation: Installing the Drives Important: Excessive dust inside the appliance can cause overheating and Important: To prevent electrostatic discharge (ESD), touch grounded metal component failures. before touching any of the appliance components. You can also prevent ESD when inserting the drive carrier into the enclosure, by holding the appliance enclosure with the other hand.
- Page 10 Tiger Box 1U4 Assembly Guide Site Installation: Installing the Drives Press upwards the lever release button on the front of the drive carrier. Find the label on the drive that specifies its corresponding drive bay. The lever opens.
- Page 11 Tiger Box 1U4 Assembly Guide Site Installation: Installing the Drives Slide the drive carrier into the corresponding slot until the lever makes contact Push the lever up to finish sliding the drive carrier into the drive bay. To ensure that with the enclosure.
- Page 12 Tiger Box 1U4 Assembly Guide Site Installation: Install The Front Panel Bezel To check that the drive carrier is properly installed and makes full contact with the Tip: You can install/remove the bezel at any time without having to turn off or dismount the appliance from the rack.
- Page 13 To remove the bezel, with your index finger push inward the release latches at each Connecting The Appliance to The Power Your Tiger Box 1U4 is shipped to you with two power supply modules, installed in the rear of the appliance. These modules supply redundant power to Tiger Box - should a power supply module fail, you can replace it while the system is operating (see “Replacing a Failed Power Module”...
- Page 14 Tiger Box 1U4 Assembly Guide Site Installation: Connecting To connect the appliance to the power supply: If the appliance is properly connected, the power module LED indicator will display solid green light. If there's problem with the module installation, its LED Plug the power cord in the power socket of the power supply module.
- Page 15 Powering On The Appliance Cabling Tiger Box Tiger Box 1U4 features a Public network port for connection to a computer, from which to perform the initial setup of Tiger Box and assign IP addresses to all available network ports. Before cabling Tiger Box 1U4 it is important to carefully plan the topology of your network.
- Page 16 Tiger Box 1U4 Assembly Guide Site Installation: Cabling Tiger Box To connect a computer to the Public port: If your fiber-optic cable has protective caps, remove them. Plug one end of the network cable provided in the shipment in the port with label Plug one end of the fiber-optic cable into the SFP socket of the appliance port.
- Page 17 Tiger Box 1U4 Assembly Guide Site Installation: Cabling Tiger Box the Public port through an Ethernet switch and spare the remaining network ports Plug one end of the cable into the 10GbE port of the appliance. for connecting LAN clients.
-
Page 18: Hardware Monitoring
Tiger Box 1U4 Assembly Guide Hardware Monitoring: Hardware Monitoring Plug one end of the cable into the network port of the appliance. To connect a computer to the Admin port: Plug one end of the network cable provided in the shipment in the port with label Admin port. - Page 19 Tiger Box 1U4 Assembly Guide Hardware Monitoring: Monitoring the System Activity Monitoring the System Activity fan failure LED blinking error or fan failure The LEDs on the bezel of Tiger Box allow you to monitor the system activity. You can...
- Page 20 Tiger Box 1U4 Assembly Guide Hardware Monitoring: Monitoring Client Connectivity Monitoring Client Connectivity link LED amber solid or The 10GbE LAN card is (right indicator) blinking initialized. You can monitor the connectivity of SAN/LAN clients using the LED indicators on the The adapter is not receiving FC/10GbE/1GbE ports respectively.
-
Page 21: Post Installation Maintenance
RAID drive fails in the future. Replacing a Failed Drive You can replace a failed hard disk, while Tiger Box 1U4 is operating and no data on the Replacing a Failed Power Module storage will be lost. If your order includes a spare drive, it is shipped to you pre- Your Tiger Box 1U4 is shipped to you with two power supply modules, installed in the installed in a drive carrier and is ready to replace the one that has failed. - Page 22 Tiger Box 1U4 Assembly Guide Post Installation Maintenance: Unplug its power cable from the module's socket. Holding the lever of the power module with your index finger, push the side tab to the right and slide out the unit from the appliance.
-
Page 23: System Restore
Important: All your settings (IP addresses, defragmentation preferences, password for the web interface, etc.) will be lost after restoring the system to the default factory settings. Follow the instructions below or contact Tiger Technology support for assistance at: support@tiger-technology.com... -
Page 24: Initial Setup Of The Appliance
Tiger Box 1U4 Assembly Guide Initial Setup of the Appliance: Access the Web Interface To perform system restore: Shut down the appliance. Tiger Box appliances are shipped to you with preset IP address of the Public port (172.16.100.100) and a preset address of the Admin port (1.2.3.4 or 1.21.32.1), if such Plug the USB flash drive in the USB port of the appliance and press the power port is predefined by vendor. - Page 25 Tiger Box 1U4 Assembly Guide Initial Setup of the Appliance: Press Enter. the Admin port of your appliance uses IP address 1.2.3.4, set the IP address of your computer to 1.2.3.10 and the subnet mask to 255.255.255.0. The web interface of Tiger Store loads.
- Page 26 Tiger Box 1U4 Assembly Guide Initial Setup of the Appliance: The appliance must have an IP address for each network port through which it In the tile of a network card, do one of the following: communicates with Tiger Clients (directly or via an Ethernet switch). The IP address •...
- Page 27 Tiger Box 1U4 Assembly Guide Initial Setup of the Appliance: with the appliance through this port. If computers in your facility are already In the tile of the respective port or team, enter the IP address and subnet mask. interconnected in a LAN, you can simply assign an IP address to the Public port in the same subnet.
- Page 28 Tiger Box 1U4 Assembly Guide Initial Setup of the Appliance: In the left pane of Tiger Store’s web interface, click System and then Settings. Click Set Date and Time. In Appliance Name, enter a new name of the appliance and click Apply.
- Page 29 Tiger Box 1U4 Assembly Guide Initial Setup of the Appliance: In System Reset drop down box, select Full System Reboot and then click Full system reboot. When the appliance is online again, accesses to files/folders on the shared volumes are authenticated against the specified Active Directory domain.
Need help?
Do you have a question about the Tiger Box 1U4 and is the answer not in the manual?
Questions and answers