GE APCD10 Series Owner's Manual And Installation Instructions
Portable room air conditioner
Hide thumbs
Also See for APCD10 Series:
- User manual (36 pages) ,
- Owner's manual and installation instructions (36 pages)
Table of Contents
Advertisement
Available languages
Available languages
IMPORTANT SAFETY INFORMATION . . . . 3
CONTROLS . . . . . . . . . . . . . . . . . . . . . . . . . . . 4
PARTS AND FEATURES . . . . . . . . . . . . . . . . 6
INSTALLATION REQUIREMENTS . . . . . . . . 7
INSTALLATION INSTRUCTIONS . . . . . . . . 8
AIR CONDITIONER USE . . . . . . . . . . . . . . . 12
AIR CONDITIONER CARE . . . . . . . . . . . . . 12
TROUBLESHOOTING . . . . . . . . . . . . . . . . . 13
WIFI SETUP . . . . . . . . . . . . . . . . . . . . . . . . . 13
LIMITED WARRANTY . . . . . . . . . . . . . . . . . 15
CONSUMER SUPPORT . . . . . . . . . . . . . . . . 16
Before you begin
Record the GE module number and
password for wifi setup. To locate this
information, see pages 13 and 14.
GE Module Number #____________
Password #____________________
Write the model and serial
numbers here:
Model # _________________
Serial # _________________
Find these numbers on a label on
the side of the air conditioner.
GE is a trademark of the General Electric Company. Manufactured under trademark license.
OWNER'S MANUAL
AND INSTALLATION
INSTRUCTIONS
APCD10
APHD10
49-5000155 Rev. 1 11-18 GEA
Advertisement
Chapters
Table of Contents

Related Manuals for GE APCD10 Series


Summary of Contents for GE APCD10 Series
-
Page 1: Table Of Contents
Write the model and serial numbers here: Model # _________________ Serial # _________________ Find these numbers on a label on the side of the air conditioner. GE is a trademark of the General Electric Company. Manufactured under trademark license. 49-5000155 Rev. 1 11-18 GEA... - Page 2 THANK YOU FOR MAKING GE APPLIANCES A PART OF YOUR HOME. Whether you grew up with GE Appliances, or this is your first, we’re happy to have you in the family. We take pride in the craftsmanship, innovation and design that goes into every GE Appliances product, and we think you will too.
-
Page 3: Important Safety Information
IMPORTANT SAFETY INFORMATION READ ALL INSTRUCTIONS BEFORE USING THE APPLIANCE IMPORTANT SAFETY INSTRUCTIONS • Disconnect power before servicing. WARNING To reduce the risk of fire, electrical • Disconnect power before cleaning. shock, injury to persons, or damage when using the air NOTE: Turning off power by pressing the Power conditioner, follow basic precautions, including the button does NOT disconnect the appliance from the... -
Page 4: Controls
Controls Features and appearance will vary. Lights next to the touch pads on the air conditioner control panel indicate the selected settings. Hold 3 Sec to Enable/Disable WIFi A. Timer Button NOTE: The temperature cannot be set when the air conditioner is in either Fan or Dehum mode. - Page 5 Controls The display will always default to show the room temperature. When the air conditioner is turned on, it will automatically start in the last mode and fan settings selected. Cool Mode Use the COOL mode for cooling. NOTE: If the air conditioner is off and is then turned on while set to COOL, it will take approximately 3 minutes To set the COOL mode: for the compressor to start and cooling to begin.
-
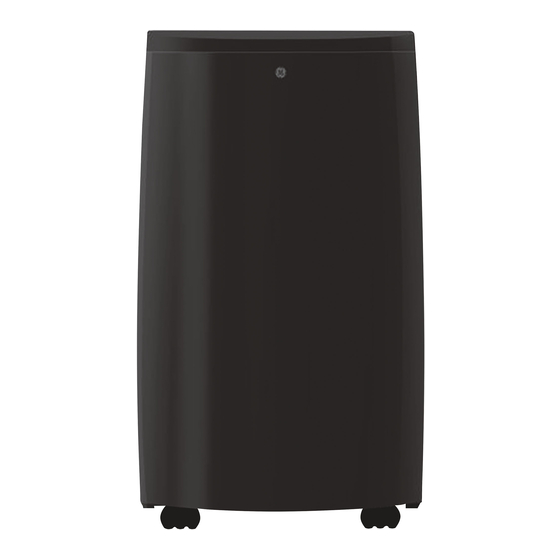
Page 6: Parts And Features
Parts and Features 1. Control Panel 6. Power Cord Storage 2. Air Discharge Louvers 7. Air Filter 3. Caster 8. Center Drain Cap 4. Remote Control Holder 9. Lower Drain Cap 5. Side Handle 49-5000155 Rev. 1... -
Page 7: Installation Requirements
Installation Requirements TOOLS AND PARTS Gather the required tools and parts before starting installation. TOOLS NEEDED • Flat-blade Screwdriver • Phillips Screwdriver PARTS SUPPLIED Main Window Extension Flat Screws (6) Panel Panels (2) 4 for extension panels 2 for nozzles Pointed Screws (7) Exhaust Hose Exhaust... -
Page 8: Installation Instructions
Installation Instructions Questions? Call GE Appliances at 800.GE.CARES (800.432.2737) or visit our Website at: GEAppliances.com. BEFORE YOU BEGIN Power cord includes a current interrupter device. A test and reset button is provided on the plug case. The Read these instructions completely and carefully. - Page 9 Installation Instructions 1. Unpack the Air Conditioner Install Main Window Panel and Extension Panels WARNING NOTE: Depending on the size of your window Excessive Weight Hazard opening, use the main panel and one or both of the extension panels. • Use two or more people to move and install air 1.
- Page 10 Installation Instructions Install Main Window Panel and Attach Exhaust Hose to the Extension Panels (cont.) Exhaust Nozzle After assembly: 1. Grasp both ends of the exhaust hose and gently pull to expand the hose. Attach with pointed screws (2) NOTE: Do not attach additional hoses to extend the length.
- Page 11 Installation Instructions Complete Installation WARNING Electrical Shock Hazard: • Plug into a grounded 3 prong outlet. • Do not remove the ground prong from the power cord plug. • Do not use an adapter. • Do not use an extension cord. •...
-
Page 12: Air Conditioner Use
Air Conditioner Use IMPORTANT: If the air conditioner has been tilted on its • When turning on the unit after previous use, it will side, wait 24 hours before turning on the air conditioner to remember the last settings used. allow the oil to return to the compressor. -
Page 13: Troubleshooting
GE Appliances U+ Connect Enabled* If your Air Conditioner (AC) has a Connected Appliance Information label located on the outside as shown below, your AC is GE Appliances U+ Connect Enabled. A WiFi communication card is built into the product allowing it to communicate with your smart phone for remote monitoring, control and notifications. - Page 14 GE Appliances Connected Data Privacy Policy. To connect your room air conditioner, you’ll need the Visit geappliances.com/privacy/privacy_policy_ GE Appliances App. The app will walk you through the connected to view this policy. connection process. Download the app from iTunes or Questions about U+ Connect Google Play.
-
Page 15: Limited Warranty
For US Customers: This limited warranty is extended to the original purchaser and any succeeding owner for products purchased for home use within the USA. If the product is located in an area where service by a GE Appliances Authorized Servicer is not available, you may be responsible for a trip charge or you may be required to bring the product to an Authorized GE Appliances Service location for service. -
Page 16: Consumer Support
Have a question or need assistance with your appliance? Try the GE Appliances Website 24 hours a day, any day of the year! You can also shop for more great GE Appliances products and take advantage of all our on-line support services designed for your convenience. - Page 17 # de Modelo _____________ # de Serie _______________ Puede encontrar estos números en una etiqueta en el costado del acondicionador de aire. GE es una marca registrada de General Electric Company. Fabricado bajo licencia de marca. 49-5000155 Rev. 1 11-18 GEA...
- Page 18 GRACIAS POR HACER QUE GE APPLIANCES SEA PARTE DE SU HOGAR. Ya sea que haya crecido usando GE Appliances, o que ésta es su primera vez, nos complace tenerlo en la familia. Sentimos orgullo por el nivel de arte, innovación y diseño de cada uno de los electrodomésticos de GE Appliances, y creemos que usted también.
- Page 19 INFORMACIÓN IMPORTANTE DE SEGURIDAD LEA TODAS LAS INSTRUCCIONES ANTES DE USAR INSTRUCCIONES IMPORTANTES DE SEGURIDAD • Desconecte el suministro de energía antes de limpiarlo.. ADVERTENCIA NOTA: Si apaga la unidad presionando el botón Power Para reducir el riesgo de incendio, (Encendido), esto NO desconecta el electrodoméstico del choque eléctrico, lesiones a personas o daños al utilizar el suministro de energía.
- Page 20 Controles Las luces al lado de las teclas de toque en el panel de control del acondicionador de aire indicarán los ajustes seleccionados. Las funciones y el aspecto pueden variar. Hold 3 Sec to Enable/Disable WIFi A. Botón Timer (Temporizador) NOTA: La temperatura no se puede fijar si el acondicionador de aire está...
- Page 21 Controles La pantalla siempre mostrará la temperatura del ambiente por omisión. Cuando el acondicionador de aire sea encendido, se iniciará de forma automática en las configuraciones de modo y ventilación que fueron usadas por última vez. Modo de Refrigeración Use el modo COOL (Refrigeración) para enfriar. NOTA: Si el acondicionador de aire está...
- Page 22 Pièces Et Caractéristiques 1. Panel de control 6. Almacenamiento del Cable de Corriente 2. Rejillas de descarga de aire 7. Filtro de Aire 3. Ruedecilla 8. Tapa del Drenaje Central 4. Suspensor del Control Remoto 9. Tapa del Drenaje Inferior 5.
-
Page 23: Requisitos De Instalación
Requisitos De Instalación HERRAMIENTAS Y PIEZAS Reúna las herramientas y piezas necesarias antes de comenzar la instalación. HERRAMIENTAS NECESARIAS • Destornillador de hoja plana • Destornillador Phillips PIEZAS SUMINISTRADAS Panel Paneles de Tornillos de cabeza plana Main Window Extension Flat Screws (6) principal de la extensión (2) (6) 4 para los paneles de... -
Page 24: Instrucciones De Instalación
Instrucciones de instalación ¿Preguntas? Llame a GE Appliances al 800.GE.CARES (800.432.2737) o visite nuestro sitio web en: GEAppliances.com. ANTES DE INICIAR El cable de alimentación incluye un dispositivo para interrupción de corriente. Se incluye un botón de prueba Lea estas instrucciones completa y cuidadosamente. - Page 25 Instrucciones de instalación 1. Desempaque Su Instalar El Panel Principal De La Ventana Y Los Paneles De Acondicionador De Aire Extensión ADVERTENCIA NOTA: Según el tamaño de la abertura de la ventana, utilice el panel principal y uno o ambos paneles de Peligro de Peso Excesivo extensión.
- Page 26 Instrucciones de instalación Instalar El Panel Principal De Sujete La Manguera De Escape La Ventana Y Los Paneles De A La Boquilla De Escape Extensión (cont.) 1. Sujete ambos extremos de la manguera de escape y tire suavemente para extender la manguera. Después de la asamblea Realice la colocación con los NOTA: No conecte mangueras adicionales para...
- Page 27 Instrucciones de instalación Complete La Instalación ADVERTENCIA Peligro de Choque Eléctrico: Conecte a un contacto de pared de conexión a • tierra de 3 terminales. No quite el terminal de conexión a tierra del cable • de alimentación. No use un adaptador. •...
-
Page 28: Uso Del Acondicionador De Aire
Uso Del Acondicionador De Aire IMPORTANTE: Si el acondicionador de aire se ha alta del ventilador. El panel de control mostrará la inclinado hacia un lado, espere 24 horas antes de temperatura actual de la habitación. encender el acondicionador de aire a fin de permitir •... -
Page 29: Configuración Wifi
GE Appliances U+ Connected Habilitado* Si su acondicionador de aire posee una etiqueta de Información del Electrodoméstico Conectado ubicada en la parte externa como se muestra a continuación, su acondicionador de aire cuenta con GE U+ Connect Habilitado. Una tarjeta de comunicación de WiFi está... - Page 30 Aplicación de GE Appliances. La aplicación con la Política de Privacidad de Datos de Conexión lo guiará a través del proceso de conexión. Descargue la de GE Appliances. Para acceder a esta política, visite aplicación de iTunes o Google Play. geappliances.com/privacy/privacy_policy_connected.
-
Page 31: Garantía Limitada
EE.UU. Si el producto está en un área donde no se encuentra disponible un Proveedor Autorizado del Servicio Técnico de GE Appliances, usted será responsable por el costo de un viaje o se podrá requerir que traiga el producto a una ubicación del Servicio Técnico de GE Appliances Autorizado para recibir el servicio. - Page 32 Servicio Programado El servicio de reparación de expertos de GE Appliances está a sólo un paso de su puerta. ¡Conéctese a través de Internet y programe su servicio a su conveniencia cualquier día del año! En EE.UU.: GEAppliances.com/service o llame al 800.432.2737 durante el horario comercial habitual.
Need help?
Do you have a question about the APCD10 Series and is the answer not in the manual?
Questions and answers