
Summary of Contents for Spectra Watermakers Z-Ion Catalina 300 Mk II
- Page 1 Z-Ion Installation and Retrofit Instructions Catalina 300 Mk II Katadyn Desalination, LLC Spectra Watermakers PH 415.526.2780 FX 415.526.2787 www.spectrawatermakers.com Revised 06.01.13...
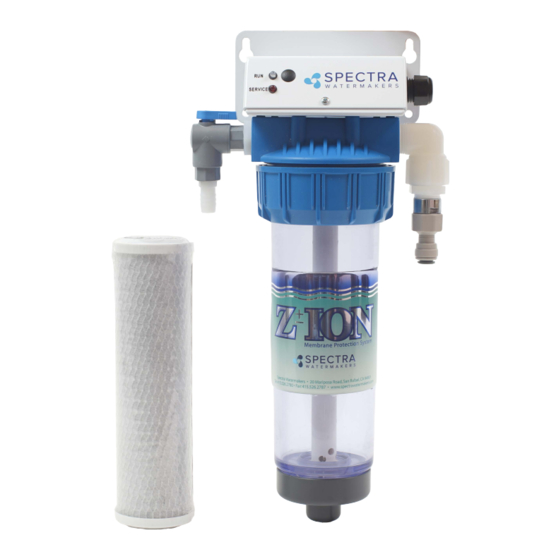
- Page 3 Thank you for choosing Spectra’s Z-Ion system! This revolutionary adap- tation of an ancient technology effectively and safely protects the mem- brane and filters on your Spectra watermaker. The Z-Ion system introduces a stream of metallic ions that kill the organ- isms in your watermaker and create an environment that prohibits them from growing and going anaerobic.
-
Page 4: Plumbing Installation
Plumbing Installation Installation should always be carried out by a qualified technician to avoid problems and ensure warranty coverage. Turn off the domestic fresh water pump and bleed any re- maining pressure in the pipes. Fresh Water Flush Module Remove the existing Fresh Water Flush Module from the system. - Page 5 Plumbing Installation Accumulator— Check Valve Assembly Close watermaker seacock . Cut inlet hose between the intake seacock and the strainer and install the accumulator- check valve assembly. Make sure that the check valve is oriented properly. Securely tighten the hose clamps as this is below the water line!
- Page 6 Plumbing Installation (Continued) Feed Pump Module Remove the Feed Pump Module cover, exposing the feed pump, and ac- cumulator tank. Remove the black 3/8” fresh water flush tube from the back of the tee fitting at the inlet to the feed pump. Note: the fitting is located be- hind the pressure sensor with the yellow band.
- Page 7 Plumbing Installation (Continued) Install the blanking plug supplied in the install kit into the now open port on the gauge tee. Using the tubing supplied in the install kit, con- nect the 3/8” tube on the discharge of the fresh water flush solenoid and route it to the tee on the accumulator check valve assembly.
- Page 8 Parker tube assembly instructions...
-
Page 9: Wiring Installation
Wiring Installation Turn the main DC breaker off or remove the main power fuse to the water- maker. Locate the DC Bus Bar, as shown below, which is the main power feed for the watermaker. Incoming DC Bus Bar Connect the DC power leads from the Z-Ion Control Box to the Incoming DC Z-Ion Fuse block Bus Bar. -
Page 10: Testing The System
Testing the system Normally no adjustment is necessary as the unit has been set up at the factory for your water- maker, however it is advisable to make sure it is working properly. You will need Spectra test kit # Once the installation is complete and the unit is powered up, activate EL-ZION-TESTKIT. - Page 11 Z-ion Specifications The Z-ION controller has been specifically designed to batch process (produce) metallic ions for system disinfection. This process has been around for many years, however most systems produce ions on a continuous slow basis rather than a short intermittent process. It was found that the most stable way to produce ions in a batch process is to maintain a constant current to the electrodes and vary the voltage.
Need help?
Do you have a question about the Z-Ion Catalina 300 Mk II and is the answer not in the manual?
Questions and answers