
Related Manuals for Avizia CA310

Summary of Contents for Avizia CA310
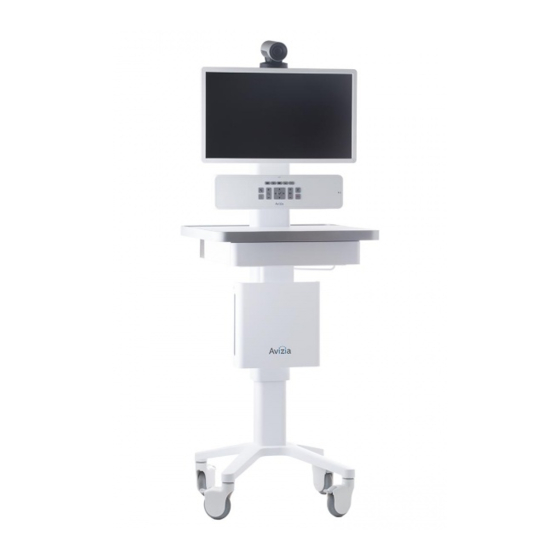
- Page 1 CA310 Telemedicine Cart User & Installation Guide AVZ-270920-A © 2017 Avizia Inc. All rights reserved. | avizia.com...
-
Page 2: Table Of Contents
Connecting to network ��������������������������������������������������������������������������������������������������������������������� 23 Troubleshooting ������������������������������������������������������������������������������������������������������������������������������������� 44 Connections overview ������������������������������������������������������������������������������������������������������������������ 23 Connect to a wired network �������������������������������������������������������������������������������������������������������� 24 Technical Specifications ����������������������������������������������������������������������������������������������������������������������� 45 Connect to a wireless network ��������������������������������������������������������������������������������������������������� 25 © 2017 Avizia Inc. All rights reserved. | avizia.com | AVZ-270920-A... -
Page 3: Before Getting Started
• Indications for use – Contraindications • Safety precautions – Warnings – Environmental considerations – Waste handling • Warnings • Operator safety summary • Important Safeguards • Equipment markings © 2017 Avizia Inc. All rights reserved. | avizia.com | AVZ-270920-A... -
Page 4: Indications For Use ������������������������������������������������������������������������������������������������������������������������������� 4 Adjusting The System Height
Contraindications The CA310 is not intended to substitute for the in-person physical examination of a patient or as a substitute for direct medical intervention� It is also not intended for real- time, active, or online patient monitoring, nor is it intend- ed to provide time sensitive data or alarms�... -
Page 5: Safety Precautions ������������������������������������������������������������������������������������������������������������������������������� 5 Lowering The Work Surface
Please use the nearest waste collection facility as directed Production of Products by your municipality or your retailer� Our factories employ efficient environmental methods for reducing waste and pollution and ensuring the products are recyclable� © 2017 Avizia Inc. All rights reserved. | avizia.com | AVZ-270920-A... -
Page 6: Warnings
The CA310 is not intended to make emergency calls� In the The CA310 may operate at a delay of up to 150 millisec- ficient bandwidth, or for other reasons� If audio or video is event of an emergency, the user should use a telephone or onds, depending on network condition�... -
Page 7: Operator Safety Summary
• Lightning - Unplug this apparatus during lightning storms Always fully lower the work surface before trans- or when unused for long periods of time� porting the system� © 2017 Avizia Inc. All rights reserved. | avizia.com | AVZ-270920-A... -
Page 8: Important Safeguards
Safety Approval is to be utilized� NEVER USE AN EXTENSION CABLE TO POWER THE SYSTEM� The leakage current could increase when connect- ed to other equipment� © 2017 Avizia Inc. All rights reserved. | avizia.com | AVZ-270920-A... -
Page 9: Equipment Markings
Located on Power Module housed within the worksurface. porting the system� Follow instructions for use� Suivez les instructions d’utilisation� Located on the rear of the system at the bottom of the system column. © 2017 Avizia Inc. All rights reserved. | avizia.com | AVZ-270920-A... -
Page 10: Getting Started
• Turning the system on and entering Quickboot • Connecting to network – Connections overview – Connect to a wired network – Connect to a wireless network • Fleet Monitoring © 2017 Avizia Inc. All rights reserved. | avizia.com | AVZ-270920-A... -
Page 11: Best Practices
CONFERENCE 1 We recommend that the system is plugged in to an electri- • Select contact and choose SAVE TO MY CONTACTS cal outlet when storing the CA310� This ensures that Quick- VIDEO BANDWIDTH Boot maintains a full charge and is ready when needed�... -
Page 12: System Overview
Hospital grade locking casters Refer to the CA310 Quick Start Guide (AVZ-CA310-DOC-QSG) included on the outside of the system packaging for initial assembly and setup� © 2017 Avizia Inc. All rights reserved. | avizia.com | AVZ-270920-A... -
Page 13: Network Considerations
“CA310: Configuring the Wireless Network Module” found at http://avizia.com/ca310support� Wireless connection The CA310 can be configured to work on a wireless net- work with the optional Silex WiFi Bridge Module or cus- tomer provide WiFi Bridge� This provides network to the video codec, network out of the console port, and for an optional PC�... -
Page 14: Tm Feature
ON position� Ensure that all work is saved on the user-sup- plied PC and that the PC is properly shutdown before initiating QuickBoot � © 2017 Avizia Inc. All rights reserved. | avizia.com | AVZ-270920-A... -
Page 15: Console Overview
QuickBoot functionality� Camera zoom Volume control Power indicator LED OK and directional pad for camera control and system menu navigation © 2017 Avizia Inc. All rights reserved. | avizia.com | AVZ-270920-A... -
Page 16: Connections Overview
The Power Button will initially power on the system, but after that it will enable QuickBoot mode and reset the console when pressed for 10 seconds. © 2017 Avizia Inc. All rights reserved. | avizia.com | AVZ-270920-A... -
Page 17: Setting Up The System
Setting up the system Setting up the system PrecisionHD Camera Initial system setup WiFi Bridge (OPTION 2x) Refer to the Avizia CA310 Quick Start Guide (included with Display and the system packaging) for procedures pertaining to initial camera bracket System power system setup�... -
Page 18: Connecting An Auxiliary Device
SD source first, Composite (SD source) the HD source second, and then to the default (main camera) source� Audio is not transmitted over HDMI� Only video is transmitted over HDMI� NOTE © 2017 Avizia Inc. All rights reserved. | avizia.com | AVZ-270920-A... -
Page 19: Connecting An Electronic Or Digital Stethoscope
Unplug the audio connection(s) higher up the prioritization schedule to present the desired audio� © 2017 Avizia Inc. All rights reserved. | avizia.com | AVZ-270920-A... -
Page 20: Connecting A Laptop
Setting up the system Setting up the system Connecting a laptop A laptop computer can be connected to the CA310 to pres- ent the laptop’s video and audio to video participants� 1� Connect the laptop video out to the CA310’s HDMI in- put for PC�... -
Page 21: Connecting A Second Display
Setting up the system Setting up the system Connecting a second display A secondary display can be connected to the CA310 to view both presentation (second display) and main video (main display) simultaneously� The system will auto detect the second display when you connect the HDMI cable from the second display to the console�... -
Page 22: Turning The System On And Entering Quickboot
System power button As long as the system is plugged into an AC outlet NOTE and the breaker switch is ON, QuickBoot will continue to charge and maintain readiness� © 2017 Avizia Inc. All rights reserved. | avizia.com | AVZ-270920-A... -
Page 23: Connecting To Network
NETWORK FOR PC (OPTION) IS AVAILABLE IF FLEET SERVICE IS NOT DETECTED. ETHERNET TO CART NOTE: CONNECTING ETHERNET TO THE SYSTEM DISABLES THE WI-FI BRIDGE PORTS ON THE NETWORK MODULE. © 2017 Avizia Inc. All rights reserved. | avizia.com | AVZ-270920-A... -
Page 24: Connect To A Wired Network
DHCP IP address, which will be displayed in the upper left hand corner of the display� If a static IP is required for the CA310 then this requires configuring the SX20 endpoint within the CA310� For more information on setting a static IP address, please reference the Cisco TelePresence Video Systems Getting Started Guide for the SX20: http://cisco.com/go/sx-docs�... -
Page 25: Connect To A Wireless Network
If a wireless connection is preferred, then the cart wired connection must be disconnected from the Multi-Client mode may required changes to the wired infrastructure� NOTE wireless network infrastructure� © 2017 Avizia Inc. All rights reserved. | avizia.com | AVZ-270920-A... -
Page 26: Fleet Monitoring
Fleet enabled on a Wi-Fi network in Multi- Client mode When connected to a wireless network (Bridge 1), and Fleet You can refer to the Fleet documentation available online at avizia.com/fleetsupport� Please contact your is enabled, the Network Module will provide the service with NOTE Avizia representative for further assistance with Avizia’s Fleet Monitoring service�... -
Page 27: Using The System
– Turning microphone on and off • Making a video call – Placing a call – Presenting a laptop – Presenting an optional PC – Presenting an auxiliary device © 2017 Avizia Inc. All rights reserved. | avizia.com | AVZ-270920-A... - Page 28 Use the handle to PULL the system safely across thresholds, cords, cables, and other potential obstacles on the ground� Always fully lower the work surface before transporting the system� © 2017 Avizia Inc. All rights reserved. | avizia.com | AVZ-270920-A...
-
Page 29: Navigating The Menus
When navigating the menu structure while you are in a call, pressing will not NOTE disconnect a call� Exit the menu system and then press to disconnect a call� © 2017 Avizia Inc. All rights reserved. | avizia.com | AVZ-270920-A... -
Page 30: Controlling The Camera
PIP is present� You can now move the PIP around the edges of the display by pressing the Selfview button� To disabled this, press the Selfview button for five seconds� © 2017 Avizia Inc. All rights reserved. | avizia.com | AVZ-270920-A... -
Page 31: Controlling Volume And Microphone
NOTE such as a digital stethoscope or laptop audio, will Mute continue to be heard during a call� (microphone, local) Volume control Integrated speakers © 2017 Avizia Inc. All rights reserved. | avizia.com | AVZ-270920-A... -
Page 32: Making A Video Call
TIP: When not in a call and not in the menu (Connect) will take you directly to system, pressing the Recent calls list� © 2017 Avizia Inc. All rights reserved. | avizia.com | AVZ-270920-A... -
Page 33: Presenting A Laptop
Making a video call Presenting a laptop An external monitor can be connected A user-supplied laptop can be connected to the CA310 to to the CA310 from the HDMI output on the side of the console� The system will present during a video call�... -
Page 34: Presenting An Optional Pc
Presenting an optional PC The PC Cabinet option (AVZ-CA310-ACC-PCC) provides a PC housing and cable kit to integrate an Ultra Small Form Fac- tor (USFF) PC with the CA310� This enables a user-supplied PC to be presented during a video call� Press... -
Page 35: Presenting An Auxiliary Device
Making a video call Presenting an auxiliary device A high definition and standard definition device can be connected to the CA310 to present during a video call� Ensure that the connections are secure and powered on� Press (AUX) to present the contents of your device to the call participants�... -
Page 36: Maintaining The System
CA310 | Installation & User Guide Maintaining the system • Displaying system information • Cleaning and maintenance guidelines • Battery guidelines • Installing updates • Factory defaulting the system • Storing the system © 2017 Avizia Inc. All rights reserved. | avizia.com | AVZ-270920-A... - Page 37 • IP address • System status • CA310 firmware version • TC version • Network module version • Network module mode Single-Client or Multi-Client An example of the System Information window� © 2017 Avizia Inc. All rights reserved. | avizia.com | AVZ-270920-A...
-
Page 38: Cleaning And Maintenance Guidelines
• Always disconnect your monitor’s power from the • All surfaces — painted and plastic cart components — The surface materials of the CA310 are durable and easy to system before cleaning� Clean the camera and LCD will withstand cleaning by commonly available multi- maintain�... - Page 39 CAUTION RISK OF EXPLOSION IF BATTERY IS REPLACED BY AN IN- CORRECT TYPE� DISPOSE OF USED BATTERIES ACCORDING TO APPROPRIATE LOCAL REGULATIONS� © 2017 Avizia Inc. All rights reserved. | avizia.com | AVZ-270920-A...
-
Page 40: Installing Updates
ROOT directory of a USB thumb/flash drive� 2� Ensure the CA310 is powered on and in an idle state (not in a call)� 3� Insert the USB drive into the USB port on the side of system console and wait 5-10 seconds for an update prompt�... - Page 41 (AUX) buttons for about 5 seconds to view version information� The Network Module’s firmware version may take up to a minute to refresh and display the new NOTE version� © 2017 Avizia Inc. All rights reserved. | avizia.com | AVZ-270920-A...
-
Page 42: Factory Defaulting The System
The source selection LEDs will light up one by one and blink three times before the entire system reboots� Once the system has fully booted up, it is ready for setup and configuration� © 2017 Avizia Inc. All rights reserved. | avizia.com | AVZ-270920-A... -
Page 43: Storing The System
2� Unplug from electrical outlet 3� Wrap power cord on the cord wrap 4� Secure or appropriately store peripheral devices and cables 5� Store the system in a cool, dry environment © 2017 Avizia Inc. All rights reserved. | avizia.com | AVZ-270920-A... -
Page 44: Troubleshooting
3� Wait a few seconds and turn the system back configured to mirror or extend to another display� on� The HDMI setting on the display should be automatically reset and no longer show a black screen� © 2017 Avizia Inc. All rights reserved. | avizia.com | AVZ-270920-A... -
Page 45: Technical Specifications
• IEEE 802�1x network authentication • 352 x 288@30, 60 fps (CIF) • ClearPath • 176 x 144@30, 60 fps (QCIF) (Decode only) AUDIO OUTPUT • One 3�5-mm audio output, for Headphones © 2017 Avizia Inc. All rights reserved. | avizia.com | AVZ-270920-A... - Page 46 WARNING: This product contains chemicals known to the State of California to cause cancer and birth defects or other reproductive harm� Third-party trademarks mentioned are the property of their respective owners� The use of the word partner does not imply a partnership relationship between Avizia and any other company� (1007R)
Need help?
Do you have a question about the CA310 and is the answer not in the manual?
Questions and answers