
Related Manuals for Abatron 7440


Summary of Contents for Abatron 7440
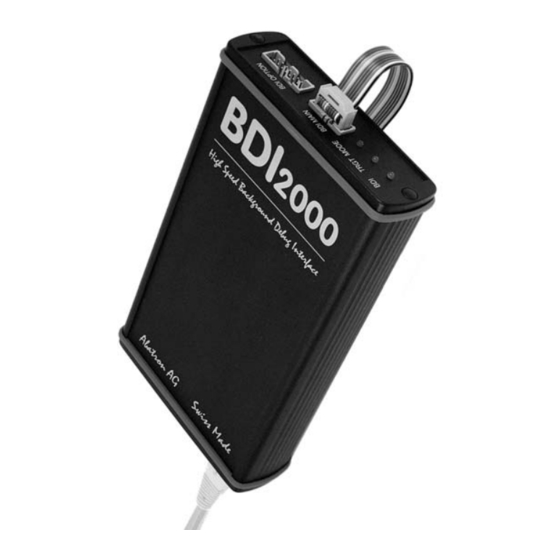
- Page 1 JTAG debug interface for SeeCode™ Debugger PowerPC 7440/7450 User Manual Manual Version 1.00 for BDI2000 © 1999-2003 ABATRON AG...
-
Page 2: Table Of Contents
7 Specifications ..........................25 8 Environmental notice ........................ 26 9 Declaration of Conformity (CE) ....................26 10 Warranty ........................... 27 Appendices A Troubleshooting ........................28 B Maintenance ..........................29 C Trademarks ..........................31 © Copyright 1999-2003 by ABATRON AG V 1.00... -
Page 3: Introduction
BDI2000 can be updated by the user with a simple Windows based configuration program. The BDI2000 supports 1.8 – 5.0 Volts target systems (3.0 – 5.0 Volts target systems with Rev. B). © Copyright 1999-2003 by ABATRON AG V 1.00... -
Page 4: Installation
14 - NC (key) 15 - CKSTP_OUT The green LED «TRGT» marked light up when target is powered up 16 - GROUND For BDI TARGET B connector signals see table on next page. © Copyright 1999-2003 by ABATRON AG V 1.00... - Page 5 This open collector output of the BDI2000 connects to the target HRESET pin. <reseved> General purpose Input This input to the BDI2000 connects to the target CKSTP_OUT pin. Currently not used. GROUND System Ground © Copyright 1999-2003 by ABATRON AG V 1.00...
-
Page 6: Changing Target Processor Type
(Version A) or via the POWER connector (Version B). For more information see chapter 2.2.1 «External Power Supply». To avoid data line conflicts, the BDI2000 must be disconnected from the target system while programming the logic for an other target CPU. © Copyright 1999-2003 by ABATRON AG V 1.00... -
Page 7: Connecting The Bdi2000 To Power Supply
The BDI2000 needs to be supplied with 5 Volts (max. 1A) via the POWER connector. The available power supply from Abatron (option) or the enclosed power cable can be directly connected. In order to ensure reliable operation of the BDI2000, keep the power supply cable as short as possible. -
Page 8: Status Led "Mode
The BDI is ready for use, the firmware is already loaded. The power supply for the BDI2000 is < 4.75VDC. BLINK The BDI «loader mode» is active (an invalid firmware is loaded or loading firmware is active). © Copyright 1999-2003 by ABATRON AG V 1.00... -
Page 9: Connecting The Bdi2000 To The Host
S S S S w w w w i i i i s s s s s s s s M M M M a a a a d d d d e e e e RS232 © Copyright 1999-2003 by ABATRON AG V 1.00... -
Page 10: Ethernet Communication
When this LED light BLINKS, data is being transmitted through the UTP port of the BDI2000 Receive When this LED light BLINKS, data is being received through the UTP port of the BDI2000 © Copyright 1999-2003 by ABATRON AG V 1.00... -
Page 11: Installation Of The Configuration Software
• Copy the entire contents of the enclosed diskette into a directory on the hard disk. • You may create a new shortcut to the b20cop.exe configuration program. • Copy ppcbdi.dll to the SeeCode \bin directory © Copyright 1999-2003 by ABATRON AG V 1.00... -
Page 12: Configuration
The following options allow you to check or update the BDI firmware and logic and to set the network parameters: Channel Select the communication port where the BDI2000 is connected during this setup session. Baudrate Select the baudrate used to communicate with the BDI2000 loader during this setup session. © Copyright 1999-2003 by ABATRON AG V 1.00... - Page 13 • Switch ON the power supply for the BDI again and wait until the LED «MODE» blinks fast DEFAULT • Turn the power supply OFF again • Return the jumper to the «DEFAULT» position • Reassemble the unit as described in Appendix «Maintenance» © Copyright 1999-2003 by ABATRON AG V 1.00...
-
Page 14: Init List
Use on-line help (F1) and the supplied configuration examples on the distribution disk to get more information about the init list. You may also use the debuggers feature to setup the hardware (chip initialization file). © Copyright 1999-2003 by ABATRON AG V 1.00... - Page 15 This entry in the init list allows to define a delay time (in ms) the BDI inserts between releas- ing the COP-HRESET line and starting communicating with the target. This init list entry may be necessary if COP-HRESET is delayed on its way to the PowerPC reset pin. © Copyright 1999-2003 by ABATRON AG V 1.00...
-
Page 16: Bdi Working Modes
Click on this button to send the initialization list and the working mode to the BDI. This is normally the last step done before the BDI can be used with the debugging system. © Copyright 1999-2003 by ABATRON AG V 1.00... -
Page 17: Startup Mode
In this mode, the following steps are executed by the BDI after system reset or power up: • HRESET is activated on the target system. • HRESET is deactivated and the target begins executing application code. • The application runs until it is stopped by the debugger. © Copyright 1999-2003 by ABATRON AG V 1.00... -
Page 18: Working With Seecode
When using the debugger in GUI mode, you may also use the debuggers Option dialog to select the appropriate BDI communication parameters. This way you can simply start SeeCode as follows: scppc For more information about debugger startup, consult SeeCode documentation. © Copyright 1999-2003 by ABATRON AG V 1.00... -
Page 19: Properties
If this property is used, all calls to the BDI interface are recorded in a file. The recorded calls are not useful for SeeCode user but may be used by Abatron to solve interface problems between the SeeCode debugger and the BDI. -
Page 20: Direct Commands
RAM on the target system. Otherwise, the algorithm is processed within the BDI. The workspace is used for a 1kByte data buffer and to store the algorithm code. There must be at least 2kBytes of RAM available for this purpose. © Copyright 1999-2003 by ABATRON AG V 1.00... -
Page 21: Flash.erase
Syntax: flash.load addr=0x02800000 size=0x200000 addr The start address of the flash memory size The size of the flash memory 5.3.5 Flash.Idle This command disables loading to flash memory. Syntax: flash.idle © Copyright 1999-2003 by ABATRON AG V 1.00... -
Page 22: Download To Flash Memory
In order to erase/program those flash chips, use the init list to unlock the appropriate blocks. WM16 0xFFF00000 0x0060 unlock block 0 WM16 0xFFF00000 0x00D0 WM16 0xFFF10000 0x0060 unlock block 1 WM16 0xFFF10000 0x00D0 ..WM16 0xFFF00000 0xFFFF select read mode © Copyright 1999-2003 by ABATRON AG V 1.00... - Page 23 AM29DX32 0x01000000 Intel 28F032B3 I28BX8 0x400000 Intel 28F640J3A STRATAX8 STRATAX16 0x800000 Intel 28F320C3 I28BX16 0x400000 AT49BV040 AT49 0x080000 AT49BV1614 AT49X8 AT49X16 0x200000 M58BW016BT I28BX32 0x200000 SST39VF160 AT49X16 0x200000 Am29LV320M MIRRORX8 MIRRORX16 0x400000 © Copyright 1999-2003 by ABATRON AG V 1.00...
-
Page 24: Telnet Interface
DABR", "CD [<id>] clear data watchpoint(s)", "INFO display information about the current state", "DCMD <direct command> execute a BDI direct command (see manual)", "HELP display command list", "QUIT terminate the Telnet session" © Copyright 1999-2003 by ABATRON AG V 1.00... -
Page 25: Specifications
-20 °C ... +65 °C Relative Humidity (noncondensing) <90 %rF Size 190 x 110 x 35 mm Weight (without cables) 420 g Host Cable length (RS232) 2.5 m Specifications subject to change without notice © Copyright 1999-2003 by ABATRON AG V 1.00... -
Page 26: Environmental Notice
User Manual 26 JTAG debug interface for SeeCode™ Debugger, BDI2000 (PPC744x/745x) 8 Environmental notice Disposal of the equipment must be carried out at a designated disposal site. 9 Declaration of Conformity (CE) © Copyright 1999-2003 by ABATRON AG V 1.00... -
Page 27: Warranty
In no event shall ABATRON be liable for any loss of profit or any other commercial damage, including but not limited to special, incidental, consequential, or other damages. -
Page 28: Appendices
Network processes do not function (loading the firmware was successful) Possible reasons • The BDI2000 is not connected or not correctly connected to the network (LAN cable or media converter) • An incorrect IP address was entered (BDI2000 configuration) © Copyright 1999-2003 by ABATRON AG V 1.00... -
Page 29: B Maintenance
2.2 Remove the two screws that hold the front panel TRGT MODE BDI MAIN BDI OPTION 3.1 While holding the casing, remove the front panel and the red elastic sealing casing elastic sealing front panel © Copyright 1999-2003 by ABATRON AG V 1.00... - Page 30 5.4 Mount the two plastic caps that cover the screws 5.5 Plug the cables Observe precautions for handling (Electrostatic sensitive device) Unplug the cables before opening the cover. Use exact fuse replacement (Microfuse MSF 1.6 AF). © Copyright 1999-2003 by ABATRON AG V 1.00...
-
Page 31: C Trademarks
User Manual 31 JTAG debug interface for SeeCode™ Debugger, BDI2000 (PPC744x/745x) C Trademarks All trademarks are property of their respective holders. © Copyright 1999-2003 by ABATRON AG V 1.00...
Need help?
Do you have a question about the 7440 and is the answer not in the manual?
Questions and answers