Table of Contents
Advertisement
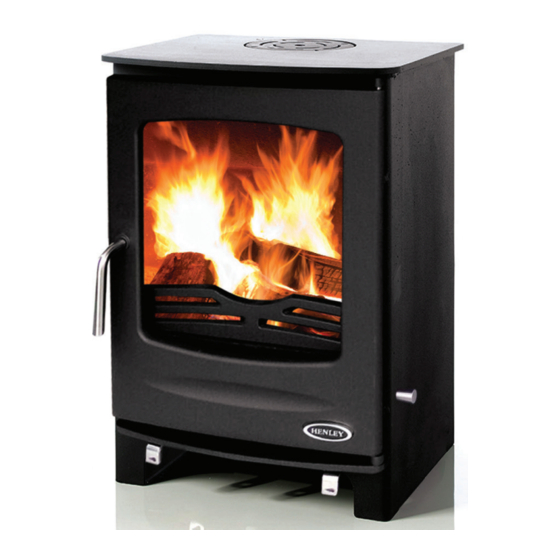
Sherwood 5
Room Heater Stove
Installation & Operating Instructions
IMPORTANT!
For safety reasons it is essential that your stove is correctly installed and operated.
Henley Stoves cannot accept responsibility for any fault or
consequential problems arising through incorrect installation or operation.
THIS PRODUCT MUST BE INSTALLED BY A HETAS / METAC QUALIFIED INSTALLER
1
Advertisement
Table of Contents

Related Manuals for Henley Stoves Sherwood 5

Summary of Contents for Henley Stoves Sherwood 5
- Page 1 IMPORTANT! For safety reasons it is essential that your stove is correctly installed and operated. Henley Stoves cannot accept responsibility for any fault or consequential problems arising through incorrect installation or operation. THIS PRODUCT MUST BE INSTALLED BY A HETAS / METAC QUALIFIED INSTALLER...
-
Page 2: Table Of Contents
This manual contains instructions on how to install and maintain your Henley Stove. For both your comfort & safety please take the time to read instructions carefully. HENLEY STOVES 5 YEAR WARRANTY You need to register your warranty online or via the post in order to activate the warranty for your stove. -
Page 3: Technical Information
Technical Information Dimensions Sherwood 5 Specifications Sherwood 5 Wood Nominal heat output kW Weight 73KG Total Efficiency % 81.4 78.2 Mean CO (at 13 % O2) 0.40 0.39 Flue gas mass flow g/s Mean flue gas temp.ºC Minimum Flue Size 125mm Dist.Combustibles Side: 500mm Rear: 500mm... -
Page 4: Stove Commissioning Checklist
Stove Commissioning Checklist Please complete the form below as it will be of great assistance in the highly unlikely event that there is a problem with the stove or a warranty claim needs to be made. Please contact the person who installed the stove or the dealer where it was purchased from if there is a problem. Dealer Appliance Was Purchased From Name: Address: Phone: Essential Information - MUST BE COMPLETED Date installed: Model Description:... -
Page 5: Installation Instructions
Installation Instructions Installation Fire Cement Before installation and/or use of this appliance Some types of fire cement are caustic and please read these instructions carefully to ensure should not be allowed to come into contact that all requirements are fully understood. The with the skin. In case of skin contact, wash appliance must be fitted by a registered installer*, immediately with plenty of water. -
Page 6: Hearth
Hearth Hearths should be constructed from suitably ro- bust materials & to appropriate dimensions. (fig.1) A way of making provision would be to adopt the guidelines outlined below & to provide a hearth appropriate to the temperatures that the appli- ance can create around it. -
Page 7: Ventilation
Ventilation This appliance requires a constant supply of air The following must be checked: to maintain proper combustion and effective flue performance. • The construction of the masonry chimneys, flue block chimneys & connecting flue pipe An inadequate air supply can result in poor system must meet requirements of the Building combustion and smoke entering the room which Regulations. -
Page 8: Flue Positions
Chimney Suitable access must be provided to enable the collection and removal of debris. The flue must be swept and inspected when the appliance is installed. The flue draught must be checked with all windows and doors closed and any extraction fans in this, or adjoining rooms, running at WARNING maximum speed (see next section for additional Under no circumstances should ventilation requirements). -
Page 9: Height Over Adjacent Building
Height Over Adjacent Building The Outlet of a chimney or flue in relation to an adjacent building should be as seen above Height Over Roof Outlet of a chimney or a flue to be not less that 1m above the highest point of contact of chimney and roof. Where the roof has a pitch of more than 10º on both sides and the outlet is at the ridge or within 600mm of it, the height of the chimney or flue pipe may be reduced to 600mm. Height Over Openings The outlet of a chimney or flue pipe should also be not less than 1m above the top of any opening skylight, opening window or wall ventilator within 2.3m... -
Page 10: Flue Options
Flue Options Each installation is unique to the property so it is not possible to give details to suit every setting. The installation must comply with Building Regulations and be made using best practice construction methods. WARNING WE RECOMMEND Many fireplace openings have a supporting lintel. If Not using External Air Supply Flexi-Liner is Used for Do not remove cover from back... -
Page 11: Non-Combustible Materials
(B). = Min. thickness of non-combustible wall Where (A) distance = 50mm • (B) minimum thickness should be 200mm. Sherwood 5 External Air Where (A) distance = 51mm to 300mm • (B) minimum thickness should be 75mm. Where (A) distance = over 300mm no •... -
Page 12: The Clean Air Act 1993
Safe distances to combustible materials for the SHERWOOD 5 should be 500mm Rear and It is an offence to emit smoke from a chimney of 500mm to the side. -
Page 13: Lighting The Stove
Once the ignition period is well under way close the primary air and gradually reduce the sec- ondary air wash control opening to establish the burning intensity you require (usually open 25% approx.). DO NOT BURN Refueling the Stove bituminous coal,‘petro-coke’ or other petroleum based fuels as this will invalidate the product warranty. -
Page 14: Refueling On To A Low Fire Bed
Shutting Down Stove The stove will normally shut down by itself as the fuel is consumed. In order to shut down the stove for other reasons, close the primary air controls (if open), When refueling the appliance it was then close the secondary air control. necessary to leave the door ajar for a period of 1 - 2 minutes in order to sustain flames on If the controls are left in this position, the fire will the newly charged fuel load. -
Page 15: Removing The Ash-Pan
Maintenance: This should be done by and competent person Removing Fire Rope such as a NACS chimney engineer who will provide a Certificate of Chimney Sweeping. Periodically visually check over the door rope seal for any damage, cuts or tears and detached Sweep the whole flue way, including the outlet at sections. least twice a year per burning season. The rope gasketing can be replaced, using a It is important that the flue ways, flue pipe and universal roping kit. -
Page 16: Replacing Baffle Plate
Top part of baffle Maintenance: Replacing Baffle Plate Rear part of baffle Baffle Plate Location Maintenance: Replacing Door Glass In the event of the door glass being broken it can easily be replaced using the following procedure: • Ensure the appliance is cold. •... -
Page 17: Air Controls
Air Controls Henley Stoves appliances have air systems providing cleaner burning, and greater efficiency and control. Please see diagram to view where the various air controls are located on your Henley Stove 1) Primary Air - Sliding the right hand lever on bottom of stove to right opens the primary air and allows air into the stove. -
Page 18: Stove Finish (Paint)
Call the Fire Service - Dial 999 or 112 Aerosol tins of paint are available for complete • Immediately close all of the air inlets to refurbishing from Henley Stoves. the appliance to reduce the air supply to the fire. Repainting Instructions: •... -
Page 19: Spare Parts
Spare Parts Over time you may require replacement parts for your Henley Stove. Replacement parts are available through your local stockist. Please use the below diagram to establish the part you require for your stove. Please ensure you quote model name and also serial number of stove when ordering spare parts. ONLY USE GENUINE HENLEY APPROVED REPLACEMENT PARTS FOR YOUR STOVE. Ref No. Description Ref No. Description Ref No. Description External Air Pipe Rear Inner Plate Grate Supports... -
Page 20: Faq's
1) Simply open the airwash and pull the lever to • Please note issues with flue draught is out the open position and open the primary. of the control of Henley Stoves and does not The airwash is normally located above the door warrant a service call. of the stove. -
Page 21: Annual Service
Check the parts for any damage. greater than 5.0 m³/(hr.m2), or • Replace any damaged parts using genuine • 6,500 mm² + 550 mm² per kW of rated Henley Stoves replacements parts. output above 5 kW where air permeability • Check and clean the firebricks with a soft is less than 5.0 m³/(hr.m2). brush. Note: •... -
Page 22: Terms & Conditions
Henley Stoves Terms & Conditions You need to register your warranty online or via the post in order to activate the warranty for http://service.henleystoves.com/ your stove. Failing to register your stove will only give you standard Henley Warranty. Warranty Terms & Conditions Room Heater Stoves –... - Page 23 We also require proof of maintenance and/or detailed service record in order for warranty to be valid. • Henley Stoves can only replace a Boiler stove found with a leak after it has been delivered to our warehouse for a forensic examination. After examining we will determine if the stove should be replaced or not.
-
Page 24: Warranty Form
Henley Stoves Warranty Form All warranty claims will only be entertained when the Online Warranty Form is http://service.henleystoves.com/ completed, this can be found at It should be completed correctly and submitted with a photo or scan of the original dated proof of purchase. Otherwise you can fill in below details along with a photo or scan of the original dated proof of purchase and mail these to: Henley Stoves Service Dept.,... - Page 25 Henley Stoves, Curraheen, Tralee, Co. Kerry, Ireland Tel: 066 7119788 | Fax: 066 7124200 Email: info@henleystoves.com www.henleystoves.com...
Need help?
Do you have a question about the Sherwood 5 and is the answer not in the manual?
Questions and answers