Table of Contents
Advertisement
Quick Links
Advertisement
Table of Contents

Summary of Contents for Night Owl H5 NVR SERIES
- Page 1 US ER MA NU AL H5 NVR SERIES 8/3 2 CHANN EL www.NightOwlSP.com...
- Page 2 Thank you for choosing Night Owl Security Products! By purchasing a Night Owl product, you receive a one (1) year warranty covering manufacturing defects in material and workmanship. Make the most of your warranty by completing the registration form online. In addition to warranty and technical support benefits, you will have access to our multitude of free instructional videos.
- Page 3 TABLE OF CONTENTS Table of Contents...
-
Page 4: Table Of Contents
6.1 Startup Wizard ....... . 26 6.2 Night Owl HD Mobile App ......27 6.3 Displays and Icons . - Page 5 7.1.2 Network ....... . 35 a. Main ....... . 35 b.
- Page 6 SUPPORT VIDEOS Night Owl’s NVRs are manufactured for quality and ease of use. As such, our NVRs contain menus designed for advanced user’s that should not be adjusted without having enhanced knowledge regarding the menu. In most cases the default settings allow ADVANCED for optimal functionality.
-
Page 7: Chapter 1: Fcc Warnings
CHAPTER 1 FCC WARNINGS Chapter 1: FCC Warnings... - Page 8 CAUTION The Federal Communications Commission warns the user that changes or modifications to the unit not expressly approved by the part responsible for compliance could void the user’s authority to operate the equipment. H5 NVR Series Users Manual...
-
Page 9: Chapter 2: Safety Instructions
CHAPTER 2 SAFETY INSTRUCTIONS Chapter 2: Safety Instructions... - Page 10 UPS used. before you move it. When moving this device, be sure to handle it with care. You may be subjected to severe electrical shock if you remove the cover of the NVR. H5 NVR Series Users Manual...
-
Page 11: Chapter 3: Specifications
CHAPTER 3 SPECIFICATIONS Chapter 3: Specifications (images may vary) -
Page 12: System Requirements
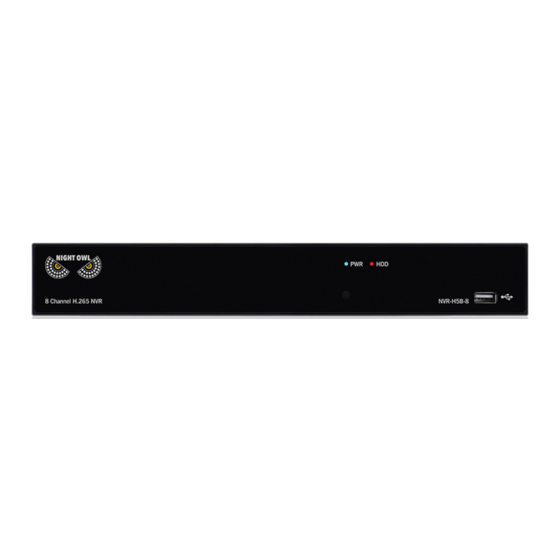
Chapter 3: Specifications The H5 NVR Series is packed with Night Owl’s newest technology such as H.265 compression for increased video storage capacity, 4MP (megapixel) cameras for up to 2K-resolution HD footage, and ONVIF 2.4, profile S compliance. 3.1 System Requirements Please be sure that your PC/MAC complies with the following specifications •... - Page 13 channel model Audio Output USB Ports On/Off Switch Audio VGA Output eSATA Port Input HDMI Output Power Alarm/RS-485 RJ-45 Video Inputs (PTZ) Port (Ethernet) Port channel model RJ-45 (Ethernet) Port On/Off Switch Audio USB 3.0 Port USB 2.0 Port eSATA Port Input Audio Output HDMI Output...
-
Page 14: Camera Diagram
9. Alarm/RS-485 (PTZ) Port – Alarm/RS-485 port allows for PTZ camera connection and integration with your monitored security company. Your security company must configure the NVR, not Night Owl. 10. USB 2.0 Port – allows for the connection of a USB mouse and/or a USB flash drive. -
Page 15: Mouse And Remote Diagrams
3.2.3 Mouse and Remote Diagrams MOUSE Left/Select: choose a field or button on screen. Right/Menu: when in Live View click to display the bottom menu bar. When in a menu window, right click to exit the menu. Chapter 3: Specifications (images may vary) - Page 16 REMOTE H5 NVR Series Users Manual...
-
Page 17: Chapter 4: Camera Installation
CHAPTER 4 CAMERA INSTALLATION Chapter 4: Camera Installation (images may vary) SUPPORT VIDEOS... -
Page 18: Video/Power
Make sure all cameras are working prior to mounting by connecting them as described in the section above. Once all cameras are confirmed to be fully operational, you can run the cables and mount the cameras at their final locations. H5 NVR Series Users Manual... -
Page 19: Mounting The Cameras
4.2 Mounting the Cameras Camera distance from viewing/recording device. The further the camera is from the NVR or monitor, the higher the chances of signal degradation. The camera’s power supply should be located as near to the camera as possible. When the distance exceeds 200’, the power level will drop resulting in video degradation. - Page 20 7. Adjust the camera housing to point in the direction of the area you would like to monitor. Don’t feel like installing the system yourself? Let InstallerNet ™ do the work for you! Contact us at 1-800-806-5513 or visit us at www.NightOwlSP.com. H5 NVR Series Users Manual...
-
Page 21: Chapter 5: Nvr Installation
CHAPTER 5 NVR INSTALLATION Chapter 5: NVR Installation (images may vary) SUPPORT VIDEOS... -
Page 22: Connecting To A Tv (Via Hdmi)
2. Plug one end of the cable into the HDMI port on the back of the NVR. 3. Connect the other end of the cable to an available HDMI input on your TV or monitor. H5 NVR Series Users Manual... -
Page 23: Power
4. Select the appropriate video input channel on your TV or monitor to view the NVR. If your TV does not have an HDMI port, you will need to purchase a VGA video cable or compatible adapter. For a VGA connection, attach one end of the VGA cable to the NVR VGA port and the other end to your TV VGA port. - Page 24 3. Plug the other end of the power adapter cable into an available wall outlet. If you are using an uninterruptable power supply (UPS), plug the adapter cable into one of its output sockets. Keep in mind, Night Owl always recommends utilizing a surge protector to minimize the risk of damage caused to your NVR in the event of a power surge.
-
Page 25: Chapter 6: Getting Started
CHAPTER 6 GETTING STARTED Chapter 6: Getting Started SUPPORT VIDEOS... -
Page 26: Startup Wizard
Chapter 6: Getting Started 6.1 Startup Wizard When your NVR is powered on it will display the Night Owl logo while initializing. Scan or click the QR code to view our Startup Wizard video which shows the quick and easy steps in detail. -
Page 27: Night Owl Hd Mobile App
Download our free Night Owl HD application from the iTunes App or Google Play store! Scan or click the QR code to view our Night Owl HD video which shows how to add and configure your smart device for remote viewing. -
Page 28: Live View (All Channels)
7. More Layouts: various layout options for viewing multiple channels at once. 8. Stream Switch: allows you to select Mainstream or Substream options. Mainstream will display your video in high definition. Substream will display your video in standard definition. H5 NVR Series Users Manual... -
Page 29: Quick Add
Position: select the position of the channel alias. Port: enter the port number used by the camera. Protocol: select Private for Night Owl cameras or ONVIF for third-party cameras. Username: enter the username you log into your DVR with. Password: enter the password you login to your DVR with. -
Page 30: Menu Screen
4. Device Menu: monitor available HDD space and access PTZ settings. 5. System Menu: access general settings such as timestamp displays, user access, system info, and access logs. 6. Advanced Menu: view and change maintenance settings, upgrades, and HDD alerts. H5 NVR Series Users Manual... -
Page 31: Chapter 7: Menus And Settings
CHAPTER 7 MENUS AND SETTINGS Chapter 7: Menus and Settings SUPPORT VIDEOS... - Page 32 Be sure to Save all changes you make in the menus. If you do not save the changes, they will not be applied. You can also select the Default button on any page to restore default settings for those parameters. H5 NVR Series Users Manual...
-
Page 33: General Menu
7.1 General Menu The general menu will allow you to access display, network, and alarm settings for your NVR system. ADVANCED 7.1.1 Display a. Output: adjust the resolution that will be displayed on your TV or Monitor. Video Output: defaulted to LIVE-OUT. Sequence View: set the amount of channels that will be viewed when you select sequential mode. -
Page 34: Privacy Zone
Areas selected in the previous line. Select, drag, and resize each area by left clicking the mouse to mask areas on camera that you do not want visible while recording or monitoring. Once the area(s) are selected, right-click to return to the menu. H5 NVR Series Users Manual... -
Page 35: Network
7.1.2 Network a. Main: find network values and optimize connectivity based on your ADVANCED Internet connection. In most cases the values should populate automatically once your NVR is connected to the Internet and you have completed the startup wizard’s simple steps. The values in this section should only be adjusted if you are an advanced user and have extensive experience in device networking. -
Page 36: Switch
FPS: increase or decrease the frames per second of the streaming video depending on your connection speed. A higher FPS will result in more data transfer but smoother video. A lower FPS will eliminate most lag but at the expense of video quality. H5 NVR Series Users Manual... -
Page 37: Email
Video Encode Type: select the Substream file format. Choose between H.264 or H.265. Bitrate Control: select between CBR (constant bitrate) or VBR (variable bitrate). Bitrate Mode: allows you to select predefined or user defined modes. The predefined mode will provide a dropdown list of standard bitrate options. The user defined mode will allow you to input your desired bitrate option. -
Page 38: Email Schedule
RTSP Password: create an RTSP password. A strong password is recommended. NOTE: The network address should be entered within the client as follows: rtsp://NVR_IP_address:rtsp_port/ch00/1 (1 for Substream; 0 for Mainstream) Example: rtsp://192.168.1.10:00554/ch01/1 *A leading zero is required for channels 1-9 e.g. ‘ch01’; Substream recommended H5 NVR Series Users Manual... -
Page 39: Ddns
Enable or Disable DDNS service to view your NVR from a computer. Click DDNS on the link to learn more. Server: set to the NIGHTOWL server when using the Night Owl free domain name server. Domain: set to the domain name you created when registering your DDNS. -
Page 40: Alarm
Push: when this tick box is checked, a push notification will be sent to the connected Night Owl HD mobile application. Record Channel: this option gives you the ability to start recording on the channels you select/highlight as soon as motion has been detected on the Channel selected above within the Channel field. -
Page 41: Alarm
b. Alarm: configure alarm settings. IO Channel: select the channel to configure. IO Status: refers to the Alarm In/Out status of the selected channel. You should leave this option as the defaulted Normal-Open option to allow the normal transmission of alarms. Buzzer: toggle between ON and OFF to enable an audible alert from the NVR. -
Page 42: Cameras Menu
Auto Assign IP to Cameras: allows the NVR to automatically assign an IP address to the selected camera. Not all IP cameras will function with this feature and you will not need to configure this setting when you utilize a Night Owl NVR10 camera. Delete: deletes the selected channels camera configuration. -
Page 43: Image Control
7.2.2 Image Control Display advanced settings which will allow you to flip your camera’s image, adjust BLC and IR-CUT modes. Channel: allows you to select the channel to configure. IR-Cut Mode: GPIO Auto; Color Mode; Black White Mode; Video Auto. IR-Cut Delay: allows you to adjust the delay when the IR-CUT initiates. -
Page 44: Settings
Date Format: allows you to select the format your date will be displayed. You can select Month/Day/Year, Year/Month/Day or Day/Month/Year. Time Format: Enable or Disable the recording time display on-screen during playback mode. Refresh Rate: Enable or Disable the on-screen timestamp during live view mode. H5 NVR Series Users Manual... -
Page 45: Record Menu
7.3 Record Menu From this menu you can enable recording, set video settings, and adjust streaming options. 7.3.1 General (Playback) Search and playback all recorded video from this menu. Choose your desired date and times from the options below, then click Play to view recorded video. Right-click to exit back to the menu screen. -
Page 46: Events (Playback & Backup Files)
Quick Backup: check the tick boxes to the left of the found video clip(s) and click this button to save that video to a USB Flash Drive. You can also Playback by right clicking on the icon located in the playback section. H5 NVR Series Users Manual... -
Page 47: Settings (Recordings)
7.3.3 Settings (Recordings) View or modify general recording settings for your NVR system. a. Basic: turn channel recording capabilities on or off. Channel: select the channel you would like to configure. Record: Enable or Disable recording capabilities for this channel. Stream Mode: select between Mainstream or Substream Pre-Record: Enable or Disable pre-recording for this channel. -
Page 48: Mainstream
The user defined mode will allow you to input your desired bitrate option. Bitrate: adjust the amount of data transferred while streaming. The default setting is sufficient for most networks. H5 NVR Series Users Manual... -
Page 49: Device Menu
7.4 Device Menu 7.4.1 HDD Check available memory on your NVR HDD and set recording parameters to optimize storage. Select: if multiple drives are installed, choose the HDD you would like to customize. Overwrite: by default, the Auto setting will overwrite the earliest footage once the HDD is full. -
Page 50: System Menu
Show Wizard: check the tick box to display the Startup Wizard each time the NVR is powered on. Mobile Wizard: click the mobile icon to launch mobile application setup portion of the Startup Wizard. H5 NVR Series Users Manual... -
Page 51: Dst
b. DST: configure Daylight Savings Time settings. DST: Enable or Disable the Daylight Savings Time feature. Time Offset: choose the amount of time (1Hour or 2Hours) to offset if DST is enabled. Daylight Saving Time: indicate whether you would like this feature to be applied the week of or an exact date. -
Page 52: Users
Permission: select a new user profile (e.g. user1) and press the Permission button to select which menus, settings, and playback/recording functions are available to that specific user and on which channels. All will give that user basic admin settings. H5 NVR Series Users Manual... -
Page 53: Info
This menu will provide crucial device and network information to allow manual reconfiguration of your mobile application if needed. Keep in mind you can also scan the QR code on this screen using your Night Owl HD mobile application to quickly reconfigure your mobile device via our Owl Scan feature. -
Page 54: Channel Info
NTP (if enabled) or if the system is turned on or off. Start Time: choose the initial date of your log search period. End Time: choose the end date of your log search period. H5 NVR Series Users Manual... -
Page 55: Advanced Menu
Backup: in order to save a log, a USB flash drive must be inserted into one of the available USB ports on the back of the NVR. Select the log or logs you would like to save; you will then be prompted to specify which drive to save to. 7.6 Advanced Menu Configure additional settings related to maintenance, hard drive space, and upgrades. -
Page 56: Events
10 seconds up to 1 minute. Buzzer: turn an audible buzzer on for a duration of time to alert you when this Event Type happens. Choose OFF to disable this feature. You can select in between 10 and 60 seconds. H5 NVR Series Users Manual... -
Page 57: Auto Upgrade
7.6.3 Auto Upgrade Control settings for auto upgrades of the NVR software. Auto Upgrade: Enable or Disable the auto upgrade feature. Firmware updates will be detected automatically when this feature is enabled. The default selection for the auto upgrade feature is enable. Check For Updates: check this tick box to periodically check for updated software versions. -
Page 58: Chapter 8 Remote Access
CHAPTER 8 REMOTE ACCESS H5 NVR Series Users Manual SUPPORT VIDEOS... -
Page 59: System Requirements
Chapter 8: Remote Access This chapter will show you how to connect your NVR to the Internet. You will learn how to properly connect your NVR to your router/modem and setup port, Internet, and mobile configurations along DDNS registration. 8.1 System Requirements You will need to have the following in order to be able to successfully connect the NVR to the Internet. -
Page 60: Network Configuration
192.168.1.150. This will become the IP address of your NVR at a later time. 4. Find “Default Gateway” in the same section and write this number down as well e.g. 192.168.1.1. You will need to enter this in the NVR network settings. H5 NVR Series Users Manual... - Page 61 For the following steps, use the information that you just wrote down. To access the network settings on your NVR, go to the General Menu, then to Network > Main and choose the Static option. 1. Manually enter the IP address into the IP Address field; this is the number that ends with 150.
-
Page 62: Mac Operating System
192.168.1.150. This will become the IP address of your NVR at a later time. 6. Make note of the IP address listed for router. You will need to enter this into the NVR network settings. H5 NVR Series Users Manual... - Page 63 For the following steps, use the information that you just wrote down. To access the network settings on your NVR, go to the General Menu, then to Network > Main and choose the Static option. 1. Manually enter the IP address into the IP Address field; this is the number that ends with 150.
-
Page 64: Port Configuration
ISP or the router manual/support to retrieve that information. 4. Once logged in to your router, go to the settings related to port forwarding. H5 NVR Series Users Manual... - Page 65 5. You will need to enter a new port forwarding entry for each port that your NVR uses: Media Port (9000), Web Port (2049 or 2051). Repeat the steps below for each entry. 6. When entering the port numbers and IP address into your router’s port forwarding section, you will need to remove any leading zeros e.g.
-
Page 66: Ddns Registration
If the domain name is taken, try again until you find an available name. NOTE: Write the registered domain name down in the User Information section at the end of the manual. H5 NVR Series Users Manual... -
Page 67: Adding The Ddns To Your Nvr
8.3.5 Adding the DDNS to Your NVR After you have registered for a free domain name you will need to add that domain to your NVR. To do so you will need to access the DDNS settings. Go to the General menu and then to the Network settings and the DDNS section. -
Page 68: Chapter 9 Glossary
CHAPTER 9 GLOSSARY H5 NVR Series Users Manual SUPPORT VIDEOS... - Page 69 Chapter 9: Glossary DDNS: Dynamic Domain Naming System. Method for automatically updating hostnames, address, or other information like a URL on a given name server. DHCP: Dynamic Host Configuration Protocol. A network protocol that allows a server to automatically assign a device and IP address. FPS: Frames Per Second.
-
Page 70: Chapter 10 Warranty
CHAPTER 10 WARRANTY H5 NVR Series Users Manual SUPPORT VIDEOS... - Page 71 (no CODs) to the address below, with the original proof of purchase receipt. In its sole discretion, Night Owl will either repair or replace the Product at no additional cost to the Purchaser. Any replacement Product (or parts) will be covered by the same warranty as the original Product through the expiration date of the original warranty period.
- Page 72 Product’s potential, ability or effectiveness to prevent, minimize, or in any way affect personal or property damage or injury. Night Owl is not responsible for any personal damage, loss or theft related to the Product or to its use for any harm, whether physical or mental related thereto.
-
Page 73: Chapter 11: Troubleshooting
CHAPTER 11 TROUBLESHOOTING Chapter 11: Troubleshooting SUPPORT VIDEOS... - Page 74 (disconnect power cable). Firmly connect a USB mouse to the System needs to be reset. USB Mouse port on the front panel of the system. Reconnect the power cable to the DC 19V port on the real panel. H5 NVR Series Users Manual...
- Page 75 Error Possible Causes Solutions 1. Check the camera video cable and connections. 2. Disconnect and reconnect the There is no picture on selected Camera cables are loose of have cable at the system and at channels/camera picture Is not become disconnected. the camera.
-
Page 76: Chapter 12 Customer Support
CHAPTER 12 CUSTOMER SUPPORT H5 NVR Series Users Manual SUPPORT VIDEOS... - Page 77 Chapter 12: Customer Support Please contact Night Owl Support before returning your product to the store. We’ll save you a trip. ONLINE • www.NightOwlSP.com • 24/7 Product Support • How-To Videos • Manuals • Firmware Updates, etc. EMAIL • Technical Support: support@NightOwlSP.com...
-
Page 78: Chapter 13 User Information
CHAPTER 13 USER INFORMATION H5 NVR Series Users Manual SUPPORT VIDEOS... - Page 79 Chapter 13: User Information Be sure to write down all the important information below and place it in a secure location. General NVR Information Admin Password: ________________________________________________________ User Password: __________________________________________________________ Mac Address: ___________________________________________________________ Serial Number: __________________________________________________________ Internet Login Information Internal IP Address: ______________________________________________________ Public IP Address: _______________________________________________________ DDNS Name: ____________________________________________________________ DDNS UserID: __________________________________________________________...
- Page 80 www.NightOwlSP.com...
Need help?
Do you have a question about the H5 NVR SERIES and is the answer not in the manual?
Questions and answers