
Subscribe to Our Youtube Channel
Related Manuals for Dillenger Puma


Summary of Contents for Dillenger Puma
- Page 1 Puma and Jaguar User Manual This manual describes how to safely complete final assembly and includes tips for use and maintenance English...
-
Page 2: Thank You
THanK You Thank you for purchasing your new Dillenger electric bike! We know you’ll love it, and with some care it should last for a very long time. Please read through this manual carefully before beginning final assembly. SaFETY mechanical Safety Check: Routinely check the condition of your bike. -
Page 3: Item Check List
ITEm CHECK lIST Each electric bike is assembled under the most strict quality control standards. Upon completion, each electric bike is test ridden by a technician inside the assembly factory to check that every function and adjustment on the bike is perfect. Item Check list: •... -
Page 4: Table Of Contents
ITEm CHECK lIST SummarY oF FInal SETuP unBoXIng maIn ParTS MAIN PARTS CONTINUED... Jaguar HandlEBarS JAGUAR HANDLEBARS CONTINUED... Puma HandlEBarS PUMA HANDLEBARS CONTINUED... PEdalS SEaT BaTTErY oPEraTIon BATTERY OPERATION CONTINUED... ImPorTanT PoInTS Jaguar ConTrollEr oPEraTIon Puma ConTrollEr oPEraTIon lEad aCId HandlEBarS... -
Page 5: Summary Of Final Setup
SummarY oF FInal SETuP Your Dillenger bike is fully assembled in our factory and tested to our high standards. To fit into an appropriately sized shipping carton to comply with the various courier networks, some basic parts of the bike are temporarily removed. This is so that the bike can fit into the shipping carton safely, and so that we can adequately package each part of the bike so that it is delivered in perfect condition. -
Page 6: Unboxing
Unboxing your Dillenger will be very exciting, but it’s important to take care when unboxing the bike as it’s possible to accidentally damage the bike or misplace crucial parts. It’s also much easier to unbox the bike with someone to help you. -
Page 7: Main Parts
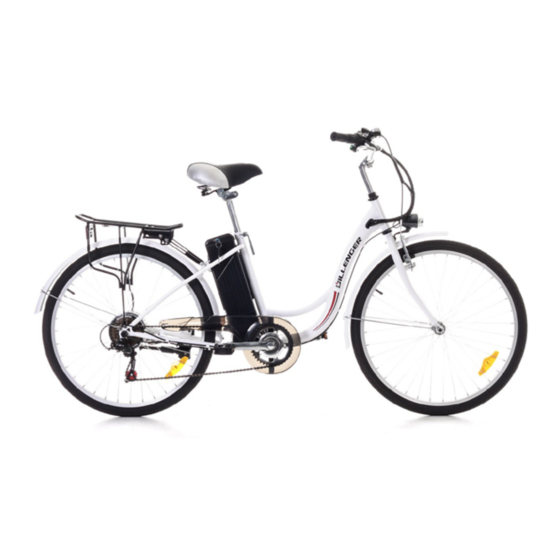
ParTS After you’ve taken your Dillenger out of it’s shipping carton, you should have these parts: 1. The Complete Bike 2. The Front Wheel 3. Handlebar Headstock (PUMA only) -
Page 8: Main Parts Continued
MAIN PARTS CONTINUED... 2. Handlebars (Attached by the Cabling) 3. Charger Note: The model of the charger depicted may not be the model of your charger rest assured the charger that came with the bike is the correct charger. 4. Pedals and Toolkit Note: These can be in the same box as the charger, or fastened to the bike separately. -
Page 9: Jaguar Handlebars
Jaguar HandlEBarS The handlebars will be connected by the cables and wires, all that’s required for final setup is to mount the handlebar stem onto the head tube as shown here: Insert the headtube into the handlebar tube. Make sure none of the cables are twisted or too tight (you may have the handlebars twisted). -
Page 10: Jaguar Handlebars Continued
JAGUAR HANDLEBARS CONTINUED... Finally align the handlebars, tighten allen key to desired tightness. Congratulations your handlebars are now ready for use. -
Page 11: Puma Handlebars
Puma HandlEBarS The handlebars will be connected by the cables and wires. The first item you will need is the handlebar head stock shown below. Use the allen keys to unscrew the two bolts that hold the clamp on. Clamp the headstock around the handlebars where the dashed lines in hte aluminium are. -
Page 12: Puma Handlebars Continued
PUMA HANDLEBARS CONTINUED... Once the headstock is in position and tightened, insert it into the front of the bike Some adjustment to the headstock maybe needed to get your handlbars angled nicely for comfort. Simply loosen the head stock and rotate the handlbars until a comfortable angle is acheived and retighten. -
Page 13: Pedals
PEdalS All bicycles (electric bikes included) have left and right side pedals. Make sure you identify each one. This image shows how to identify each pedal. You can see the ‘R’ written on this pedal, denoting this is the right side pedal, to be used on the right side of the bike (if you were sitting on the bike). -
Page 14: Seat
SEaT This is the easy part. Simply insert your seat to the desired height (about hip height) as shown below: At the rear of the seat is a latch. Use this latch to tilt the seat forward to remove battery or to help remove seat Ensure seat clamp is aligned with the groove and loosly tightened using bolt handle The seat is placed into the hole and adjusted to the desired height then the bolt handle is... -
Page 15: Battery Operation
BaTTErY oPEraTIon The battery for your Dillenger is the most expensive single component and the most crucial. The battery can be removed following these steps. Use the key provided to unlock the battery: The key hole and charging plug is located on the bottom of the frame near the folding join The key is placed in the smaller hole of the two. -
Page 16: Battery Operation Continued
BATTERY OPERATION CONTINUED... Remove the battery by pulling the handle shown above after unlocking the battery with the key You may remove the battery to charge or the battery can be charged in the frame. For transport by car, we recommend taking the battery out of the bike and storing inside the car, in a safe place. -
Page 17: Important Points
Keys: The keys for your bike are zip tied to your handlebars. You will have 2 keys so please keep one as a spare separately. Replacing keys can only be done in the Dillenger Warehouse. Battery Indicator: The battery light indicator on the battery is not an indication of battery charge. The only approximation of battery charge level is on the LCD display. -
Page 18: Jaguar Controller Operation
Jaguar ConTrollEr oPEraTIon There are two verions of this bike Sealed Lead Acid version and the Lithium Ion upgraded version. Lithium Ion Handlebar Display The handlebar display has 3 different button that perform different functions. These functions are outlined below. ON/OFF - Press to turn the electric bike on and off (ensuring the key is switched on) MODE - Pressing this will change the controllers level of pedal assistance from LOW/MED/ HIGH... -
Page 19: Puma Controller Operation
Puma ConTrollEr oPEraTIon There are two verions of this bike Sealed Lead Acid version and the Lithium Ion upgraded version. Lithium Ion Handlebar Display The handlebar display has 3 different button that perform different functions. These functions are outlined below. -
Page 20: Lead Acid Handlebars
lEad aCId HandlEBarS Sealed lead acid Handlebar Functions The left handlebar has two buttons, a red button and a green button. The red button activates the bikes lights. the green button activate the horn. To turn the bike on simply turn the key on the battery switch. -
Page 21: Charging
CHargIng 1. Plug the charger into the wall socket/ outlet, just like a laptop of mobile phone charger. 2. Check that one of the charger indicator lights glows green. 3. Plug the charger, (battery end) into the battery plug carefully, making sure it is all the way in. -
Page 22: Maintenance
Lastly (just to reiterate) it’s important that you charge the battery at least once every month to ensure the battery maintains a safe storage level. PlEaSE noTE Any modifications to any Dillenger product that isn’t approved by Dillenger will void your warranty. -
Page 23: Troubleshooting
TrouBlESHooTIng Dillenger’s troubleshooting advice will take you through a logical way to diagnose any issues that may arise during installation and use. Before commencing troubleshooting, disconnect all components. Do not short cut this process. There are countless times a loose plug has caused grief. By disconnecting all the plugs and then reconnecting just the crucial components, this will solve any loose plug issue. -
Page 24: Troubleshooting Continued
Please refer to display manual for error code definition and if display needed, report the error code to Dillenger in a service ticket. Check all connections to make sure all the plugs are all the way My kit loses power connected. -
Page 25: Troubleshooting Continued
Make sure the tyre pressures are at optimum (ideal pressures are written on the tyre side wall) • Select the right gear for assisting up hills (the steeper the rise, the lower the gear needed) If you would like to submit a Dillenger service ticket, please go to this URL: Support Site... -
Page 26: Contact Us
ConTaCT uS Dillenger Head Office 3/13 Olympic Circuit Southport Qld 4215 auSTralIa Tel.: +617 5532 9235 dillenger.zendesk.com www.dillengerelectricbikes.com © Dillenger 2015...
Need help?
Do you have a question about the Puma and is the answer not in the manual?
Questions and answers