Table of Contents
Advertisement
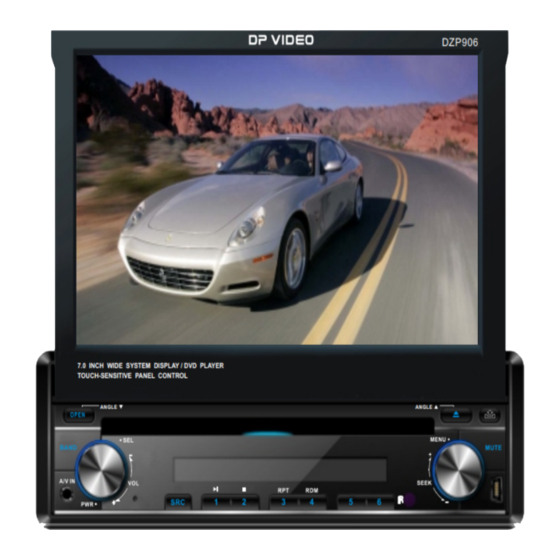
CAR DVD/VCD/CD/MP3/MPEG-4 PLAYER WITH
USB PORT
7.0 INCH WIDE SYSTEM DISPLAY / DVD PLAYER
TOUCH-SENSITIVE PANEL CONTROL
ANGLE
Warning:
Watching TV while driving is illegal in most states.
There is a safety feature on this device which enables viewing videos only when parked.
All other features may still be used while driving, such as audio and radio, etc, but must be done with care.
Please contact an authorized installer for professional installation
English Version
DZP906
PWR
PWR
SOURCE
SOURCE
EQ EQ
LOUD
LOUD
GOTO
GOTO
1 1
2 2
3 3
BAND
BAND
TITLE
TITLE
4 4
5 5
6 6
AMS
AMS
7 7
8 8
9 9
MENU
MENU
LOC
LOC
0 0
SUB-T
SUB-T
CLEAR
CLEAR
ANGLE
ST ST
ENTER
ENTER
AUDIO
AUDIO
ANGLE
ANGLE
OSD
OSD
SETUP
SETUP
ZOOM
ZOOM
P / N
P / N
PROG
PROG
RPT
RPT
RDM
RDM
VOL
VOL
SEL
SEL
VOL+
VOL+
Advertisement
Table of Contents

Summary of Contents for DP VIDEO DZP906
- Page 1 English Version CAR DVD/VCD/CD/MP3/MPEG-4 PLAYER WITH USB PORT DZP906 SOURCE SOURCE EQ EQ LOUD LOUD GOTO GOTO BAND BAND TITLE TITLE 7.0 INCH WIDE SYSTEM DISPLAY / DVD PLAYER TOUCH-SENSITIVE PANEL CONTROL MENU MENU SUB-T SUB-T CLEAR CLEAR ANGLE ANGLE...
-
Page 2: Table Of Contents
Contents Before You Start DVD/VCD/MP4 Important Safeguards DVD/VCD/MP4 Setup About this manual DVD/VCD/MP4 Play Precautions Selecting Tracks Fast Maintenance Number Buttons Location & function of the controls 7 Pause the Playback Remote control Stop the Playback Specifications Play tracks at Random 26 Repeat Playing Installation Skip backward/forward/ F.F/F.REW the... - Page 3 Additional Information Contents Simple Troubleshooting Guide The following checklist might help to solve the problems which you meet when using the unit. Please double check and make sure the connections are correct and you are following the operating procedures before using the checklist below . Cause/Solution Problem On Screen Display 38...
-
Page 4: Before You Start
Before You Start IMPORTANT SAFEGUARDS About this manual AUX Touch Screen Menu In AUX mode, select A V SET: Press SRC to turn to AUXF SET: AUDIO ADJUST This unit features a number of sophisti- AUXF Be sure to connect the color coded leads VIDEO ADJUST according to the diagram. -
Page 5: Precautions
Tuner Before You Start PRECAUTIONS MO/ST Selector On Screen Display During radio status, press OSD to display During radio status, you can press the edition information. This unit can play the following discs only: button on the remote control to select MONO mode or mode. -
Page 6: Maintenance
Tuner Before You Start Maintenance Band Selector Listening to the radio During radio status, repeatedly press BAND button to select bands in lowing order: CH:1 87.50MHz Replacing the Fuse Make sure the amperage matches the MW2(AM2) MW1(AM1) 87.50M 106.10M specified value when replacing the fu- (For Two Bands) 107.90M 90.10M... -
Page 7: Location & Function Of The Controls
CD/MP3/SD/USB Before You Start Location of the Controls On Screen Display Eject SD Card Push SD card to eject it. During CD status, press OSD button the During SD playing mode, to eject SD card display shows: to switch to Disc mode; if there is no disc The Expanding in the main unit, it will switch to USB mode, Single elapsed... - Page 8 Before You Start CD/MP3/SD/USB The Base Repeat Playing Stop Play During CD/MP3/SD/USB playback, Press During CD/MP3/SD/USB playback, press to stop the playback. RPT to replay the current track, press it again to cancel this function. Note: * Pressing in the monitor perform the same Note: function.
-
Page 9: Remote Control
CD/MP3/SD/USB Before You Start CD/MP3/SD/USB Setup Press this region and the screen Remote Control Track Region: shows the following menu: touching During CD playback, touch the screen shows number keys appears, touch the the following menu: number to select tracks. Track region Touch the "... - Page 10 Before You Start DVD/VCD/MP4 ---Preferences page-- SOURCE/PWR (Pause/Play) (Stop Playing) GOTO (playing time/track) Default Example showing how to set load factory setting: SETUP BAND/TITLE (Press , then press ENTER) (Press (F.R/F.F) --Preference Page-- --Preference Page-- AMS/MENU (Previous/Next Track) TV Type Auto TV Type Auto...
-
Page 11: Specifications
DVD/VCD/MP4 Before You Start Specifications ---Preferences page-- General AM Tuner Section DVD Menu Example showing how to set Disc Menu Language: Power Requirement Frequency Range 522-1620(KHz) 14.4V DC (Press , then press ENTER) (Press (11-16V allowable) (Optional) (Europe/Russia) --Preference Page-- --Preference Page-- 530-1710 (KHz) Load Impedance... -
Page 12: Installation
Installation DVD/VCD/MP4 Wiring Connection ---Preference page--- (Black line with red (black line with TV Type AUX Audio input AUX Video input Example showing how to set TV type: & white head) yellow head) (Light Grey line with (Brown line with Rear RCA Subwoofer red &... -
Page 13: Install The Unit
DVD/VCD/MP4 Installation Install the Unit --Dual mono/DRC Setup-- Dual Mono Example showing how to set stereo mode: Main Parts List (Press , then press ENTER) (Press --Dual mono/DRC Setup-- --Dual mono/DRC Setup-- Dual Mono Dual Mono Stereo Dynamic Dynamic L-Mono R-Mono M5x5 Mix-Mono... - Page 14 Installation DVD/VCD/MP4 Install the Unit --General Setup Page-- Installation Method Captions Example showing how to set captions on/off: Bracket supplied Installation using the screw holes at to your car (Press , then press ENTER) sides of the unit. (Press --General Setup Page-- --General Setup Page-- Select a position where the screw holes of TV shape...
-
Page 15: Detach The Unit
DVD/VCD/MP4 Installation --General Setup Page-- Detach the Unit Detach the front panel at first. For more de- tails, please refer to detach the front panel. TV Display Example showing how to set TV Display mode: 2. Put the keys into the host on both sides of the unit and hold the keys to the mount (Press , then press ENTER) -
Page 16: Install The Front Panel
Installation DVD/VCD/MP4 DVD SETUP MENU Selecting MENU Install the Front Panel Detach the Front Panel Press SETUP on remote control or MENU Put notch (shown as picture) onto shaft Press REL button in the upper rightcorner, Selecting Menu: During DVD status, on the main unit or in the monitor, main .And then slightly press into the right side. -
Page 17: Clean The Connector
DVD/VCD/MP4 Installation Changing the viewing angle Program Playing Clean the connector (Multi-angle) may not During VCD mode, press PROG, the If the connector of the unit and the front panel With DVDs featuring multi-angle (scenes TFT displays the program menu. Press is dirty, the unit may does not work normally. -
Page 18: Common Operations
Common Operations DVD/VCD/MP4 To Select Source by Menu Turning the Unit On/Off During VCD status, press OSD button the Changing audio language display shows: (Multi-audio) Briefly press PWR button to turn on the In any mode(except for DVD, SD, USB unit, press it again, the unit is still in mode), press SRC, BACK/ in the... -
Page 19: Eq Setting
Common Operations DVD/VCD/MP4 Playing Tracks at Random EQ Setting Mute Function Note: The function can be operated by selecting the Press button to shut off sound While listening to the popular music, classic During DVD/VCD/MP4 playback, press DVD MENU SETUP. output. -
Page 20: Main Menu
Main Menu Main Menu DVD/VCD/MP4 Set up Main Menu Number Buttons 1.Video Adjust DVD/VCD/MP4 Setup touching Press one of Number Buttons(0~9) After selecting VIDEO, the sub menu will During DVD/VCD/MP4 playback, touch to select a track, it will be played auto- appear as follows: When the unit is on, the monitor will display the screen the bottom shows the following... - Page 21 Main Menu Main Menu 2.Audio Adjust Adjust Screen 3.Source Adjust After selecting AUDIO, the sub menu will In the main menu, press SOURCE in the appear as follows: monitor, the sub menu will appear as follows: CLOCK SYS KEY BEEP MONI FLEX SAVE VOLUME...
- Page 22 Main Menu Main Menu Clock System Next Setup AMS Fullup Local Press to display the menu follows, press to display the previous one. CLOCK SYS LOCAL AREA KEY BEEP SUBWOOFER LOCAL MONI FLEX GOTO FREQ SUBWOOFER EXIT EXIT EXIT Press CLOCK SYSTEM in the monitor to In this menu to set the modes of AMS.
Need help?
Do you have a question about the DZP906 and is the answer not in the manual?
Questions and answers