Table of Contents
Advertisement
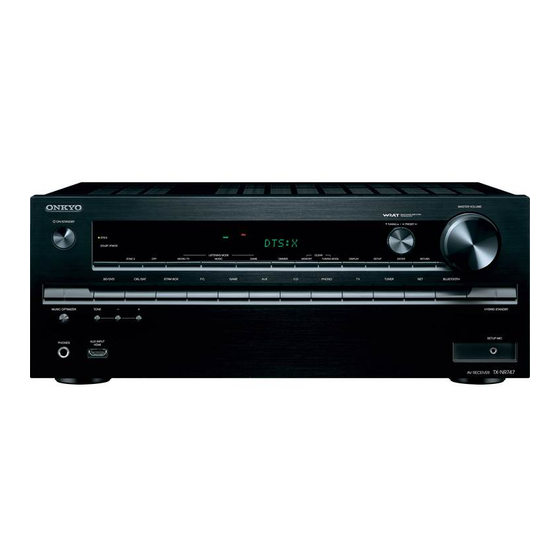
TX-NR747
AV RECEIVER
Basic Manual
This manual includes information needed when
starting up and also instructions for frequently
used operations. The Advanced Manual is
published on the web for ecological reasons and
has more detailed information and advanced
settings.
Advanced Manual
found here
En
http://www.onkyo.com/manual/txnr747/adv/en.html
Advertisement
Table of Contents

Subscribe to Our Youtube Channel
Related Manuals for Onkyo TX-NR747


Summary of Contents for Onkyo TX-NR747
- Page 1 TX-NR747 AV RECEIVER Basic Manual This manual includes information needed when starting up and also instructions for frequently used operations. The Advanced Manual is published on the web for ecological reasons and has more detailed information and advanced settings. Advanced Manual found here http://www.onkyo.com/manual/txnr747/adv/en.html...
-
Page 2: Table Of Contents
6 Multi-zone ...............18 ● Advanced speaker connections ● 32 bit DSP (Digital Signal Processor) with excellent ・ Making Multi-zone Connection ........18 ● Connecting and Operating Onkyo RI Components calculation performance ・ Performing Multi-zone Playback .........19 ● Firmware Update ● Music Optimizer™ for compressed digital music files 7 Quick Setup Menu ............19... -
Page 3: Front Panel
(European, Australian (European, Australian and Asian models) and Asian models) Front Panel zON/STANDBY button: Turns the unit on or into TUNING MODE button: Switches the tuning mode. circuits are turned off to switch the unit to Pure Audio standby mode. DISPLAY button: Switches the information on the mode and provide purer sound. -
Page 4: Rear Panel
Rear Panel the listening mode. Stays lit when Music Optimizer is enabled. RI REMOTE CONTROL jack: An Onkyo product with RI SPEAKERS terminals: Speakers are connected. To Lights in the following conditions. "AUTO": Tuning mode jack can be connected and synchronized with this unit. -
Page 5: Step 1: Connections
Step 1: Connections Characteristics of speaker types Dolby Surround listening mode. Install Top Front speakers so that they are positioned "# output front stereo sound and $ Connecting speakers at a point between directly above the output center sound such as dialogs and listening position and directly above the vocals. - Page 6 Step 1: Connections and the other type is designed to be integrated with normal speakers. Dolby Enabled Speakers placed with their " Right back Left back diaphragms facing toward the ceiling create higher effect Front R Front L Or right height Or left height in the Dolby Atmos and Dolby Surround listening modes A speaker configuration...
-
Page 7: Instructions On How To Connect Speakers
Step 1: Connections Instructions on how to connect speakers When using commercially available banana plugs: tighten the speaker terminals to the end and then insert the banana plugs. Do not insert the core of speaker cable directly into the hole for banana plug of speaker terminal. (North American models) Cut and remove the plastic coating from the end of the speaker cable, twist the core and connect it to the terminal. -
Page 8: Connecting The Tv And Players
Step 1: Connections Connecting the TV and players HDMI HDMI To use the ARC function, connect to the ARC compatible HDMI jack of the TV and make an appropriate setting on the unit. See "2 Source Game console Connection" of "Step 2: Initial Setup". HDMI HDMI HDMI cable... -
Page 9: Connecting Components Without Hdmi
Step 1: Connections modify the settings to enable the input selection link with A player with a digital audio out jack can be connected. Video upconversion function CEC (Consumer Electronics Control) compliant device, Digital optical cable (OPTICAL) connection with ARC compatible TV, and HDMI Standby Video signals input to the VIDEO IN jack or the ... -
Page 10: Other Connections
Step 1: Connections Network connection You can enjoy Internet radio, DLNA and AirPlay by Other connections connecting the unit to LAN. The unit can be connected to the router with an Ethernet cable or to the wireless LAN router with Wi-Fi connection. In case of wired connection, AM/FM antenna connections connect the Ethernet cable to the Ethernet port. -
Page 11: Step 2: Initial Setup
Step 2: Initial Setup "Initial Setup" automatically starts on the TV when you first Before Start turn the unit on. Setup is performed as a series of responses to questions AccuEQ Room Calibration asked by the unit. Select the item with the cursors of the remote controller and press ENTER to confirm your selection. -
Page 12: Source Connection
Step 2: Initial Setup The subwoofer sound may not be detected since it is extremely 5� The test tones sound from the connected speakers ¼ low frequencies. Set the subwoofer volume to around the half of its and automatic speaker setting starts� Source Connection maximum volume. -
Page 13: Remote Mode Setup
Step 2: Initial Setup ● If you changed the initial setting of the access point to skip password entry, step 3 is unnecessary. Source Connection Network Connection ● If you changed the initial setting of the access point The following CEC-compatible devices are found; Do you wish to turn on the CEC link? to hide the SSID, see "When the access point is not xxxxxxxxxxx... - Page 14 ENTER. For how to register the PIN code to the access may be cases when Dolby TrueHD, Dolby Atmos, and DTS- I have read Onkyo’s Privacy Policy and agree to its terms. point, refer to its instruction manual. HD Master Audio is not output according to the format of the source.
-
Page 15: Step 3: Playing Back
Step 3: Playing Back z RECEIVER button: Turns the unit on or into standby Part names and functions of the remote mode. controller Basic Operations REMOTE MODE/INPUT SELECTOR buttons: Switch the input to be played. Furthermore, by registering a particular remote control code to a button, you can switch the remote control mode to operate other equipment by pressing that button. -
Page 16: Network Functions
Step 3: Playing Back start playback. ● The AirPlay icon is displayed in the control center if you ● This unit needs to be connected to the same router as a are using iOS 7 and later. To display the control center, Network Functions computer or NAS device. -
Page 17: Bluetooth
Step 3: Playing Back low, the sound will not be output from this unit. on the main unit or CH +/− on the remote controller. ● Due to the characteristics of Bluetooth wireless Bluetooth ® ● To delete a preset station, after selecting the preset technology, the sound produced on this unit may slightly number you want to delete with PRESET... -
Page 18: Multi-Zone
Step 3: Playing Back Making Multi-zone Connection b� Connecting with speakers in a separate room Multi-zone There are the following two methods of connection: Connect the speakers in another room to the SPEAKERS a. Connecting with a pre-main amplifier in a separate room ZONE2 jacks of the unit using speaker cables. -
Page 19: Performing Multi-Zone Playback
● It cannot be set if the listening mode is Pure Audio room and then "BLUETOOTH" is selected as playback (interlink between Onkyo components) is disabled. (European, Australian and Asian models), Direct or source in the separate room, the input in the main room ●... -
Page 20: Other Useful Functions
Step 3: Playing Back Dialog Control: You can increase the dialog portion of Checking the Input Format "Setup"-"2. Speaker"-"Equalizer Settings" to "Preset1" to the audio in 1 dB steps up to 6 dB so that you can make "Preset3". The same sound field setting is applied to all Press DISPLAY on the remote controller several times to dialog easier to hear over background noise. -
Page 21: Troubleshooting
SSID or the ANY connection may be off. the rear panel. After that, turn the unit on again. If "NG" appears, Change the setting and try again. unplug the power cord immediately and contact your Onkyo dealer. There's no sound, or it's very quiet�... -
Page 22: Specifications
Others Specifications Network Section ● HDMI Input Ethernet LAN IN1 (BD/DVD, HDCP2.2), IN2 (CBL/SAT, HDCP2.2), IN3 (STRM BOX, 10BASE-T/100BASE-TX Amplifier Section HDCP2.2), IN4 (PC), IN5 (GAME), IN6, IN7, AUX INPUT HDMI (front) Wireless LAN Output IEEE 802.11 b/g/n standard Rated Output Power (North American) OUT MAIN (ARC), OUT SUB (Wi-Fi standard) -
Page 23: Table Of Image Resolutions
Others Table of image resolutions Resolutions supported by HDMI Refer to the following table for information about the image formats and resolutions output by this unit in Content Input Display response to input signals protection Frame rate Color space Color Depth Remarks support resolution... - Page 24 Direktiv 1999/5/EC. – Limits for harmonic current emissions – Hér með lýsir Onkyo Corporation því yfir að varan TX-NR747 er í samræmi – Limitation of voltage changes, voltage við grunnkröfur og aðrar kröfur sem gerðar eru í tilskipun 1999/5/EC.
- Page 25 ® manner any information, content or services available through this Bluetooth SIG, Inc. and any use of such marks by Onkyo is under license. Other trademarks and trade names are those of their respective owners. device, unless expressly permitted by the appropriate copyright, patent, trademark and/or other intellectual property owner, including, Manufactured under license from THX Ltd.
- Page 26 License along with the Library. Onkyo notifies you that, according to the attached GPL/LGPL, you have right to obtain, modify, and redistribute software source You may charge a fee for the physical act of transferring a copy, and you may at your option offer warranty protection in 7.
- Page 27 In response to requests from the copyright owners of each piece of software, Onkyo notifies you of the following: We protect your rights with two steps: (1) copyright the software, and (2) offer you this license which gives you legal permission she is willing to distribute software through any other system and a licensee cannot impose that choice.
- Page 28 Others NOT LIMITED TO, PROCUREMENT OF SUBSTITUTE GOODS OR SERVICES; LOSS OF USE, DATA, OR PROFITS; OR CONTRIBUTORS BE LIABLE FOR ANY DIRECT, INDIRECT, INCIDENTAL, SPECIAL, EXEMPLARY, OR CONSEQUENTIAL [1]Mark Andrews <mark_andrews@isc.org> Leitch atomic clock controller BUSINESS INTERRUPTION) HOWEVER CAUSED AND ON ANY THEORY OF LIABILITY, WHETHER IN CONTRACT, STRICT DAMAGES (INCLUDING, BUT NOT LIMITED TO, PROCUREMENT OF SUBSTITUTE GOODS OR SERVICES;...
- Page 29 Others mailto: moeller@gwdgv1.dnet.gwdg.de Copyright (c) 1998 Red Hat Software "Contribution" shall mean any work of authorship, including the original version of the Work and any modifications or additions to mailto: mogul@pa.dec.com Permission is hereby granted, free of charge, to any person obtaining a copy of this software and associated documentation files that Work or Derivative Works thereof, that is intentionally submitted to Licensor for inclusion in the Work by the copyright owner mailto: tmoore@fievel.daytonoh.ncr.com (the "Software"), to deal in the Software without restriction, including without limitation the rights to use, copy, modify, merge,...
- Page 30 Others END OF TERMS AND CONDITIONS Any subroutines or modules supplied by You and linked into the Source Code or Executable Files this Work shall not be Copyright (c) 2002, Xiph.org Foundation considered part of this Work and will not be subject to the terms of this License. Redistribution and use in source and binary forms, with or without modification, are permitted provided that the following APPENDIX: How to apply the Apache License to your work.
- Page 31 En-31...
-
Page 32: Supplied Accessories
Tsim Sha Tsui Kowloon, Hong Kong. http://www.us.onkyo.com/ Tel: 852-2429-3118 Fax: 852-2428-9039 http://www.hk.onkyo.com/ F1504-0 SN 29401986 (C) Copyright 2015 Onkyo Corporation Japan. All rights reserved. Onkyo has the Privacy Policy. You can review it at [http://www.onkyo.com/privacy/]. * 2 9 4 0 1 9 8 6 *...
Need help?
Do you have a question about the TX-NR747 and is the answer not in the manual?
Questions and answers