Table of Contents
Advertisement
Quick Links
Advertisement
Table of Contents

Subscribe to Our Youtube Channel
Related Manuals for Robin Actor 3 ST

Summary of Contents for Robin Actor 3 ST
- Page 1 Version 1.3...
-
Page 2: Table Of Contents
3.3 Rigging the fixture ...................... 9 3.4 DMX-512 connection ....................11 4. Control menu map ......................12 5. Robin Actor 3 ST - DMX chart ..................14 5.1 Virtual colour wheel - colour mixing chart..............18 5.2 LED zone order ......................22 6. -
Page 3: Safety Instructions
Please consider that damages caused by manual modifications to the device are not subject to warranty. The Robin Actor 3 ST was designed for indoor use and it is intended for professional application only. It is not for household use. - Page 4 Air vents and slots in the fixture´s head and base are provided for ventilation, to ensure reliable operation of the device and to protect it from overheating. Do not block the LEDs array with any object when the fixture is under operation. The openings should never be covered with cloth or other materials, and never must be blocked.
-
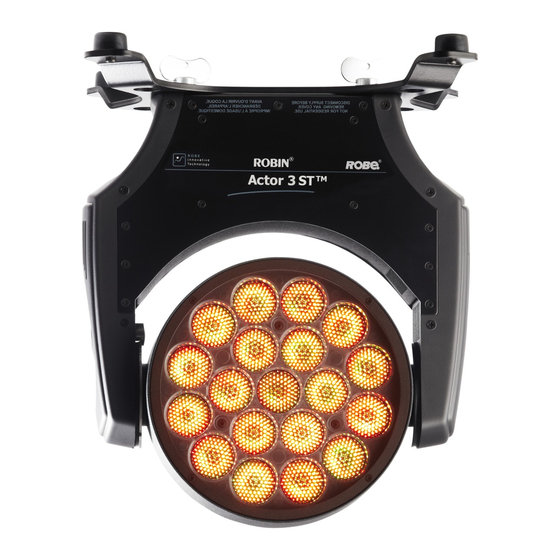
Page 5: Fixture Exterior View
2. Fixture exterior view 1 - Moving head 2 - Tilt lock 3 - Control buttons 4 - Display 5 - Apertures for safety chain 6 - DMX out 7 - DMX in 8 - PowerCon socket 9 - Fuse holder 10 - Apertures for quick-turn fasteners... -
Page 6: Installation
3.1 Connection to the mains For protection from electric shock, the fixture must be earthed! The Robin Actor 3 ST is equipped with auto-switching power supply that automatically adjusts to any 50-60Hz AC power source from 100-240 Volts. If you need to install a suitable plug on the power cord, note that the cores in the power cord are coloured according to the following table. -
Page 7: Installing The Top Hat And Barndoors
3.2 Installing the top hat and barndoors Switch off the fixture before top hat and barndoors installation To install the top hat 1.Unscrew the four fastening screws (3) which securing flange (4) to the head (5) and install new flange. Keep its right position- the cutouts (A) in the flange must look towards the arms. - Page 8 To install the barndoors and diffuser 1. Unscrew the four fastening screws (2) which securing flange (1) to the head and screw the new flange (3). Keep its right position- the cutouts (A) in the flange have to look towards the fixture arms. 2.
-
Page 9: Rigging The Fixture
3.3 Rigging the fixture The overhead installation must always be secured with a secondary safety attachment, e.g. an appropriate safety rope. This secondary safety attachment must be constructed in a way that no part of the installation can fall down if the main attachment fails. When rigging, derigging or servicing the fixture staying in the area below the installation place, on bridges, under high working places and other endangered areas is forbidden. - Page 10 Use only a safety wire with screw-on snap-hook. Thread the snap-hook through two apertures in the fixture base and the wire around the truss as shown on the picture below. 1-Safety wire 2-Apertures for safety wire 3-Truss When installing fixtures side-by-side, avoid illuminating one fixture with another!
-
Page 11: Dmx-512 Connection
3.4 DMX-512 connection The fixture is equipped with 5-pin XLR sockets for DMX input and output. Only use a shielded twisted-pair cable designed for RS-485 and 5-pin XLR-plugs and connectors in order to connect the controller with the fixture or one fixture with another. DMX - output DMX-input XLR mounting-sockets (rear view):... -
Page 12: Control Menu Map
4. Control menu map Default settings=Bold print Level 1 Level 2 Level 3 Level 4 Level 5 Level 6 Level 7 DMXA Set DMXA 001-255 Zoom Vir C Dimm MENU Info POn Time Total Reset DMX In Pover 0-255 Dimm F 0-255 Temp Current... - Page 13 Level 1 Level 2 Level 3 Level 4 Level 5 Level 6 Level 7 Prog 1 Prog 2 Prog 3 Pr Edit Prog 1 Step 1 Prog 2 Prog 3 Step 40 F.Tim 0-25.5 S.Tim 0-25.5 COPY Prg End 1-40 Reset Special RDM Low...
-
Page 14: Robin Actor 3 St - Dmx Chart
5. Robin Actor 3 ST - DMX chart Version 1.0 Mode/Channel Type of Value Function control No function No function No function No function No function Special functions 0 - 9 Reserved To activate following functions , stop in DMX value for at least 3sec. - Page 15 Mode/Channel Type of Value Function control Green fine (16 bit) - zone 1 12 10 0-255 Fine green or magenta LEDs saturation control proportional Blue/Yellow (8 bit) zone 1 13 11 0-255 Blue or yellow LEDs saturation control (0-100%) proportional Blue/Yellow (16 bit) zone 1 14 12 0-255...
- Page 16 Mode/Channel Type of Value Function control No function step 26 10 1-255 Colour temperature correction from 20000K to 2700K) proportional Virtual Colour Wheel For detailed description see " Virtual colour wheel- colour mixing chart No function step White 2700 K step White 2700 K (Halogen lamp mode***) step...
- Page 17 Mode/Channel Type of Value Function control Dimmer (8 bit) 31 15 10 0-255 Dimmer intensity from 0% to 100% proportional Dimmer fine (16 bit) 32 16 0-255 Fine dimming proportional ** DMX values of all channels are saved into fixture and will be recall after switching the fixture on (without DMX controller connected).
-
Page 18: Virtual Colour Wheel - Colour Mixing Chart
5.1 Virtual colour wheel - colour mixing chart Scale* Virtual Colour Wheel Green Blue White 1-2 (White 2700K) 3 (White 2700K /Hal.mode/) 4-5 (White 3200K) 6 (White 3200K /Hal.mode/) 7-9 (White 4200K) 10-12 (White 5600K) 13-15 (White 8000K) Page 1... - Page 19 Robin 600 LED Wash - Virtual Colour Wheel Scale* Virtual Colour Wheel Green Blue White Page 2...
- Page 20 Robin 600 LED Wash - Virtual Colour Wheel Scale* Virtual Colour Wheel Green Blue White Page 3...
- Page 21 Robin 600 LED Wash - Virtual Colour Wheel Scale* Virtual Colour Wheel Green Blue White Page 4...
-
Page 22: Led Zone Order
Robin 600 LED Wash - Virtual Colour Wheel Scale* Virtual Colour Wheel Green Blue White **** **** **** **** 248-255 (Rainbow+ zone effects) * Colour scale as an illustration only 5.2 LED zone order Page 5... -
Page 23: Control Menu
Set DMXA- Use this menu item to set the DMX start address of the fixture, which is defined as the first channel from which the Robin Actor 3 ST will respond to the controller. If you set, for example, the address 36, the Robin Actor 6 will use channels 36 - 67 for control (if Mode 1 is selected). -
Page 24: Personality (Pers)
[Enter] button at the same time. DMX In - DMX readout. The menu is used to read DMX values of each channel received by the fixture. Temp - Temperature. The menu shows temperature in the LED module. Current - A current temperature of the LED module. Highest - A maximum temperature of the LED module since the fixture has been fabricated. -
Page 25: Test Program (Test Prg)
Pr Edit - Editing program. Select this menu to edit or create the program. The Robin Actor 3 ST has one built- in program and one user-editable program up to 40 steps. Each program step has a step time - during which effects last in the current step and a fade time- during which effects move to new positions. - Page 26 Wireless - Wireless DMX status. The menu serves for reading of the wireless operation status. r.InF. - Wireless DMX information. The menu item shows level of received signal in %. If the fixture is not linked to the transmitter, “no.LI” is displayed. r.UnL.
-
Page 27: Rdm
RDM allows explicit commands to be sent to a device and responses to be received from it. The list of commands for Robin Actor 3 ST is the following. Parameter ID Discovery command SET command... -
Page 28: Error And Information Messages
PARAMETER_DESCRIPTION 8. Wireless DMX operation The wireless version of the Actor 3 ST is equipped with the Lumen Radio CRMX module and antenna for receiving DMX signal. CRMX module operates on the 2.4 GHz band. The item " Wireless " from the menu "DMX Input" allows you to activate receiving of wireless DMX (Pers-->... -
Page 29: Technical Specifications
10. Technical Specifications Electrical Power supply:......electronic auto-ranging Input voltage range:....supply 100-240V, 50-60Hz Fuse:........T 3.15A/250V ~ Power consumption ....200W,power factor=0,96 (R+G+B+W=full) Optic Light source: 19 Osram Ostar RGBW multichips (SMT LE RTDUW S2W) 3 zones with individual colour control of each Typical Lumen Maintenance: 70% @ 60,000 hours LED life expectancy: 60.000 hours RGBW or CMY colour mixing +CTO... - Page 30 6.3 kg (with floor stand) Dimensions (mm) Accessories Omega holder (P/N 99010420)...........1 piece Rest of bracket-assembled (P/N 99013638).......1 piece EggCrate Robin 300 LEDWash-black (P/N 19520089)..1 piece Optional accessories Top hat -black (P/N.10980102) Top hat -white (P/N.10980104) Barndoors-black (P/N 10980154) Diffuser 19°x35°...
-
Page 31: Maintenance And Cleaning
11. Maintenance and cleaning It is absolutely essential that the fixture is kept clean and that dust, dirt and smoke-fluid residues must not build up on or within the fixture. Otherwise, the fixture‘s light output will be significantly reduced. Regular cleaning will not only ensure the maximum light output, but will also allow the fixture to function reliably throughout its life. -
Page 32: Photometric Diagrams
13. Photometric diagrams...
Need help?
Do you have a question about the Actor 3 ST and is the answer not in the manual?
Questions and answers