
Subscribe to Our Youtube Channel
Summary of Contents for Elite EPC-414
- Page 1 4 QT. DIGITAL PRESSURE COOKER Model: EPC-414(A~Z) INSTRUCTION MANUAL Before operating your new appliance, please read all instructions carefully and keep for future reference.
-
Page 2: Table Of Contents
TABLE OF CONTENTS IMPORTANT SAFEGUARDS SAFETY WARNING/ADDITIONAL SAFETY TIPS E1 - E4 ERROR INDICATOR ABOUT YOUR PRESSURE COOKER SHORT CORD PURPOSE/POLARIZED PLUG PARTS IDENTIFICATION PRESSURE COOKER LID MARKINGS RUBBER SEAL RING ASSEMBLY BEFORE FIRST USE Lid assembly PREPARING YOUR PRESSURE COOKER 10-12 Opening the lid Closing the lid... -
Page 3: Important Safeguards
IMPORTANT SAFEGUARDS When using pressure cookers, basic safety precautions should always be followed: Read all instructions before operation. Do not operate while unattended. Do not touch hot surfaces. Use handles or knobs. Close supervision is necessary when the pressure cooker is used near children. DO NOT allow children to operate under any circumstance. - Page 4 IMPORTANT SAFEGUARDS 25. Food should not be kept warm for more than 4 hours in order to maintain the freshness of the food. The pressure cooker should not be used for more than 6 hours continuously. Serious Injury and/or damage may occur if any safeguards are ignored.
-
Page 5: Safety Warning/Additional Safety Tips
Safety Warning There is a potential risk of fire, electric shock or injury to persons if the product is not used as instructed. Protection against electric shock is assured only if the main power cord is connected to a properly grounded 120V | 60Hz power receptacle. ... -
Page 6: About Your Pressure Cooker
This digitally controlled and automatic pressure cooker uses advanced technology so you and your family can enjoy the benefits of better, faster and healthier cooking. Your Elite Platinum Pressure Cooker seals in steam to cook hotter and faster while maintaining important nutrients for healthier meals. -
Page 7: Short Cord Purpose/Polarized Plug
SHORT CORD PURPOSE NOTE: A short power cord is provided to reduce the risk of personal injury resulting from becoming entangled in or tripping over a longer cord. Longer power-supply cords or extension cords are available and may be used if care is exercised in their use. -
Page 8: Parts Identification
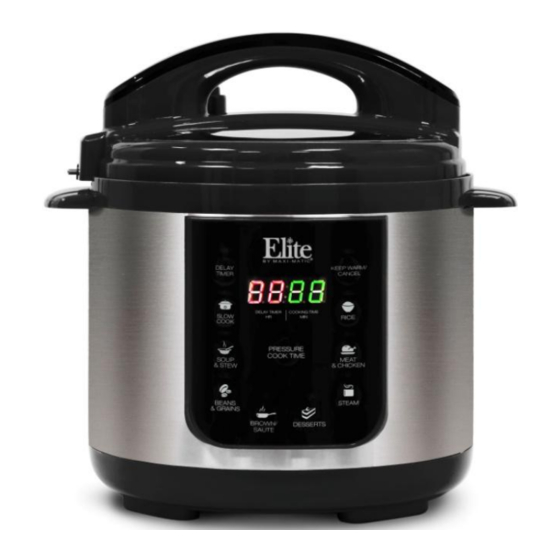
PARTS IDENTIFICATION 1. Handle 9. Upper Ring 17. Filter 2. Lid 10. Control Panel 18. Rubber Seal Ring 3. Pressure Limiting Valve 11. Power Cable 19. Sensor 4. Float Valve (external view) 12. Condensation Cup 20. Stainless Steel Rack 5. Float Valve (internal view) 13. -
Page 9: Pressure Cooker Lid Markings
PRESSURE COOKER LID MARKINGS Please note the "OPEN" and "CLOSE" markings on the Upper Ring (9) of the pressure cooker body (13) and the“ ”on the rim of the Lid (2). To properly close and secure the pressure cooker Lid (2), always line up the "CLOSE" marking on the Upper Ring (9) and the “... -
Page 10: Before First Use
BEFORE FIRST USE Working Maximum Keep Warm Delay Timer Pressure Pressure Temperature 0~70kPa 12 PSI 90kPa 140ºF ~ 175 ºF 0.5~24 HR Remove packaging materials such as cardboard, plastics or Styrofoam and discard appropriately. 2. Clean all the parts by wiping with a soft damp cloth or sponge and dry thoroughly. LID ASSEMBLY: How to open the lid: Hold the handle (1) firmly, turn the lid (2) clockwise until it loosens and lift vertically (Figures 3-4). -
Page 11: Preparing Your Pressure Cooker
PREPARING YOUR PRESSURE COOKER Opening the lid: Hold the handle (1) firmly, turn the lid (2) clockwise until it loosens and lift vertically (See Figures 7-8). Remove the inner pot (6) and add desired ingredients. The amount of water and food should not exceed 2/3 of the height of the inner Pot (6) (Figure 9). -
Page 12: Closing The Lid
PREPARING YOUR PRESSURE COOKER (CONT). Closing the Lid: Make sure the Rubber Seal Ring (18) is fitted properly onto the metal ring inside the lid (2). Observe the Rubber Seal Ring (18) inside the lid (2) and ensure that it is fitted onto the outer part of the metal ring all the way around. (Caution: If the rubber seal ring is damaged, do not use the pressure cooker. - Page 13 PREPARING YOUR PRESSURE COOKER (CONT). NOTES & TIPS #1: Please note that the Pressure Limiting Valve (3) will be loose when you are not using the unit for cooking. It will rock slightly and will turn 360° manually. Once the pressure cooker is in operation and the pressure has built up to its capacity, the Pressure Limiting Valve (3) will tighten but on the surface it will resemble a bobble-head, only allowing itself to be turned to “Exhaust”.
-
Page 14: Operating Instructions
OPERATING INSTRUCTIONS HOW TO USE THE There are eight MENU BUTTONS programmed for your pressure cooker. They are SLOW COOK, SOUP & STEW, BEANS/GRAINS, BROWN/SAUTÉ, DESSERTS, STEAM, MEAT & CHICKEN, and RICE. The default times are programmed for quick and easy cooking for small portions of food. - Page 15 OPERATING INSTRUCTIONS (CONT.) The pressure cooker will begin to operate based on a cooking time of 12 minutes. When proper pressure is achieved, the display will show 00:12 and the cooking time will begin to countdown. (The time displayed will depend on the selected MENU BUTTON and the DEFAULT COOK TIMES CHART on page 13).
- Page 16 OPERATING INSTRUCTIONS (CONT.) NOTES & TIPS #6: a. NATURAL RELEASE is recommended when cooking foods that will not have the tendency to overcook such as Potatoes, Beans, Soups & Stews. During the Natural Release time period, the pressure cooker may still be heated and cooking the food slightly. In Natural Release, do not move the Pressure Limiting Valve (3) to EXHAUST immediately after cooking.
-
Page 17: How To Use The Delay Timer
OPERATING INSTRUCTIONS (CONT.) TIP: If you cannot adjust the PRESSURE COOK TIME, it is because too much time has passed since you first pressed the PRESSURE COOK TIME BUTTON. Cancel the cooking process. Press desired MENU BUTTON and then quickly press the PRESSURE COOK TIME BUTTON continuously until you've reached the desired cook time. -
Page 18: How To Use The Pressure Cook Time Button
OPERATING INSTRUCTIONS (CONT.) PRESSURE COOK TIME: Press a MENU BUTTON and then quickly press the PRESSURE COOK TIME button to reach the desired cook time. Follow the instructions under "How to use the PRESSURE COOK TIME button." Once the desired DELAY TIME and PRESSURE COOK TIME are selected, the DELAY TIMER and the MENU BUTTON will illuminate and the unit will begin counting down the delayed time before cooking begins. -
Page 19: How To Use The Keep Warm Function
OPERATING INSTRUCTIONS (CONT.) HOW TO USE THE FUNCTION: Food can be prepared at an earlier time and kept warm inside the pressure cooker using the KEEP WARM function. Food should not be kept warm for more than 4-hours. Additional time may cause a change in flavor, appearance and cause food to spoil. Prepare desired food and place into cooking pot. -
Page 20: How To Use The Steam Function
OPERATING INSTRUCTIONS (CONT.) HOW TO USE THE BUTTON: Place wire rack into Inner Pot. A stainless steel wire rack or trivet no larger than 8.25" in diameter is recommended for use with this pressure cooker. Place heat resistant dish or container on top of wire rack. Add water to a level just below the top of the rack. -
Page 21: How To Use The Pressure Cooker For Canning
OPERATING INSTRUCTIONS (CONT.) HOW TO USE THE PRESSURE COOKER FOR It is recommended to purchase a separate instructional book that is specific to Canning. These books can be purchased at a local book store. This pressure cooker can be used to do basic pressure canning and the water-bath method. - Page 22 OPERATING INSTRUCTIONS (CONT.) Naturally Releasing the pressure (See Notes & Tips #6). 18. Open lid once pressure has completely released. 19. Carefully remove jars using special canning utensils or tools. CAUTION: Jars are hot! 20. Set jars on a towel or cooling rack and allow to cool completely in a draft-free location.
-
Page 23: Helpful Tips
HELPFUL TIPS Read this manual thoroughly and follow all instructions. Be familiar with the recipe and have all ingredients prepped before you begin. Be sure the lid is secured and locked properly before beginning. You may wish to brown some meats before cooking with other ingredients. To do so, follow instructions on page 17. -
Page 24: How To Clean Your Pressure Cooker
HOW TO CLEAN YOUR PRESSURE COOKER Always make sure the Pressure Cooker is unplugged, depressurized and completely cooled down before dismantling. Use a non-abrasive sponge or damp wash cloth to clean the exterior of the outer body (13) and the exterior surface of the pressure cooker. NEVER immerse the pressure cooker in any liquids. -
Page 25: Troubleshooting
TROUBLESHOOTING PROBLEM SOLUTION If you are not cooking or using the unit, the Valve (3) will be loose. It will turn 360 degrees and may even come off if you pull on it. Once you start using the Is the pressure cooker and the pressure has built up, and the Valve is set to Airtight/Exhaust “Airtight”... - Page 26 PROBLEM SOLUTION See Notes & Tips #2. The Rubber Seal Ring (18) did not make a proper seal. Cancel all the Steam is being released functions. Exhaust any remaining pressure and steam. Open the lid and around the rim of the lid remove it entirely.
-
Page 27: Cooking Time Chart
COOKING TIME CHART Courtesy of www.healthfoods.com Please note that all the below information is for your reference only and can be adjusted according to the user’s preference. Meat/Poultry Always cook meat or poultry with at least 1-3 cups of liquid. If the cooking time exceeds 15 minutes, use 2 cups of liquid. - Page 28 Vegetables Always cook with at least 1-2 cups of liquid. Add 1-2 additional minutes to cooking time when preparing frozen vegetables. Use the quick-release release method at the end of cooking cycle so vegetables will not become soggy. (Below chart is for quantity approximately half a pot). Type of Vegetable Approximate Cooking Minutes Pressure Release Quick Release...
- Page 29 Dried Beans and Other Legumes Place beans or legumes in pressure cooker. Add 3 cups of water for each cup of beans or legumes. Add 1 tablespoon of vegetable oil for each cup of water to cut down on foaming. Do not add salt until after cooking.
- Page 30 Meat/Poultry (Larger Cuts) Always cook meat or poultry with at least 1-3 cups of liquid. If the cooking time exceeds 15 minutes, use 2 cups of liquid. If weight of meat or poultry is 3lbs, use 3 cups of liquid. Preserved or salted meats should be immersed in water.
-
Page 31: Recipes
RECIPES Recipes on this page are courtesy of Joelle Hunter. MACARONI N' CHEESE SERVES 8 Ingredients 2 Tbsp butter 3 pounds elbow noodles (or your favorite 2 shallots, minced small pasta) 12 cups water 1 loaf original Velveeta, cut into cubes 2 Tbsp seasoned salt 2 cups shredded mozzarella cheese 1 Tbsp Worcestershire sauce... - Page 32 RECIPES Recipes are courtesy of www.recipezaar.com and www.fastcooking.ca. Please note that all of the information is for your reference only and can be adjusted according to the user’s preference. BEEF IN PEPPER SAUCE SERVES 4 Ingredients Pepper Sauce 1 teaspoon salt 1 red bell pepper or green bell pepper 1/2 teaspoon black pepper 1/2 cup baby carrot...
- Page 33 RECIPES CHICKEN PICCATA SERVES 6 Ingredients 6 chicken breast halves 1 cup pimento stuffed olive, minced 1/2 cup all-purpose flour 1/4 cup sour cream 1/4 cup olive oil 1 tablespoon potato starch or flour 4 shallots 1/4 cup fresh parmesan cheese, grated (1 ounce) 3 garlic cloves, crushed fontinella cheese, grated 3/4 cup chicken broth...
- Page 34 RECIPES Place ribs into pressure cooker pot after coating with sauce. Add the 1 cup of stock to the bottom of pot. Close and lock the pressure cooker lid. Adjust the pressure valve on top to Airtight and press the MEAT & CHICKEN function switch. When the pressure cooker has finished the cooking cycle, release the pressure by carefully setting the valve to Exhaust on the top of the lid.
- Page 35 RECIPES JAMBALAYA SERVES 4-6 Ingredients 1 tablespoon vegetable oil 1 onion, chopped 1/2 lb boneless skinless chicken breasts, cut 3 garlic cloves, minced into 1" pieces 1 green bell pepper, chopped 1/2 lb fully cooked Andouille or Italian 3 stalks celery, sliced sausage, sliced 1 cup long grain rice 1/2 lb uncooked shrimp, peeled and...
- Page 36 RECIPES Close and lock the lid and program the pressure cooker for 40-minutes. When the pressure cooker has finished the cooking cycle, release the pressure by carefully setting the valve to Exhaust on the top of the lid. Once the pressure has released, the lid can be turned and unlocked.
- Page 37 RECIPES Directions Season the chicken on both sides with salt and pepper. Then place ham hock and chicken into bottom of inner pot. Place all remaining ingredients into pot. The chicken will brown on the side touching the bottom of the pot. Close and lock the lid on your pressure cooker.
- Page 38 RECIPES extra thick, you can also make a roux with a bit of the liquid ladled out in a little bowl, mix a bit of flour with it until smooth and pour it back into the pot.) Once the sauce has thickened to your desired consistency, place the chicken back in. Now it’s ready to serve with rice or on its own.
- Page 39 RECIPES separate serving platter. In a small bowl, mix half a cup of water with 1 tbsp of flour and mix until it becomes a runny white goo. Stir it while slowly pouring in the flour mixture and keep stirring and simmering until the gravy becomes a nice thick consistency.
- Page 40 RECIPES APPLES AND ONION PORK TENDERLOIN SERVES 4 Ingredients 3-5 lb. Pork Rump or Pork Tenderloin 2 Cups Apple Juice 3 Apples (Sliced) 1 Cup Broth (Chicken, Beef or Vegetable, 1 Whole Onion (Sliced) doesn’t matter) 2 Bay Leaves Salt & Pepper to taste Directions Remove any unwanted fatty pieces from pork.
- Page 41 RECIPES Cooking should be approximately 15-20 minutes. When the pressure cooker has finished the cooking cycle, release all pressure by carefully setting the valve to Exhaust on the top of the lid. Once all pressure has released, the lid can be turned and unlocked.
- Page 42 RECIPES SAUSAGE AND LENTIL SOUP SERVES 4 Ingredients 3-4 Cups Dried Lentils 2 Bay Leaves 1-2 Cups Chopped Sausage (any sausage to 2 Tbsp Beef Buillion (Or 2 Cups Beef Broth) your liking) 6 Cups Fresh Water (Less or more 2 Cups Crushed Roasted Tomatoes depending on the size of your pressure 1 Cup Mirepoix (chopped mixture of celery,...
- Page 43 RECIPES Note: If you are making a really large, almost full pot, the pressure cooker will take quite a while to heat up everything inside and come to pressure, about 20 to 30-minutes to build up pressure. Once the pressure has been reached the 10-minutes will begin to count down. Once the 10- minutes have reached 0, the cooker will automatically beep and go to keep warm.
- Page 44 RECIPES To the roux mix, add the chopped onions, garlic and chopped tomatoes, plus the celery. Cook the mixture for just a couple of minutes and cancel "BROWNING." The mixture should be thick and creamy. Season with salt and pepper. Add the water, tomato sauce and chicken stock.
- Page 45 RECIPES When the pressure cooker has finished the cooking cycle, release all pressure by carefully setting the valve to Exhaust on the top of the lid. Once all pressure has released, the lid can be turned and unlocked. Add the sautéed asparagus, and Parmesan cheese. Serve immediately.
- Page 46 RECIPES CREAM OF GARDEN TOMATO SOUP SERVES 4-6 Ingredients 1 tablespoon vegetable oil teaspoon dried) 1 tablespoon butter 1 teaspoon salt 1 large yellow onion, finely chopped (you 1/4 teaspoon black pepper, freshly ground can also use a white onion) 1/2 cup chicken broth (or vegetable broth 3 lbs tomatoes, coarsely chopped or water)
- Page 47 RECIPES BABY BACK RIBS – FAST & EASY SERVES 2-3 Ingredients 3 lbs beef back ribs 1/4 teaspoon paprika 1/2 teaspoon salt 2 tablespoons olive oil 1/4 teaspoon black pepper 1 cup beer 1/2 teaspoon onion powder 12 ounces barbecue sauce 1/4 teaspoon garlic powder Directions Cut ribs into serving pieces.
- Page 48 RECIPES CHICKEN STOCK SERVES 6 Ingredients 2 lb chicken parts, primarily backs, 2 sprigs parsley but also including gizzards, necks, hearts 6 peppercorns or 1/4 teaspoon ground and wings black pepper 1 medium onion, peeled and halved 1 teaspoon thyme 1 celery stalk, cut in several pieces 2 bay leaves 1 large carrot, scraped and cut in several...
- Page 49 RECIPES When the pressure cooker has finished the cooking cycle, release all pressure by carefully setting the valve to Exhaust on the top of the lid. Once all pressure has released, the lid can be turned and unlocked. Slice and serve immediately. TOMATO PASTA SAUCE SERVES 2-3 Ingredients...
- Page 50 RECIPES LEMON CHICKEN SERVES 4 Ingredients 3 1/2 lb chicken cut into serving pieces 2 teaspoons oregano 1/4 cup plus 2 tablespoons olive oil Salt and freshly ground pepper to taste 1/4 cup lemon juice 1/2 cup chicken stock Directions: In a small bowl, mix together 1/4 cup oil, lemon juice, oregano, salt and pepper.
-
Page 51: Desserts
RECIPES MACARONI PUTTANESCA SERVES 4-5 Ingredients 1 26oz jar of puttanesca, marinara or your favorite sauce 1 16oz box of macaroni (or any type of pasta) 1 bag of frozen meatballs 1 onion, diced 1 bell pepper, diced (any color) 2 cloves garlic, minced salt &... - Page 52 DESSERTS CREAMY CHEESECAKE WITH FRUIT GLAZE Makes one 7-inch cheesecake Ingredients 1 tablespoon butter 2 teaspoons grated lemon zest 4 tablespoons bread crumbs or cookie 2 tablespoons flour crumbs 6 tablespoons sour cream Two 8-oz packages of cream cheese 2 eggs 3/4 cup sugar 2 egg yolks 1/4 cup heavy cream...
- Page 53 DESSERTS Close and lock the pressure cooker lid. Adjust the pressure valve to Airtight and press DESSERTS. When pressure cooker has finished the cooking cycle, release all pressure by carefully setting the valve to Exhaust on the top of the lid. Once all pressure has released, the lid can be turned and unlocked.
- Page 54 DESSERTS In a small bowl mix together the egg, evaporated milk and vanilla. Stir in a little of the hot liquid from pressure cooker, then add mixture to the pressure cooker. Cover again and set to cook for 5 more minutes. When the pressure cooker has finished the cooking cycle, release all pressure by carefully setting the valve to Exhaust on the top of the lid.
- Page 55 DESSERTS CINNAMON APPLE FLAN WITH MAPLE SYRUP SERVES 6 Ingredients 5 tablespoons maple syrup 1/4 teaspoon vanilla 1/4 teaspoon cinnamon 6 tablespoons sugar 2 apples, peeled and cut in 1/4" slices 2 1/2 cups milk 3 whole eggs 3 egg yolks Directions: Follow the BROWNING instructions in this manual: combine the maple syrup and the cinnamon.
- Page 56 DESSERTS Open two cans of Sweetened Condensed Milk and add to the rice pudding and stir. Allow to cool slightly, then cover and place into refrigerator to cool completely. Serve warm or cold with a drizzle of honey if desired. Garnish with sliced strawberries, blueberries, orange zest or nutmeg.
-
Page 57: Canning Recipes
CANNING RECIPES Recipes courtesy of www.allrecipes.com DILL PICKLES Ingredients 8lbs 3 to 4 in long pickling cucumbers 16 garlic cloves, peeled and halved 4 cups white vinegar 8 sprigs fresh dill weed 12 cups water 8 heads fresh dill weed 2/3 cup of pickling salt Directions Wash cucumbers, and place in the sink with cold water and lots of ice cubes. - Page 58 CANNING RECIPES Ladle into sterilized jars and follow the instructions for “How to use the Pressure Cooker for CANNING” in this manual and process sealed jars for 5 minutes in a boiling water bath. When the unit has reached optimum pressure, it will begin to pressure-seal the mason jars. The programmed time will begin to count down until it reaches zero.
- Page 59 CANNING RECIPES FRESH GARDEN SALSA Ingredients 7 cups of fresh tomatoes, peeled, cored, ½ cup of vinegar seeded and diced 2 Tbsp lime juice 6 green onions, sliced 4 drops of hot pepper sauce 2 or 3 jalapeno peppers, diced 2 Tbsp fresh minced cilantro 4 cloves of garlic, minced 2 tsp salt...
- Page 60 CANNING RECIPES between the jars. Pour in more boiling water if necessary until the water level is at least 1 inch above the tops of the jars. Follow the instructions for “How to use the Pressure Cooker for CANNING” in this manual and process sealed jars for 10 minutes in a boiling water bath.
-
Page 61: Slow Cooker Recipes
SLOW COOKER RECIPES ITALIAN MEATBALLS SERVES 4 Ingredients 1 lb. ground beef 1/2 lb. Italian sausage 2 eggs 1/4 C. milk 1/2 C. dry breadcrumbs 3 Tbsp. grated parmesan cheese 1/2 tsp. garlic powder salt and pepper In a bowl, beat eggs and add milk. Add beef and Italian sausage. Mix together. Add rest of ingredients and mix until combined. - Page 62 SLOW COOKER RECIPES CHILI DIP SERVES 2-3 Ingredients 1 lb. ground beef 1 16 oz. jar mild picante sauce 2 cans refried beans 8 oz. sour cream 1/2 tsp. chili powder 1/2 C. chopped onion 8 oz. cheddar cheese shredded Jalapenos or mild chilies to taste Directions Brown ground beef and onion in the pressure cooker by following the BROWNING instructions.
- Page 63 SLOW COOKER RECIPES POT ROAST SERVES 6 Ingredients 3 - 4 lb. pot roast large onion cut up 1 C. beef broth 1 lb. carrots cut in 2 inch pieces 4 - 5 potatoes cut up salt and pepper Directions Brown pot roast in the pressure cooker by following the BROWNING instructions.
- Page 64 SLOW COOKER RECIPES Directions Rinse chicken, pat dry and set aside. Place the mushrooms, onion and garlic in the pressure cooker. Place the chicken pieces on top of the vegetables. Combine broth, tomato paste, wine, tapioca, dried basil (if using), sugar, salt and pepper in a medium bowl.
- Page 65 SLOW COOKER RECIPES CHICKEN PAPRIKA WITH DUMPLINGS SERVES 6-8 Ingredients 6 boneless, skinless chicken breasts 1 medium onion chopped 1 tsp. salt 1/2 tsp. black pepper 1 Tbsp. Hungarian paprika 1 cup chicken broth 8 ounces sour cream 1 Tbsp. cornstarch or flour Dumpling Ingredients: 3 eggs 1/3 cup water...
- Page 66 SLOW COOKER RECIPES SALMON BAKE SERVES 3 Ingredients 2 cans salmon, boned and skinned (15 oz. size) 4 cups bread crumbs 1 tsp. lemon juice 1 (8-oz.) can tomatoes 1 chopped green bell pepper 1 (8-oz.) can cream of onion soup 1 can cream of celery soup 4 well beaten eggs 1 tsp.
- Page 67 SLOW COOKER RECIPES PIÑA COLADA BREAD PUDDING SERVES 4 Ingredients 1 lb. loaf French bread 10 oz. frozen piña colada drink mix 6 oz. pineapple juice 12 oz. evaporated milk 1/2 C. cream of coconut 2 large bananas; sliced 3 eggs 1/4 C.
-
Page 68: Warranty And Return Instructions
LIMITED WARRANTY* ONE (1) YEAR WARRANTY IS ONLY VALID WITH A DATED PROOF OF PURCHASE PLEASE DO NOT RETURN TO STORE. If you have any problems with this unit, contact Consumer Relations for service Your small kitchen appliance is built with precision, inspected and tested before leaving our factory. It is warranted to the original purchaser to be free from any manufacturing defects under normal use and conditions for one (1) year, cord excluded. - Page 69 RETURNS: Any return of defective merchandise to the manufacturer must be processed accordingly by first contacting customer service (info@maxi-matic.com) to obtain an RA # (Return Authorization Number). We will not accept any returns of merchandise without an applicable RA #. IMPORTANT RETURN INSTRUCTIONS.
Need help?
Do you have a question about the EPC-414 and is the answer not in the manual?
Questions and answers