
Summary of Contents for Gliderol Glidermatic GTS+ Optima
- Page 1 Glidermatic GTS+ Optima Heavy Duty Automatic Tilt and Sectional Door Operator Installation Instructions and Glidermatic GTS+ Optima Owners Manual...
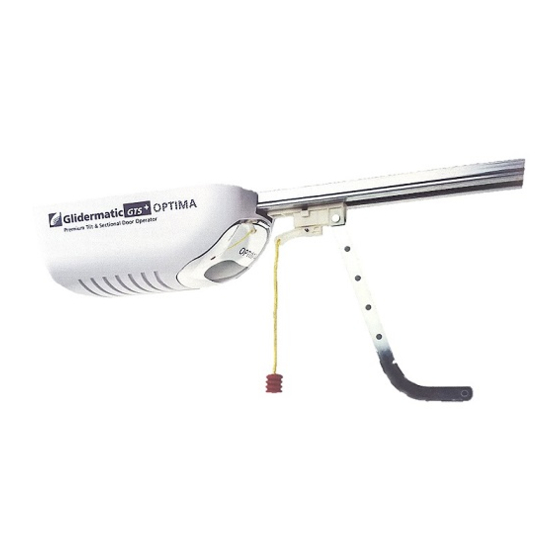
- Page 2 1 LEARN Transmitter Learn LIMIT Door Limit Setting 2 OPEN On‐Board Open 3 STOP On‐Board Stop 4 5 CLOSE On‐Board Close 6 EXCON External I/O Terminal LED1 Transmitter Learn LED Indicator 7 8 1KEY/3KEYS Transmitter Key Settings AUTO CLOSE Auto Close Setting 9 10 BUZZER Buzzer Setting FORCE Force Setting 11 12 WIRELESS P/CELL Wireless Photocell Connector EAS EAS Receiver Connector 13 ...
- Page 3 Limit Setting – By Opener 1. Press and hold [LIMIT] button. Unit will beep three times to signal for limit setting mode 2. Proceed to setup the TOP limit, by using on‐board [OPEN] & [CLOSE] buttons, and confirm TOP limit position by pressing [STOP] button 3. Then set the BOTTOM limit, also by using on‐board [OPEN] & [CLOSE] buttons, and confirm BOTTOM limit position by pressing [STOP] button 4. Once limits are set, the unit will automatically perform a full calibration cycle 5. When the door is closed after calibration, the limits are successfully setup 6. The door will now travel between limits and automatically set the optimal operation force 7. Now test the door on a block of wood 40mm off the ground. In most installations the door should ...
- Page 4 Limit Resetting – By Transmitter (Under 3 Keys Transmitter Mode) 1. Using an already programmed transmitter, press and hold OPEN & CLOSE keys simultaneously for 5 seconds 2. While unit beeps three times to signal for limit setting mode, proceed to setup the TOP limit, by using transmitter’s OPEN & CLOSE keys, and confirm TOP limit position by pressing STOP key 3. Then set the BOTTOM limit, also by using transmitter’s OPEN & CLOSE keys, and confirm BOTTOM limit position by pressing STOP key 4. Once limits are set, the unit will automatically perform a full calibration cycle 5. When the door is closed after calibration, the limits are successfully setup. ...
- Page 5 Photo Sensor Connection Diagram External Wall Switch Connection Diagram External Light Connection Diagram (Optional Interface Board Required) ...
- Page 6 For products sold and installed by Gliderol, the Gliderol Warranty extends to cover defects of manufacture and costs of delivery and/or re‐ installation of any product repaired or replaced under the terms of the Gliderol Warranty. In all other circumstances, where the products are ...
- Page 7 Manufacturer his or her servant agent and attorney for the such purposes. (v) Deposit is non‐refundable if the job is cancelled by the customer/customers’ agent if the door has commenced manufacture. 12. To secure to Gliderol the payment of the price the customer as owner lessee or tenant of the premises hereby charges the customers interest in the premises with the payment of the price. Gliderol may at any time after (but not before) default by the customer lodge a caveat over the customers interest in the premises. 13. Any discount applicable will not be granted if the account is unpaid after 7 days. ...
- Page 8 ...
Need help?
Do you have a question about the Glidermatic GTS+ Optima and is the answer not in the manual?
Questions and answers
where is the control panel to program a new remote ?
The control panel for programming a new remote on the Gliderol Glidermatic GTS+ Optima is located on the opener unit. It includes a [LEARN] button and an LED indicator labeled [LED1] for transmitter learning.
This answer is automatically generated