Table of Contents
Advertisement
Quick Links
Advertisement
Table of Contents

Summary of Contents for Ferro Works Inc Navigator E-GPS010
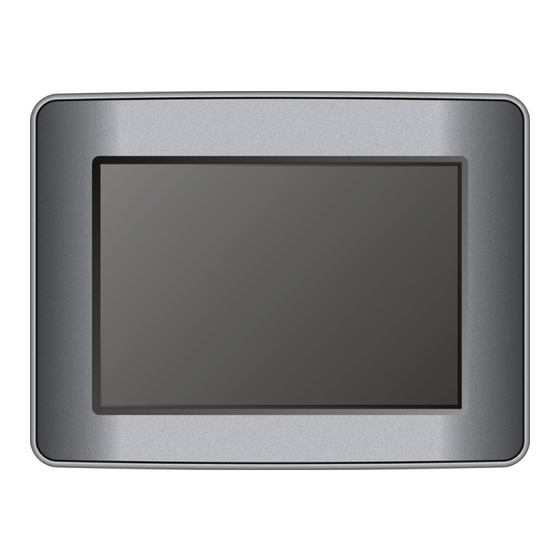
- Page 1 Operation Manual Mobile GPS Car Navigation with 3.5inch screen Model No. E-GPS010...
-
Page 2: Important Safety Instructions
CAUTION: TO REDUCE THE RISK OF ELECTRIC SHOCK, DO NOT REMOVE COVER (OR BACK). NO USE-SERVICEABLE PARTS INSIDE. REFER SERVICING TO QUALIFIED SERVICE PERSONNEL. The lightning flash with arrowhead symbol, within an equilateral triangle, is intended to alert the user to the presence of uninsulated “dangerous voltage” within the product’s enclosure that may be of sufficient magnitude to constitute a risk of electric to persons. - Page 3 Important Safety Instructions NOTES Read these instructions. Keep these instructions. Heed all warnings. Follow all instructions. Do not use this apparatus near water. Clean only with a dry cloth. Do not block any of the ventilation openings. manufacturer's instructions. Do not install near any heat sources such as radiators, heat registers, stoves, or other apparatus (including amplifiers) that produce heat.
- Page 4 Important Safety Instructions Warning Failure to avoid the following potentially hazardous situations may result in injury or property damage. The unit is designed to provide you with route suggestions. It does not reflect road closures or road conditions, traffic congestion, weather conditions, or other factors that may affect safety or timing while driving.
-
Page 5: Features
Features Navigation Function Navigation Function: Supports address destination, POI suggestions, route planning, favorites route setup, etc. Audio prompts to help you keep your eyes on the road while providing helpful navigation cues. OSD (On-screen Display) language: There are several languages for you to choose for the OSD language. -
Page 6: Parts
Picture Part No. NOTE Parts and their quantities are subject to modification without prior notice due to improvements. Parts Description Q’ty GPS Unit Home Power Adaptor Car Power Adaptor Mounting Bracket Mounting Cradle Dashboard Mount Disk USB Cable Touch Pen... -
Page 7: Table Of Contents
View of Main Unit----------------------------------------------------------------------------------------- System Connections------------------------------------------------------------------------------------ Power Supply Preparation----------------------------------------------------------------------------- Mount Parts------------------------------------------------------------------------------------------------- Navigation--------------------------------------------------------------------------------------------------- Destinations Menu-------------------------------------------------------------------------------------- What's on the Map? ------------------------------------------------------------------------------------ GPS Not Found------------------------------------------------------------------------------------------ Map Views------------------------------------------------------------------------------------------------- Point on the Map---------------------------------------------------------------------------------------- Navigation Screen Buttons---------------------------------------------------------------------------- Cycling Through Screens------------------------------------------------------------------------------ Search for a Location----------------------------------------------------------------------------------- Recent Locations---------------------------------------------------------------------------------------- My Favorites---------------------------------------------------------------------------------------------- Gas, Food, and Lodging, Etc.------------------------------------------------------------------------... -
Page 8: View Of Main Unit
Front and Side panel POWER button Press the button to turn ON/OFF the unit. Press for several seconds to enter or exit the standby mode. During operation, press to return to the main menu. Card Port Insert the SD/MMC card into the slot. Earphone Jack Connect earphone for private listening. - Page 9 View of Main Unit Rear panel RESET button Press to reset the system. GPS Antenna Jack Connect the external GPS antenna. Note: This unit comes without extra external GPS antenna. Please purchase external antenna separately.
-
Page 10: System Connections
Note: This unit comes without extra external GPS antenna. Please purchase external antenna separately. The unit is designed with GPS antenna jack which allows you to connect external GPS antenna to receive GPS signals in the car when the signal is bad. - Page 11 System Connections Connecting to External USB Device The unit is designed with a USB port which allows you to connect the unit to PC for software and map updating. See the below figure for details: You should install the driver into your PC first. You can download the driver (MSASYNC) via the Internet from web site: http://www.microsoft.com/windowsmobile/downloads/activesync42.mspx Turn on the unit.
-
Page 12: Power Supply Preparation
Do not operate the unit while driving a vehicle. Place the unit in a proper position for viewing. Disconnect the player from the Car Adaptor when starting the vehicle. Your portable GPS player comes with a built-in rechargeable battery. Please see details in the following segment. Power Supply... -
Page 13: Charging The Rechargeable Battery
Power Supply Preparation About Rechargeable Battery Your portable GPS player comes with a built-in rechargeable battery. Charge the battery fully before initial use. Charging time is normally about 3.5 hours. A fully charged battery delivers about 3 hours of use. -
Page 14: Mount Parts
When using the unit in vehicle, you can use the supplied mount parts (mount bracket, mount cradle and dashboard mount disk) to mount the unit in the vehicle. Take the following steps to operate: See Fig. 1. Push the mount cradle to mount bracket. See Fig. -
Page 15: Navigation
Navigation When turn on the unit, later the screen will display the warning menu, as shown right: Tap “Agree” to enter the navigation mode and the screen display the destinations menu, as shown right: Destinations Menu Note: When you have the Main Map screen displayed, you can tap the Menu button to display the Destinations menu. -
Page 16: Options Menu
Navigation My Favorites Screen A Favorite is a destination that you have stored for easy retrieval. Tap the My Favorites button to enter the menu as shown right: For a complete description of how to navigate to an address, see "My Favorites" on page 27. -
Page 17: Setup Menu
QuickNav button, located on the Main Map screen. For more information, see " QuickNav " on page 40. Display the GPS configurations by tapping the GPS Signal button. For more • information, see "GPS Signal" on page 40. Specify voice or visual prompts that you want to use by tapping the Prompts •... -
Page 18: What's On The Map
When you tap the Map button on the Destinations menu screens, the Main Map screen appears. You can use the icons displayed on this screen to view your route. Current Location Zoom Out Compass Volume GPS-Generated Information Navigation Directions Bar Zoom In Menu Button Directions Bar... -
Page 19: Gps Not Found
The generated route. Your selected destination. The Compass displays the travel direction. The GPS bar is a toggle button that displays the remaining travel distance and travel time, estimated time of arrival, and speed and altitude, and street name and address number. -
Page 20: Map Views
Map Views You can determine whether you want to see a two-dimensional or three-dimensional map in daylight or nighttime conditions. The 2D Day Mode View is optimized for a daytime viewing. 2D views let you manually pan or zoom. For an example, refer to Figure 1 - 2D Day Mode Map View. The 2D Night Mode View is optimized for night driving or adverse weather conditions. -
Page 21: Point On The Map
Navigation Figure1-2D Day Mode Map View Figure3-3D Day Mode Map View Point on the Map You can navigate to any point by tapping its location directly on the Main Map screen. This feature is especially handy when you want to navigate to a specific point on the map, but you don’t have the street address. -
Page 22: Navigation Screen Buttons
Navigation Screen Buttons The following buttons appear on many of the navigation screens. When you tap the Enter button for a selected address, group, or place, the unit automatically opens the next screen in the sequence. After you have specified your destination, tap the Enter button to display a map screen showing your selected location. -
Page 23: Search For A Location
Navigation Selecting an item form the list and tapping the Next button. • The sequence ends with the Show on Map screen, where the destination is displayed and the GO button is available for you to calculate a route. You must first select an item from the list to cycle through the screen sequence, and for the Actions, Enter and Back buttons to be enabled. - Page 24 You can use the keyboard to enter the first characters of the address name. The characters appear in the Address field. It automatically searches the Address list for the first occurrence of the entered characters. After you have selected a city, it displays the next address field, such as street and address number.
-
Page 25: Address Modes
Navigation Address Modes You can define the information used to locate an address by tapping the Mode button. The unit provides a variety of address formats, as described below. This sequence displays the following address screens: City, Street, Address City-Street Number You can also navigate to city or street only. -
Page 26: Address Actions
The navigation device displays the selected location as a starting point only for a few seconds before returning you to your current location. Note: You are still receiving the GPS signal. Lets you see the selected address on the map. Show on Map... -
Page 27: Recent Locations
Set as Origin than your current location Note: You are still receiving the GPS signal. Add to My Lets you add an address to your list of favorite locations. For more Favorites information, see "My Favorites"... -
Page 28: My Favorites
My Favorites A Favorite is a destination that you have stored for easy retrieval. To access a favorite destination, open the Destinations menu and tap the My Favorites button. The My Favorites screen displays your favorites groups. When you tap on a selected group, the unit automatically displays its stored locations. -
Page 29: Favorite Groups
Navigation Favorite Groups You can tap the Actions button from the My Favorites screen to add, edit, or delete groups, as described below. When you tap this button, the Add Group Favorites Group screen appears. Enter the group name and select an icon to identify the group, as shown below. -
Page 30: Favorite Alerts
Navigation Favorite Alerts Alerts let you know that you are within a certain distance of a favorite location. You can tap the Alerts button to set the distances for the 1st and 2nd Alerts. When you travel closer than the designated distance, the alert will sound, as shown below. -
Page 31: Add Favorite Locations
Set as Origin would use this command when calculating a route from a point other than your current location. Note: You are still receiving the GPS signal. Lets you see the map with the selected favorite destination for Show Map you to review before creating a route. -
Page 32: Gas, Food, And Lodging, Etc
Navigation Gas, Food, and Lodging, Etc. The Gas, Food, Lodging, Etc. list is a collection of hundreds of interesting or useful places organized by easy-to-find categories. For example, you can use the unit to guide you to a mall, hotel, restaurant, or gas station. On the Destinations menu, tap the Gas, Food, Lodging, Etc. - Page 33 Navigation 1. POI Locations Note: On the Item Entries Actions screen, tap the Sort by ABC button to display the category entries in alphabetical order. Subcategories Many categories have subcategories to provide for an even greater list of choices. For example, “Gasoline Station”...
-
Page 34: Search Near A Location
Search Near a Location You can tap the Near button to determine the location area, where you want to search for a specific place, such as a gas station, hotel, or restaurant, as shown right. The available options are listed below. Current Lets you search near your current location. -
Page 35: Turn-By-Turn List
Set as Origin use this command when calculating a route from a point other than your current location. Note: You are still receiving the GPS signal. Lets you show the map with the displayed destination for you to review Show on Map before creating a route. -
Page 36: Show Route Or Cancel Route
The following options are available: The Route Summary button displays your entire route on the Map screen, plus the travel distance and the Estimated Travel Time Remaining (ETR). The Show Turn button displays the next turn on the Map screen, including the street name, the distance to it, and the turn direction. -
Page 37: Avoid Road Groups
Navigation 1. Displays Groups 2. Add Group Avoid Road Groups On the Avoid Roads menu, tap the Actions button to enter the menu right. The Actions menu lets you select from the following commands: Create a new a group of roads to avoid. For example, you can create a Add Group group called “San Francisco Roads”, where you designate the roads in that area to be avoided. -
Page 38: Avoid Road Locations
Avoid Road Locations When you tap Default or an Avoid Roads group, the unit displays the group screen, which lets you select roads to avoid. On this screen, you can use the Allow or Avoid buttons to include or exclude a selected road when calculating a route. 1. -
Page 39: Setup
Navigation You can tap the Actions button on this menu to select from the following commands: Lets you select a road. An address screen appears for you to specify a Add Road city and street. When you have completed updating your road information, tap Save. -
Page 40: Map And Route Planning
Map and Route Planning You can tap the Map and Route Settings button on the Setup menu to specify map and route planning options, as shown right: The following map and route settings are: The Faster route option selects the route that takes less time. Route Planning Quickest route is the default value. -
Page 41: Quicknav
Free Browse Map mode or you tap the GPS Off button. The GPS receiver may take a few minutes to find its initial location. For best results, ensure that the GPS receiver has a clear view of the sky. -
Page 42: Prompts
The GPS On and GPS Off buttons let you connect or disconnect from the GPS receiver. If you are working in Free Map Browsing mode, the unit automatically disconnects from the GPS receiver. Tap the Set button on GPS Signal menu to enter the... -
Page 43: Select Map
This prompt is activated when the unit recalculates a new route. Route This prompt is not active unless selected. Recalculation This prompt warns that the GPS signal is too low and unreliable for Unreliable GPS navigation. This prompt is automatically active. Signal This prompt is activated when the unit cannot find the GPS signal. -
Page 44: Pedestrian Mode
The following Select Map commands are: Lets you designate a selected map as the current map. Select Lets you permanently remove a selected map. Delete Note: You cannot delete the current map. Lets you refresh the screen when a new memory card is inserted into the Refresh device. -
Page 45: Multistop Planner
Navigation Multistop Planner The Multistop Planner lets you plan a route with up to twelve stops. When you press the GO button, the route is calculated in stages from the departure point to the first stop. When you reach the first stop, the route recalculates to the second stop, and so on. -
Page 46: Setting Stops Along The Route
Setting Stops along the Route You can set up stops by selecting the Route Group and tapping the Enter button. On the Stops menu, tap the Actions button to add, rename, or delete a destination. Add a stop by Address, POI, My Favorites, or Recent Locations. Select one of these options, specify a location, and click the OK button. -
Page 47: About
Set as Origin would use this command when calculating a route from a point other than your current location. Note: You are still connected to the GPS signal. Lets you add a location by specifying an address from recent Add Stop locations, favorite locations, or pre-defined POIs, such as fuel, food, or lodging. -
Page 48: Definitions
South poles at right angles to the equator - expressed in degrees. Orbit Orbital path of a Satellite. Path or trajectory of a body through space. A GPS satellite traces out an orbit about the earth. Point Of Interest. A place or item of interest along the selected route. -
Page 49: Troubleshooting
The unit may be obstructed by buildings or metal block. The unit can’t receive satellite signals or can’t orient. The built-in GPS antenna is not open or it’s angle is not correct.. POSSIBLE SOLUTION Connect the adaptor correctly. Use the adaptor to supply power or charge the battery. - Page 50 POSSIBLE CAUSE PROBLEM The built-in rechargeable battery is weak. The unit can receive signals The unit may be obstructed now but can’t by veil, such as heat then or signals insulation paper. received are not Swing of the unit is too stable.
-
Page 51: Specifications
Specifications TFT screen size Frequency Response Audio Signal-to-noise Rate Audio distortion+noise Channel Separation Dynamic Range Power AC 100-240V ~ Power Consumption Dimensions 100mmX76mmX22mm (L*W*D) Weight Design and specifications are subject to change without notice. 3.5 inches 20Hz~20kHz ≥65dB ≤-20dB (1kHz) ≥70dB (1kHz) ≥80dB (1kHz) 50/60Hz...
Need help?
Do you have a question about the Navigator E-GPS010 and is the answer not in the manual?
Questions and answers