Table of Contents
Advertisement
Quick Links
Advertisement
Table of Contents

Subscribe to Our Youtube Channel
Related Manuals for Wireless Whiskers AC100

Summary of Contents for Wireless Whiskers AC100
- Page 1 ® Wireless Whiskers AutoDiet™ Feeder Model AC100 Owner’s Manual Revision 2.1...
- Page 2 CONTENTS OF PRODUCT BOX ® Wireless Whiskers Model AC100 unit Feed tube Top cover AC adapter Wireless tags (2) Sample Paw Guard (1) Owner’s Manual and Warranty © Encaya Corporation 2010-2016. All rights reserved.
- Page 3 OWNER’S MANUAL TABLE OF CONTENTS CONTENTS OF PRODUCT BOX ....... ii INTRODUCTION ........1 PREPARING YOUR NEW FEEDER ...... 4 HOW IT WORKS PRODUCT DESCRIPTION ......6 AUTODIET FEEDER CONTROLS Keypad ......8 LED Lights ......9 LCD Display ......9 ON/OFF ......
-
Page 4: Table Of Contents
MORE ON OPERATING MODES ....... 24 DISPLAY MODE Alerts ......25 Time and Date Display ....26 System Settings Display .... 26 Pet Stats ......26 FEEDING MODE Available Allowance ....28 MENU MODE Accessing MENU MODE ....29 MENU MODE Timeout ....30 AVAILABLE SETTINGS ...... - Page 5 MAINTENANCE ........42 Cleaning Packaging Batteries TROUBLESHOOTING ....... 43 WARRANTY ........46 PARTS AND ACCESSORIES ......47 FCC COMPLIANCE STATEMENTS ..... 47 COPYRIGHTS, TRADEMARKS AND PATENTS .... 48 FEEDING RECORD ......... a QUICK REFERENCE MENU GUIDE ..... c © Encaya Corporation 2010-2016. All rights reserved.
- Page 6 INTRODUCTION Welcome Congratulations your purchase Wireless ® Whiskers AutoDiet™ Feeder. This revolutionary product designed in Silicon Valley California is the world’s most advanced diet management system pets. offers very latest technology finally triumph over your pets’ wayward feeding behavior. Sophisticated access control capabilities let you decide which pets can use the feeder and how much.
- Page 7 SAFETY INSTRUCTIONS AND CAUTIONS READ CAREFULLY BEFORE USING THE PRODUCT TO AVOID RISK OF ELECTRIC SHOCK, FIRE OR INJURY. Warning When using electric appliances, basic precautions should always be followed, improper use may result in a risk of fire or electrocution. It is also important that your pets are under supervision and that you continually check the feeder’s settings and daily consumption to ensure they are appropriate...
- Page 8 discontinue use and remove the power plug and remove batteries. If the unit produces smoke, unusual amounts of heat, unusual odors, unusual sounds, immediately discontinue use and remove the power plug then remove the batteries. Do not place the unit or power cord in walkways or ...
- Page 9 PREPARING YOUR NEW FEEDER Please follow the Initial and Optional Set Up instructions this manual. (See p.11 p.14). Or if you prefer visit our website for a VIDEO GUIDE that takes you step by step through the set up and features of your new feeder. ...
- Page 10 HOW IT WORKS Pets using the AutoDiet™ Feeder are fitted with a Wireless tag that uniquely identifies them. Whenever a pet tries to feed it is welcomed by name and the feeder measures, then sets their daily allowance automatically (up to 8 pets). When a pet reaches its available allowance the feeder doors shut! You can allow or lock out pets as desired by controlling access and also set up multiple feeding stations...
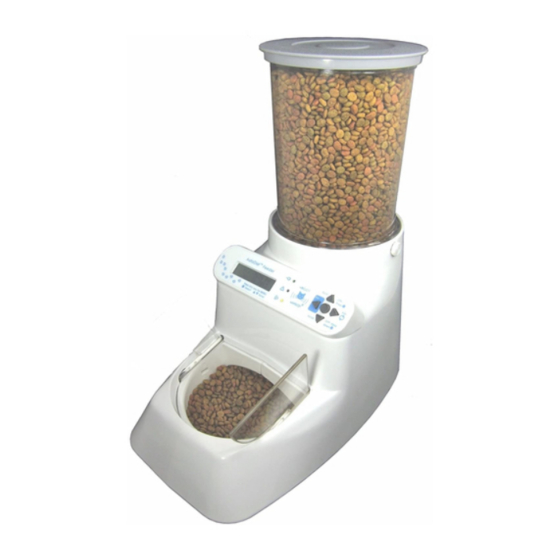
- Page 11 PRODUCT DESCRIPTION ® Figure 1: Wireless Whiskers AutoDiet Feeder AC100 © Encaya Corporation 2010-2016. All rights reserved.
- Page 12 Scroll AutoDiet F eeder ● Press ● Press any key for ME NU Scroll ● Select Scroll Figure 2: Control Panel Figure 3: Part Names and Function © Encaya Corporation 2010-2016. All rights reserved.
- Page 13 AUTODIET FEEDER CONTROLS Operating and programming the AutoDiet Feeder is very easy. Let’s first become familiar with Control Panel. It consists of a 5 button keypad, 3 LED indicator lights and a LCD display. Keypad SELECT (●) key: used to make a selection in MENU MODE and for turning the feeder ON/OFF.
- Page 14 LED Lights AC power: the green LED is on when AC power is connected. Alert/Warning: when the red LED flashes, an alert/warning is displayed. Tag Detect: the yellow LED flashes whenever a wireless tag is detected. Figure 5: LED light description LCD Display The LCD display shows the time and date, along with feeder...
- Page 15 SYSTEM OPERATING MODES feeder basic operating modes: DISPLAY MODE, FEEDING MODE and MENU MODE (for programming). DISPLAY MODE When the feeder is idle it enters DISPLAY MODE. In this mode the display cycles the TIME/DATE, System Settings Statistics (for last detected or selected using the keypad).
- Page 16 INITIAL SET UP The initial set up varies depending on the number of pets you have and your diet management goals. The basic set up procedure consists of the following steps: Required o Turn on the feeder by pressing the (●) key o Set the Time and Date o Register wireless tags for your pets o Properly Fit the wireless tags to your...
- Page 17 are happy, press the (●) key to program the SETTINGS and exit MENU MODE. The following short hand is used in the Owner’s manual to indicate a navigation path. In the example above the path to change time is: >TIME AND DATE>Set Time>.
- Page 18 PROPER FITTING OF WIRELESS TAGS It is important to properly fit a wireless tag to your pet’s collar to ensure correct operation. The AutoDiet™ feeder’s detector is activated whenever a pet lowers its head to eat. The wireless tag must dangle in the detection zone as shown.
- Page 19 Wireless tags are very low maintenance: they do not require batteries and are water resistant. Each tag has a unique ID that is not dependent on color. Additional tags may be obtained on our website. IMPORTANT NOTE: THE DETECTION ZONE IS DESIGNED TO ACTIVATE WHEN A PET LOWERS ITS HEAD TO EAT.
- Page 20 detected, then doors open. doors will immediately shut when a pet reaches its available allowance or an excluded pet is detected. Default Shut mode particularly useful there are other pets in the house that you wish to exclude from the feeder that are not fitted with a wireless tag.
- Page 21 Typically pets learn this behavior very quickly, as the food is visible beneath the transparent doors. During this learning period you can optionally raise the feeder by placing it on a phonebook to make the detection zone higher, until your learns lower its head.
- Page 22 No Night Feed hours can be adjusted using the Cycle Start Hour which is set to 12 am by default. Setting the Cycle Start Hour to 3 am will delay No Night Feed hours by 3 hours to: 1am to 9 am. It also moves the daily cycle starting time (when all allowances are tallied and refreshed) from midnight to 3 am.
- Page 23 statistics in DISPLAY MODE to guide you. This is a measurement of how much each pet fed on the prior day and is a good indication of its typical Daily Allowance. You should not manually set the Daily Allowance too high, otherwise Underfeed...
- Page 24 their Daily Allowance to 000m. This will cause them to be detected and locked out. accommodate unlimited number pets feeding stations you should register only the pets that will use a particular feeder. Then set all remaining unregistered slots (Pet ?…Pet H) to 000m. Once this is done, all the slots on the feeder are occupied and no additional pets can be registered.
- Page 25 The AutoDiet Wizard settings can be selected by navigating to: >AUTODIET SET UP> AutoDiet Wizard >. IMPORTANT: Do not feed your pets with treats or other food during the AutoDiet Wizard™ calibration unless you intend to do exactly the same every day thereafter.
- Page 26 PUTTING YOUR PET ON A DIET If you have a pet that needs to lose or gain weight, Adjust AutoDiet feature increase decrease their allowance increments. navigate to this feature >AUTODIET SET UP>Adjust AutoDiet > and select a SETTING. All changes apply only to the last pet detected or selected using the keypad.
- Page 27 this information to monitor them. If a pet appears excessively hungry or the allowance appears to be inappropriate, reactivate the AutoDiet Wizard recalculate the Daily Allowance or carefully set it manually. Do not set your pet’s allowance too high or the Underfeed Alert will not operate properly.
- Page 28 saying you should eat the same amount as your friend neighbor! Veterinarians realize this will weigh your pet every visit compare it to baseline established at your first visit. Thereafter changes allowance recommended based changes in your pet’s actual weight. AutoDiet Wizard establishes...
-
Page 29: More On Operating Modes
Converting Cups to TIME If you really insist on using cups, converting to equivalent TIME fairly easy. done loading one day’s food into an empty feeder just before midnight Cycle Start Hour). Then restart AutoDiet Wizard using setting. This will automatically measure and set the equivalent Daily Allowance. -
Page 30: Alerts
information displayed, System Settings and/or Pet Stats displays can be turned ON or OFF. Alerts Your feeder is designed to alert you to important conditions. This table shows different alerts you should aware active alert will accompanied by a flashing red light on the control panel. -
Page 31: Time And Date Display
Time and Date Display This self-explanatory display is shown below: Thu 12:00 AM 1, 2010 In the event of total power loss, all the feeder settings will saved. However when power restored time, date and today’s feeding statistics will lost. Time/Date will have... - Page 32 feeder or you can select a pet using the keypad >SELECT PET>. If you entered your pet’s name during set up, the name Pet A will be replaced by your pet’s actual name. DAILY PET A ALLOWANCE Allow TODAY’S PET A FEEDING Today YESTERDAY’S...
-
Page 33: Feeding Mode
indicate that AutoDiet Wizard activated. Since this is a partial day, feeding data is not used in the calibration. The numbers indicate the day count in the actual calibration. Stats turned MENU MODE navigating to: >SYSTEM CONTROL>Show Pet Stats>Off. FEEDING MODE Any time a pet feeds, the system will recognize and greet it by name: Hello... -
Page 34: Menu Mode
night. The diagram shows how the available allowance is calculated. Figure 7: Available Allowance MENU MODE This mode is activated using the keypad and is used to edit SETTINGS. Editing is very easy: the menus nested into four levels shown below. -
Page 35: Menu Mode Timeout
entry in the OPTION menu. Use the keypad as shown in the Menu tree to navigate through the OPTIONS and FEATURES. MENU MODE Timeout If 60 seconds elapse in MENU MODE without a key being pressed, the system returns to DISPLAY MODE. AVAILABLE SETTINGS The table on p.32-33 shows the screen views for editing each SETTING when in MENU MODE. - Page 36 In both examples ▓Exitmeans that if you press the () key you will exit MENU MODE without saving any settings. The () key does NOT move the cursor to the left, it is the escape key. If you hold down the ()() keys the VALUES will fast scroll.
- Page 37 © Encaya Corporation 2010-2016. All rights reserved.
- Page 38 © Encaya Corporation 2010-2016. All rights reserved.
-
Page 39: Time And Date
DESCRIPTION OF FEATURES TIME AND DATE ® Wireless Whiskers AutoDiet™ Feeder has a built-in clock and calendar. Time is displayed in 12 hour AM/PM format. The day of the week is not directly linked to the calendar and must be set at initial power up. -
Page 40: Autodiet Tm Set Up
AUTODIET SET UP These FEATURES allow you to select and customize the automatic manual diet control programs. Some FEATURES can be set individually, while others are global and apply to all pets. When adjusting the SETTINGS for an individual pet, the desired pet must be selected in advance. -
Page 41: Daily Allowance
Daily Allowance This is described in OPTIONAL SET UP. (See p.17). Portion Control This is described in OPTIONAL SET UP. (See p.16). Cycle Start Hour start each feeding when allowances are refreshed is by default set to 12 am (midnight). If desired, you may shift to a different start hour. -
Page 42: Backlight
Backlight Controls operation display backlight. There are 3 settings available: Automatic, Always On Always Off. Navigate follows: >SYSTEM CONTROL>Backlight>. Door Control This is described in OPTIONAL SET UP. (See p.14). Detection Window This FEATURE allows you to adjust the time allowed for a detection to occur before ending the current feeding session. -
Page 43: System Reset
restart AutoDiet Wizard change Detection Window, so that this is calibrated into the Normal Allowance. Generally we recommend using the longest Detection Window that meets your needs. However, if you do reduce the Detection Window you should monitor your pet’s feeding closely ensure... -
Page 44: Edit/Delete Pet
selected this FEATURE it will display information for one minute or until any key is pressed. The same information is displayed during the power up welcome sequence. There editable VALUES this FEATURE. EDIT/DELETE PET Edit Pet Name This is described in OPTIONAL SET UP. (See p.14). Delete Pet If you wish to delete a pet from the feeder you can do this at any time using the Delete Pet feature. -
Page 45: Battery Power
Battery Power The AutoDiet feeder can be operated using four D- size alkaline batteries. feeder does recharge batteries. change batteries: first ensure the cover and locking screws are securely fastened to the feed tube (refer to Figures 1-3). Power down the feeder by holding down the (●) key until the display indicates “Powering Down”. -
Page 46: Power Outage
batteries are low when using AC power by temporarily unplugging the AC adapter and observing if a Low Battery alert is displayed. Power Outage In the event of a loss of AC power your AutoDiet™ Feeder will seamlessly transition to battery power (assuming good batteries are installed). -
Page 47: Maintenance
Power Up is disabled and the feeder will power up only in response to Owner intervention by pressing the (●) key. MAINTENANCE There are no owner serviceable components inside the unit other than replaceable D-size alkaline batteries (purchased separately). Cleaning •... -
Page 48: Troubleshooting
TROUBLESHOOTING Problem Solution MECHANICAL Doors obstructed warning. Remove obstruction and wait a seconds doors return to normal operation. Doors jammed. Cycle doors fully open fully closed several times by hand. Check Door Control is not set Doors do not sequence as desired. - Page 49 Remove power. Then unplug the control panel and check the red/black wire has been disconnected from left side circuit board. Feeder will open Check that the Door Control shut. override setting (Permanently Shut). Doors open and close too 1. Select a different Portion frequently or do not stay Control program...
- Page 50 Daily Allowance Change AutoDiet Adjust setting. high or too low. 2. Carefully change the Daily Allowance setting. 3. Consider the possibility of health problems and consult your veterinarian. Set Door Control to Default Dog steals cat’s food. Shut. Underfeed Alert. 1.
-
Page 51: Warranty
WARRANTY We are very proud of our products and back up each with following warranty. This warranty offers free repairs of defects or failures in the product, provided that product used accordance with instructions Owner's Manual and all cautions, warnings, and indications. Warranty Period is 180 days from date of purchase. -
Page 52: Parts And Accessories
This warranty is only valid within the country of purchase and requires a valid proof of purchase. Note: this warranty covers free repairs as described herein, and does not impair or affect the legal rights customer. event that provision this Warranty invalid under... -
Page 53: Copyrights, Trademarks And Patents
COPYRIGHTS, TRADEMARKS AND PATENTS Any redistribution or reproduction or resale in part or in whole of the contents of this document in any ® form is prohibited. Wireless Whiskers and associated logo, AutoDiet and AutoDiet Wizard are protected trademarks. -
Page 54: Feeding Record
FEEDING RECORD (Y’Day feeding) MONTH/YEAR: Pet Name: Allowance /Adjust © Encaya Corporation 2010-2016. All rights reserved. - Page 55 FEEDING RECORD (Y’Day feeding) MONTH/YEAR: Pet Name: Allowance /Adjust © Encaya Corporation 2010-2016. All rights reserved.
-
Page 56: Quick Reference Menu Guide
QUICK REFERENCE MENU GUIDE The following chart shows the menu tree for controlling and Programming the AutoDiet Feeder. Power on: press the (●) key Power off: hold down the (●) key © Encaya Corporation 2010-2016. All rights reserved.
Need help?
Do you have a question about the AC100 and is the answer not in the manual?
Questions and answers