Table of Contents
Advertisement
Quick Links
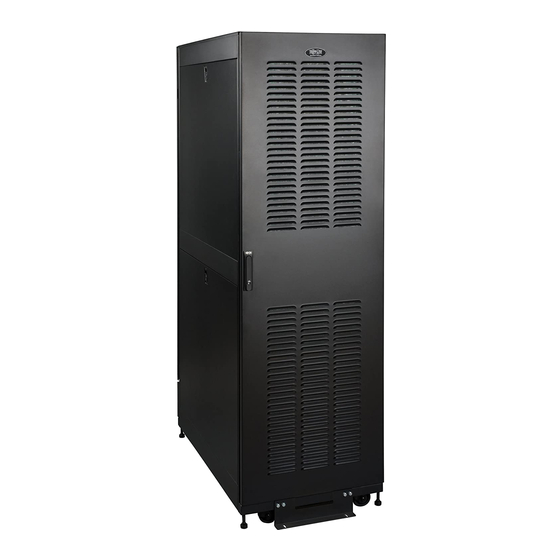
SmartRack
with IP54 (NEMA 12) Rating
PROTECT YOUR INVESTMENT!
Register your product for quicker service and ultimate peace of mind.
You could also win an ISOBAR6ULTRA surge protector-a $100 value!
Copyright © 2017 Tripp Lite. All trademarks are the sole property of their respective owners.
Owner's Manual
®
Model: SR42UBEIS
Cable Management Rails
Français
www.tripplite.com/warranty
1111 W. 35th Street, Chicago, IL 60609 USA • www.tripplite.com/support
Rack Enclosure
1
2
2
3
4
4
4
5
6
6
6
7
7
7
8
8
9
10
11
11
12
12
12
13
25
Advertisement
Table of Contents

Subscribe to Our Youtube Channel
Summary of Contents for Tripp Lite SmartRack SR42UBEIS
-
Page 1: Table Of Contents
Register your product for quicker service and ultimate peace of mind. You could also win an ISOBAR6ULTRA surge protector—a $100 value! www.tripplite.com/warranty 1111 W. 35th Street, Chicago, IL 60609 USA • www.tripplite.com/support Copyright © 2017 Tripp Lite. All trademarks are the sole property of their respective owners. -
Page 2: Important Safety Instructions
• Do not re-ship the enclosure with additional equipment unless the enclosure was shipped with a special shock pallet (“SP1” and “SP2” models only). The combined weight of the enclosure and installed equipment must not exceed the load capacity of the pallet. Tripp Lite is not responsible for any damage that occurs during re-shipment. -
Page 3: Feature Identification
Feature Identification Roof Panel with Drip-Resistant Cap Locking Rear Door with Dust-Resistant Gasket* Ventilation Fan Panels AC Inputs Locking Side Panels Cable Management Rails Heavy-Duty Industrial Casters and Levelers Mounting Rails (Provide horizontal and vertical mounting points for equipment.) Shipping/Floor Brackets (can be used to secure the enclosure cabinet to the floor— see “Leveling”... -
Page 4: Enclosure Installation
Remove the heavy plastic bag surrounding the enclosure. Examine the enclosure for any damage or loose parts. Confirm that all parts are present. If anything is missing or damaged, contact Tripp Lite for assistance. Do not attempt to use the enclosure if it has been damaged. -
Page 5: Placement
Enclosure Installation Locate the 2 shipping brackets that attach the enclosure to the shipping pallet. Use a 13 mm open-end wrench to remove the shipping brackets. Be extremely careful, as the enclosure could shift unexpectedly after bracket removal. Save the brackets and bracket hardware for later use. -
Page 6: Leveling
Attach the brackets to secure mounting points in the floor using user-supplied hardware or Tripp Lite's SmartRack Bolt-Down Kit (Part # SRBOLTDOWN). Ground Connection All the parts of the enclosure are grounded to the frame of the enclosure. Use the enclosure's front... -
Page 7: Enclosure Configuration
Adding or Removing Roof Panel WARNING: Do not attempt to use the roof panel for weight-bearing purposes other than those explicitly described and approved by Tripp Lite. Do not attempt to add or remove the roof panel without assistance. Removing Roof Panel Remove the 4 screws (2 on front, 2 on back) that attach the roof panel to the unit. -
Page 8: Adding Or Removing Side Panels
Enclosure Configuration Adding or Removing Side Panels Removing Side Panel Open the latch by sliding it downward. Tilt the top of the panel away from the enclosure. Lift the panel away from the brace that supports it. To Reinstall Side Panel, Reverse Steps 1-3 Adjusting Mounting Rails and Cable Management Rails WARNING: Do not attempt to adjust rails without assistance. -
Page 9: Combining (Baying) Enclosures
Enclosure Configuration Combining (Baying) Enclosures WARNING: Combining enclosures is not a substitute for stabilizing the enclosures. Each enclosure in a bay of combined enclosures requires the same stabilizing measures as a standalone enclosure. Arrange the enclosures in the correct position for baying. Each enclosure includes 4 baying brackets that correspond to baying connection points on the adjoining enclosure. -
Page 10: Cleaning/Replacing Filters
Enclosure Configuration Cleaning/Replacing Filters The SR42UBEIS comes with pre-installed dust filters in the front door. It uses standard 18” x 30” filters that can be found at most home improvement stores. To remove the filters for cleaning or replacement: Slide the filter up into the top filter slot so Pull the filter away from the door until it is Pull the filter down out of the top filter slot. -
Page 11: Equipment Installation
Equipment Installation WARNING: Do not install equipment until you have stabilized the enclosure. Install heavier equipment first and install it toward the bottom of the enclosure. Install equipment starting from the bottom of the enclosure and proceeding toward the top of the enclosure - never the reverse. -
Page 12: Specifications
Product Registration Visit www.tripplite.com/warranty today to register your new Tripp Lite product. You'll be automatically entered into a drawing for a chance to win a FREE Tripp Lite product!* * No purchase necessary. Void where prohibited. Some restrictions apply. See Web site for details. -
Page 13: Español
1111 W. 35th Street, Chicago, IL 60609 USA 773.869.1234 (USA) • 773.869.1212 (International) www.tripplite.com Tripp Lite has a policy of continuous improvement. Specifications are subject to change without notice. Made in China. Copyright © 2009 Tripp Lite. All rights reserved. 200905072 • 932902-EN...


Need help?
Do you have a question about the SmartRack SR42UBEIS and is the answer not in the manual?
Questions and answers