Table of Contents
Advertisement
Advertisement
Table of Contents

Summary of Contents for Apexis APM-J602-WS-IR
- Page 1 IP Wireless / Wired Camera WATERPROOF User Manual Silver Purple CONTENTS...
-
Page 2: Table Of Contents
More Security, More Convenience www.apexis.com.cn / www.apexis.cc 1 WELCOME ..............................3 ........................................ 3 1.1 F EATURES ......................................3 ... -
Page 3: Welcome
More Security, More Convenience www.apexis.com.cn / www.apexis.cc 1 WELCOME This is an integrated wireless IP Camera solution. It combines a high quality digital Video Camera with network connectivity and a powerful web server to bring clear to your Desktop from anywhere on your local network or over the Internet. -
Page 4: Product Views
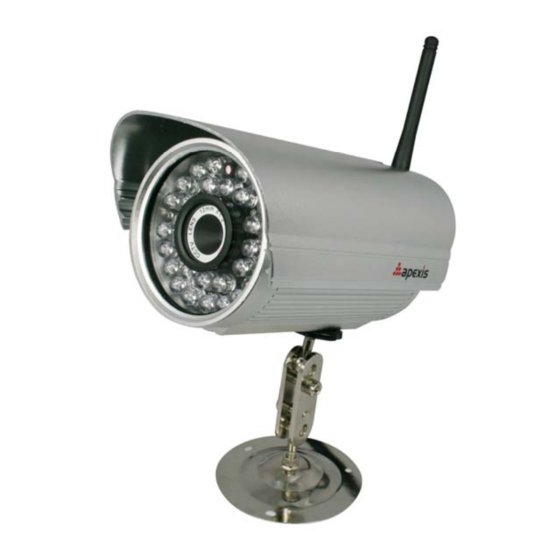
More Security, More Convenience www.apexis.com.cn / www.apexis.cc 1.3 Product Views 1.3.1 Front View Figure 1.1 1. Sensitive Hole: For light sensitive 2. -
Page 5: Pc System Requirements
Original Apexis IPCAM have some stickers at the bottom/back, such as MAC address sticker, QC sticker etc. If your camera does not have these stickers, it may be a clone one, clone Apexis IPCAM could not use the original firmware and obtain our good after sale service. -
Page 6: Software Installation
More Security, More Convenience www.apexis.com.cn / www.apexis.cc Figure1.4 1.6 Software Installation ATTENTION: In order to make the installation correctly, we suggest that turn off your Firewall and Antivirus before install the ActiveX, Don’t worry, it is safe. - Page 7 More Security, More Convenience www.apexis.com.cn / www.apexis.cc Figure1.7 Figure1.8 After this done, the icon “IP Camera Tool” will be displayed on desktop automatically .
-
Page 8: Software Operation
More Security, More Convenience www.apexis.com.cn / www.apexis.cc 2. SOFTWARE OPERATION 2.1 IP Camera Tool When the Device has been mounted properly, you can double click the Icon “IP Camera Tool”... - Page 9 More Security, More Convenience www.apexis.com.cn / www.apexis.cc Figure2.0 2.1.1 .1 Basic Properties There are some device information in the Basic Properties, such as Device ID, System Firmware Version, Web UI Version.(Figure 2.1)...
- Page 10 More Security, More Convenience www.apexis.com.cn / www.apexis.cc Figure2.2 Obtain IP from DHCP server: If clicked, the device will obtain IP from DHCP server. In other words, the camera will have a dynamic IP.
-
Page 11: Camera Login
More Security, More Convenience www.apexis.com.cn / www.apexis.cc 2.4) Figure 2.4 Please download the firmware package under the correct type of your camera before upgrade. - Page 12 More Security, More Convenience www.apexis.com.cn / www.apexis.cc Figure 2.5 Figure 2.6 The default user name is admin, no password Input the correct user name and password, the Sign In interface will pop-up.
-
Page 13: For Ie Browser
More Security, More Convenience www.apexis.com.cn / www.apexis.cc 2.3 For IE Browser Choose Active Mode (For IE Browser), and sign in Figure 2.8... - Page 14 More Security, More Convenience www.apexis.com.cn / www.apexis.cc Note: If there is still no live video after run ActiveX, and a red cross showed in the center of the screen, or even just a black screen, please try to enable the ActiveX options of IE security settings.
-
Page 15: For Safari, Firefox, Google Browser
More Security, More Convenience www.apexis.com.cn / www.apexis.cc Figure 3.2 NOTE: Make sure that the firewall or anti-virus sof tware does n’t block the software or ActiveX. If you couldn’t see live video, please close your firewall or anti-virus software, and try again . -
Page 16: For Mobile Phone
More Security, More Convenience www.apexis.com.cn / www.apexis.cc 2.5 For Mobile Phone hoose Sign in mobile phone, and sign in. Mobile phone doesn’t support ActiveX, only so me basic functions can be available in this mode. - Page 17 More Security, More Convenience www.apexis.com.cn / www.apexis.cc Figure 3.5 Channels: Our IE software supports 9 channels totally. Click can get different windows.
- Page 18 More Security, More Convenience www.apexis.com.cn / www.apexis.cc Figure 3.6 OSD Settings: Figure 3.7 OSD: Means “On-Screen Display”, click “Video” > “OSD”, set display date and time on the video.
- Page 19 More Security, More Convenience www.apexis.com.cn / www.apexis.cc Rate and Resolution: Rate: Set video frame here, from “full-speed to 1fp/5s”. (Figure 3.9) Resolution: Set the resolution to be 160*120/ VGA(640*480)/ QVGA (320*240).
-
Page 20: For Operator
More Security, More Convenience www.apexis.com.cn / www.apexis.cc 2.8 For Operator When login as Operator, you can enter the IP Camera for Operator. -
Page 21: For Administrator
More Security, More Convenience www.apexis.com.cn / www.apexis.cc Mode, Bright, Contrast Settings Figure 4.4 Mode: This is work mode optional, 50HZ/60HZ for the users who use 50HZ/60HZ frequency, outdoor for the... -
Page 22: Settings As Administrator
More Security, More Convenience www.apexis.com.cn / www.apexis.cc 3 Settings as Administrator When login as Administrator, you can enter the IP Camera for Administrator. - Page 23 www.apexis.com.cn / www.apexis.cc Click The 2nd Device and click the item in the Device List in Lan, it will fill the Alias, Host, Http Port automatically, then input the correct user name and password, click Add.
- Page 24 More Security, More Convenience www.apexis.com.cn / www.apexis.cc Figure 4.9 3.1.2 Set Multi-Device for WAN If you want to view cameras from internet, you have to add these devices by DDNS domain name.
- Page 25 www.apexis.com.cn / www.apexis.cc NOTE: The Alias is optional; you can set the alias as per your wish. The Host must be the camera’s DDNS domain name, and without “http://”, it’s not the Lan IP address.
- Page 26 More Security, More Convenience www.apexis.com.cn / www.apexis.cc Click Live Video and then selec t to see four channels, or to see nine channels.
-
Page 27: Network Settings
More Security, More Convenience www.apexis.com.cn / www.apexis.cc 3.1.4 Restore Factory Settings Click Restore Factory Settings, will pop-up a prompt, select OK, all the parameter will be returned to factory settings, and the device will reboot. - Page 28 More Security, More Convenience www.apexis.com.cn / www.apexis.cc Figure 5.8 If you don’t know Subnet Mask, Gateway, DNS Server. Please check the Local Area Connection Status of your computer;...
-
Page 29: Wireless Lan Settings
More Security, More Convenience www.apexis.com.cn / www.apexis.cc If you don’t know the DNS Server, you can set it the same as Gateway. - Page 30 More Security, More Convenience www.apexis.com.cn / www.apexis.cc Figure 6.4 Figure 6.5 Figure 6.6 Shenzhen Apexis Electronic Co., Ltd Tel: +86-755-26509025 Fax: +86-755-26509229...
-
Page 31: Adsl Settings
More Security, More Convenience www.apexis.com.cn / www.apexis.cc 3.5 ADSL Settings When connected to the Internet through ADSL directly, you can enter the ADSL username And password obtained from ISP. - Page 32 More Security, More Convenience www.apexis.com.cn / www.apexis.cc There are 2 options: Manufacturer’s DDNS: This domain is provided by manufacturer. Third Party DDNS: This domain is provided by the 3 party, such as Dyndns, Oray, 3322 etc.
- Page 33 More Security, More Convenience www.apexis.com.cn / www.apexis.cc Change the camera’s port. The default port of camera is “80”, please change “80” to any other one you like, such as “81”, “100”, “8091”...
- Page 34 More Security, More Convenience www.apexis.com.cn / www.apexis.cc BELKIN: 1. Login the router. 2. Choose “Firewall”, select “Virtual Servers” 3. Input the port (except 80) and IP address, then click save.
-
Page 35: System Settings
More Security, More Convenience www.apexis.com.cn / www.apexis.cc Step: “Login”>”System”>”Device Info”: Figure 7.8 Figure 7.9 3.8 System Settings Figure 8.0 3.8.1 Device Info You can find the information about Device ID, Firmware Version, Embedded Web UI Version, Alias, Alarm Status, DDNS Status, UPnP Status and MSN status.. -
Page 36: Alias Settings
More Security, More Convenience www.apexis.com.cn / www.apexis.cc Figure 8.1 3.9 Alias Settings Default device name is anonymous. You set any new name for your camera here, then click Submit . -
Page 37: Users Settings
More Security, More Convenience www.apexis.com.cn / www.apexis.cc Figure 8.4 3.11 Users Settings Eight accounts are acceptable for this system. Here you can set the user names and password as Administrator, Operator or Visitor, the permission for them as below: Visitor: In this mode, you can only view. -
Page 38: Backup & Restore
More Security, More Convenience www.apexis.com.cn / www.apexis.cc 3.12 Backup & Restore Figure 8.7 (1)Backup: Backup IP Camera all the Parameter, if you want to save all the current settings that you have set already, you can click Submit, then all the parameters you set will store as a parameters bin file. -
Page 39: Other Settings
www.apexis.com.cn / www.apexis.cc NOTE: Set the port forwarding sucessfully before setting MSN (Refer to port forwarding in DDNS settings). -
Page 40: Mail Service Settings
More Security, More Convenience www.apexis.com.cn / www.apexis.cc 3.14 Mail Service Settings Set Mail Service Settings to enable the camera send email alert when motion detection triggered. -
Page 41: Ftp Service Settings
More Security, More Convenience www.apexis.com.cn / www.apexis.cc 3) Server Error 4) Incorrect user or password 5) The sender is denied by the server. Maybe the server need to authenticate the user, please check it and try again 6) The receiver is denied by the server. -
Page 42: Alarm Service Settings
More Security, More Convenience www.apexis.com.cn / www.apexis.cc between the current image and the next image. NOTE: Here upload image now means it can upload images freely, no need alarm triggered. - Page 43 More Security, More Convenience www.apexis.com.cn / www.apexis.cc Figure 9.6 After enable motion detect armed, if there is motion triggered, the Alarm Status will turn to Motion Detect Alarm.
-
Page 44: Send Mail On Alarm
More Security, More Convenience www.apexis.com.cn / www.apexis.cc 3.16.3 Alarm Input Armed / IO Linkage on Alarm If you want to connect external alarm devices, when it’s an alarm input device, choose Alarm Input Armed to enable it, when it’s an output device, choose IO Linkage on Alarm to enable it. - Page 45 More Security, More Convenience www.apexis.com.cn / www.apexis.cc Enable Upload Image on Alarm to set upload images to FTP once alarmed. Upload Interval: Set the upload interval (Seconds).
-
Page 46: Path Settings
www.apexis.com.cn / www.apexis.cc 6. If you set Upload Image on Alarm, it will upload images to the FTP Server you set already once alarmed. -
Page 47: Server Push Mode (For Safari, Firefox, Google Browser)
More Security, More Convenience www.apexis.com.cn / www.apexis.cc Figure 10.9 3.19 Server Push Mode (For Safari, FireFox, Google Browser) Choose Server Push Mode, login the camera, you will see the main user interface as below: Figure 11.0... -
Page 48: Sign In Mobile Phone
More Security, More Convenience www.apexis.com.cn / www.apexis.cc 3.20 Sign in mobile phone If you are using a mobile phone, choose Sign in mobile phone, login the camera, you will see the main user interface as below: Figure 11.1... -
Page 49: Appendix
More Security, More Convenience www.apexis.com.cn / www.apexis.cc 4. APPENDIX 4.1 Frequently Asked Questions Note: Any questions you would meet, please check Network connections firstly. - Page 50 More Security, More Convenience www.apexis.com.cn / www.apexis.cc 4.1.6 UPnP always failed UPnP only contains port forwarding in our recent software. Sometimes, it may be failed to do port forwarding automatically because of firewall or anti-virus software.
-
Page 51: Default Parameters
More Security, More Convenience www.apexis.com.cn / www.apexis.cc 4.1.13 No pictures Problems with ActiveX Controller If use IE browser to connect the camera for the 1 time, maybe there is no image displayed, and there will be a clue to install the ActiveX. -
Page 52: Specifications
More Security, More Convenience www.apexis.com.cn / www.apexis.cc 5. Specifications Model APM-J602-WS-IR Image Sensor Sensor 1/4” Color CMOS Sensor Resolution 640 x 480 Pixels (300k Pixels) IR Lens f: 12mm, F 2.0... -
Page 53: Obtaining Technical Support
More Security, More Convenience www.apexis.com.cn / www.apexis.cc 6. OBTAINING TECHNICAL SUPPORT While we hope your experience with the IP CAMERA network camera is enjoyable and easy to use, you may experience some issues or have some questions that this User’s Guide has not answered.
Need help?
Do you have a question about the APM-J602-WS-IR and is the answer not in the manual?
Questions and answers