Table of Contents
Advertisement
Quick Links
Advertisement
Table of Contents

Related Manuals for Kanvus Life H85


Summary of Contents for Kanvus Life H85
- Page 1 User Manual Windows & Macintosh V1.01...
-
Page 2: Table Of Contents
Table of the Contents About This User’s Manual ......2 4. Using the Bundled Software ....57 Notes for This Manual ....... 2 System Requirements......58 Safety Information ........3 Introduction to Tablet Software ... 59 Supporting Operating Systems ... 60 Care and Cleaning ........ -
Page 3: About This User's Manual
About This User’s Manual You are reading the Kanvus Life H85 Graphic Tablet User Manual. This Manual provides information regarding the components in the Kanvus Graphic Tablet and how to use them. The following are major sections of this User’s Manual : 1. -
Page 4: Safety Information
S a f e t y I n f o r m a t i o n Adhering to the following safety information will prolong the life of the Tablet. 1. DO NOT try to open the housing of the tablet and the digital pen. It will void your warranty. -
Page 5: Product Introduction
1. Product Introduction -Package Contents -Tablet -Digital Pen... -
Page 6: Package Contents
Package Contents Check your package for the following items. Kanvus Life H85 Digital Tablet Quick Start Guide Kanvus Pen KP-201 (Including 1AAA Kanvus Tutorial DVD Alkaline Battery, 2Replacement Pen Tipsand 1 Pen Clip) Life Kanvus Cover Installation CD... -
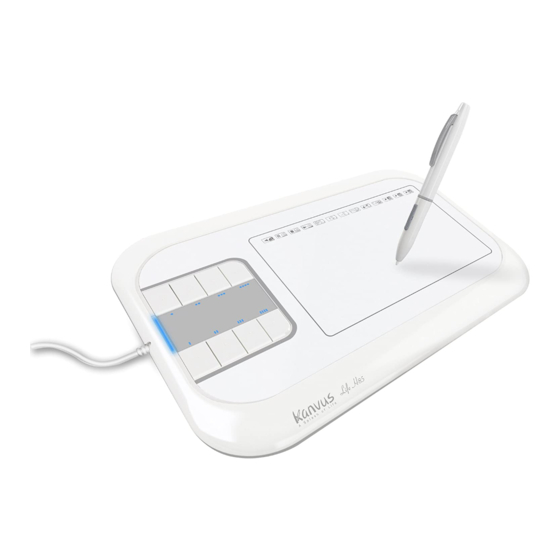
Page 7: Tablet
Tablet Refer to the picture below. USB Connector LED Indicator Hotspot Area Hot Key Working Area Descriptions ○ ○ ○ ○ 1 — USB Connector : Connect to a USB port on your PC. ○ ○ ○ ○ 2 — Working Area : Please refer to Working area section for detail descriptions. ○... - Page 8 to “wake it up” if it has gone into power saving mode. (b) When the pen tablet is re-activated, the LED light will go on for a moment, and will then turn off again. (c) When the tablet detects the digital pen, the LED will blink slowly. This happens when the pen tip is idling or is being placed within the working area on the tablet.
-
Page 9: Digital Pen
Digital Pen Refer to the pictures below. Button 2 Button 1 Pen Tip Descriptions ○ ○ ○ ○ 1 — Button 2 : This button functions as the Right Click of the mouse (by default). ○ ○ ○ ○ 2 — Button 1 : Functions like the scroll of the mouse, you can move up/down/left/right (by default). - Page 10 The power saving mode will be activated if the pen is left unused for about 3 minutes. To wake the pen up, please press the pen tip once anywhere on the surface before you start writing again. Changing the Kanvus Tip...
-
Page 11: Getting Started
2 . G e t t i n g S t a r t e d -Installation -Configuration... -
Page 12: Installation
Installation Windows Installing the Driver Software on Windows Please follow the installation instructions below for Microsoft Windows 2000, XP and Vista operating systems : 1. Insert the packaged installation CD into CD-ROM drive. 2. The main installation window will appear automatically. If not, please start the installation manually by opening 【My Computer】►【CD/DVD ROM】►... - Page 13 3. When installing the driver, please follow the installation instructions on screen and press the “Enter” key for each step. After the installation is completed, please reboot the computer (recommended). Hardware Installation Connect the tablet to a PC via an available USB 2.0 port, after you have installed the driver and rebooted your PC.
-
Page 14: Mac Os
Mac OS Installing the Driver Software on Mac OS Please follow the steps below to install the driver : 1. Place Tablet CD into the CD-ROM drive. 2. Click “DriverSetup” on the TABLET window. - Page 15 3. Choose “Driver Setup” when the “Setup Items” dialog box appears. If your Mac OS version is below Mac OS X, please browse your CD. (Mac Driver / Mac OS 9) 4. Click Continue 5. Click “Install” when the “OS X - PenTablet Driver” message appears.
- Page 16 6. Key-in your name and password (Mac computers require username and password). 7. Click Close...
- Page 17 Hardware Installation Connect the tablet to a PC via an available USB 2.0 port, after you have installed the driver and rebooted your PC. Driver must be installed before you connect the device.
-
Page 18: Configuration
Configuration Windows To configure your tablet, please press 【Start】 ► 【Settings】 ► 【Control Panel】 , and double-tap the 【Tablet Setting 】icon. Or tap on the tablet icon ( ) in the System Tray (located at the lower right corner of the screen). There are 5 tabs : Info, Button, Scope, Hot Cells, Pressure. - Page 19 1. Info The Info tab displays the version number of the driver and Tablet PC function. (1) Show Icon in System Tray : Tick the box beside it if you want to show the tablet icon ( ) in the system tray. (2) Support Tablet PC Feature : Tick the box Support Tablet PC Feature to enable the Tablet PC function of pressure sensitivity.
- Page 20 2. Button (1) Button Name You may configure the functions of Pen Tip, Barrel Button 1 and Barrel Button 2 by clicking the drop-down menu for Button Name. Assign a command according to the Mouse Command list. You can select No Action, Left Click, Left Double Click, Middle Click, Middle Double Click, Right Click, or Right Double Click.
- Page 21 (2) Double Click Time Move the cursor towards “Slow” if you want a slower double-tapping time with the Pen Tip, or move towards “Fast” if you want it faster. You can achieve the same setting if you go to the Double-click Speed page displayed by selecting【Start】►【Control Panel】►【Mouse】►【Buttons】, which allows you to adjust the speed setting.
- Page 22 3. 3. 3. 3. Hot Keys (1) Default Resume the Express Keys to the default settings. (2) Re-define Express keys Select “Common”, “Mouse”, “Multimedia”, “Other”, “Run”, “Internet” and “Hot Key” tabs to re-define the settings.
- Page 23 (2.1) Common (2.1.1)Express key name Rename the Express Key. (2.1.2)Disable Disable the Express Key name display on the Pen Tablet control panel. (2.1.3)Default Resume the Express Key name to the default setting.
- Page 24 (2.2) Mouse (2.2.1)Mouse function Select Mouse mode settings.
- Page 25 (2.3) Multimedia Multimedia function Select multimedia function settings: “Play/Pause”, “Stop”, “Previous”, “Next”, “Mute”, “Volume Up” and “Volume Down”.
- Page 26 (2.4)Other Tablet's working area Select “Largest Working Area” or “Screen Ratio”. Show setting Show Express key name.
- Page 27 (2.5) Run (2.5.1)Run Use the browse button to select a file and run, or type in a file name with the complete path. (2.5.2)Start in This is the initial folder when the program starts the execution. (2.5.3)Parameters The string type will be passed to the program as parameters. For example, you may type in a document name here and pass it to a word processing program specified in the Run line above.
- Page 28 (2.6) Internet Network function Select “Previous Page”, “Next Page”, “Refresh”,” Stop”, “My Favorite”, “IE”, “E-Mail”. (2.6.1)Link to: Kind of Service Select an Internet service to start. For example, browsing website, send an E-mail.The exact program initiated (for example, the browser program) depends on system settings.
- Page 29 (2.7) Hot Key The key combination to press Select any key such as alphanumeric key or cursor control key, combined with Shift, Ctrl and/or Alt key. Common function Select some common used settings.
- Page 30 4. Scope (1) Full Area Tap on the “Full Area” button to enable the full working area. (2) Screen Ratio Set the tablet screen ratio. The screen ratio you set will then be the screen size of your working area.
- Page 31 (3) Reserve Edges Tap on the “Reserve Edges” button to allocate spaces for the tablet’s hotspots. (4) Pen Area Dimensions This indicates the current height and width in the Pen Area Dimensions. Enter new values here if you wish to change the dimensions of the pen area.
- Page 32 (5) Pen Area Offset This indicates the horizontal and vertical distances from the upper left corner of the Pen Area to the upper left corner of the maximum Pen Area. Enter new values by typing in numbers or clicking the up/down arrows if you wish to adjust the offset distance.
- Page 33 5. Hotspot (1) Hot Pad Layout You can see the properties of the hot keys by clicking the blue blocks at the edges of the digital tablet. (2) Hot Edges There are four edges around the tablet for you to allocate the hot keys. (3) Define Press the Define key to configure hotspots for running programs, the Internet or hot keys.
- Page 34 passed to the program as parameters. For example, you may type in a document name here and it will be passed to a word processing program. Then it will be run as the Run option above. (3.2) Define Hotspot – Internet Kind of Service –...
- Page 35 (3.4) Define Hot Cell - Multimedia Multimedia function Select multimedia function settings: “Play/Pause”, “Stop”, “Previous”, “Next”, “Mute”, “Volume Up” and “Volume Down (3.5) Define Hot Cell - Other Tablet's working area Select “Largest Working Area” or “Screen Ratio”. Show setting Show Express key name.
- Page 36 (4) Print Tap on the “Print” button to print an overview of all hot spot functions. (5) Clear Tapping on this button will clear up the definition of the selected Hotspot, so no action will be taken when the Hotspot is tapped later on. (6) Load Default Return to original default.
- Page 37 6. Pressure (1) Pressure Test You can click the slide bar below to adjust pressure sensitivity and there are 4 color choices for the pen : Black, Red, Green and Blue. There is a Pressure Test area to see the thickness of a line for a certain sensitivity of the pen tip on the tablet pad.
-
Page 38: Mac Os
Mac OS Go to Tablet Setting Page Click【GO】►【Applications】 Click Pen Tablet Setting... - Page 39 Click Tablet Setting...
- Page 40 There are 5 tabs : Info, Button, Scope, Hot Cells, Pressure. 1. Info The Info tab displays the version number of the driver and Tablet Mac information.
- Page 41 2. Button (1) Button Name You may configure the commands of the pen tip and the two barrel buttons by selecting the button name from the drop down menu and assigning a command based on a traditional three-button mouse. You can select No Action, Left Click, Left Double Click, Right Click, or Right Double Click. (2) Default Tap on the “Default”...
- Page 42 3. Hot Keys define page For the models with express keys, you can change the express key settings from the Hot Keys Configuration Page. (1) Select Hot Keys Button settings...
- Page 43 (2) Select “reset Customer Defined” Hog Keys settings. (3) Application You may use the browse button to select a file and run, or you may type in a file name with the complete path. (4) Hot Key...
- Page 44 Select the key combination to press – You may select any key such as alphanumeric key or cursor control key, combined with Shift, Option and / or Command key. (5) Internet Type: Select “Web Side”, “Mail”. (6) Mouse Mouse Action: Select “Click”, “Right Click”, “Double Click”.
- Page 45 4. Scope (1) Full Area Tap on the “Full Area” button to enable full working area. (2) Screen Ratio Set the screen ratio for the tablet working area. The screen ratio chosen will be the screen size for the working area.
- Page 46 (3) Reserve Edges Tap on the “Reserve Edges” button to allocate spaces tablet’s hotspots. (4) Pen Area Dimensions This indicates the current height and width of the Pen Area Dimensions. Enter new values here if you wish to change the dimensions of the pen area. (5) Pen Area Offset This indicates the horizontal and vertical distances from the upper left corner of the Pen Area to the upper left corner of the maximum Pen Area.
- Page 47 5. Hot Cells (1) Hot Pad Layout You can see the property of a hot key by clicking the blue cells surrounding the digital tablet. (2) Hot Edges There are four edges around the tablet where you can allocate your hot key locations. (3) Define Press the “Define”...
- Page 48 (3.1) Define Hot Cells – Run Run – You may use the browse button to select a file and run it, or you may type in a file name with the complete path. (3.2) Define Hot Cells – Internet Kind of Service – You can select some Internet services, for example, browsing a website, newsgroup, sending an E-mail, or using other Internet services.
- Page 49 (3.3) Define Hot Cells – Hot Key Configure the key combination – You may select any key such as alphabet, numeric key or cursor control key to be combined. (4) Clear Tapping on this button will clear up the definition of the selected Hot Cell, so there is no action will be taken when the Hot Cell is tapped later on.
- Page 50 6. Pressure (1) Pressure Test There are four different colors for selecting and the pressure sensitivity of the pen tablet can be adjusted in this tab. There is a test area to see the thickness of a line by pressing a certain pressure of pen tip on the tablet pad.
-
Page 51: Using The Tablet
3 . U s i n g t h e T a b l e t -Holding the Pen -Working Area -Positioning -Clicking -Dragging -Pressure Control... -
Page 52: Holding The Pen
Holding the Pen Hold the digital pen as you would hold a pencil. Keep the buttons of the pen close to your index finger or thumb so that you can click the button easily. When the pen is not in use, place it in the pen stand or lay it flat on your desk. To maintain the sensitivity of your pen tip, do not store the pen in a container where it will rest on its tip. -
Page 53: Working Area
Working Area Working area is the area of the tablet that can sense the movement of the digital pen. The working area of the tablet corresponds with the screen of your PC. Screen Area Working Area The cursor in the screen area indicates pen position, and the cursor follows the movement of the pen. -
Page 54: Positioning
Positioning Use the digital pen to position the cursor on your PC screen. The distance between the pen tip and the tablet surface must be less than 10mm so that the tablet can sense the movement / location of the pen. The cursor location on the screen corresponds with the location of your pen tip on the tablet. -
Page 55: Clicking
Clicking One Click : Tapping the pen tip once on the tablet surface within the working area performs a click. A “Click” is used to select something. Double Click : A double tap with the pen tip in the working area performs a double-click. “Double-Click”... -
Page 56: Dragging
Dragging To drag an object, simply point to and click on the object (to highlight the object), then move the pen tip to the location you want to drag to. -
Page 57: Pressure Control
Pressure Control The tablet comes with drawing applications that support pressure sensitivity, so you can change the thickness of the line you draw with different pressure, just as if you were using a real pen or pencil. To draw with pressure sensitivity, first select a pressure-sensitive tool from your application’s tool bar. -
Page 58: Using The Bundled Software
4. Using the Bundled Software -System Requirements -Introduction to Tablet Software -Supporting Operating Systems -Installing Tablet Software -Uninstalling Tablet Software... -
Page 59: System Requirements
System Requirements ® Operating System Windows / Vista (SP2) Pentium III or above Hard Disk 256 MB or Higher RAM (Memory) 256 MB (Windows 2000 / XP), 1 GB (Windows Vista/ 7) Equipments USB connector, CD/DVD ROM... -
Page 60: Introduction To Tablet Software
Introduction to Tablet Software K-WorkInk Allows you to handwrite, make notes or put annotations on Microsoft Word documents and you can save the handwriting / notes. K-Notice You can take a snapshot of the pictures on the screen and then insert your selected text and pictures for use in presentations or e-mails. -
Page 61: Supporting Operating Systems
Supporting Operating Systems Windows XP Windows Windows Operating System Windows XP Vista K-Notice K-Mail K-WorkInk K-Command K-Signer K-WordInk Suggestion! Windows Vista users are able to use the Annotation function through MS OFFICE 2003 or 2007. K-Command Suggestion! Windows Vista users are able to use the handwriting and input function built-in under the Windows Vista system. -
Page 62: Installing Tablet Software
Installing Tablet Software To use the Tablet software, you need to install the Driver first and then install the Tablet Software. (For more information about the installation of driver, please refer to the included Driver Installation Manual.) Open your computer and start the Windows. Place the CD disc into the CD/DVD ROM driver and the installation program will be automatically activated (See figure to the right). - Page 63 When you run the installation with Windows Vista, after you finish step 4, please wait until you see the message box (see figure to the right) and select “This program installed correctly”. After your computer system has finished reading the data from the CD/DVD ROM, take the CD out and finish the installation.
-
Page 64: Uninstalling Tablet Software
Uninstalling Tablet Software In order to uninstall the Tablet Software, move your cursor to the lower left corner of the screen 【Start】►【Programs】►【Tablet Software】►【Uninstall】. -
Page 65: Specification Summary
5. Specification Summary -Tablet -Digital Pen... -
Page 66: Tablet
Tablet Active area 8.0"x5.0" Dimension (L X W X H) 240 x 341 x 9.6 mm Weight 755g Interface USB 2.0 Resolution 4000 LPI Report rate 200 RPS 1024 Level Pressure sensitivity Reading height 10 mm (From up case) Hot Key 8 Buttons Hotspot 13 Hotspots... -
Page 67: Digital Pen
Digital Pen 137.7 X 12 / 16.4 mm Dimension 9 g (Except battery) Weight Power supply One 1.5V AAA alkaline battery Power consumption 180 uW Buttons 3 keys Power saving Mode Time to stand by 5 ~ 30 min. Durability batteries 5000 hr. -
Page 68: Troubleshooting
6 . T r o u b l e s h o o t i n g -Testing your device -FAQ -Service and Technical Support -Driver Download... -
Page 69: Testing Your Device
Testing your device Please do the following tests first to identify your problem. 1. Check the connection : After you connect the device to your computer, you should see a tablet icon in the system tray. If you do not see the icon, please follow these steps : (1) Make sure the USB cable is properly connected to a USB port. - Page 70 means the hardware is OK. If it does not work, try replacing the battery. (c) After changing the pen’s battery, if it is still not working, this means there is an error with the hardware. (4) Download the latest version of the driver directly from our official website. You can also check the latest FAQ on our web site for other information.
-
Page 71: Faq
Question : How can I get the updated software ? Answer : You can download the new driver from our website. 1. Uninstall your old driver : Click【Start】►【Programs】►【Kanvus Tablet】►【Uninstall】 2. Download the latest version of the driver in the download section and save it onto your hard drive. - Page 72 Question : Why can‘t I select K-WordInk or K-Command to install during installation ? Answer : Because both K-WordInk and K-Command are for Windows 2000 or XP version only. For Windows Vista user, Windows Vista has built-in Annotation function through Office 2003 / 2007 which is similar to K-WordInk, and also the built-in Pen flicks function that can perform common actions as K-Command.
-
Page 73: Service And Technical Support
KWorld Computer Co., Ltd. Tel : +886 2 8228 6066 6/F, No. 113, Jian 2 Road Jhonghe City, Taipei County 235, Taiwan (R.O.C.) http://www.kanvus-global.com/ Driver Download You can download the latest driver and e-documents from the following web sites. http://www.kanvus-global.com/... -
Page 74: Appendix
A p p e n d i x -Declarations and Safety Statements -Ordering Components and Accessories -Copyright Information -Limitation of Liability... -
Page 75: Declarations And Safety Statements
Plug the equipment and computer into an outlet that is on a different circuit form the television or radio. If necessary, consult with your dealer or an experienced radio/television technician for help. The Kanvus tablet has been tested and found to comply with the following harmonized European Norms : EN55024 (electromagnetic immunity) -
Page 76: Ordering Components And Accessories
Ordering Components and Accessories To purchase parts and accessories, please contact your local dealer or distributor. -
Page 77: Copyright Information
INCIDENTAL, OR CONSEQUENTIAL DAMAGES (INCLUDING DAMAGES FOR LOSS OF PROFIT, LOSS OF BUSINESS, LOSS OF DATA, INTERRUPTION OF BUSINESS AND THE LIKE), EVEN IF KANVUS HAS BEEN ADVISED OF THE POSSIBILITY OF SUCH DAMAGES ARISING FROM ANY DEFECT OR ERROR IN THIS MANUAL OR PRODUCT. -
Page 78: Limitation Of Liability
Kanvus. In each such instance, regardless of the basis on which you are entitled to claim damages from Kanvus , Kanvus is liable for no more than damages for bodily injury (including death), damage to real property and tangible personal property; or any other actual and direct damages resulted from omission or failure in performing legal duties under this warranty statement, up to the listed contract price of each product.
Need help?
Do you have a question about the Life H85 and is the answer not in the manual?
Questions and answers