Table of Contents
Advertisement
Quick Links
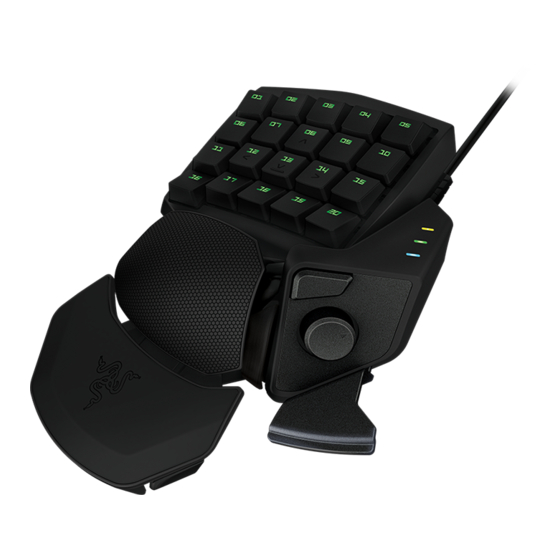
The Razer OrbweaverStealth Edition binds every command and skill from any FPS, RTS,
and MMORPG to 20 mechanical keys at your fingertips. Each key only requires an
optimized actuation force of 45g to get lightning fast responsiveness in-game from your
commands. The distinctive silent tactile feedback from the mechanical keys also
provides a whole new feel to your gaming experience.
For your complete comfort, the Razer Orbweaver Stealth Edition features adjustable
hand, thumb, and palm-rest modules.
With the Razer Orbweaver Stealth Edition, get complete control for complete, and
stealthy, victory.
1 | razer
Advertisement
Table of Contents

Related Manuals for Razer Orbweaver Stealth Edition


Summary of Contents for Razer Orbweaver Stealth Edition
- Page 1 The Razer OrbweaverStealth Edition binds every command and skill from any FPS, RTS, and MMORPG to 20 mechanical keys at your fingertips. Each key only requires an optimized actuation force of 45g to get lightning fast responsiveness in-game from your commands.
-
Page 2: Table Of Contents
2. REGISTRATION / TECHNICAL SUPPORT ........... 4 3. TECHNICAL SPECIFICATIONS ..............5 4. DEVICE LAYOUT ..................6 5. USING YOUR RAZER ORBWEAVER STEALTH EDITION ......7 6. INSTALLING YOUR RAZER ORBWEAVER STEALTH EDITION ....11 7. CONFIGURING YOUR RAZER ORBWEAVER STEALTH EDITION ....12 8. -
Page 3: Package Contents / System Requirements
1. PACKAGE CONTENTS / SYSTEM REQUIREMENTS PACKAGE CONTENTS Razer Orbweaver Stealth Edition Quick Start Guide SYSTEM REQUIREMENTS PC / Mac with a free USB port Windows® 8 / Windows® 7 / Windows Vista® / Windows® XP (32-bit) / Mac OS X (10.7-10.9) -
Page 4: Registration / Technical Support
To learn more about Razer Synapse and all its features, visit www.razerzone.com/synapse If you are already a Razer Synapse user, register your product by clicking on your email address at the Razer Synapse application and select Warranty Status from the dropdown list. -
Page 5: Technical Specifications
Backlit keypad for total control even in dark conditions Synapse enabled APPROXIMATE SIZE & WEIGHT Width 202 mm / 7.95” Height 154mm / 6.06” Depth 55 mm / 2.17” Weight 300 g / 0.66 lbs 5 | razer... -
Page 6: Device Layout
4. DEVICE LAYOUT A. 20 Fully Programmable Mechanical Backlit Keys B. Swiveling Palm Rest C. Adjustable Soft-Touch Wrist Pad D. Adjustable Thumb Module E. Hyperesponse Thumb Key F. Keymap Indicator G. Programmable 8-Way Directional Thumb Pad H. Spacebar Actuator 6 | razer... -
Page 7: Using Your Razer Orbweaver Stealth Edition
5. USING YOUR RAZER ORBWEAVER STEALTH EDITION ADJUSTING THE THUMB MODULE 1. Press and hold the button to unlock the thumb module. 2. Slide the thumb module diagonally to adjust. 7 | razer... - Page 8 3. Release the button to lock the thumb module into position. ADJUSTING THE OVERALL LENGTH 1. Press and hold the lever to unlock the bottom half of the Razer Orbweaver. 8 | razer...
- Page 9 2. Slide the bottom half of the Razer Orbweaver vertically to adjust. 3. Release the lever to lock the bottom half into position. 9 | razer...
- Page 10 ADJUSTING THE PALM REST Free-Play Mode Pull the locking pin to allow the palm rest to swing. Locked Mode Push the locking pin to secure the palm rest to its current position. 10 | razer...
-
Page 11: Installing Your Razer Orbweaver Stealth Edition
Step 1: Connect your Razer device to the USB port of your computer. Step 2: Install Razer Synapse when prompted* or download the installer from www.razerzone.com/synapse Step 3: Create your Razer ID or login to Synapse with your existing Razer ID. *Applicable for Windows 8 or later. 11 | razer... -
Page 12: Configuring Your Razer Orbweaver Stealth Edition
7. CONFIGURING YOUR RAZER ORBWEAVER STEALTH EDITION Disclaimer: The features listed here require you to log in to Razer Synapse. These features are also subject to change based on the current software version and your Operating System. KEYPAD TAB The Keypad Tab is your default tab when you first install Razer Synapse. This tab allows you to customize your device’s profiles, key assignments and lighting. - Page 13 Keymaps are especially useful for games which require different play-styles for different character classes. With Keymaps, you can have up to 8 sets of key assignments per profile. Each keymap has an equivalent color on the Keymap Indicator to make it easier to check your current keymap. 13 | razer...
- Page 14 The changes made in this tab are automatically saved to your current profile. Top View The Top View is where you can customize the 20 fully programmable keys. 14 | razer...
- Page 15 Side View The Side View is where you can customize the Thumb Key, the Directional Thumb Pad and the Spacebar Actuator. 15 | razer...
- Page 16 KEYBOARD FUNCTION from the Key Assignment Menu and enter the key you wish to use on the given field below. You may also include modifier keys such as Ctrl, Shift, Alt or any of those combinations. 16 | razer...
- Page 17 Inter-device from the Key Assignment Menu, a sub-menu will appear. DEVICE TO LINK allows you to choose which currently connected Razer device can be linked while FUNCTION allows you to choose which functionality you want to use for the linked device.
- Page 18 With this option you can change the functionality of any key into a joystick button or an analog stick direction. To choose a joystick function, select JOYSTICK FUNCTION from the Key Assignment Menu and an ASSIGN BUTTON submenu will appear. 18 | razer...
- Page 19 This option enables you to assign the key into an Operating System shortcut command. For more information please visit: http://support.microsoft.com/kb/126449 Disable This option renders the assigned key unusable. Use Disable if you do not want to use the key or if it interferes with your gaming. 19 | razer...
- Page 20 Lighting Tab The Lighting Tab allows you to adjust the backlight by using the BRIGHTNESS slider or by using the PULSATE option. This tab also allows you to turn off the backlighting whenever your screen enters sleep mode. 20 | razer...
- Page 21 To create a macro command, simply click the button and all your keystrokes and button presses will automatically register on the macro screen. When you are done recording your macro commands, click on the button to end the session. 21 | razer...
- Page 22 DEFAULT DELAY uses a predefined time (expressed in seconds) as the delay. And NO DELAY omits all the pauses in-between keystrokes and button presses. Note: You may use up to three decimal places when inserting values on the seconds (sec) field. 22 | razer...
- Page 23 The buttons gives you the option to move the command up or down. button allows you to put in additional keystrokes, button presses or time delays either before or after the selected command. 23 | razer...
- Page 24 The dropdown menu on this window allows you to choose a keystroke or a delay to be added in before or after the highlighted macro command. 24 | razer...
- Page 25 You may add in a new set of macro commands by clicking the button on the keystroke menu; or input time delays on the duration field using the delay menu. 25 | razer...
- Page 26 ADD ON TAB The Add On Tab expands your device’s usability by adding game-specific settings such as a custom interface. To start using Razer Add Ons you must first enable the USE RAZER ORBWEAVER ADD ON option. 26 | razer...
- Page 27 Next, search for the game program or game application using the button. Finally, select your user account for the game by choosing it on the dropdown menu beside Sync Account. The Account Information screen will show you all the relevant information regarding your user account. 27 | razer...
-
Page 28: Safety And Maintenance
8. SAFETY AND MAINTENANCE SAFETY GUIDELINES In order to achieve maximum safety while using your Razer Orbweaver, we suggest that you adopt the following guidelines: 1. Should you have trouble operating the device properly and troubleshooting does not work, unplug the device and contact the Razer hotline or go to www.razersupport.com for support. - Page 29 MAINTENANCE AND USE The Razer Orbweaver requires minimum maintenance to keep it in optimum condition. Once a month we recommend you unplug the device from the computer and clean it using a soft cloth or cotton swab with a bit of warm water to prevent dirt buildup. Do not use soap or harsh cleaning agents.
-
Page 30: Legalese
LIMITATION OF LIABILITY Razer shall in no event be liable for any lost profits, loss of information or data, special, incidental, indirect, punitive or consequential or incidental damages, arising in any way out of distribution of, sale of, resale of, use of, or inability to use the Product. In no event shall Razer’s liability exceed the retail purchase price of the Product. - Page 31 (in so far as it is invalid or unenforceable) shall be given no effect and deemed to be excluded without invalidating any of the remaining terms. Razer reserves the right to amend any term at any time without notice. 31 | razer...
Need help?
Do you have a question about the Orbweaver Stealth Edition and is the answer not in the manual?
Questions and answers