Table of Contents
Advertisement
Quick Links
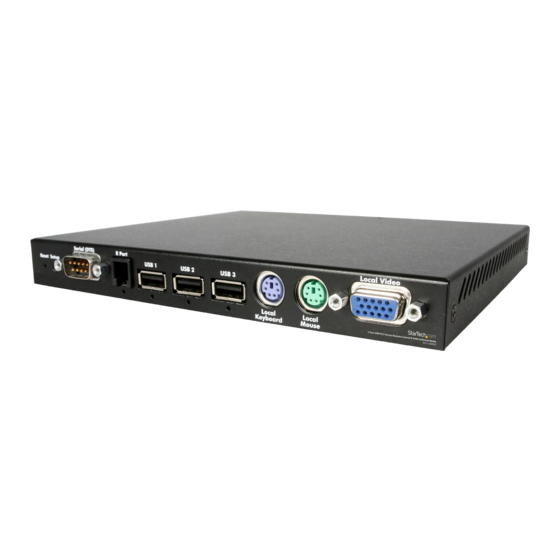
1 Port USB PS/2 Server Remote Control IP
KVM w/Virtual Media
SV1115IPEXT
SV1115IPEXGB
SV1115IPEXEU
DE: Bedienungsanleitung - de.startech.com
FR: Guide de l'utilisateur - fr.startech.com
ES: Guía del usuario - es.startech.com
IT: Guida per l'uso - it.startech.com
NL: Gebruiksaanwijzing - nl.startech.com
PT: Guia do usuário - pt.startech.com
For the most up-to-date information, please visit: www.startech.com
Manual Revision: 02/11/2013
*actual product may vary from photos
Advertisement
Table of Contents
Troubleshooting

Related Manuals for StarTech.com SV1115IPEXT

Summary of Contents for StarTech.com SV1115IPEXT
- Page 1 DE: Bedienungsanleitung - de.startech.com FR: Guide de l'utilisateur - fr.startech.com ES: Guía del usuario - es.startech.com IT: Guida per l'uso - it.startech.com NL: Gebruiksaanwijzing - nl.startech.com PT: Guia do usuário - pt.startech.com For the most up-to-date information, please visit: www.startech.com Manual Revision: 02/11/2013...
- Page 2 StarTech.com. Where they occur these references are for illustrative purposes only and do not represent an endorsement of a product or service by StarTech.com, or an endorsement of the product(s) to which this manual applies by the third-party company in question. Regardless of any direct acknowledgement elsewhere in the body of this document, StarTech.com hereby...
-
Page 3: Table Of Contents
Connecting to the Host Computer and Network ................3 Connecting a Local Keyboard, Mouse, and Monitor ..............6 Disabling Mouse Acceleration on the Host Computer ..............7 Configuring the SV1115IPEXT ..............8 Web Configuration Using the On-Screen Display ................. 8 Web Configuration Using DHCP ......................9 Web Configuration Using Static IP ...................... - Page 4 VirtKeys Menu ............................34 Video Tuning Menu ..........................35 Disk Control Menu ............................ 39 Using the IPMI Feature ................39 Configuring IPMI on the SV1115IPEXT ....................41 Accessing the Status Screen ........................42 Accessing IPMI Controls .......................... 43 Using the Modem Feature ..............44 Connecting a Modem ..........................
-
Page 5: Introduction
Introduction Packaging Contents • SV1115IPEXT unit • Power Adapter • Power Cord • Instruction Manual • PS/2 KVM cable System Requirements • PS/2 or USB enabled computer system or KVM switch Note: KVM switch must have a USB hub port •... -
Page 6: Required Cables And Hardware
Required Cables and Hardware The included integrated KVM cable will allow you to connect the SV1115IPEXT to most IBM compatible computers. Depending on your requirements and how you wish to handle the initial configuration of the unit, you may wish to use the following additional cables and hardware. -
Page 7: Installation
Remote User Follow these instructions if the host computer uses a PS/2 keyboard and mouse: 1. Power down the computer to which the SV1115IPEXT will be connected (host computer). If purchased, install the unit in your rack or cabinet following the... - Page 8 SV1115IPEXT as appropriate. 6. Using a Category 5 Ethernet patch cable, connect the LAN connector on the rear panel of the SV1115IPEXT to a network data jack (usually on a hub, switch, router, or pre-wired wall jack).
- Page 9 7. Using a Category 5 Ethernet patch cable, connect the LAN connector on the rear panel of the SV1115IPEXT to a network data jack (usually on a hub, switch, router, or pre-wired wall jack). 8. Optional: If needed, connect the WAN connector on the rear panel of the SV1115IPEXT to a network data jack (usually a hub, switch, router, or pre-wired wall jack).
-
Page 10: Connecting A Local Keyboard, Mouse, And Monitor
NOTE: If you are using cables other than those provided in the SV1115IPEXT package or branded by StarTech.com, ensure that the cables are of high quality and use the minimum possible distance necessary. Low quality or excessively long (particularly video) cables between the host computer and the SV1115IPEXT could degrade performance. -
Page 11: Disabling Mouse Acceleration On The Host Computer
4. Power on the host computer. Disabling Mouse Acceleration on the Host Computer NOTE: If you are using USB to connect SV1115IPEXT to the host computer, you will not be required to adjust the mouse settings on the host computer, as this device uses “Absolute”... -
Page 12: Configuring The Sv1115Ipext
Web Configuration Using the On-Screen Display Upon boot-up, including following a reset, SV1115IPEXT will display a window on the local video output (front VGA connector), that will appear as follows: The initial screen will display the IP address assigned by your existing DHCP server (if present on your network). -
Page 13: Web Configuration Using Dhcp
At the main OSD menu (pictured below), you will be given several basic setup options. To configure SV1115IPEXT to your required network settings, use the Network Setup Wizard. To select from the menus provided, use the arrow keys on your keyboard. At any time, you can return to the previous menu by pressing the Page Up key. -
Page 14: Web Configuration Using Static Ip
MAC Address: 00-0E-C5-00-08-1A Device Name: (none) The easiest way to identify your SV1115IPEXT on the network is by its MAC address, a unique hardware identifier that is specific to your unit. The MAC address of the unit can be found using the OSD setup screen. Write down this number and keep it for future reference. - Page 15 NOTE: It is advisable to verify whether another device on your network is using the same IP address as the SV1115IPEXT before connecting it to the network, to avoid a conflict. Should an IP address conflict occur with another device on the network, power off the conflicting device or assign it another IP address before continuing the installation.
-
Page 16: Terminal Configuration Using A Serial Cable
Terminal Configuration Using a Serial Cable *sample HyperTerminal configuration Configuring the SV1115IPEXT using a serial cable is the best choice if you need to preconfigure the unit before attaching it to a network, (i.e. when sending to a branch office, customer site, etc). In general, the Web configuration is preferable because of its intuitive interface and the fact that you do not have to be within close physical proximity to perform the configuration. -
Page 17: Using The Web Interface
Using the Web Interface The Web interface is the most intuitive way to configure the SV1115IPEXT. Offering a Java-based VNC client that can be used to control the host computer from a remote location, as well as support for any industry-standard HTML Web browser. You can access the Web interface by opening your Web browser and entering the IP address of the SV1115IPEXT you wish to access/configure. -
Page 18: Web Interface Introduction
Web Interface Introduction After the initial login screen, the screen will be divided into several sections, four of which will remain on the screen at all times while viewing the Web Interface: At the top of the screen, the name of the machine being controlled is displayed Name Tip Line Help Area... -
Page 19: Main Menu Selections
You can transfer files to the virtual disk at any time. SV1115IPEXT will wait until the host is not using the disk, and add or remove the files. When the host computer next looks at the drive, it will notice the changes. - Page 20 When emulating a floppy disk or RAMdisk, the data is stored in RAM on the SV1115IPEXT itself. In order to emulate a CD-ROM disk drive, a web server is required to provide the CD-ROM image data. The Web server must be accessible to the unit, which communicates with it constantly as data is needed.
- Page 21 CD-ROM. The ISO file must be made available on a web server that can be accessed by SV1115IPEXT. To switch to this mode, type in a URL pointing to the ISO image, and click on Commit. The system will connect to the web server and test the file for access.
- Page 22 Booting from USB Disk If the host computer’s BIOS supports USB boot devices, it is possible to boot from the emulated CD-ROM or floppy. This allows complete operating system replacement without any on-site intervention. The first step is getting a bootable disk image onto the emulated floppy or CD-ROM. For CD-ROM images, you will need an ISO image from a disk that contains special bits to enable boot (“El Torito”...
- Page 23 LAN port, and any changes will not affect the setup for that port. Adjusting the setting for the WAN port allows you greater control over how the SV1115IPEXT is configured for access from outside the local network, particularly if a firewall or proxy is in use.
- Page 24 When Ethernet bridging is enabled, the two Ethernet ports are virtually connected inside the SV1115IPEXT. Packets arriving on either port that are not meant for it will be forwarded out to the other port, when appropriate. IEEE-802.1d (“Spanning Tree Protocol”) is implemented to avoid broadcast storms and to determine the topology of the network.
- Page 25 This menu will allow you to add accounts other than admin to the system. These accounts will not have the authority to change settings, but can access the Web interface and log into the VNC console. Selecting Delete permanently removes the user from the system.
- Page 26 (PCM8155HNA). These can be left at their default values if you are not connecting the unit to a KVM or power management device. The SNMP menu allows you to configure the SV1115IPEXT so it can be recognized and managed using industry-standard Simple Network Management Protocol software.
- Page 27 Enable modem connections (PPP) via serial port/modem. The Serial Ports menu allows you to manage and connect to devices connected to the unit using the R-Port on the SV1115IPEXT. Date and time are stored without consideration for time zone. If you are controlling multiple sites in different time zones, we recommend you use UTC (Universal Coordinated Time, also sometimes called GMT or Zulu) for all machines.
- Page 28 Auto Self Upgrade The SV1115IPEXT unit includes an innovative feature allowing it to upgrade itself over the Internet. Simply click on the button labeled Upgrade to Latest and the unit will go out to the Internet and download the latest version of the system firmware and then install it.
- Page 29 To disable a service, change its port number to 0. For flexibility, both the LAN and WAN ports can be configured separately. When you have made any necessary changes, click Commit Changes to use the settings the next time the SV1115IPEXT restarts. To force the unit to restart immediately, click Restart Servers.
-
Page 30: Using The Terminal Interface Via Serial Port
The terminal interface you can access via the serial port permits the configuration of the basic settings of the SV1115IPEXT. While not intended to be a substitute for the Web interface, it does allow you to configure some of the same functions. The menu list below describes the options that can be modified through the terminal interface. -
Page 31: Accessing The Vnc Interface
The type of encryption method or client used is not critical. Web Interface Using SV1115IPEXT’s web interface requires a browser, with cookies and JavaScript enabled. To start the Java VNC client, login to the Web configuration interface and click on the thumbnail of the desktop on the Home menu, or click on the Connect button, located in the Main Menu. -
Page 32: Native Vnc Client
This client software requires the use of Java 2 (JRE 1.4) to enable features like wheel mouse support. Sun Microsystems’ Java site, www.java.com, is an excellent resource to ensure your browser and operating system are updated accordingly. Native VNC Client This system implements the VNC protocol, so any off the shelf VNC client can be used. -
Page 33: Using The Vnc Menu
VNC data stream so that it is effectively laid over the existing video. These menus allow you to control the many features of the SV1115IPEXT without using the web interface or a custom client. -
Page 34: Bribar Feature
Bribar Feature Along the bottom of the VNC screen is a dark blue bar with various buttons known as the bribar. Its purpose is to show a number of critical status values and to provide shortcuts to commonly used features. Here is a snapshot of what it may look like. There will be slight differences based on optional features and system configuration. - Page 35 Keys: Shows the VirtKeys menu, which allows you to simulate pressing special keys such as the Windows key or complex multi-key sequences. Disk: Shows the USB emulated disk menu. In/Ej: Insert or eject the emulated USB disk. Enabled only if the host recognizes the USB disk. R/W: Shows if the disk image is readable and/or writable.
-
Page 36: Main Menu
Main Menu To access the main menu, quickly press F7 twice quickly. You must press the key twice within one second. If you press it once or too slowly, then the F7 key(s) are sent to the host, just like any other key. This is the only way to get into the menu system, if the Bribar is disabled. - Page 37 • KVM Menu: Generates the key sequence used to access the on-screen menu for an enterprise-class KVM switch. When these conventional KVM switches are combined with the SV1115IPEXT, this key makes accessing their built-in menu easier, especially from the Java client. This button will only be shown when an external KVM has been enabled via the web interface.
-
Page 38: Virtkeys Menu
VirtKeys Menu Clicking any button in the top half of the window simulates pressing and releasing the indicated key. In the bottom area of the screen, clicking will simulate the indicated Meta key being pressed. You may then click in the top part to send another key and release the Meta key at the same time. -
Page 39: Video Tuning Menu
Video Tuning Menu Use the Auto Everything button to automatically fine-tune all three adjustments. If the test pattern for Color Offset calibration is not present on the screen, then the Color Offset adjustment is skipped. Changes/frame indicates the number of 16x16 blocks of video that are being sent, on average, for every frame of video. - Page 40 VNC sessions. Sampling Phase does not normally need to be used since SV1115IPEXT tunes the sampling phase whenever the video mode changes. This button does not require a test pattern, but will perform optimally when used with our standard test pattern.
- Page 41 VNC client allow. Network latency, which is the total time it takes for a packet to get to the SV1115IPEXT and come back, has the biggest impact on perceived performance and usability.
- Page 42 The Presets section contains up to sixteen different settings, plus the factory setting. If a number is highlighted, then that preset has been programmed with valid settings and may be used. Note that the Factory preset is always available. Simply click on the appropriate button and those settings will be restored.
-
Page 43: Disk Control Menu
Using the IPMI Feature Background To offer a more complete remote server control solution, the SV1115IPEXT offers a power management feature that allows remote hardware restarts and the ability to power the host computer on and off. You may be able to take advantage of this feature if the host computer you are managing supports IPMI (Intelligent Platform Management Interface). - Page 44 StarTech.com dealer. Connecting the SV1115IPEXT for IPMI Control You can use either serial port on the SV1115IPEXT to send IPMI access; your choice will determine the type of cable you will use to make the connection. The DTE Serial port on the front panel requires the use of a null modem serial cable.
-
Page 45: Configuring Ipmi On The Sv1115Ipext
• Enable IPMI (Intelligent Platform Management Interface via serial port: select Enabled. • Select which serial port to use: select either Front serial port (DTE pin out) or Rear serial port (DCE pin out) based on how the SV1115IPEXT is connected to the IPMI serial port on the host computer. -
Page 46: Accessing The Status Screen
BMC password (as well as any other error information) will be recorded in the SV1115IPEXT’s system log on the Status page of the Web interface. If the host computer’s BIOS setup allows for multiple levels of security for the BMC, ensure the password you enter on the menu offers sufficient authority to control chassis power and monitor fan status. -
Page 47: Accessing Ipmi Controls
Accessing IPMI Controls There are two ways to access power controls for the managed computer. The first is through the Home screen on the Web interface. The second is through the Bribar during an active VNC session. Once IPMI is enabled and functioning correctly, a set of controls will appear immediately under the thumbnail image of the host computer on the Home screen on the Web interface. -
Page 48: Using The Modem Feature
Using the Modem Feature Background The modem feature allows the SV1115IPEXT to act as an Internet connection server for increased security and flexibility in connecting with the host computer. Unlike the TCP/ IP connection used with the standard Web configuration and VNC clients, the modem... -
Page 49: Connecting A Modem
“downstream” rate is often within a similar range for a typical connection. Therefore, speeds below 56,000 bps do not indicate a problem with the modem or the SV1115IPEXT, but simply reflect the line conditions at the time the connection is made. -
Page 50: Modem Configuration
The initialization (“init”) string is the command (using the standardized Hayes AT command set) that the SV1115IPEXT will send to the modem to activate it. The string included should work with the majority of modems and configures the following connection properties: answer incoming calls on the first ring, enable hardware flow control, and lock the connection speed. -
Page 51: Configuring The Remote Connection
9. In the space provided under Phone Number enter the phone number for the line to which the SV1115IPEXT’s modem is connected. You may need to add the area code, country code, or other digits needed to access the outside line as appropriate. When finished, click Next. -
Page 52: Accessing The Web Interface
(see immediately above for instructions on what type of cable to use for the port you are accessing on the SV1115IPEXT) and begin a terminal session following the instructions under Terminal Configuration Using a Serial Cable in this manual. -
Page 53: Troubleshooting Guide
Modem init chat script failed The modem did not respond to the initialization string from the SV1115IPEXT. You may need to change the init string or verify the cabling and modem status. -
Page 54: Serial Remote Control Operation
For the first module, connect the cable (provided) to the R-Port on the rear panel of the SV1115IPEXT. Connect the opposite end to the DATA OUT (or similar) port on the Serial Remote Control unit. Note that some devices may use an integrated cable, so you will not need to make a separate connection on the serial device. - Page 55 All common baud rates between 300 and 115,200 bps are supported. Mode: Sets the character framing scheme that the SV1115IPEXT will use with the R-Port module. You can choose from the following selections: 8N1: Eight bits, no parity, one stop bit (default and most common).
-
Page 56: Advanced Configuration Using The Integrated Ssh Shell
Advanced Configuration Using the Integrated SSH Shell In most cases, configuring the SV1115IPEXT to the same settings as the R-Port devices you are connecting should allow the devices to work with a minimum amount of configuration. However, you can also change the default settings on each R-Port device to fit your preferences and the needs of your application. - Page 57 • Hardware handshaking (CTS/RTS) is required for speeds exceeding 9600 bps. It is enabled by default on the SV1115IPEXT, but may need to be enabled on the other end of the connection. For Unix systems, the command is: stty –crtscts <...
-
Page 58: About Security Certificate Warnings
Certificate Authorities (CAs) and contain essential details about a site that must match the information supplied to your Web browser. Why do I receive a warning when I access the login screen on the SV1115IPEXT? As it redirects you to a secure (SSL) session by default, the login screen may generate a warning from your Web browser or the VNC Java client for two different reasons. - Page 59 The following instructions detail how to install the certificate from the SV1115IPEXT onto your local computer (in this case, when using Internet Explorer with Windows XP). 1. Open your Web browser and go to the SV1115IPEXT login screen. Click the Update security certificate link.
-
Page 60: Troubleshooting
It is normal for a warning dialog to be shown when connecting via HTTPS. The SSL certificate SV1115IPEXT uses is created when the unit is first produced. It does not contain the correct hostname (subject name) because you can change the hostname as required. - Page 61 Mouse performance is erratic when using the GNOME or KDE desktop in a Linux X-Window environment. The mouse controls in GNOME and KDE environments offer both an acceleration and sensitivity setting. The following directions correct this issue, and apply to Red Hat Fedora Core 2, but should be similar for other distributions that use GNOME or KDE: 1.
-
Page 62: Supported Protocols
Supported Protocols Service Description Benefit Secure Shell May be used to securely “tunnel” VNC and HTTP protocols. HTTP Web redirector (to HTTPS) Convenience server to redirect all web traffic to encrypted port. Clear-text HTTP is not supported SNMP SNMP agent (UDP) Allows integration with existing SNMP network management systems. -
Page 63: Specifications
Specifications 2 x PS/2 female 1 x DE-15 VGA female 3 x USB type A Console Connectors (Local) 2 x RJ45 (WAN/LAN) 2 x DB9 serial (female/male) 1 x R-Port 2 x DC power connector 2 x PS/2 female Host Connectors 1 x DE-15 VGA female 1 x USB type B Power, R-Port, WAN/LAN Link, USB,... -
Page 64: Technical Support
Limitation of Liability In no event shall the liability of StarTech.com Ltd. and StarTech.com USA LLP (or their officers, directors, employees or agents) for any damages (whether direct or indirect, special, punitive, incidental, consequential, or otherwise), loss of profits, loss of business, or any pecuniary loss, arising out of or related to the use of the product exceed the actual price paid for the product. - Page 65 StarTech.com is an ISO 9001 Registered manufacturer of connectivity and technology parts. StarTech.com was founded in 1985 and has operations in the United States, Canada, the United Kingdom and Taiwan servicing a worldwide market.
Need help?
Do you have a question about the SV1115IPEXT and is the answer not in the manual?
Questions and answers