Table of Contents
Advertisement
Quick Links
Advertisement
Table of Contents

Subscribe to Our Youtube Channel
Related Manuals for Minox Leica M3 2.1


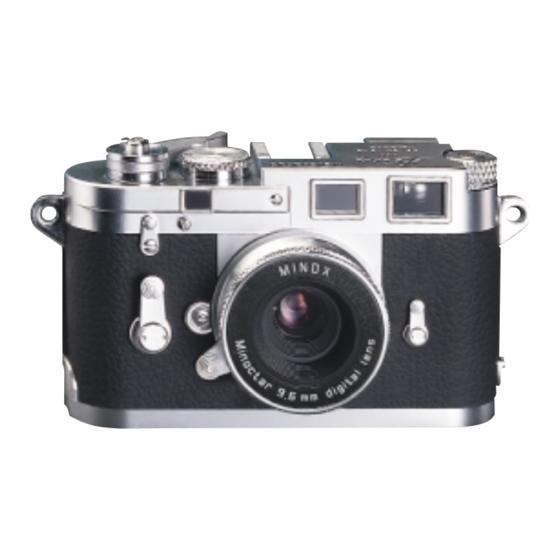
Summary of Contents for Minox Leica M3 2.1
- Page 1 Digital Classic Camera Leica M3 2.1 Instruction manual...
- Page 2 Digital Classic Camera Leica M3 2.1 • English...
- Page 3 Digital Classic Camera Leica M3 2.1 MINOX Classic Camera Blitz / Flash Optionally available...
-
Page 4: Table Of Contents
Contents Introduction Page 3 Video conference Page 14 For users in the United States Page 4 Image processing on the PC Page 15 For users in Canada Page 4 - Loading still images Getting to know your camera Page 5 - Image download using the Camera Wizard The right power supply Page 5... -
Page 5: Introduction
It also guarantees unlimited photographic fun with its distinguished striking looks. The MINOX Digital Classic Camera – DCC for short – is now ready to become your permanent companion and capture wonderful memories in a very modern way. -
Page 6: For Users In The United States
For users in the United States to try to correct the interference by one or more of the following measures: - Reorient or relocate the receiving antenna FCC Declaration of Conformity - Increase the separation between the equipment This device is in conformity with Part 15 of FCC rules. and the receiver Operation of the device is subject to the following two - Contact the equipment into an outlet on a... -
Page 7: Getting To Know Your Camera
• Remove the battery prior to storing the camera or Note if you do not plan to use it for a prolonged period The MINOX Classic Camera Flash (10) is optionally of time. available and not included in the scope of delivery. -
Page 8: Inserting The Batteries
Inserting batteries Trademark information 1. Open the battery compartment of your DCC. MS-DOS and Windows are registered trademarks of 2. Take a new CR2 battery and place it in the battery Microsoft Corporation in the U.S.A. and other countries. compartment. Pay attention to the correct pole Windows is an abbreviated term which refers to the alignment (+)(-) which is indicated on the side of Microsoft Windows Operation System. -
Page 9: Installation Of The Pc-Software
Available hard disk space 90 MB (for 98/SE/ME) update. If you do, you may choose to click the continue 128 MB (for 2000/XP) anyway-button. Minox has tested this driver or update on USB interface USB Port Windows XP and it does not impair or destabilize your... -
Page 10: Installing Arcsoft Photoimpression
Contents of the DCC CD-ROM 2. Select the language you wish to use. 3. Click on „Continue“ on the start page to continue • DCC Camera Driver for Windows 98/SE/ME/XP the Setup. and MacOS 9.x 4. Click on „Yes“ on the page with the terms and conditions, after reading them, to accept these •... - Page 11 that the DCC CD-ROM is positioned in the CD-ROM Note drive. Please follow the instructions given below for When employing Windows 98/SE, make sure that the DCC connecting your camera to your PC. CD-ROM is in the CD-ROM drive before you connect your DCC to the computer for the first time! Note Install the software before you provide the USB...
-
Page 12: Using The Dcc
6. Follow the instructions on the screen to complete Flash is activated the installation of the WebCam driver. Delete last image Note Delete all images Web-Cam Driver applies to all Windows OS versions. Make sure that the DCC CD-ROM is in the CD-ROM drive Switch off bevore you connect your DCC to the computer for the Video Conference... -
Page 13: Shooting And Deleting Images
(e.g. twilight 1. Switch on your DCC by pressing the On/Mode or in dark-lit areas), you will require the MINOX Classic button once. The LCD display of your camera Camera flash which is optionally available from Minox shows the image counter. -
Page 14: Shooting Images With The Self-Timer
2. Switch on your DCC by pressing the On/Mode button. 4. Compose your subject through the viewfinder. Place 3. Press down the On/Mode button your DCC on a flat and steady base. until the flash mode „FL“ appears. 5. Press the shutter release once and you will hear short Press the shutter release to confirm and set this mode. -
Page 15: Altering The Image Compression
Delete the last image taken The DCC allows you to alter the degree of image com- 1. Switch your DCC on by pressing the On/Mode button. pression before taking the shot (compression rate). Al- 2. Press the On/Mode button untill the mode „dL“ for ways follow the following instructions for this purpose. -
Page 16: Video Conference
signal confirms the alteration. After changing the Note Hr/Lr mode, the camera will automatically reset to Video Conference is available in PC only. basic mode. Web Cam Brightness Adjustment The Camera is preset to auto –brightness mode during Video conference web-cam operation. -
Page 17: Image Download Using The Camera Wizard
connect the DCC to your computer using the provided Start > Programme > ArcSoft PhotoImpression > USB cable. For Windows 98/SE users, please make sure PhotoImpression. when you are connecting the camera to the computer 3. Select „Get Photos“ from the left panel. the first time, the DCC CD-ROM is positioned in the CD- 4. -
Page 18: Uninstalling The Software
1. Click on „Get Photos“ and select „Camera/Scanner“. Uninstalling the software 2. Select „Zoran COACH USB digital camera“. You can uninstall the software in the „Add/Remove 3. Click on the icon Program“ in the control panel of your PC. 4. Select „Live“ to show the video. Note Image processing on the MacOS Only carry out this procedure when the installed soft-... -
Page 19: Uninstalling Drivers
Uninstalling drivers 1. Follow the instructions for switching the camera into camera mode. 2. Switch on your PC and connect the camera to the PC. Uninstalling the web cam driver 3. Start up Windows, open the window "My Compu- You can uninstall web cam drivers using the Device ter"... -
Page 20: Camera Maintenance
Camera maintenance If the camera is not used for a prolonged period of time Always read the following information to make sure you If you plan not to use the camera for a prolonged period are using your DCC correctly. of time, always remove the battery. -
Page 21: Troubleshooting
Faulty connection. Check all connecting cables. my images are blurred. Could be due to instantaneous Hold your LEICA M3 2.1 steady delay between the pressing until you hear the beep sound of the release and the that indicates the shot has shooting of the image. -
Page 22: Technical Data
(camera) Viewfinder Integrated optical viewfinder LCD status display 2 digit Flash MINOX Classic Camera Flash, optional, order number: 69125 Lens 5 elements, glass lens element with IR filter Lens aperture F 2.8 Focal length 9,6 mm / related to small picture: approx. 48 mm Sharpness range 1.5 m to infinity... -
Page 23: Technical Support
PC connection USB cable Dimensions 65 x 48 x 44 mm (LxWxH) Weight approx. 95 g Technical Support MINOX GmbH Walter-Zapp-Str. 4 D-35578 Wetzlar, Germany Tel.: +49 (0) 6441 / 917-0 Fax: +49 (0) 6441 / 917-612 e-mail: info@minox.com www.minox.com... -
Page 24: Conditions Of Warranty
MINOX product together with the typewritten sales to special quality standards. slip and a description of the claim to the MINOX GmbH or MINOX agency. For this product the MINOX GmbH provides warranty of 2 5) Tourists may, if required, make use of the Agency of the years. - Page 26 Design subject to alterations without notice. MINOX is a registered trademark of MINOX GmbH, Wetzlar. Leica is a registered trademark of Leica Microsystems I. R. GmbH. MINOX GmbH Walter-Zapp-Str. 4 D - 35578 Wetzlar, Germany Tel.: +49 (0) 6441 / 917-0 Fax: +49 (0) 6441 / 917-612 e-mail: info@minox.com...
Need help?
Do you have a question about the Leica M3 2.1 and is the answer not in the manual?
Questions and answers