Advertisement
Quick Links
Advertisement

Related Manuals for Edimax IC-5160GC


Summary of Contents for Edimax IC-5160GC
- Page 1 IC-5160GC Quick Installation Guide 06-2016 / v1.0...
-
Page 2: Package Contents
Package Contents CD-ROM Connector Wires IC-5160GC Power Ethernet Screws Wall Mount Adapter Cable USB Garage Screwdriver Accessory... -
Page 3: Led Status
LED Status LED Color LED Status Description Network camera is on and connected to cloud server. Quick Flashing Network camera is restarting. Power Green Network camera is starting up or Slow Flashing (1 x network camera is not connected per second) to cloud server. -
Page 4: Camera Setup
Camera Setup Follow the instructions below to connect your network camera to your Wi-Fi using the EdiLife smartphone app. Refer to the chapter Garage Door to connect the product to your garage door terminal. Your network camera’s unique SSID is displayed on the product label on the network camera and consists of “EdiView.Setup **”... - Page 5 Use a smartphone or tablet to search, download and install the EdiLife app from Google Play or the Apple App Store. For iOS users, go to your iPhone’s Wi-Fi settings and connect to your network camera’s SSID (EdiView.Setup **), before opening the EdiLife app. Continue to Step 7.
- Page 6 Android users select your camera from the available wireless device list and wait a moment for the app to make a connection. Tap refresh in the top right corner if your camera isn’t listed. For better security, enter a new device name and password when prompted.
- Page 7 Select your Wi-Fi from the list and enter your Wi-Fi password. Tap OK to continue. Tap refresh in the top right corner if your Wi-Fi isn’t listed. Please wait a moment while your camera connects to your Wi-Fi. When you see the Setup complete screen, click the LIVE icon or tap the arrow to continue.
- Page 8 Setup is complete. The camera’s green power LED & orange Internet LED should display on. Your camera should be listed on the EdiLife home screen. Tap your camera to see a live stream which you can view anytime you are connected to the Internet. You can configure your camera’s settings and functions using the icons below the live image.
- Page 9 The WPS (Wi-Fi Protected Setup) button is a quick and easy alternative to establish a secure wireless connection between your network camera and your wireless router/access point. Press and hold the WPS button on your wireless router/access point for the correct length of time to activate its WPS. Please check the instructions for your wireless router/access point for how long you need to hold down its WPS button to...
- Page 10 Using Your Network Camera As well as the EdiLife app, you can use the camera’s web-based management interface to see a live stream and to configure the camera’s functions such as motion and sound detection. Go to the camera’s IP address in a web browser on a computer connected to the same local network: You can find your network camera’s IP address using EdiView Finder on a computer, or using the EdiLife smartphone app (go to Settings).
- Page 11 After installation, use the EdiLife app to remote control your garage door from your smartphone. Disconnect your IC-5160GC and garage door terminal from any power supplies before attempting installation. Refer to the manufacturer’s instructions for your garage door model and always proceed with caution when wiring electrical appliances.
- Page 12 – Insert the ends of the two connector wires firmly into the terminals on the underside of the USB garage accessory. Tighten the screws on top of the USB garage accessory to secure the wires in place.
- Page 13 Remove the case on your garage door terminal/motor and follow the manufacturer’s instructions to connect the other end of the included wires. Check the manufacturer’s documentation when opening and connecting your terminal. Procedure varies according to brand and model. Example shown below:...
- Page 14 Check everything is correctly attached and that your terminal is closed and secure, and then connect the IC-5160GC to a power supply. The USB garage accessory’s green LED should display on. And the camera’s green power LED & orange Internet LED should display...
- Page 15 Open the EdiLife app and you can open/close your garage door using the icon on the Live view page. Other settings can be found in Advanced.
-
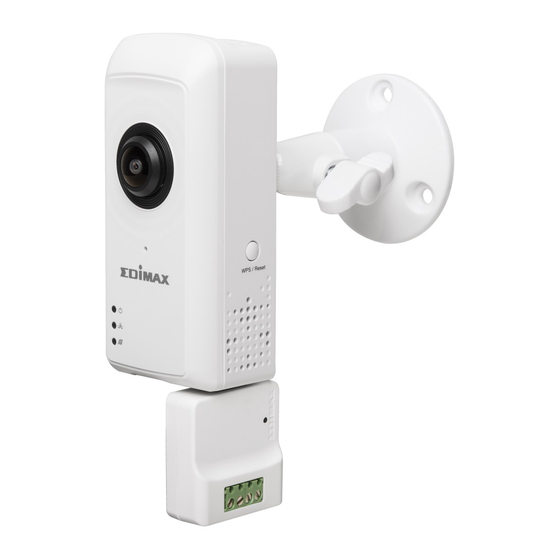
Page 16: Wall Mount
Wall Mount A wall mount is included in the package contents to fix your camera to the wall. The stand requires some assembly. It’s recommended to connect your product to the garage door terminal/motor before installing the wall mount. Attach the wall-mount to a wall using the included screws as shown below: Attach the rear of the network camera to the mounting stand and tighten into place, as shown below:... - Page 17 Reset If you experience problems with your network camera, you can reset the camera back to its factory default settings. This resets all settings back to default. Press and hold the WPS/Reset button found on the side panel for at least 10 seconds.
- Page 18 Federal Communication Commission Interference Statement This equipment has been tested and found to comply with the limits for a Class B digital device, pursuant to Part 15 of FCC Rules. These limits are designed to provide reasonable protection against harmful interference in a residential installation.
- Page 19 EU Declaration of Conformity English: This equipment is in compliance with the essential requirements and other relevant provisions of Directive 1995/95/EC, 2011/65/EC. Français: Cet équipement est conforme aux exigences essentielles et autres dispositions de la directive 1995/95/CE, 2011/65/CE. Čeština: Toto zařízení je v souladu se základními požadavky a ostatními příslušnými ustanoveními směrnic 1995/95/ES, 2011/65/ES.
- Page 20 Declaration of Conformity We, Edimax Technology Co., Ltd., declare under our sole responsibility, that the equipment described below complies with the requirements of the European R&TTE directive (1999/5/EC, 2006/95/EC) . Equipment: Fisheye Wi-Fi Network Camera with Garage Door Control Model No.:...
- Page 21 Notice According to GNU General Public License Version 2 This product includes software that is subject to the GNU General Public License version 2. The program is free software and distributed without any warranty of the author. We offer, valid for at least three years, to give you, for a charge no more than the costs of physically performing source distribution, a complete machine-readable copy of the corresponding source code.
- Page 22 1. You may copy and distribute verbatim copies of the Program’s source code as you receive it, in any medium, provided that you conspicuously and appropriately publish on each copy an appropriate copyright notice and disclaimer of warranty; keep intact all the notices that refer to this License and to the absence of any warranty; and give any other recipients of the Program a copy of this License along with the Program.
- Page 23 Therefore, by modifying or distributing the Program (or any work based on the Program), you indicate your acceptance of this License to do so, and all its terms and conditions for copying, distributing or modifying the Program or works based on it. 6.
Need help?
Do you have a question about the IC-5160GC and is the answer not in the manual?
Questions and answers