Table of Contents
Advertisement
Quick Links
Network Camera
imagine
Thanks you for purchasing this Samsung product.
To receive a more complete service, please visit
our website
www.samsungsecurity.com
RoHS compliant
Our product complies with "The Restriction Of the use of certain Hazardous
Substances in electrical and electronic equipment", and we do not use the
6 hazardous materials- Cadmium (Cd), Lead (Pb), Mercury (Hg), Hexavalent
Chromium (Cr
+6
), Poly Brominated Biphenyls (PBBs), Poly Brominated Diphenyl
Ethers (PBDEs)- in our products.
User Manual
the possibilities
SNV-3080(P)
Advertisement
Table of Contents

Related Manuals for Samsung SNV-3080


Summary of Contents for Samsung SNV-3080
- Page 1 SNV-3080(P) Network Camera User Manual imagine the possibilities Thanks you for purchasing this Samsung product. To receive a more complete service, please visit our website www.samsungsecurity.com RoHS compliant Our product complies with “The Restriction Of the use of certain Hazardous Substances in electrical and electronic equipment”, and we do not use the...
- Page 2 overview CAUTION RISK OF ELECTRIC SHOCK. DO NOT OPEN CAUTION TO REDUCE THE RISK OF ELECTRIC SHOCK, DO NOT REMOVE COVER (OR BACK) NO USER SERVICEABLE PARTS INSIDE. REFER SERVICING TO QUALIFIED SERVICE PERSONNEL. This symbol indicates that dangerous voltage consisting a risk of electric shock is present within this unit.
- Page 3 If this product fails to operate normally, contact the nearest service center. Never disassemble or modify this product in any way. (SAMSUNG is not liable for problems caused by unauthorized modifications or attempted repair.) When cleaning, do not spray water directly onto parts of the product.
- Page 4 overview CAUTION Do not drop objects on the product or apply strong blows to it. Keep away from a location subject to excessive vibration or magnetic interference. Do not install in a location subject to high temperature (over 50°C), low temperature (below -10°C), or high humidity.
- Page 5 FCC STATEMENT This device complies with part 15 of the FCC Rules. Operation is subject to the following two conditions : 1) This device may not cause harmful interference, and 2) This device must accept any interference received including interference that may cause undesired operation.
-
Page 6: Overview
overview IMPORTANT SAFETY INSTRUCTIONS Read these instructions. Keep these instructions. Heed all warnings. Follow all instructions. Do not use this apparatus near water. Clean only with dry cloth. Do not block any ventilation openings. Install in accordance with the manufacturer’s instructions. -
Page 7: Table Of Contents
CONTENTS OVERVIEW Important Safety Instructions Product Features Recommended PC Specifications What’s Included At a Glance INSTALLATION & Disassembling Inserting/Removing an SD CONNECTION Memory Card Memory Card Information (not included) Connecting with other Device Installation Optional Accessories for Installation CAMERA SETUP How to use the menu key Main Menu Profile... - Page 8 overview WEB VIEWER Connecting to the camera Login Installing ActiveX Using the Live Screen Backup Using the SD Search Viewer Screen SETUP SCREEN Accessing the Setup screen Default Setup System Setup Overlay Setup Event Setup Network Setup APPENDIX Profile Terminology Specifications Frame Rate (NTSC) Frame Rate (PAL)
-
Page 9: Product Features
PRODUCT FEATURES Support various communication protocols Supports TCP/IP, UDP, RTP/RTSP, SMTP for email, and FTP protocols as well as various internet protocols such as ARP, HTTP, HTTPS and DHCP. Web Browser-based Monitoring Using the Internet web browser to display the image in a local network environment. Automatic Local IP Setup Even a network novice can install it with minimum operations. -
Page 10: What's Included
Please check if your camera and accessories are all included in the product package. Image Part name Standard Quantity Usage Camera SNV-3080 User Manual/ IP INSTALLER User Manual Alarm Cable Used to connect to a monitor for camera Cable for operation test. -
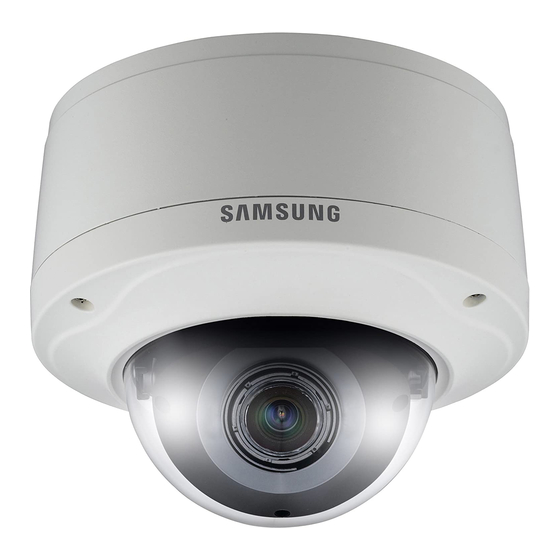
Page 11: At A Glance
AT A GLANCE Appearance Item Description Dome Cover Dome cover for the lens and unit protection. Operates if ambient temperature drops below 5°C, for defrosting the dome Heater cover. Main unit Main unit includes the lens, switch board, PCB boards and screws. Power Port Used to plug the power cable. - Page 12 overview Inside Item Description Network Port Used to connect a PoE or LAN cable. Alarm in/out terminals can be configured as follows: - ALARM IN : Terminal for Alarm Input. Alarm In / Out terminals - ALARM OUT : Terminal for Alarm Output. - GND : Grounding terminal.
- Page 13 Components 3 4 5 Item Description Inner Cover Cover for the main unit’s protection. Side wing hooks By lifting it while gently pressing the both ends, you can separate the inner cover. Using the test monitor cable, you can connect to a mobile display for camera Monitor Out test.
-
Page 14: Installation & Connection
installation & connection DISASSEMBLING To connect the alarm in/out, the dome cover and lens cover are to be separated. Using the L-wrench provided, loosen 3 screws by turning them counterclockwise and separate the dome cover. Lift up the inner cover while gently pressing its both ends to separate it from the unit. -
Page 15: Inserting/Removing An Sd Memory Card
INSERTING/REMOVING AN SD MEMORY CARD Inserting an SD Memory Card Push the SD memory card in the direction of the arrow shown in the diagram. Do not insert the SD memory card while it’s upside down by force. Otherwise, it may damage the SD memory card. -
Page 16: Memory Card Information (Not Included)
installation & connection MEMORY CARD INFORMATION (NOT INCLUDED) What is a memory card? The memory card is an external data storage device that has been developed to offer an entirely new way to record and share video, audio, and text data using digital devices. Selecting a memory card that’s suitable for you Your camera supports SDHC memory cards. -
Page 17: Connecting With Other Device
CONNECTING WITH OTHER DEVICE Power Monitor Power Supply Connect the power adaptor and camera’s power in jack. Be careful not to reverse the polarity when you connect the power cable. You can also use a router featuring PoE (Power over Ethernet) to supply power to the camera. Connecting to the monitor Connect the camera’s Video Out jack and the monitor’s video in jack. - Page 18 installation & connection Connecting to Audio Input/Output Microphone LINE-OUT Microphone LINE-IN Speaker Connect the AUDIO IN port of the camera with the microphone directly or LINE OUT port of the amplifier that the microphone is connected to. Direct Mic Connection : Set Audio Input Gain high (10). (Refer to page 56) Line Out Connection : Set Audio Input Gain low (1).
- Page 19 Audio I/O Block Diagram Network Microphone Speaker Audio Codec G.711 PCM. μ-law 64kbps 8kHz sampling Full duplex Audio Audio in Used for mono signal line input (Max.2.4 Vpp) Audio out Used for mono signal line output (Max.2.4 Vpp) Line out impedance English _19...
- Page 20 installation & connection Connecting to the I/O port box Connect the Alarm I/O cable to the corresponding port of the inner port box. 5 4 3 2 1 1,2 : ALARM IN 1,2 3 : GND 4,5 : ALARM OUT 1,2 ALARM IN 1, 2 : Used to connect the alarm input signal.
-
Page 21: Installation
INSTALLATION Precautions before installation Ensure you read out the following instructions before installing the camera: Select an installation site (ceiling or wall) that can endure at least 5 times of the camera weight. Stuck-in or peeled-off cables can cause damage to the product or a fire. For safety purposes, keep anyone else away from the installation site. - Page 22 installation & connection CORNER MOUNT ADAPTOR (SCX-300KM) This is an adaptor for WALL MOUNT ADAPTOR (SCX-300WM) installation on the corner of wall joint. Installing on the ceiling directly Using the L-wrench provided, loosen 3 screws by turning them counterclockwise and separate the dome cover. 22_ installation &...
- Page 23 Loosen 3 screws by turning them counterclockwise, press both left and right lock releases inwards (in arrow direction) to unlock the stopper, and then separate the camera from the case. Drill holes (diameter 5mm, more than 35mm deep) on the ceiling by matching to the holes on the case bed, and insert plastic anchors (HUD 5) fully into the holes.
- Page 24 installation & connection Flushed installation on the ceiling Using the provided template, drill a hole for the camera unit and fixing holes (diameter 5mm, more than 35mm deep) on the ceiling. Insert the plastic anchors (HUR-5) fully into the fixing holes. Separate the dome cover and case.
- Page 25 Installing on adaptors (sold separately, SCX-300WM, 300CM, 300KM, 300PM) Separate the dome cover and case. For separating dome cover and case, refer to the steps 1 and 2 of “Installing on the ceiling directly”. Assemble and secure the case and adaptor (sold separately) using 4 fixing screws (BH, M4xL8, provided).
- Page 26 installation & connection Adjusting the monitoring direction for the camera Panning Tilting Lens rotation You can adjust the camera direction only when the camera is fixed on the ceiling. Then, turning the camera to the left or right is referred to as "Panning", while tilting the angle is "Tilting".
-
Page 27: Camera Setup
camera setup You can configure the camera settings using the Web Viewer. For accessing the Web Viewer, refer to "Network Connection and Setup". (page 36) HOW TO USE THE MENU KEY Follow the steps below if you run the Web Viewer for setting the menus. Launch the Web Viewer. -
Page 28: Main Menu
camera setup MAIN MENU You can configure the camera settings to your preference. PROFILE MAIN MENU You can select a mode that is appropriate to the PROFILE camera installation environment. CAMERA SET PRIVACY ZONE CAMERA SET OTHER SET Configure the camera functions and settings. SYSTEM INFO LANGUAGE PRIVACY ZONE... - Page 29 CAMERA SETUP You can configure the general settings of the camera module. For selecting and saving each menu item, refer to "How to use the menu key". (page 27) CAMERA ID Provide the ID and position for a camera that displays on the screen. Select <CAMERA SET>...
- Page 30 camera setup MOTION CAMERA SET ◄ ► You can specify a level of AGC for controlling the CAMERA ID IRIS camera motion. MOTION (F.FAST)--- Select F.FAST if you want to monitor a very fast moving object in a low contrast scene, and S.SLOW SHUTTER SENS-UP AUTO X4...
- Page 31 DAY/NIGHT You can specify a recording mode according to the scene. Select <CAMERA SET> - <DAY/NIGHT>. AUTO Select a screen transition mode according to BURST the illumination, and set options as appropriate. DAY NIGHT BRIGHTNESS DAY : Fixed to DAY mode, regardless of the DWELL TIME scene.
- Page 32 camera setup According to the specified recording mode, WHITE BAL select a WHITE BAL mode with necessary options. DAY/NIGHT NIGHT BRIGHTNESS BRIGHTNESS : Specify a brightness level MODE [ 00 ] ---- I ---- triggering the switch from DAY to NIGHT [ 00 ] ---- I ---- BLUE mode.
-
Page 33: Privacy Zone
PRIVACY ZONE You can set up to 12 privacy zones that will be hided for privacy of the subject when recording. For selecting and saving each menu item, refer to "How to use the menu key". (page 27) ZONE SETUP Select <MAIN MENU>... -
Page 34: Others
camera setup OTHERS You can reset the camera, or select the OSD font color to your preference. For selecting and saving each menu item, refer to "How to use the menu key". (page 27) FACTORY DEFAULT Select <MAIN MENU> - <OTHER SET> OTHER SET ◄... -
Page 35: System Info
SYSTEM INFO You can check the system information. For selecting and saving each menu item, refer to "How to use the menu key". (page 27) Select <MAIN MENU> - <SYSTEM INFO>. SYSTEM INFO ◄ ► The current system information is displayed. 3 _ IPV _ P TYPE CAMERA VER. -
Page 36: Network Connection And Setup
You can set up the network settings according to your network configurations. Before installing or while using this program, visit the Samsung website www.samsungsecurity.com and download and upgrade with the latest S/W version available. CONNECTING THE CAMERA TO AN IP ROUTER WITH THE XDSL/CABLE MODEM This is for a small network environment such as homes, SOHO and ordinary shops. -
Page 37: Connecting The Camera To An Ip Router With Local Area Networking
IP router are correct. CONNECTING THE CAMERA TO AN IP ROUTER WITH LOCAL AREA NETWORKING This is for a large network environment such as corporate office, building, public office and factory. SNV-3080 Switch INTERNET IP Router External IP 공유기... -
Page 38: Connecting The Camera Directly To A Dhcp-Based Xdsl/Cable Modem
BASED XDSL/CABLE MODEM INTERNET xDSL or xDSL 또는 Cable 모뎀 Cable Modem 외부 원격 PC External SNV-3080 Remote PC DDNS Server DDNS 서버 (Data Center, KOREA) (Data Center, KOREA) Setting the IP Router This is enabled for a modem using DHCP. -
Page 39: Connecting The Camera Directly To Local Area Networking
NETWORKING Connecting to the camera from a local PC in the LAN Launch an Internet browser on the local PC. Enter the IP address of the camera in the address bar of the browser. SNV-3080 Switch INTERNET External 외부 원격 PC... -
Page 40: Ip Address Setup
network connection and setup IP ADDRESS SETUP Buttons used in IP Installer Item Description Model name of the connected camera. Device Name Click the column to sort the list by model name. However, search will be stopped if clicked during the search. Displays either <Static>... -
Page 41: Static Ip Setup
DDNS URL address enabling access from the external Internet. However, this will be replaced with the <IP Address> of the camera if DDNS registration has failed. IPv4 Scans for cameras with the IPv4 setting. IPv6 Scans for cameras with the IPv6 setting. Scans for cameras that are currently connected to the network. - Page 42 network connection and setup If using an IP router : IP Address : Enter an address falling in the IP range provided by the IP router. ex) 192.168.1.2~254, 192.168.0.2~254, 192.168.XXX.2~254 Subnet Mask : The <Subnet Mask> of the IP router will be the <Subnet Mask> of the camera.
- Page 43 Click [OK]. Manual network setup will be completed. When the manual setup including <IP> is completed, the camera will restart. If the IP router has more than one camera connected Configure the IP related settings and the Port related settings distinctly with each other. Category Camera #1 Camera #2...
-
Page 44: Dynamic Ip Setup
network connection and setup Enter the password. This is the login password for the "admin" user who accesses the camera. The default password is "4321". Click [OK]. Auto network setup will be completed. The camera will automatically complete the network setting and restart. DYNAMIC IP SETUP Dynamic IP Environment Setup Example of the dynamic IP environment... -
Page 45: Port Range Forward (Port Mapping) Setup
PORT RANGE FORWARD (PORT MAPPING) SETUP If you have installed an IP router with a camera connected, you must set the port range forwarding on the IP router so that a remote PC can access the camera in it. Manual Port Range Forwarding From the Setup menu of the IP router, select <Applications &... -
Page 46: Connecting To The Camera From A Shared Local Pc
network connection and setup CONNECTING TO THE CAMERA FROM A SHARED LOCAL Launch <IP Installer>. It will scan for connected cameras and display a list of them. Double-click a camera to access. The Internet browser starts and connects to the camera. ... -
Page 47: Web Viewer
web viewer CONNECTING TO THE CAMERA Normally, you would Launch the Internet browser. Type the IP address of the camera in the address bar. ex) • IP address (IPv4) : 192.168.1.200 http://192.168.1.200 - the Login dialog should appear. • IP address (IPv6) : 2001:230:abcd: ffff:0000:0000:ffff:1111 http://[2001:230:abcd:ffff:0000 :0000:ffff:1111]... -
Page 48: Login
web viewer To check the DDNS address The DDNS address consists of: <one of the lower-case letters: c, m, p> + <the last 6 digits of the MAC (Ethernet) address> + <websamsung.net> The small letter will be <c> if the first 6 digits of the MAC (Ethernet) address is <00:00:f0>, or <m>... -
Page 49: Installing Activex
INSTALLING ACTIVEX If connecting to a camera for the first time, you will see the installation message. Then, install the required ActiveX to access the camera and control the video from it in real time. For Windows XP Service Pack 2 users Click the installation message that pops up when you first access the camera. -
Page 50: Using The Live Screen
web viewer USING THE LIVE SCREEN Item Description SD Search Moves to the screen for searching event images from the SD card. Setup Move to the Setup screen. About You can check the firmware version, serial number and manufacturer information. Reset Alarm Resets the Alarm icon. -
Page 51: Backup
Click [OK]. The screenshot will be saved in the specified path. Default file path Windows XP : C:\Program Files\Samsung\SNV-3080\SnapShot\Live If you want to change the path, click [Set path ( )] and specify a path. Windows Vista, Windows 7 : C:\users\[UserID]\Documents\Samsung\SNB-3000\ VideoClip\Live On the Windows Vista, Windows 7 system, the path to save is fixed. - Page 52 web viewer To print out the screenshot Click [ ] on the scene to print out. The Print setup dialog appears. Specify the name of the printer connected, and click [OK]. To record a video Click [ ] on the scene to record. You will see the Save AVI dialog;...
- Page 53 Default file path Windows XP : C:\Program Files\Samsung\SNV-3080\VideoClip\Live If you want to change the path, click [Set path ( )] and specify a path. Windows Vista, Windows 7 : C:\users\[UserID]\Documents\Samsung\ SNB-3000\VideoClip\Live On the Windows Vista, Windows 7 system, the path to save is fixed.
-
Page 54: Using The Sd Search Viewer Screen
web viewer USING THE SD SEARCH VIEWER SCREEN Click <SD search> tab in the Live screen. The SD Search Screen appears. SD Search Viewer Screen layout Name Function and description Thumbnail Size The thumbnail images are displayed based on the selected size. Date You can select the desired date to search for events generated. -
Page 55: Accessing The Setup Screen
setup screen ACCESSING THE SETUP SCREEN You can configure the default setting, system, overlay, event and network related settings, and change them as necessary. In the Live screen, click the <setup> tab. The Setup screen appears. DEFAULT SETUP To configure the video & audio settings You can set the video resolution, quality, CODEC and audio input/output settings. - Page 56 setup screen Target bitrate : Transfers video signal at a specified bit rate. Compression : Adjust the compression rate from 5 through 100 by 5. Encode priority : Set the video transfer method to Frame rate or Quality. GOP* size : Select a GOP size between 5 and 15. Deblock : This will soften the edges between macro blocks.
- Page 57 Upload port (TCP) : Used to upgrade the software firmware, defaulted to 60004(TCP). IPv6 configuration : Obtains the IPv6 address to access the IPv6 network. VNP configuration : Set a port used to transfer video signals with the Samsung protocols.
- Page 58 setup screen RTP configuration : You can set the RTP protocol. RTSP port : You can set the RTSP port. Streaming port : Used to transfer video signal with the RTP protocols. The default range is between 61000 and 61999. Multicast address : IP address used to transfer video signal with the RTP protocols.
- Page 59 User Registration From the User setup window, click [Insert]. The Register User window appears. Provide the <User ID>, <Password>, and <Confirm password>, respectively. You can enter up to 9 alphanumeric or special characters (some excluded) for the user ID and password, respectively.
-
Page 60: System Setup
setup screen To set the display language Click <Basic> - <language>. The Language setup window appears. You can select one from 7 languages (English/Korean/Chinese/French/Italian/ Spanish/German). When done, click [Apply]. The selected language will be applied. SYSTEM SETUP To set the date/time You can obtain the current system time from the NTP server or your PC for your time setting. - Page 61 To set the system time Select a desired address in <Address> or select <Synchronize with PC viewer>. If you select Manual, input the date and time manually. Click [Apply]. The specified system time will be applied. <NTP Server IP> is provided by a public agency, the list of which is subject to change from time to time.
- Page 62 setup screen To update the software Select <System> - <Software update>. The Software update window appears. How to update the software From the software update window, click [Browse…]. The Open dialog appears. Select an updatable file and click [Open]. From the software update window, click [Install].
- Page 63 After the system is reset or restarts, you should try to connect to the camera again. It takes several minutes until the system completes rebooting. Wait until the system rebooting is completed and try to connect again. After executing <Factory default>, you must run the <IP Installer.exe>...
-
Page 64: Overlay Setup
setup screen OVERLAY SETUP You can display text on the screen. To set the text Select <Overlay> - <Overlay text>. The Overlay Text setup window appears. When done, click [Apply]. Your settings will be saved. Overlay text settings : If you select <Disable>, the overlay text will not be displayed;... -
Page 65: Event Setup
EVENT SETUP To set the event transfer function You can set the FTP/email server (SMTP) to transfer the alarm images present in the camera, in case an alarm event occurs. Select <Event> - <Transfer setup>. The Image transfer setup window appears. ... - Page 66 setup screen Port : The FTP port is defaulted to 21. This value can be changed according to the FTP server setting. User ID : Provide the user account ID to access the FTP server. Password : Provide the user account password to access the FTP server. E-mail(SMTP) transfer : With this setting, you can transfer alarm images to the email server.
- Page 67 To setup the record Click <Event> - <Record setup>. The Record setup window appears. To complete the setting, click the [Apply] button. The settings are saved. SD card : Enables you to verify data saved on the SD memory card and format the memory card itself.
- Page 68 setup screen Post-alarm duration : The post alarm duration can be one among 5 seconds, 10 seconds, 15 seconds, and 30 seconds. You can send a post-alarm image of up to 30 seconds after the alarm is triggered. (The max time differs, depending on the frame rate) ...
- Page 69 To Set Intelligent Video Analysis Click <Event> - <Intelligent video analysis>. The Intelligent Video Analysis screen appears. When done, click [Apply]. Your settings will be saved. IV analysis function : Activated if <Enable> is selected, deactivated if <Disable> is selected. ...
- Page 70 setup screen Set rules You can set the event rules. Virtual line based rules : You can configure event rules for up to 3 virtual lines. <Event Types> Pass : Event is generated if a moving object crosses the virtual line in the specified direction ( , Defined area based rules : You can configure event rules for up to 3 user- defined areas.
- Page 71 Activation time : Sets the operation time of the intelligent video analysis. Always : Configured action is performed whenever an intelligent video analysis event occurs. Only scheduled time : Configured action is performed when intelligent video analysis event occurs during the specified time period. Action : You can configure the action for an intelligent video analysis event.
-
Page 72: Network Setup
When done, click [Apply]. Your settings will be saved. VNP streaming : You can set the Samsung Protocol (VNP) for the streaming service. Protocol : Select a video transfer protocol from TCP*, UDP (Unicast)*, and UDP (Multicast)*. Speaking to the camera unit through microphone is not supported. -
Page 73: Appendix
appendix PROFILE CAMERA SETUP MENU STANDARD BACKLIGHT DAY/NIGHT GAMING Parent Menu Sub-menus IRIS LENS LEVEL BACKLIGHT (F.FAST) (F.FAST) (F.FAST) MOTION NORM SLOW SHUTTER AUTO 1/250 SENSE UP AUTO X4 AUTO X2 AUTO X4 AUTO X4 AUTO X4 AUTO AUTO AUTO DAY/NIGHT NIGHT BURST... -
Page 74: Terminology
appendix TERMINOLOGY GOP : You can set between 5 and 15 for the MPEG4 and H.264 CODEC. The default is 15, and if set to 15, one I-Frame will be output per 15 frames as one I-Frame and 14 P-Frames constitute the GOP. The lower the GOP size is, the better the quality is;... - Page 75 Filtering range The filtering range is calculated based on IP address and subnet mask provided by user as follows: The subnet value defines the number of masked bits, which will mask the IP address that is converted into 32-bit binary; rest of masked out bits are ignored to produce the range as shown below.
- Page 76 appendix SPECIFICATIONS Description Item NTSC Camera Color/BW Color Type Device 1/3" Super-HAD PS CCD Image Total 811 x 508 795 x 596 Pixels Effective 768 x 494 752 x 582 System Progressive Scanning Horizontal Frequency 15.734 Hz 15.625 Hz Vertical Frequency 59.94 Hz 50 Hz Sens off : 0.12 Lux(15 IRE), 0.2 Lux(30 IRE),...
- Page 77 Description Item NTSC Horizontal 600 TV Lines Resolution Vertical 350 TV Lines Video Output Video Output VBS 1.0Vp-p S/N Ratio S/N Ratio about 52 dB Lens Drive Type MANUAL/AI(VIDEO/DC) Lens Mount Type CS/C Embedded Linux Flash memory 32M byte 256M byte Network Board Hardware...
- Page 78 Viewer UI Language E/F/G/S/I/C/K (Default) S/W upgrade Support Video Player RTP/RTSP streaming Quicktime, VLC player Video Samsung iPOLiS Management Video Management System 3rd Party S/W appliction Software Application IP Installation IP Installer Application for All Samsung IP Devices 78_ appendix...
- Page 79 Description Item NTSC Provides functionality to control cameras and set/retrieve internal parameter values. HTTP API CGI Command Get JPEG image or MJPEG stream Alarm In/Out control RTP/RTSP API RTP Header, RTSP Command Document ActiveX ActiveX API for viewing data streams from IP camera. AC24V±10%(60Hz±0.3Hz)/ DC12V+10%/-5% / Power PoE (Power over Ethernet)
-
Page 80: Frame Rate (Ntsc)
appendix FRAME RATE (NTSC) Test Condition: MJPEG - Resolution(CIF), Quality(1), Frame rate(1) H.264 - Bitrate control(CBR), Compression(40), Encode Priority(Frame rate), GOP size(15), Deblock(ON), Profile(Baseline), Entropy coding(CAVLC), Motion estimation(HPel) MPEG4 - Bitrate control(CBR), Compression(40), Encode Priority(Frame rate), GOP size(15) MPEG4 (4CIF) Frame Rate 30 FPS 15 FPS... - Page 81 H.264 (4CIF) Frame Rate 30 FPS 15 FPS 8 FPS 3 FPS 1 FPS Quality 2298 Kbps 1229 Kbps 737 Kbps 369 Kbps 147 Kbps LEVEL10 19 FPS 10 FPS 6 FPS 3 FPS 1 FPS 1751 Kbps 1198 Kbps 645 Kbps 369 Kbps 111 Kbps...
- Page 82 appendix MPEG4 (VGA) Frame Rate 30 FPS 15 FPS 8 FPS 3 FPS 1 FPS Quality 4055 Kbps 2580 Kbps 1290 Kbps 737 Kbps 221 Kbps LEVEL10 22 FPS 14 FPS 7 FPS 4 FPS 1 FPS 3533 Kbps 2304 Kbps 1075 Kbps 614 Kbps 184 Kbps...
- Page 83 H.264 (VGA) Frame Rate 30 FPS 15 FPS 8 FPS 3 FPS 1 FPS Quality 2089 Kbps 1229 Kbps 737 Kbps 369 Kbps 147 Kbps LEVEL10 17 FPS 10 FPS 6 FPS 3 FPS 1 FPS 1659 Kbps 1014 Kbps 553 Kbps 276 Kbps 111 Kbps...
- Page 84 appendix MPEG4 (CIF) Frame Rate 30 FPS 15 FPS 8 FPS 3 FPS 1 FPS Quality 1382 Kbps 691 Kbps 369 Kbps 184 Kbps 55 Kbps LEVEL10 30 FPS 15 FPS 8 FPS 4 FPS 1 FPS 1152 Kbps 576 Kbps 307 Kbps 154 Kbps 46 Kbps...
- Page 85 H.264 (CIF) Frame Rate 30 FPS 15 FPS 8 FPS 3 FPS 1 FPS Quality 922 Kbps 461 Kbps 215 Kbps 123 Kbps 37 Kbps LEVEL10 30 FPS 15 FPS 7 FPS 4 FPS 1 FPS 691 Kbps 346 Kbps 184 Kbps 92 Kbps 28 Kbps...
-
Page 86: Frame Rate (Pal)
appendix FRAME RATE (PAL) Test Condition: MJPEG - Resolution(CIF), Quality(1), Frame rate(1) H.264 - Bitrate control(CBR), Compression(40), Encode Priority(Frame rate), GOP size(15), Deblock(ON), Profile(Baseline), Entropy coding(CAVLC), Motion estimation(HPel) MPEG4 - Bitrate control(CBR), Compression(40), Encode Priority(Frame rate), GOP size(15) MPEG4 (4CIF) Frame Rate 25 FPS 13 FPS... - Page 87 H.264 (4CIF) Frame Rate 25 FPS 13 FPS 6 FPS 3 FPS 1 FPS Quality 2359 Kbps 1180 Kbps 737 Kbps 442 Kbps 147 Kbps LEVEL10 16 FPS 8 FPS 5 FPS 3 FPS 1 FPS 1991 Kbps 1106 Kbps 664 Kbps 332 Kbps 111 Kbps...
- Page 88 appendix MPEG4 (VGA) Frame Rate 25 FPS 13 FPS 6 FPS 3 FPS 1 FPS Quality 4424 Kbps 2654 Kbps 1327 Kbps 664 Kbps 221 Kbps LEVEL10 20 FPS 12 FPS 6 FPS 3 FPS 1 FPS 3871 Kbps 2212 Kbps 1106 Kbps 553 Kbps 184 Kbps...
- Page 89 H.264 (VGA) Frame Rate 25 FPS 13 FPS 6 FPS 3 FPS 1 FPS Quality 2507 Kbps 1327 Kbps 737 Kbps 442 Kbps 147 Kbps LEVEL10 17 FPS 9 FPS 5 FPS 3 FPS 1 FPS 1991 Kbps 1217 Kbps 664 Kbps 332 Kbps 111 Kbps...
- Page 90 appendix MPEG4 (CIF) Frame Rate 25 FPS 13 FPS 6 FPS 3 FPS 1 FPS Quality 1382 Kbps 664 Kbps 332 Kbps 166 Kbps 55 Kbps LEVEL10 25 FPS 12 FPS 6 FPS 3 FPS 1 FPS 1152 Kbps 553 Kbps 276 Kbps 138 Kbps 46 Kbps...
- Page 91 H.264 (CIF) Frame Rate 25 FPS 13 FPS 6 FPS 3 FPS 1 FPS Quality 922 Kbps 442 Kbps 221 Kbps 111 Kbps 37 Kbps LEVEL10 25 FPS 12 FPS 6 FPS 3 FPS 1 FPS 691 Kbps 332 Kbps 166 Kbps 83 Kbps 28 Kbps...
-
Page 92: Troubleshooting
appendix TROUBLESHOOTING PROBLEM SOLUTION Check to make sure that the camera’s Network settings are appropriate. Check to make sure that all network cables have been connected properly. If connected using DHCP, verify that the camera is able to acquire I can’t access the camera from a dynamic IP addresses without any problem. - Page 93 PROBLEM SOLUTION Verify the settings in the following sequence: No JPEG file is transferred via FTP/ A. NTP must be properly configured. SMTP on occurrence of intelligent video analysis event of camera B. The <Intelligent Video Analysis> should be set to <Enable>. even when the <Intelligent Video C.
- Page 94 GPL/LGPL SOFTWARE LICENSE This product uses open-source software distributed under the terms of GPL and LGPL. And you can request by email to sec.vss@samsung.com to get the source codes of the following GPL and LGPL software used for this product.
- Page 95 to avoid the danger that redistributors of a recipients of the Program a copy of this free program will individually obtain patent License along with the Program. licenses, in effect making the program You may charge a fee for the physical proprietary.
- Page 96 considered independent and separate c) Accompany it with the information works in themselves, then this License, and you received as to the offer to its terms, do not apply to those sections distribute corresponding source code. when you distribute them as separate (This alternative is allowed only for works.
- Page 97 However, nothing else grants you a whole is intended to apply in other permission to modify or distribute the circumstances. It is not the purpose of Program or its derivative works. this section to induce you to infringe any These actions are prohibited by law if you patents or other property right claims or do not accept this License.Therefore, by to contest validity of any such claims;...
- Page 98 choose any version ever published by the USE OR INABILITY TO USE THE Free Software Foundation. PROGRAM (INCLUDING BUT NOT LIMITED TO LOSS OF DATA OR DATA 10. If you wish to incorporate parts of the BEING RENDERED INACCURATE Program into other free programs OR LOSSES SUSTAINED BY YOU whose distribution conditions are OR THIRD PARTIES OR A FAILURE...
- Page 99 You should have received a copy of the GNU GENERAL PUBLIC LICENSE GNU General Public License along with this Version 3, 29 June 2007 program ; if not, write to the Free Software Foundation, Inc.,51 Franklin Street, Fifth Copyright © 2007 Free Software Foundation, Floor, Boston, MA 02110-1301, USA.
- Page 100 And you must show them these terms so they TERMS AND CONDITIONS know their rights. 0. Definitions. Developers that use the GNU GPL protect “This License” refers to version 3 of the GNU your rights with two steps: (1) assert copyright General Public License.
- Page 101 1. Source Code. The Corresponding Source need not include anything that users can regenerate The “source code” for a work means the automatically from other parts of the preferred form of the work for making Corresponding Source. modifications to it. “Object code” means any non-source form of a work.
- Page 102 When you convey a covered work, you waive This License gives no permission to any legal power to forbid circumvention of license the work in any other way, but it technological measures to the extent such does not invalidate such permission if you circumvention is effected by exercising rights have separately received it.
- Page 103 reasonable cost of physically performing resolved in favor of coverage. For a particular this conveying of source, or (2) access to product received by a particular user, copy the Corresponding Source from a “normally used” refers to a typical or common network server at no charge.
- Page 104 Corresponding Source conveyed, and reasonable ways as different from the Installation Information provided, in accord original version; or with this section must be in a format d) Limiting the use for publicity purposes that is publicly documented (and with an of names of licensors or authors of the implementation available to the public in material;...
- Page 105 However, if you cease all violation of this An “entity transaction” is a transaction License, then your license from a particular transferring control of an organization, or copyright holder is reinstated (a) provisionally, substantially all assets of one, or subdividing unless and until the copyright holder explicitly an organization, or merging organizations.
- Page 106 In the following three paragraphs, a “patent software, under which you make payment to license” is any express agreement or the third party based on the extent of your commitment, however denominated, not activity of conveying the work, and under to enforce a patent (such as an express which the third party grants, to any of the permission to practice a patent or covenant...
- Page 107 14. Revised Versions of this License. 16. Limitation of Liability. The Free Software Foundation may publish IN NO EVENT UNLESS REQUIRED BY revised and/or new versions of the GNU APPLICABLE LAW OR AGREED TO IN General Public License from time to time. WRITING WILL ANY COPYRIGHT HOLDER, Such new versions will be similar in spirit to OR ANY OTHER PARTY WHO MODIFIES...
- Page 108 Preamble We protect your rights with a two-step method : (1)we copyright the library, and The licenses for most software are designed (2)we offer you this license, which gives you to take away your freedom to share and legal permission to copy, distribute and/or change it.
- Page 109 We call this license the "Lesser" General TERMS AND CONDITIONS FOR Public License because it does Less COPYING, DISTRIBUTION AND to protect the user's freedom than the MODIFICATION ordinary General Public License. It also provides other free software developers 0. This License Agreement applies to any Less of an advantage over competing non- software library or other program which free programs.
- Page 110 Whether that is true depends on what the (For example, a function in a library to Library does and what the program that compute square roots has a purpose uses the Library does. that is entirely well-defined independent of the application. Therefore,Subsection 1.
- Page 111 Once this change is made in a given copy, Library, the object code for the work may it isirreversible for that copy, so the ordinary be a derivative work of the Library even GNU General Public License applies to all though the source code is not.
- Page 112 readable source code for the Library from it. However, as a special exception, including whatever changes were used the materials to be distributed need not in the work (which must be distributed include anything that is normally distributed under Sections 1 and 2 above) ; and, (in either source or binary form)with the if the work is an executable linked with major components (compiler, kernel, and...
- Page 113 9. You are not required to accept this is intended to apply, and the section License, since you have not signed it. as a whole is intended to apply in other However, nothing else grants you circumstances. permission to modify or distribute the It is not the purpose of this section to Library or its derivative works.
- Page 114 conditions either of that version or of any YOU FOR DAMAGES, INCLUDING ANY GENERAL, SPECIAL, INCIDENTAL OR later version published by the Free Software CONSEQUENTIAL DAMAGES ARISING Foundation. If the Library does not specify OUT OF THE USE OR INABILITY TO a license version number, you may choose USE THE LIBRARY (INCLUDING BUT any version ever published by the Free...
- Page 115 WARRANTY ; without even the implied display the following acknowledgment : warranty of MERCHANTABILITY or "This product includes software FITNESS FOR A PARTICULAR PURPOSE. developed by the OpenSSL Project for See the GNU Lesser General Public use in the OpenSSLToolkit. (http://www. License for more details.
- Page 116 This product includes cryptographic and/or other materials provided with the software written by Eric Young (eay@ distribution. cryptsoft.com). 3. All advertising materials mentioning This product includes software written by features or use of this software must Tim Hudson (tjh@cryptsoft.com). display the following acknowledgement : "This product includes cryptographic Original SSLeay License software written by Eric Young (eay@...
- Page 117 Correct Disposal of This Product (Waste Electrical & Electronic Equipment) (Applicable in the European Union and other European countries with separate collection systems) This marking on the product, accessories or literature indicates that the product and its electronic accessories (e.g. charger, headset, USB cable) should not be disposed of with other household waste at the end of their working life.
Need help?
Do you have a question about the SNV-3080 and is the answer not in the manual?
Questions and answers