Table of Contents
Advertisement
Quick Links
Advertisement
Table of Contents

Summary of Contents for Linvatec Hall Surgical PowerPro PRO3600
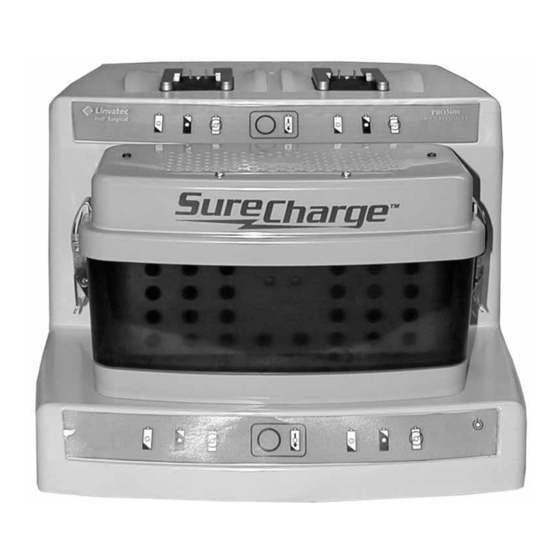
- Page 1 The Power (PRO3600) ® Battery Charger Instruction Manual...
- Page 2 Linvatec. Linvatec reserves the right to revise this publication and to make changes from time to time in the contents hereof without obligation to notify any person of such revision or changes, unless otherwise required by law.
-
Page 3: Table Of Contents
Table of Contents Page INTRODUCTION Intended Use ............1 General Warnings . - Page 4 Table of Contents Page MAINTENANCE (Continued) 3.1.7 Sterilization Information ........20 3.1.7.1 Sterilization Warnings, Precautions and Notes .
-
Page 5: Introduction
Standard batteries may be charged prior to ster- INTRODUCTION ilization by placing the battery pack directly on the battery charger. Or, they can be charged t is recommended that personnel study this after sterilization by placing them in the Sure- manual before attempting to operate, clean Charge Sterilization/Charging Case. -
Page 6: General Warnings
4. Prior to use, inspect all equipment for recycling. Outside the U.S. contact your proper operation. local Linvatec representative. 5. Do not handle the battery charger by the 11. After each use, thoroughly clean the cord. Do not pull on the power cord or charger (See “3.1 Cleaning and Steriliz-... -
Page 7: Symbol Definitions
In the U.S. call 1-800- should not be immersed in any 925-4255, or outside the U.S. contact your type of fluid. local Linvatec representative for addi- tional information on battery disposal or Warning: Burn potential. recycling. Caustic materials. -
Page 8: Battery Charger
❶ ❷ ❸ ❹ ❺ ❻ ❹ Battery Fault Indicator Light — Steadily Battery Charger illuminates when there is a battery fault. See “3.2 Troubleshooting” on page 23 for more information. 1.4.1 Front Panel ❶ NOTE: During initial power up, all Battery Receptacle Platform (4) —... -
Page 9: Rear Panel
❶ ❷ ❺ ❸ ❹ ❺ Mains Power Switch — Place this switch 1.4.2 Rear Panel to the ON position to activate the charger. ❶ Cooling Fan — Removes heat build-up within the unit. ❷ Accessory Outlet — Allows for a second battery charger to be plugged into the primary charger using the accessory cord... -
Page 10: Battery Charger Operation
Any of the above conditions could BATTERY CHARGER shorten the life of the batteries and/or OPERATION compromise the seal integrity, resulting in leakage of Potassium Hydroxide (KOH) which is alkaline and can burn NOTES: skin, eyes or clothing. 1. Batteries are shipped uncharged and Do not allow battery leakage or residue non-sterile. - Page 11 1. Ensure the charger is turned off. Plug the 4. When initially turned on, the charger will power cord into the receptacle on the rear of perform a self-diagnostic test, at which time the charger and a properly earthed mains the LED’s will blink and the charger fan supply outlet.
-
Page 12: Charging Standard Large (Pro3010) And Small (Pro3020) Battery Packs Without The Surecharge Sterilization/Charging Case
Charging Standard Large (PRO3010) and Small (PRO3020) Battery Packs without the SureCharge Sterilization/Charging Case NOTES: 1. Always clean the battery pack prior to Charging of the battery pack will charging. Refer to “3.1.5 Cleaning begin automatically. During the Instructions for Standard Battery Packs” charge cycle, the yellow “charging”... - Page 13 2. Prior to sterilization, inspect the lid of Charging Standard Large the case. Ensure the seal is not damaged (PRO3010) and Small or missing. Ensure the filter is placed (PRO3020) Battery Packs using correctly within the designated area of the lid, and the filter bracket is latched the SureCharge Sterilization/ correctly.
- Page 14 3. Do not reuse filters. Filters are Prior to sterilizing battery packs, remove single-use only. Whenever the them from the handpiece and clean them case is opened after sterilization according to “3.1 Cleaning and Steriliz- the filter must be removed and disposed ing”...
- Page 15 (c) Insert the flange of the filter plate Slide the metal contacts of the battery pack behind the metal bar on the underside into the receiving receptacle of the inner of the lid. basket. (d) Firmly press on the side tabs until both latches lock into place.
- Page 16 Important: Battery packs must be cooled to (a) During the discharge cycle, the room temperature prior to discharging them associated yellow LED will on the battery charger. Failure to do this will blink. When the battery packs result in an increased discharge time. are completely discharged, the associated yellow LED will illu- 6.
-
Page 17: Charging Sterile Transfer Batteries
(d) If no LED illuminates, or the Charging Sterile Transfer red (replace) LED illuminates, Batteries reference “3.2 Troubleshoot- ing” on page 23 for more information. (e) If all three LEDs flash, this is a system fault. Reference “3.2 Troubleshoot- ing” on page 23 for more information. (f) After battery packs are charged, the case may be removed from the charger and stored ready for use. - Page 18 1. To charge a battery, perform the following: Charging of the battery will begin automati- cally and will take approximately 5 to 70 (a) Slide the sterile transfer battery plat- minutes to fully charge each battery, form (PRO3135) onto the battery depending on the amount of charge remain- charger until it completely snaps into ing in the battery.
- Page 19 11. The scrub secures the lid by pressing first on the bottom of the latch, then on the front 8. The circulator will insert the battery of the latch, ensuring the latch is fully through the sterile transfer shroud and into engaged on the tabs of the Sterile Transfer the battery case.
-
Page 20: Maintenance
Follow universal precautions for protective PowerPro instruments and will provide compe- apparel when handling and cleaning con- tent and efficient service. Service at Linvatec/ taminated instruments. Hall Surgical at the recommended service inter- val is mandatory to keep your product warran- Never immerse battery charger, ties in effect. -
Page 21: Cleaning Instructions For The Battery Charger
3.1.2 Cleaning Instructions for the 3.1.3 Cleaning Instructions for the Battery Charger Sterile Transfer Battery Platform 1. Turn the battery charger power off. Discon- 1. Remove batteries from the Sterile Transfer nect the power cord from the electrical Battery Platform. power source and from the rear of the 2. -
Page 22: Sterile Transfer Shroud, Sterile Transfer Battery Case And Sterile Transfer Battery
Clean the Sterile Transfer Battery Case by 3.1.4 Cleaning Instructions for the wiping with a clean, soft cloth or brush Sterile Transfer Shroud, Sterile dampened with a mild, pH-balanced deter- Transfer Battery Case and Sterile gent or alcohol. Remove all traces of blood Transfer Battery and coagulated material, etc. -
Page 23: Cleaning Instructions For Standard Battery Packs
3.1.5 Cleaning Instructions for 3.1.6 Cleaning Instructions for the Standard Battery Packs SureCharge Battery Sterilization/ Charging Case 1. Remove the Battery Pack from the hand- piece before cleaning. 1. Wipe all surfaces of the SureCharge Battery Sterilization/Charging Case with a clean, 2. -
Page 24: Sterilization Information
Do not leave Standard battery packs or the 3.1.7 Sterilization Information SureCharge Battery Sterilization/Charging Case containing Standard battery packs, in team sterilization is safe and effective and the autoclave longer than the recommended has no contraindications for its use in ster- sterilization exposure times. - Page 25 The recommended minimum sterilization exposure times are as follows: Table 1: Sterilization Parameters Minimum Minimum Sterilization Type Dry Time Temperature Exposure Time Sterilization Parameters for sterilizing PowerPro Standard Large (PRO3010) and Small (PRO3020) Battery Packs Steam Pre-vacuum 270°F (132°C) 3 minutes None (wrapped/unwrapped) Steam Gravity...
-
Page 26: Ethylene Oxide Sterilization Guidelines For Standard Battery Packs Without The Surecharge Battery Sterilization/Charging Case
3.1.7.2 Ethylene Oxide Sterilization Guidelines for Standard Battery Packs without the SureCharge Battery Sterilization/Charging Case Pre Conditioning (1 hour minimum) Temperature Setpoint: 54° ± 3°C Humidity Setpoint: 50% ± 10% Chamber Temperature Setpoint: 54° ± 3°C Humidity Setpoint: 60% ± 10% Humidity Dwell: 30 minutes Vacuum:... -
Page 27: Troubleshooting
Troubleshooting Table 2: Troubleshooting Symptom Possible Cause Corrective Action ♦ ♦ Battery charger Power cord unplugged or faulty. Plug in power cord. (primary or second- ♦ Replace power cord. ary charger) not functioning. ♦ ♦ Battery charger(s) not turned on. Turn on power switch on battery charger(s). - Page 28 Table 2: Troubleshooting Symptom Possible Cause Corrective Action ♦ ♦ The red LED illu- Battery pack (PRO3010 or Verify that the battery pack is minates. PRO3020) is not completely completely engaged in the recep- engaged in the receptacle on the tacle on the charger.
- Page 29 Table 2: Troubleshooting Symptom Possible Cause Corrective Action ♦ ♦ The red LED illu- The SureCharge Battery Steril- Verify that the SureCharge Bat- minates (contin- ization/Charging Case is not tery Sterilization/Charging Case ued). engaged completely on the bat- is completely engaged on the bat- tery charger.
-
Page 30: Fuse Replacement
Fuse Replacement Ground Bond Test 1. Turn the battery charger power off and dis- The purpose of this test is to check the continu- connect the mains power cord. ity of the ground bond from the power plug to the battery charger chassis whenever any main- 2. -
Page 31: Leakage Test
Leakage Test The purpose of this test is to measure the amount of 50/60 cycle leakage from the trans- former primary to the circuitry of the battery charger. The AC leakage from any exposed metal part to earth ground and from all exposed metal parts having a return to chassis must not exceed 300µa. -
Page 32: Technical Specifications
For more information contact customer service. Linvatec Corporation is certified by TÜV Product Service to EN ISO 9001 and EN 46001 and to the Medical Device Directive 93/42/EEC with certificates for Annex II, Clause 3; Annex II, section 4 and Annex V. -
Page 33: System Environmental Requirements
3.6.2 System Environmental Requirements Operating: Ambient Operating Temperature: + 50°F to 104°F (+ 10°C to + 40°C) Relative Humidity: 30% to 75% Atmospheric Pressure: 700 hPa to 1060 hPa Transport and Storage: Ambient Temperature: - 40°F to 158°F (- 40°C to + 70°C) Relative Humidity: 10% to 100% including condensation Atmospheric Pressure:... -
Page 34: Batteries
The disposal of batteries as municipal waste is prohibited. Dispose or recycle in accordance with your local, state and governmental regulations. In the U.S. call 1-800-925-4255, or outside the U.S. contact your local Linvatec representative for additional information on battery disposal or recycling. 3.6.4.1... -
Page 35: Accessories
Accessories Description PRO3600 PowerPro Battery Charger PRO2601 Battery Charger Accessory Cord, 18” PRO2602 AC Power Cord, 115 VAC, 6 ft. PRO2603 AC Power Cord, 230 VAC, 2 meters C7104 AC Power Cord, 115 VAC, 10 ft. C7105 AC Power Cord, 230 VAC, 3 meters PRO3010 Standard Large Battery PRO3020... - Page 40 11311 Concept Boulevard Largo, Florida 33773-4908 Phone: (727) 392-6464 Customer Service: (800) 925-4255 USA Fax: (727) 399-5256 International Fax: (727) 397-4540 www.linvatec.com © 2002 Linvatec Corporation, a subsidiary of ConMed Corporation All rights reserved. Printed in USA W41-069-004 Rev. B 09/2002...
Need help?
Do you have a question about the Hall Surgical PowerPro PRO3600 and is the answer not in the manual?
Questions and answers